


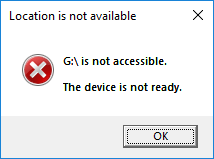
You’ve seen a “the device is not ready” error? Many Windows users have had the same error occurring when they open the files on their external hard drive or flash drive.
This is a frustrating issue. You can’t access your files on your external storage device because of this error. But don’t worry. It can still be fixed…
Fixes to try
The following are three methods that have helped many people fix the error. You don’t have to try them all; just work your way down the list until you find the one that works for you.
Method 1: Do some basic troubleshooting
Your external storage device may not connect to your computer properly. So it’s worth checking the connection between your storage device and your computer.
1) Reconnect your device to your computer and see if this fixes the error.
2) Try connecting your device to another USB port and see if this works.
3) Try connecting your device to another computer and see if the problem comes from your computer. If it does, you should contact the manufacturer of your computer for advice.
Method 2: Run Check Disk
Check Disk is a Windows built-in utility that can find and repair errors on a hard drive volume or an external drive. You should run Check Disk to fix the device not ready error. To do so:
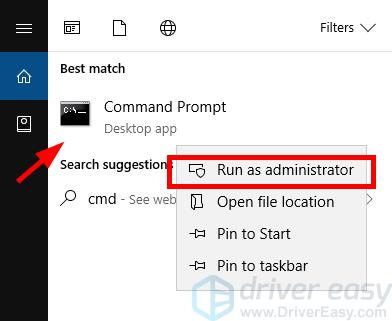
1) Click the Start button in the lower left corner of your screen, then type “cmd“.

2) Right click Command Prompt in the search results, then click Run as administrator.
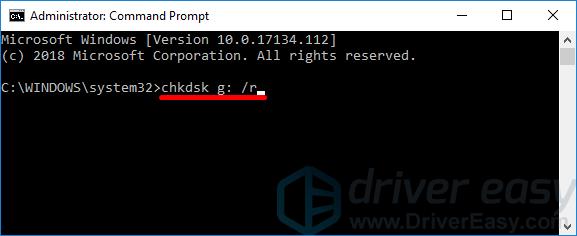
3) Type “chkdsk g: /r” and press Enter on your keyboard.
4) If you are prompted, type “y” and press Enter on your keyboard. Then restart your computer.

5) Wait for the Check Disk utility to complete the repairing process.
Method 3: Update your device driver
You may also get the device not ready error because you’re using a wrong device (storage device or USB controller) driver or it’s out of date. You should update your driver to see if that’s the problem for you. If you don’t have the time, patience or skills to update your driver manually, you can do it automatically with Driver Easy.
Driver Easy will automatically recognize your system and find the correct drivers for it. You don’t need to know exactly what system your computer is running, you don’t need to risk downloading and installing the wrong driver, and you don’t need to worry about making a mistake when installing.
You can download and install your drivers by using either Free or Pro version of Driver Easy. But with the Pro version it takes only 2 clicks (and you get full support and a 30-day money back guarantee):
1) Download and install Driver Easy.
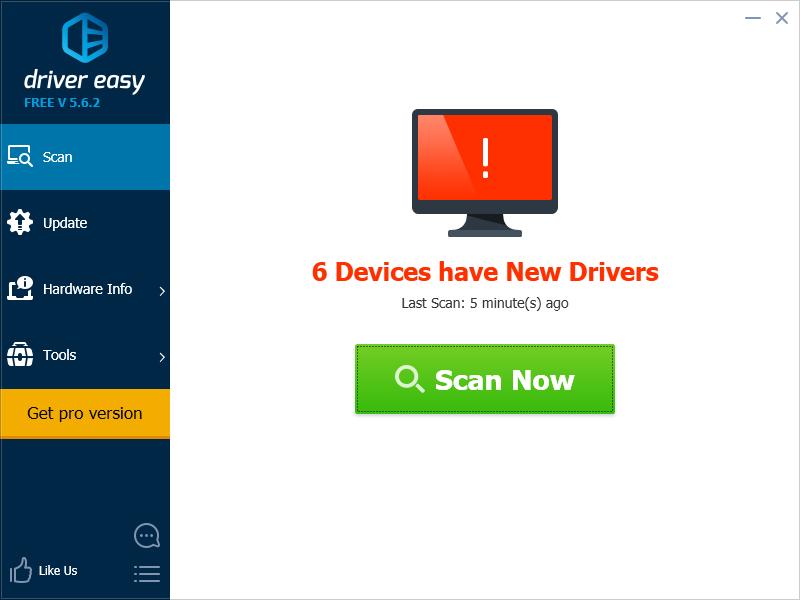
2) Run Driver Easy and click the Scan Now button. Driver Easy will then scan your computer and detect any problem drivers.
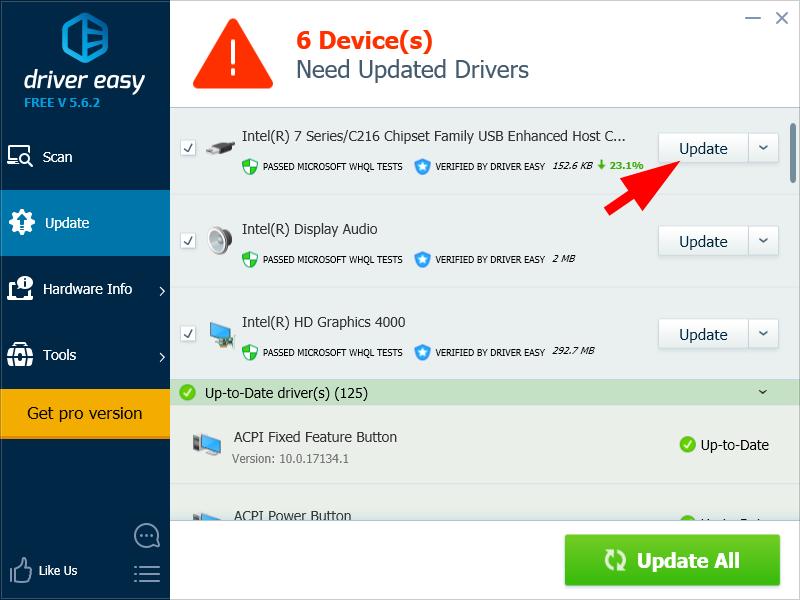
3) Click the Update button next to your storage device or USB device to download the latest and correct driver for it, then you can manually install the driver. You can also click the Update All button at the bottom right to automatically update all outdated or missing drivers on your computer (this requires the Pro version — you will be prompted to upgrade when you click Update All).
4) Restart your computer and check to see if your device runs faster.