


When you try to turn on WiFi on Windows 10, the wireless network somehow won’t turn on. And you have to use the wired network to try troubleshooting this “Windows 10 WiFi won’t turn on” problem. Don’t worry, this article gives you 6 effective methods to solve the problem, quickly and easily.
Try these methods
You don’t have to try them all; just work your way down the list until you find the one that works for you.
- If you’re using a laptop, verify the WiFi switch is toggled on
- Change the property of your wireless network adapter
- Update your network adapter driver
- Uninstall and reinstall your network adapter driver
- Run network adapter troubleshooter
- Perform a system restore
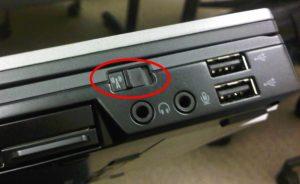
Method 1: If you’re using a laptop, verify the WiFi switch is toggled on
On laptop, there’s usually a switch or button for WiFi connection. If you’ve been unable to use WiFi on your laptop, you should try toggling the WiFi switch on your laptop multiple times to check.
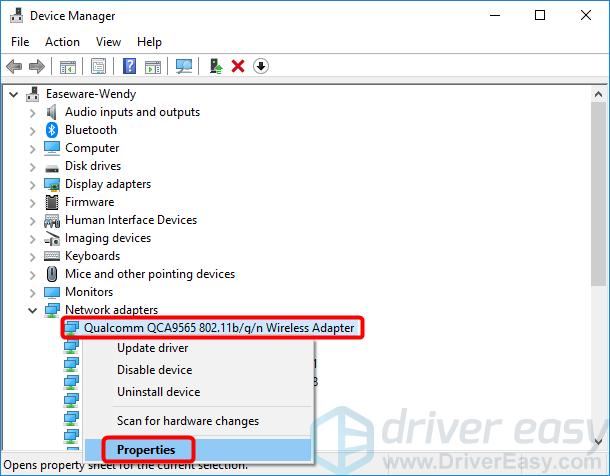
Method 2: Change the property of your wireless network adapter
The “Windows 10 WiFi won’t turn on” issue may occur due to corrupt network settings. And some users fixed their “WiFi won’t turn on” problem by changing the property of their WiFi network adapter. You can follow these steps:
- On your keyboard, press the Windows logo key and R at the same time to open the Run box.
- Type devmgmt.msc and press Enter to access Device Manager.

- Expand the Network adapters entry.
- Right-click on your WiFi network adapter, and select Properties.
- Click the Advanced tab.
- Under Property, select 802.11n Channel Width for band 2.4, then change the value from auto to 20 MHz Only.
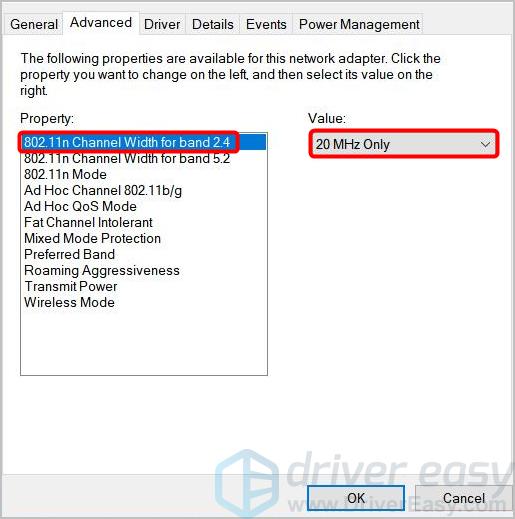
- Click OK. WiFi should work after that. If it still doesn’t turn on, try Method 3, below.
Method 3: Update your network adapter driver
A corrupted or outdated network adapter driver may also stop WiFi from turning on. You can update your network adapter driver to better troubleshoot your “Windows 10 WiFi won’t turn on” problem.
There are two ways to update your network adapter driver: manually and automatically.
Update your network adapter driver manually — You can update your driver manually by going to the hardware manufacturer’s website, and searching for the latest driver for your network adapter. But if you take this approach, be sure to choose the driver that’s compatible with the exact model number of your hardware, and your version of Windows.
OR
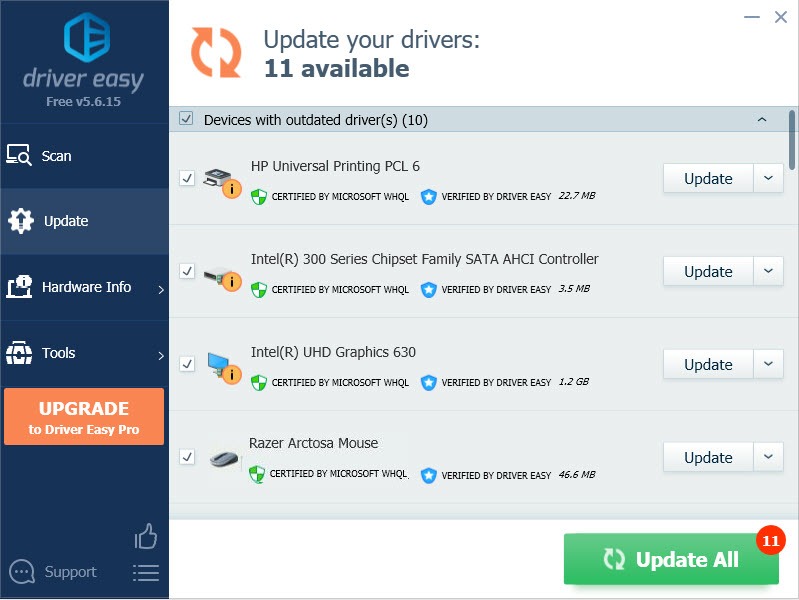
Update your network adapter driver automatically — If you don’t have the time, patience or computer skills to update your network adapter driver manually, you can do it automatically with Driver Easy. You don’t need to know exactly what system your computer is running, you don’t need to risk downloading and installing the wrong driver, and you don’t need to worry about making a mistake when installing. Driver Easy handles it all.
- Download and install Driver Easy.
- Run Driver Easy and click Scan Now. Driver Easy will then scan your computer and detect any problem drivers.

- Click Update next to any flagged devices to automatically download the correct version of their drivers, then you can install them manually. Or click Update All to automatically download and install them all automatically. (This requires the Pro version – you’ll be prompted to upgrade when you click Update All. You get full support and a 30-day money back guarantee.)
- Once you’ve updated your network adapter driver, check if you can turn on WiFi. If not, you can contact Driver Easy’s support team at support@drivereasy.com for further assistance. They’d be happy to help you. Or you can try Method 4, below.
Method 4: Uninstall and reinstall your network adapter driver
You can also try uninstalling your network adapter driver and see if this helps solve your WiFi problem.
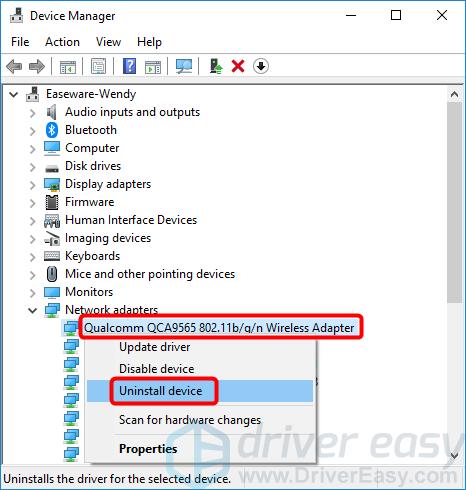
- Go to Device Manager.
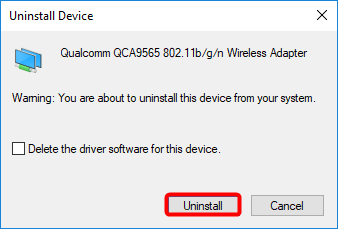
- Expand the Network adapters entry, right-click on your WiFi network adapter, and select Unisntall device.
- Click Uninstall.
- Restart your computer, and Windows will automatically reinstall a driver for your network adapter.
- Check to see if your WiFi now works. If not, try Method 5, below.
Method 5: Run network adapter troubleshooter
You can also use the handy tool — network adapter troubleshooter — to try fixing your “Windows 10 WiFi won’t turn on” problem. You can run the network adapter troubleshooter by following these steps:
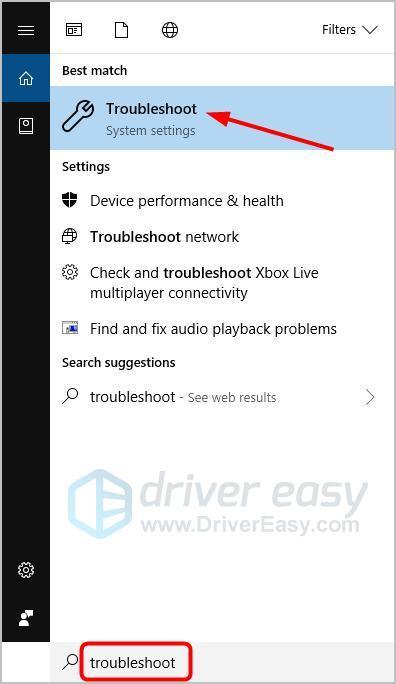
- Type troubleshoot in the search box and press Enter.
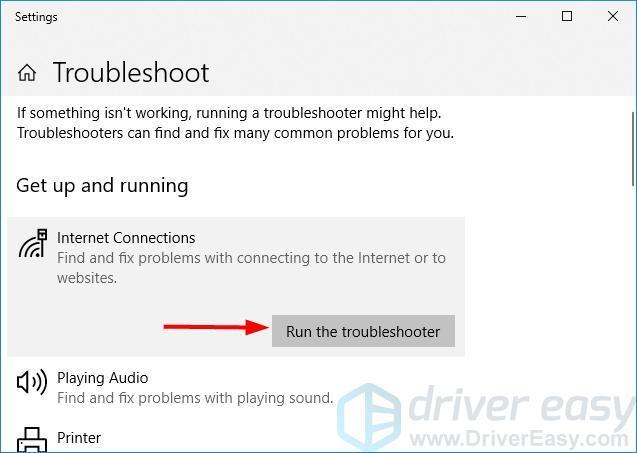
- Click Internet Connections, then click Run the troubleshooter.
- Click Network Adapter, then click Run the troubleshooter.
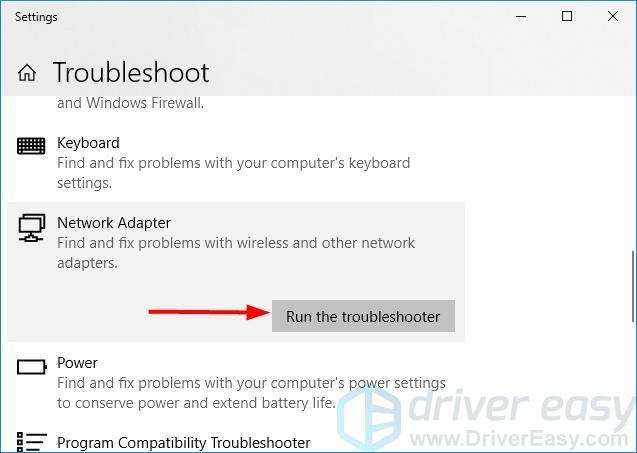
- Check to see if your WiFi problem is fixed. If not, try Method 6, below.
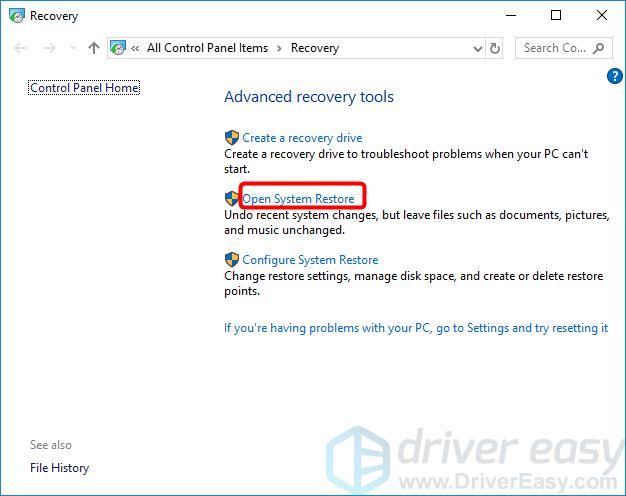
Method 6: Perform a system restore
If the steps above didn’t work for you and your ” Windows 10 WiFi won’t turn on” issue only occurs recently, we recommend performing a system restore on your computer. It’ll return your system files and settings to an earlier point in time when WiFi works properly on your computer, without affecting your personal files.
Here’s how to perform a system restore:
- Type recovery in the Windows search box, then press Enter.
- At Recovery, click Open System Restore.
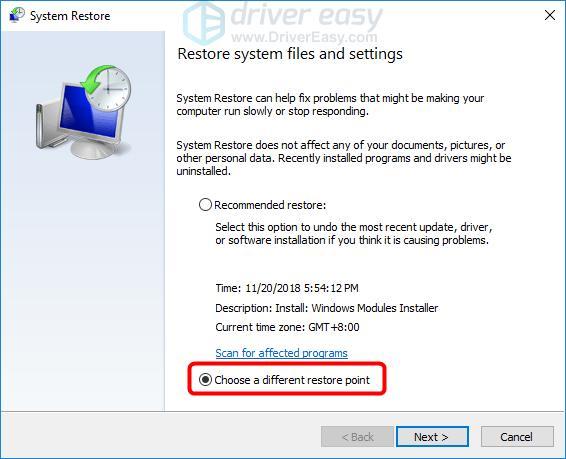
- Select Choose a different restore point, and click Next.
- Check the box beside Show more restore points. You should see a list of ‘restore points’. These are like backups of your computer, as it was at that particular date and time. Think back to a date when you were able to connect to WiFi, and select a restore point from that date or slightly earlier (but no later).
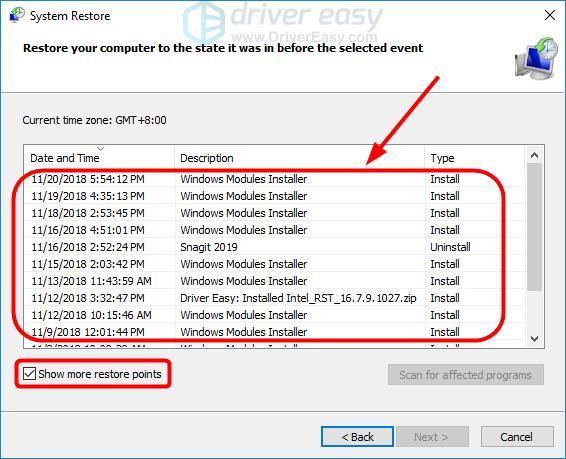
- Click Next > Finish.
- Check to see if you’re now able to turn on WiFi on your Windows 10 computer.
If you have any question or suggestion, please feel free to leave a comment below.