


Want to overclock your GPU? Although you may think this requires some advanced technical skills, it’s actually not as difficult as that. We’ll show you a safe and easy way to overclock your GPU on your PC or laptop and boost your graphics performance.
Also, you should note that keeping your GPU overclocked for a very long time may shorten its life.
Before you overclock your GPU
Make sure your device drivers, especially your graphics driver, are up to date before overclocking. This is important because, under overclocking conditions, it’s very common for your drivers to cause your computer to overheat, crash, or even blue-screen.
There are two ways to update your graphics card driver:
Download and install your drivers manually – You can update your drivers manually by going to your hardware manufacturers’ websites, and searching for the latest driver for your device. But if you take this approach, be sure to choose the driver that’s compatible with the exact model number of your hardware, and your version of Windows.
or
Download and install your drivers automatically – If you don’t have the time, patience or computer skills to update your drivers manually, you can, instead, do it automatically with Driver Easy. You don’t need to know exactly what system your computer is running, you don’t need to risk downloading and installing the wrong driver, and you don’t need to worry about making a mistake when installing. Driver Easy handles it all.
- Download and install Driver Easy.
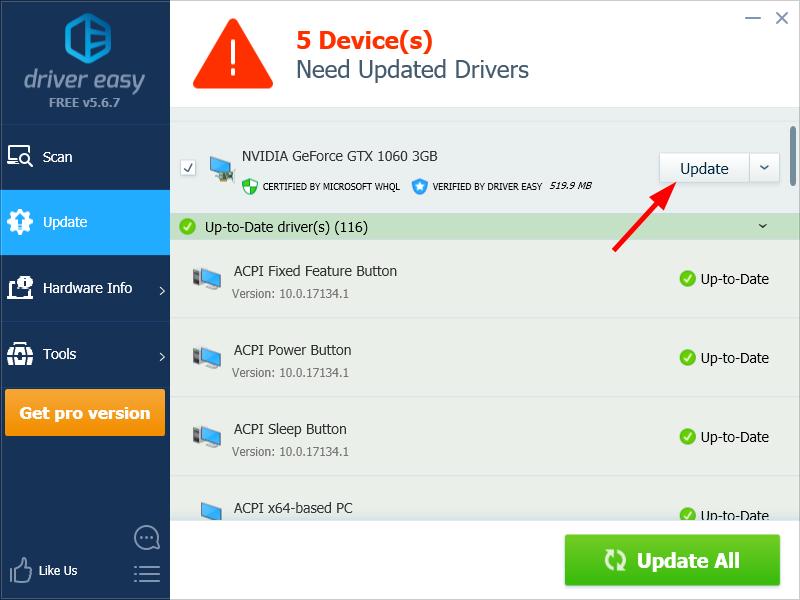
- Run Driver Easy and click the Scan Now button. Driver Easy will then scan your computer and detect any problem drivers.

- Click the Update button next to your device to download the correct version of its driver, then you can manually install it. Or click the Update All button at the bottom right to automatically update all the drivers. (This requires the Pro version — you will be prompted to upgrade when you click Update All. You get full support and a 30-day money back guarantee.)
You can do it for free if you like, but it’s partly manual.
To overclock your GPU
These are the steps you should follow to overclock your GPU on PC or laptop:
Step 1: Download MSI Afterburner and Heaven
There are two programs we’re going to use. They are Afterburner and Heaven.
Afterburner is developed by MSI. It‘s a utility application that allows you to monitor and overclock your GPU. It works with graphics adapters from nearly all brands.
Heaven is a program you can use to run performance and stability tests for your GPU. It is useful when you want to see if your GPU runs stably under stress.
Both programs are free for you to use. Download MSI Afterburner from the MSI website, and download Heaven from the UNIGINE website. Then install these programs on your computer.
Step 2: Run a performance and stability test
You should run a test for your GPU before you overclock your GPU. This is to make sure your GPU works properly even under normal conditions. And it gives you a benchmark for measuring how much performance boost you’ll get.
To run a test:
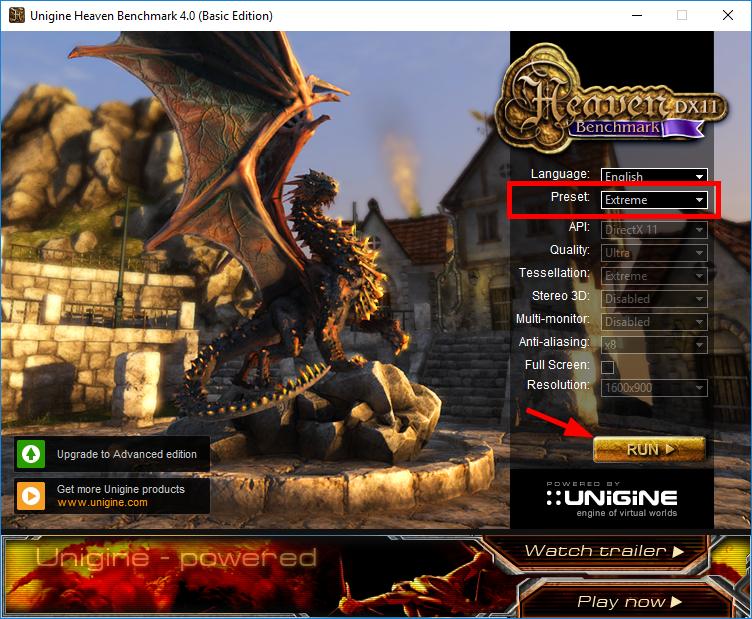
- Run Heaven.
- Change the Preset settings to Extreme. (This use all the power of your GPU.), then click the Run button.
- Click the Benchmark button in the upper left corner.

- Check to see if you have any problems with your computer (program or computer crashes, blue screens, visual artifacts, …).
- Save or write down your results when the test is finished.
If your computer is not working properly during the test, we strongly suggest you leave your GPU as it is. But if everything is fine, then move on to the next step.
Step 3: Overclock your GPU
You will use Afterburner to adjust your GPU clock frequency.
You should have a clear understanding of the Afterburner interface before changing your GPU settings. Run Afterburner, then take a look at the following components:
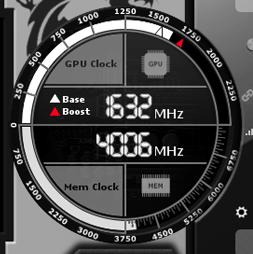
- Clock frequency monitor — This is where you view your GPU and graphics memory clock frequency.
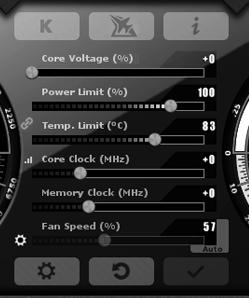
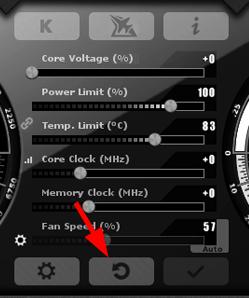
- Control panel of your GPU settings — This is where you’ll make your adjustment to overclock your GPU.
- Voltage and temperature monitor — This is where you view your current voltage and temperature of your GPU. By checking them, you know if your GPU is working properly (both voltage and temperature should not be too high.)
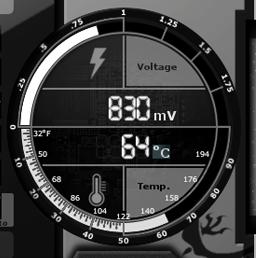
- GPU usage monitor — These graphs show you the usage, temperature and voltage of your GPU during a certain period of time.

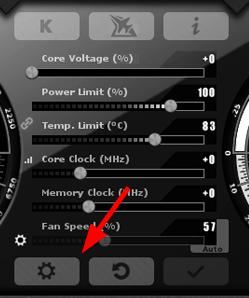
To adjust your GPU settings to overclock your GPU:
- Click the Settings button.
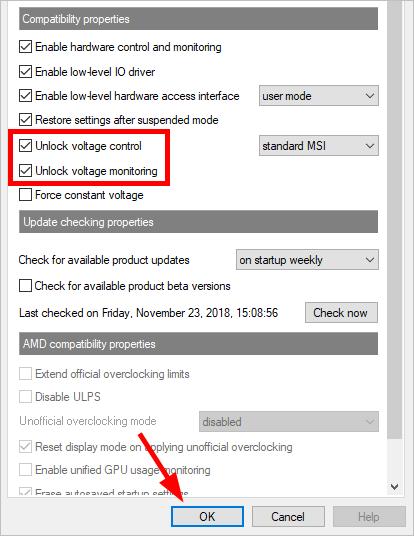
- Check Unlock voltage control and Unlock voltage monitoring, then click OK.
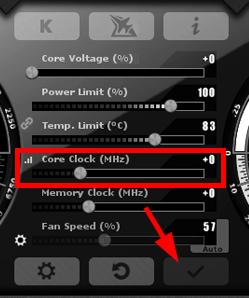
- Drag the slider of Core Clock to slightly to the right to increase it by 10. Then click the apply button (the button with a check mark).
- Run a stability test with Heaven and see if you have any issues (visual artifacts, program or computer crashes, blue screens, …).
- If there are issues occurring:
- Drag the slider of Core Voltage to slightly to the right to increase it by 5, then run a stability test to see if your issues go away. If so, go to 6).
- Decrease the Core Clock and Core Voltage back to the previous settings, then go to 7).
- If your computer is working properly, repeat 3) and 4) until you are OK with the setting, or you have any issues with your computer (undo this change if so).
- Run a stability test with Heaven to make sure you have no problem with the current GPU frequency. (You may also need to compare the results with the benchmark)
- Run your game and enjoy the performance boost!
Hopefully, the steps above helped you overclock your GPU on your PC or laptop. If you have any questions or suggestions, feel free to leave us a comment below!