


Don’t know how to record screen? Don’t worry! You’ve come to the right place. No matter you want to record screen on your Windows PC or your Mac, you can find the step-by-step guide in this post.
Record screen on Windows 10
Windows 10 has a built-in game capturing tool (Game bar) that can be used to screen recording. To record screen, make sure you’ve turned on the Game Bar feature in Windows settings. Here is how to do it:
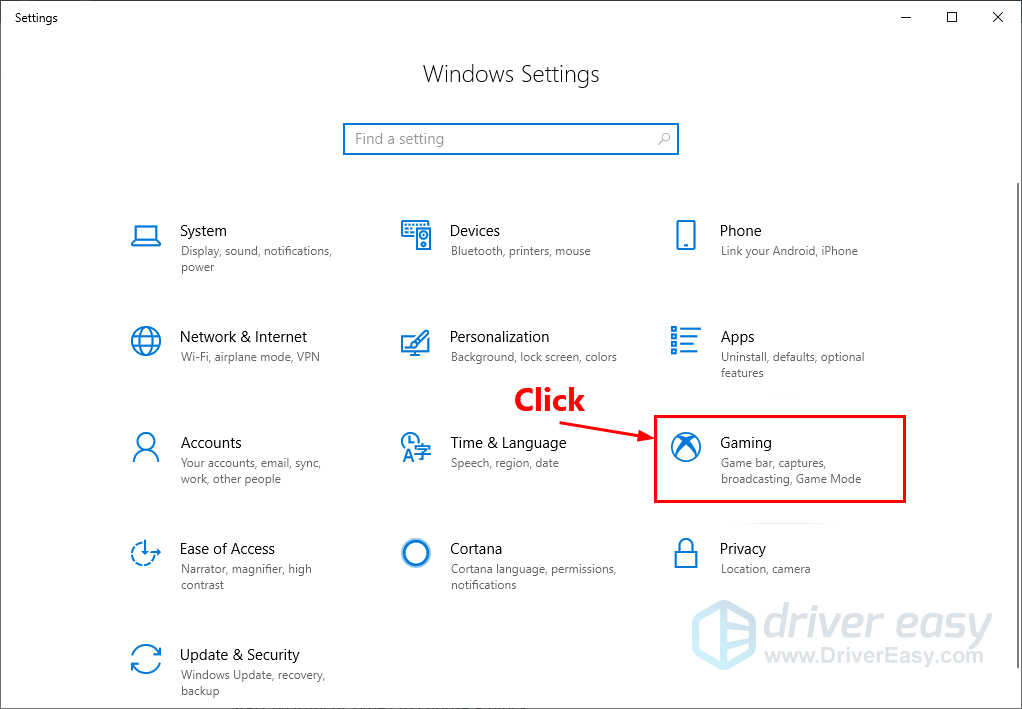
1) On your keyboard, press the Windows logo key and I at the same time to open Windows Settings. Then click Gaming.
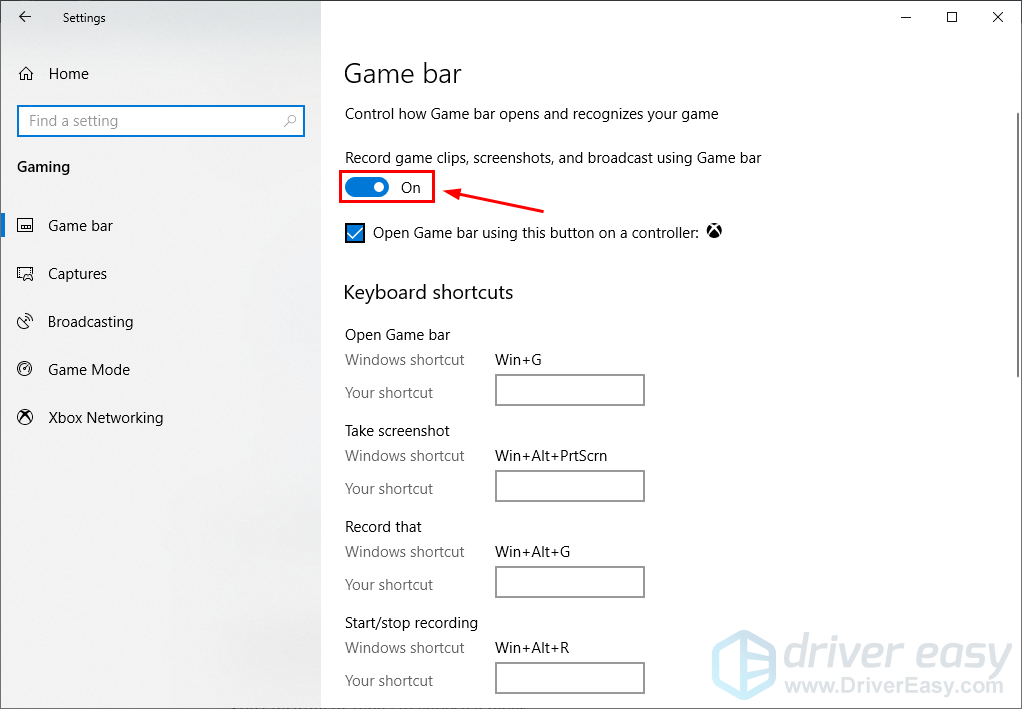
2) Turn on the toggle to enable the Game bar feature.
3) To record the screen activity in an app, open that app and move your mouse cursor to it, then on your keyboard, press the Windows logo key and G at the same time to invoke Game bar.
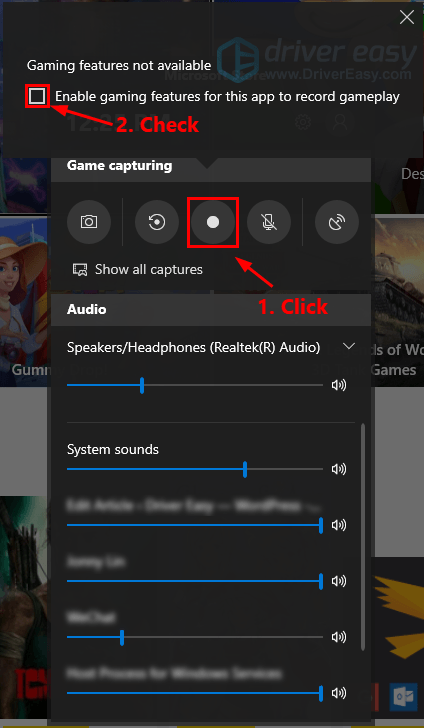
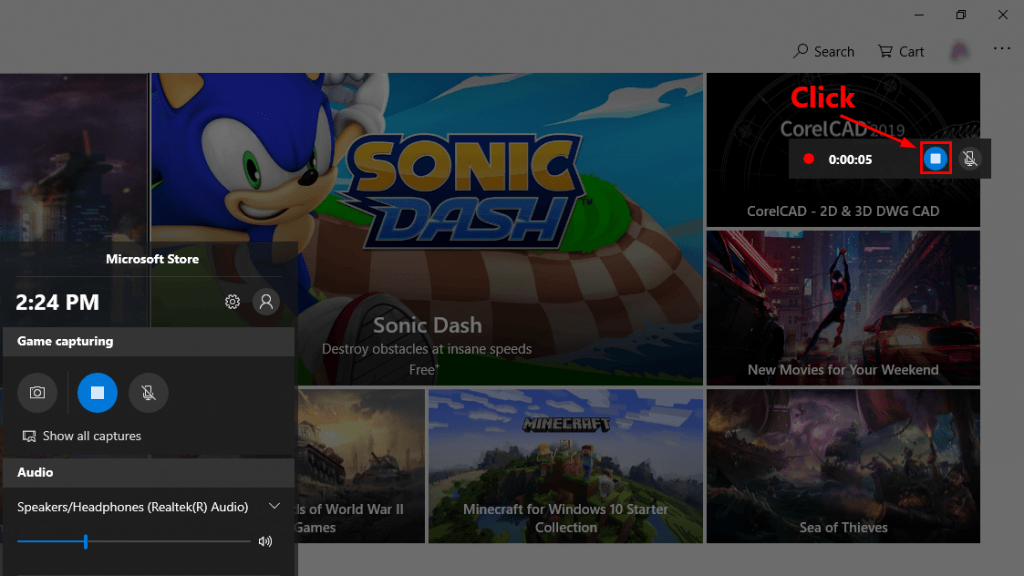
4) Click the record button to start recording. If you see a message telling you that Gaming features is not available, then check the box next to Enable gaming features for this app to record gameplay.
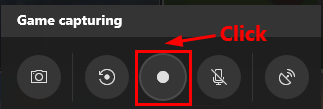
5) Click the record button to start recording.
6) To stop recording, click the stop button or press the Windows logo key, Alt and R at the same time on your keyboard.
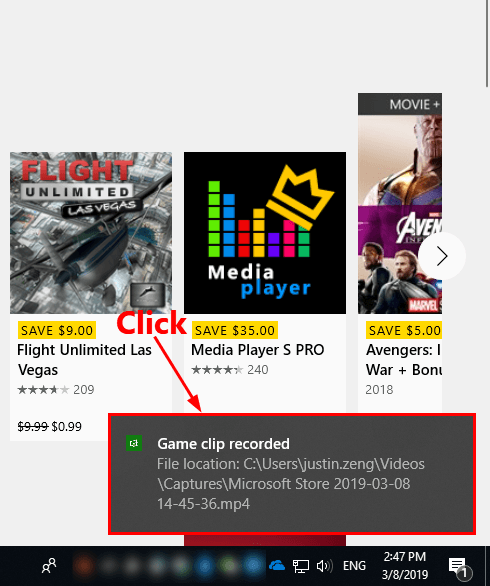
7) To view this screen recording, just click the notification bubble on the lower-right corner of your screen.
Record screen on macOS
If your Mac is running Mojave, you can record your screen quickly and easily. Here is how to do it:
1) On your keyboard, press Shift, Command, and 5 at the same time to open the built-in screen recording tool.


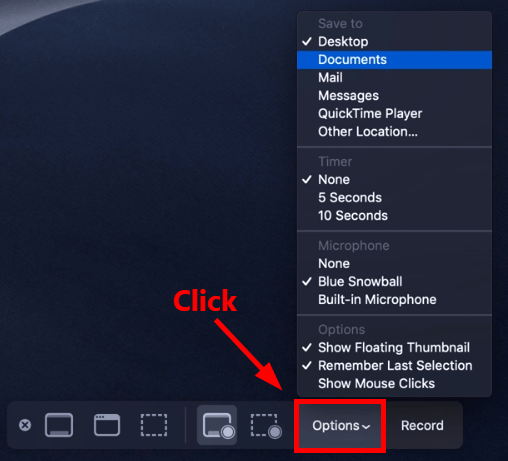
2) Click Options to change the screen recording settings before you start recording.
3) Click the entire screen icon to start recording the entire screen. Once you click on it, your pointer will change to a camera icon.

4) Click anywhere on your screen to start recording. You can also start recording by clicking Record in the screen recording tool.

5) To stop screen recording, click the stop button in the menu bar or press Command, Control and Esc (Escape) at the same time on your keyboard.

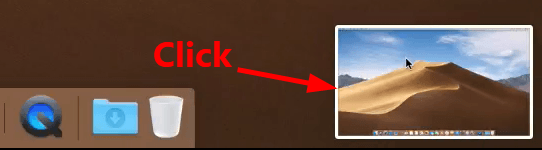
6) Click the thumbnail of the screen recording video in the lower-right corner to view this screen recording.
In macOS, you can also record screen with QuickTime Player. You can refer to the post: How to record screen on Mac [Quickly & Easily] for more information.
Bonus tip: record screen with Camtasia
Why choose Camtasia?
Although the system built-in screen capturing tools is simple and easy to use, it still has limitations.
For Windows 10, the Game bar features not available for Windows desktop and File Explorer, which is really a pity.
For macOS, the built-in screen-capturing tool can only record the sound from your microphone. In other words, it cannot capture any of the system sound, such as the audio playing in iTunes, games or any other applications.
If the system built-in screen capturing tool fail to meet your requirement, you may want a professional screen capturing software.
Camtasia might be the best screen recording software for you to try. It is simply, but full of features. Besides, Camtasia is available both on Windows and Mac. With Camtasia, you can record screen and webcam, add effects, music, annotations, etc. What’s more, Camtasia also allows you to instantly upload your video to YouTube, Vimeo, Screencast, or your online video course.
How to record screen with Camtasia?
To record your screen with Camtasia:
1) Download and install Camtasia on your Windows PC or Mac. For Windows users, click here to start downloading. If you’re a Mac user, click here to download Camtasia for Mac.
2) Run Camtasia.
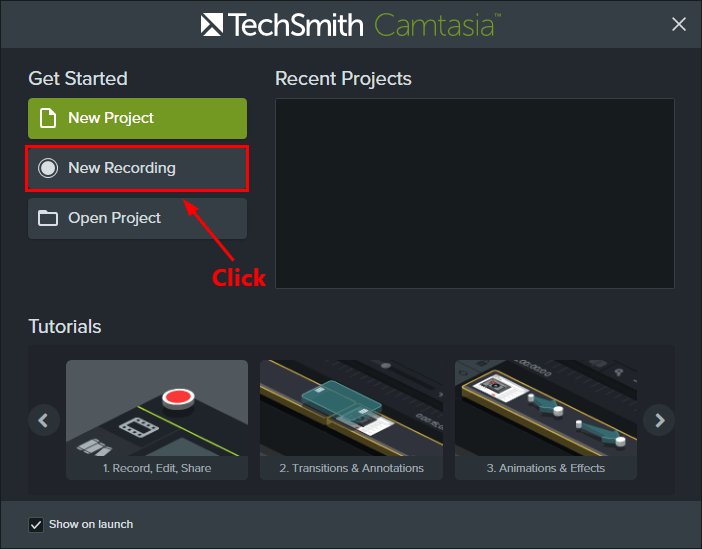
3) Click New Recording.
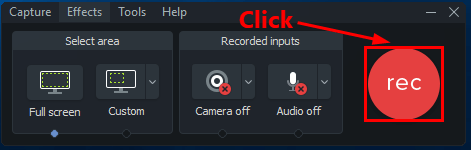
4) Click the red rec button to start screen recording. By default, Camtasia will record the entire screen. If you want to record a selected area of your screen, click the screen icon above Custom in the Select area section. In the Recorded inputs part, you can decide to turn on or off camera and audio input devices before the screen recording. With Camtasia, you can easily record the system sound on your Mac.
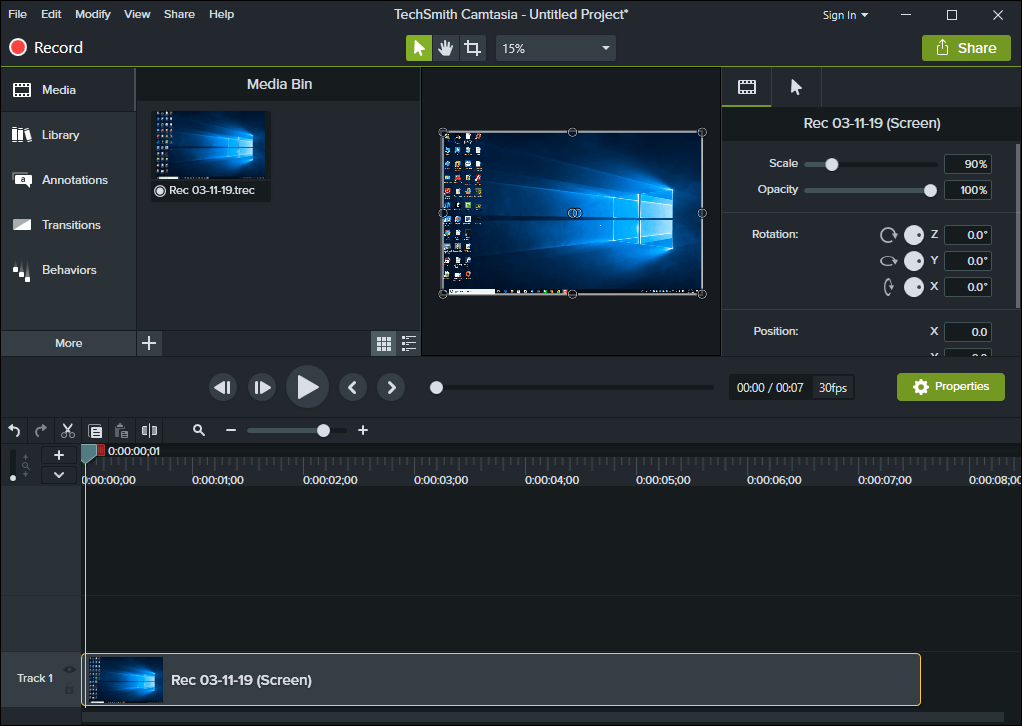
5) To stop screen recording, simply press F10 on your keyboard. The main screen of Camtasia will reappear.
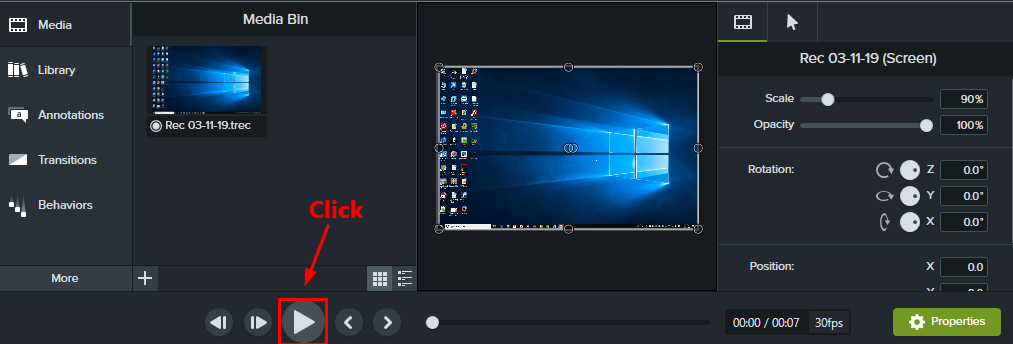
6) You can preview the screen recording by clicking the Play button.
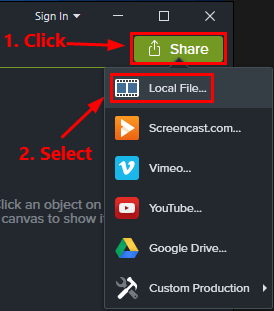
7) To save the screen recording on your computer, click the Share button. Then select Local File….
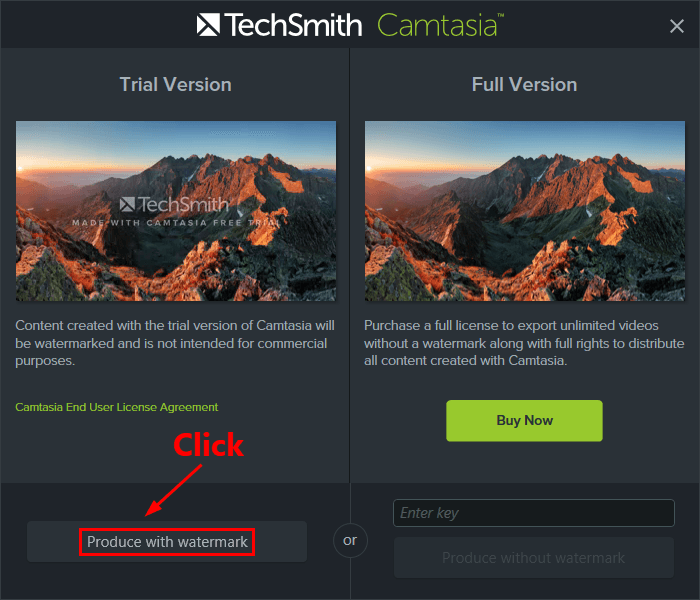
8) Click Produce with watermark to continue. With the trial version, the screen recording video will be watermarked.
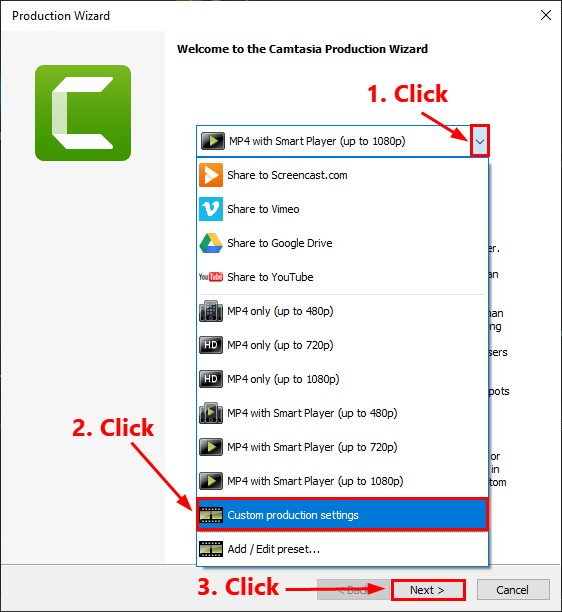
9) Click the downward arrow to select Custom production settings. Then click Next.
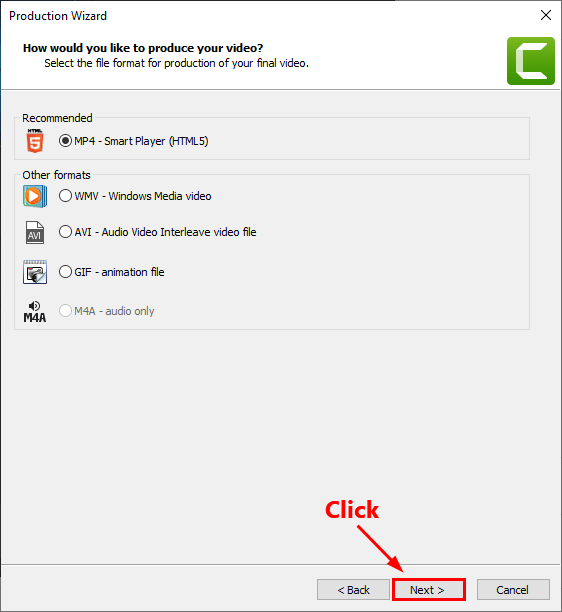
10) Select the output format for your screen recording video. Then click Next.
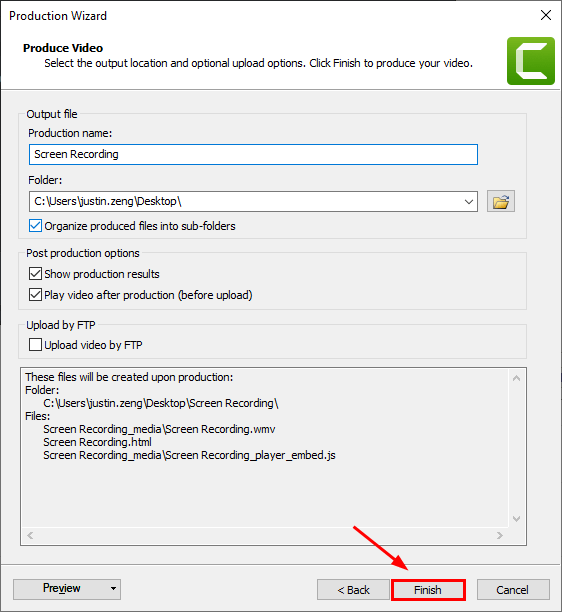
11) Click Next until you see the following window in the wizard. Name your screen recording video and select a folder to save it. Then click Finish.
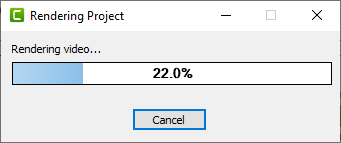
12) Wait until Camtasia finishes the rendering process.
13) When Camtasia completes the rendering process, go to the folder you save the screen recording video to view it.
That’s it! It’s pretty easy, isn’t it? If you have any questions or suggestions, please leave us a comment below.