


Don’t know how to take a screenshot on Windows 7? Don’t worry. You’ve come to the right place!
Taking a screenshot on Windows 7 is very, very easy! From this article, you’ll learn how to take a screenshot on Window 7 quickly!
1. Take a screenshot of the whole screen
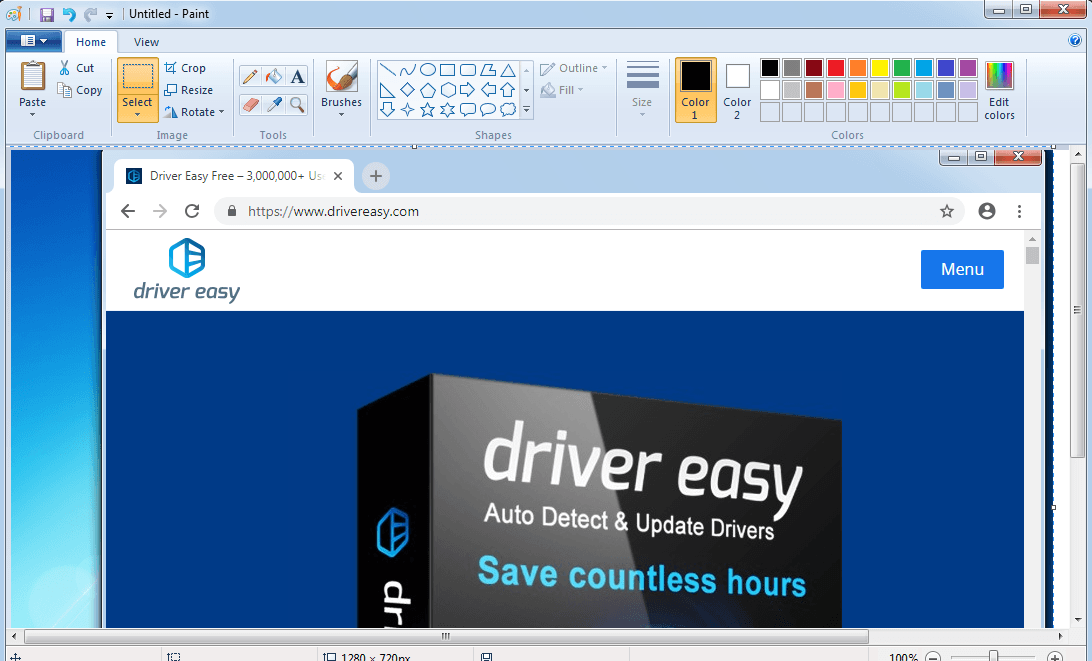
This is probably the easiest method to take a screenshot of the whole screen. You just need to press the print screen key on your keyboard, and the screenshot will go to your clipboard. Then, you can paste it into the Paint program. Here is how to do it:
- On your keyboard, press PrtSc (This key might also be called Prnt Scrn and Prt Sc on your keyboard). The complete current screen will be copied to your clipboard.
- Press the Windows logo key and type paint. In the list of search results, click the Paint program to open it.

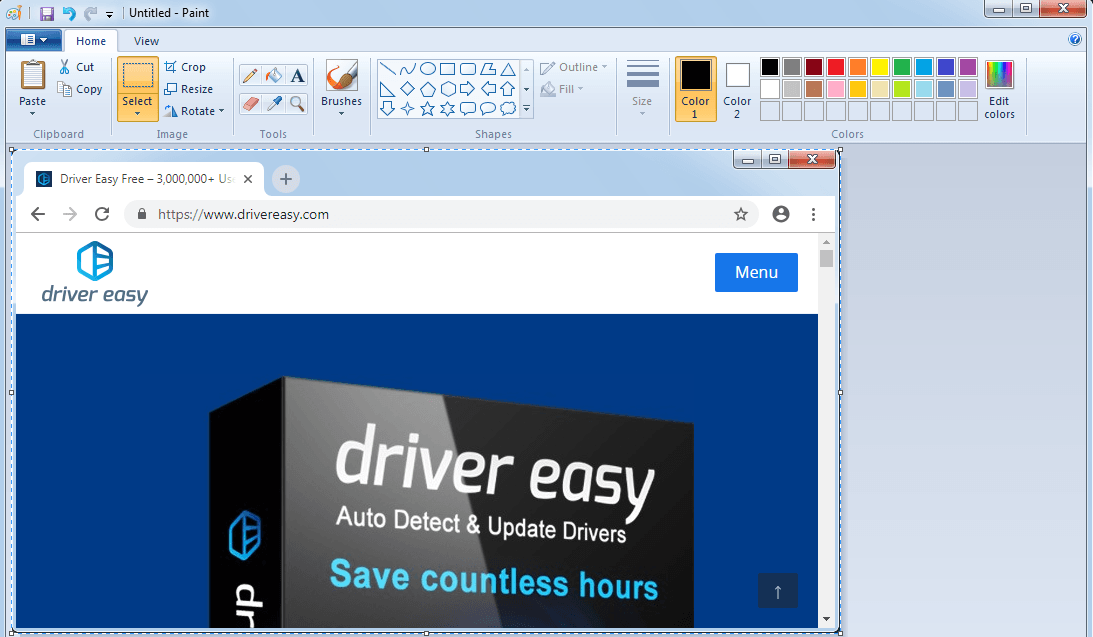
- On your keyboard, press Ctrl and V at the same time to paste the screenshot into the Paint program.
- On your keyboard, press Ctrl and S at the same time to save this screenshot.
2. Take a screenshot of an active window
To take a screenshot of an active window (the window currently in use) on your PC:
- Click anywhere of the window to make it the active window.
- On your keyboard, press Alt and PrtSc at the same time to take a screenshot of it.
- Press the Windows logo key and type paint. Click the Paint program to open it.
- On your keyboard, press Ctrl and V at the same time to paste the screenshot into the Paint program.
- On your keyboard, press Ctrl and S at the same time to save this screenshot.
The active window is now captured and saved to your PC.
3. Take a custom screenshot
If you want to take a screenshot of a certain area, there are two methods for you to try:
- Method 1: Take a custom screenshot using Snipping Tool
- Method 2: Take a custom screenshot using Snagit
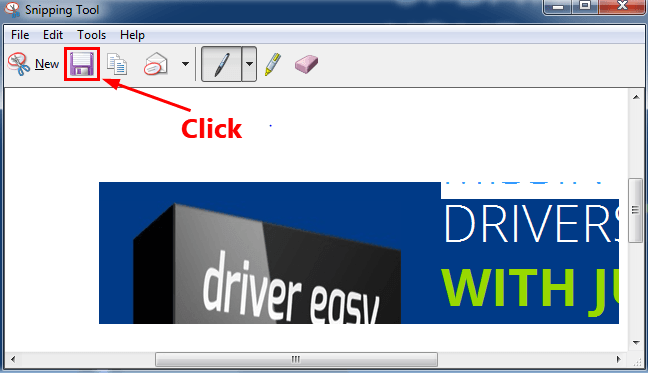
Method 1: Take a custom screenshot using Snipping Tool
The Windows built-in Snipping Tool can be used to take a custom screenshot. Follow the steps below to take a custom screenshot using Snipping Tool:
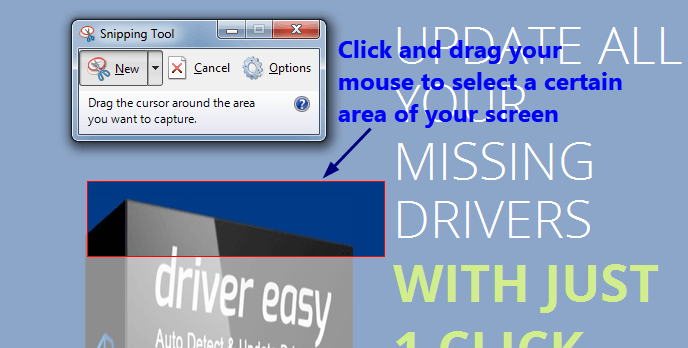
- On your keyboard, press the Windows logo key and then type snip. Click Snipping Tool in the list of search results.

- Your mouse pointer will change from an arrow to a cross. Click and drag your mouse to select a certain area of your screen. Then release the mouse button.
- In the pop-up window, click the Save Snip icon to save this custom screenshot.
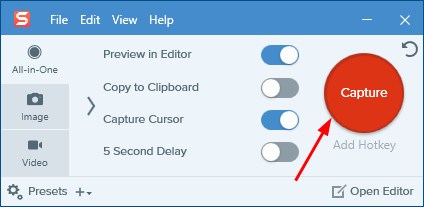
Method 2: Take a custom screenshot using Snagit
If you want to take your screenshot more easily and quickly and edit your image with more powerful tools, you can use Snagit. Follow the steps below to take a custom screenshot using Snagit.
- Download and install Snagit.
- Run and sign in Snagit, then click the Capture button.
- Click and drag to select a custom area, then release your mouse button.
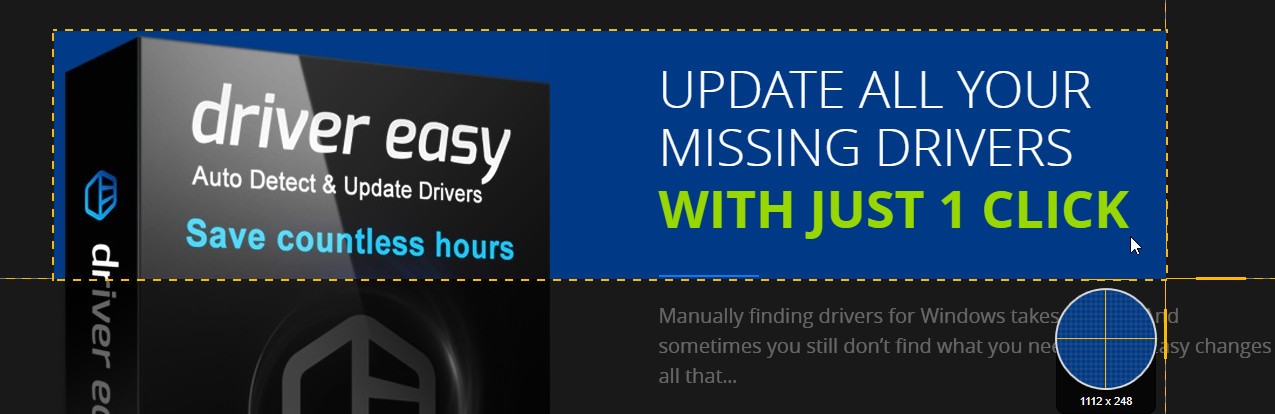
- Click the camera icon to capture the selected area.

- Edit your screenshot on the pop-up Snagit Editor. You can add shapes, text, effects, or make adjustments to your screenshot.

- On your keyboard, press Ctrl and S to save this screenshot.