Are you thinking about splitting your computer screen to display two or more programs? In fact, having multiple programs displayed on the same screen in Windows 10 is very easy. Windows 10 has a feature called “snapping“, which allows you to “snap” a program window to the side or the corner of your desktop. You can use it to “split” your screen and display several program windows at a time!
To split your screen in Windows 10
There are two ways you can split your screen. You may not have to try them all; just choose the one suitable for your need.
You can display two windows on a same desktop side by side. To do so:
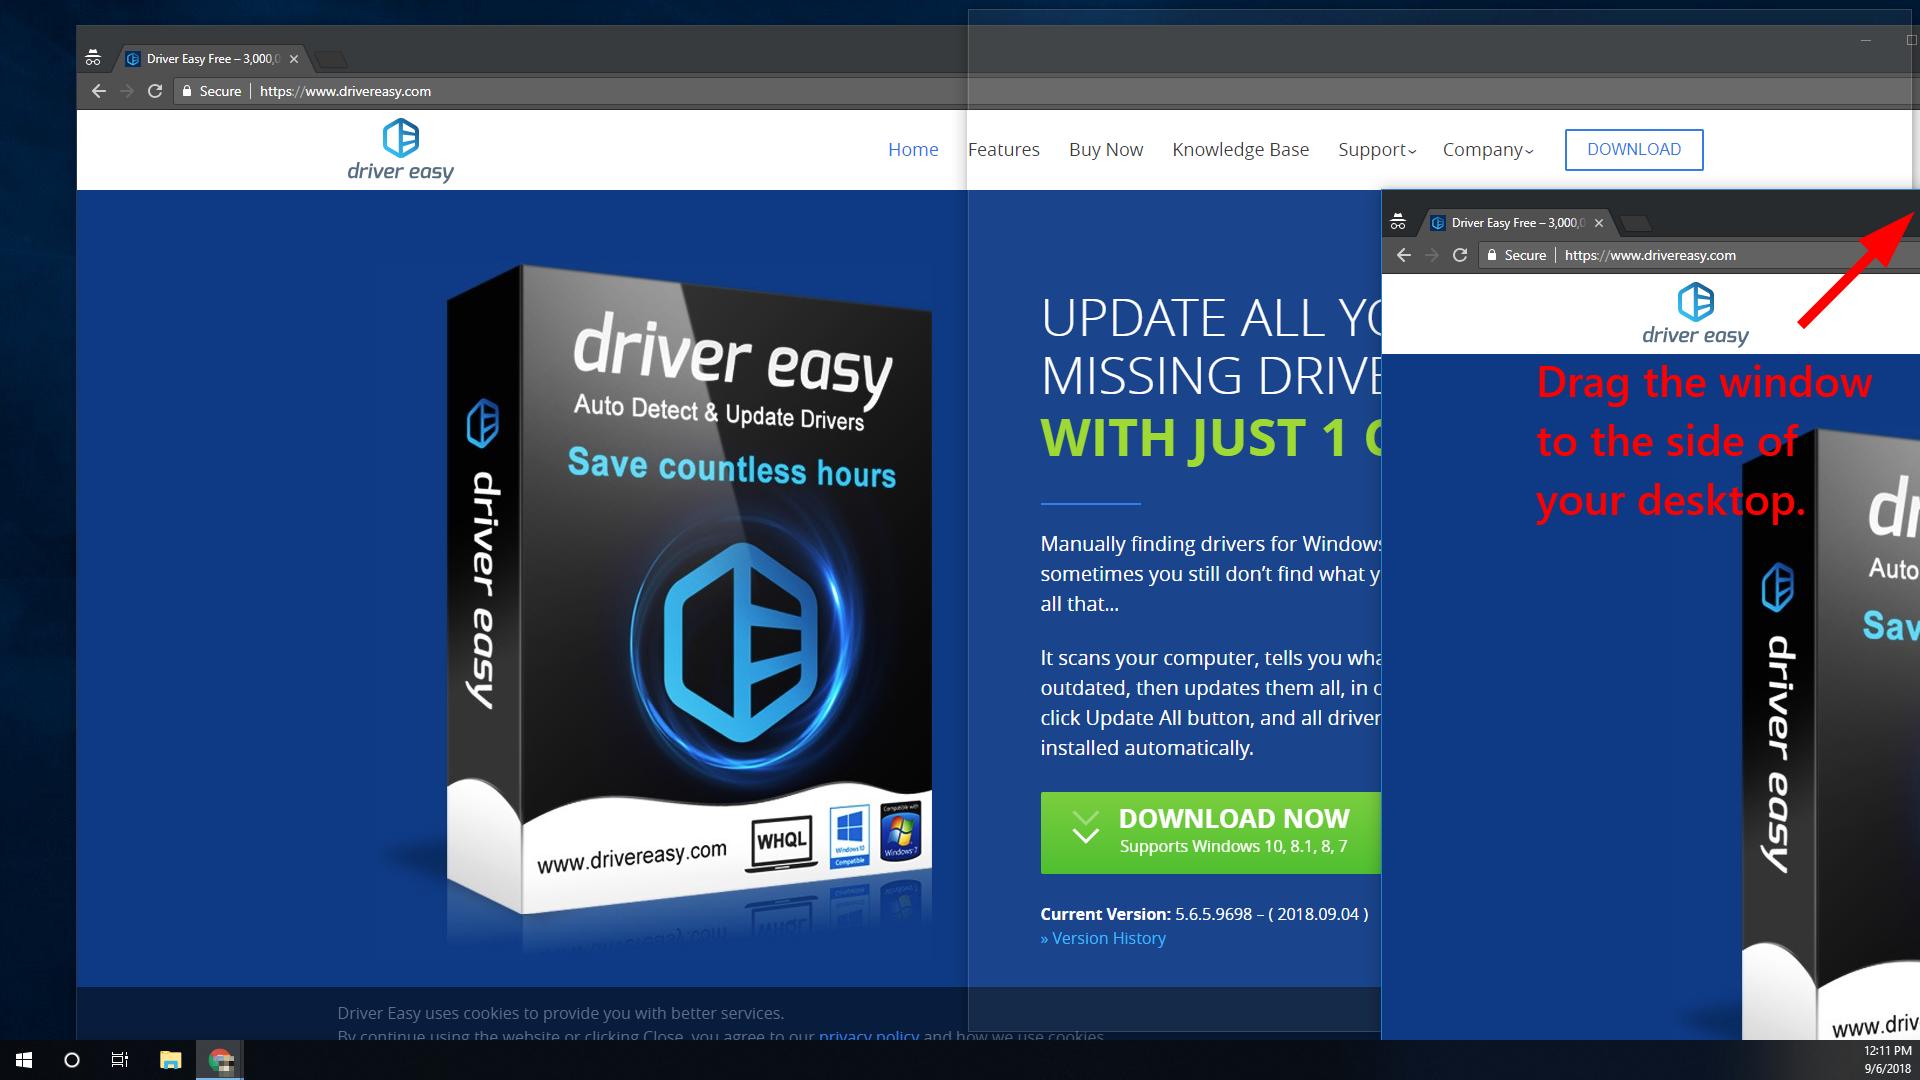
Click and drag one window to the side of your desktop, then, when a transparent box appear, release your mouse button.
A transparent square will appear indicating you’re snapping the window to that side of your desktop.
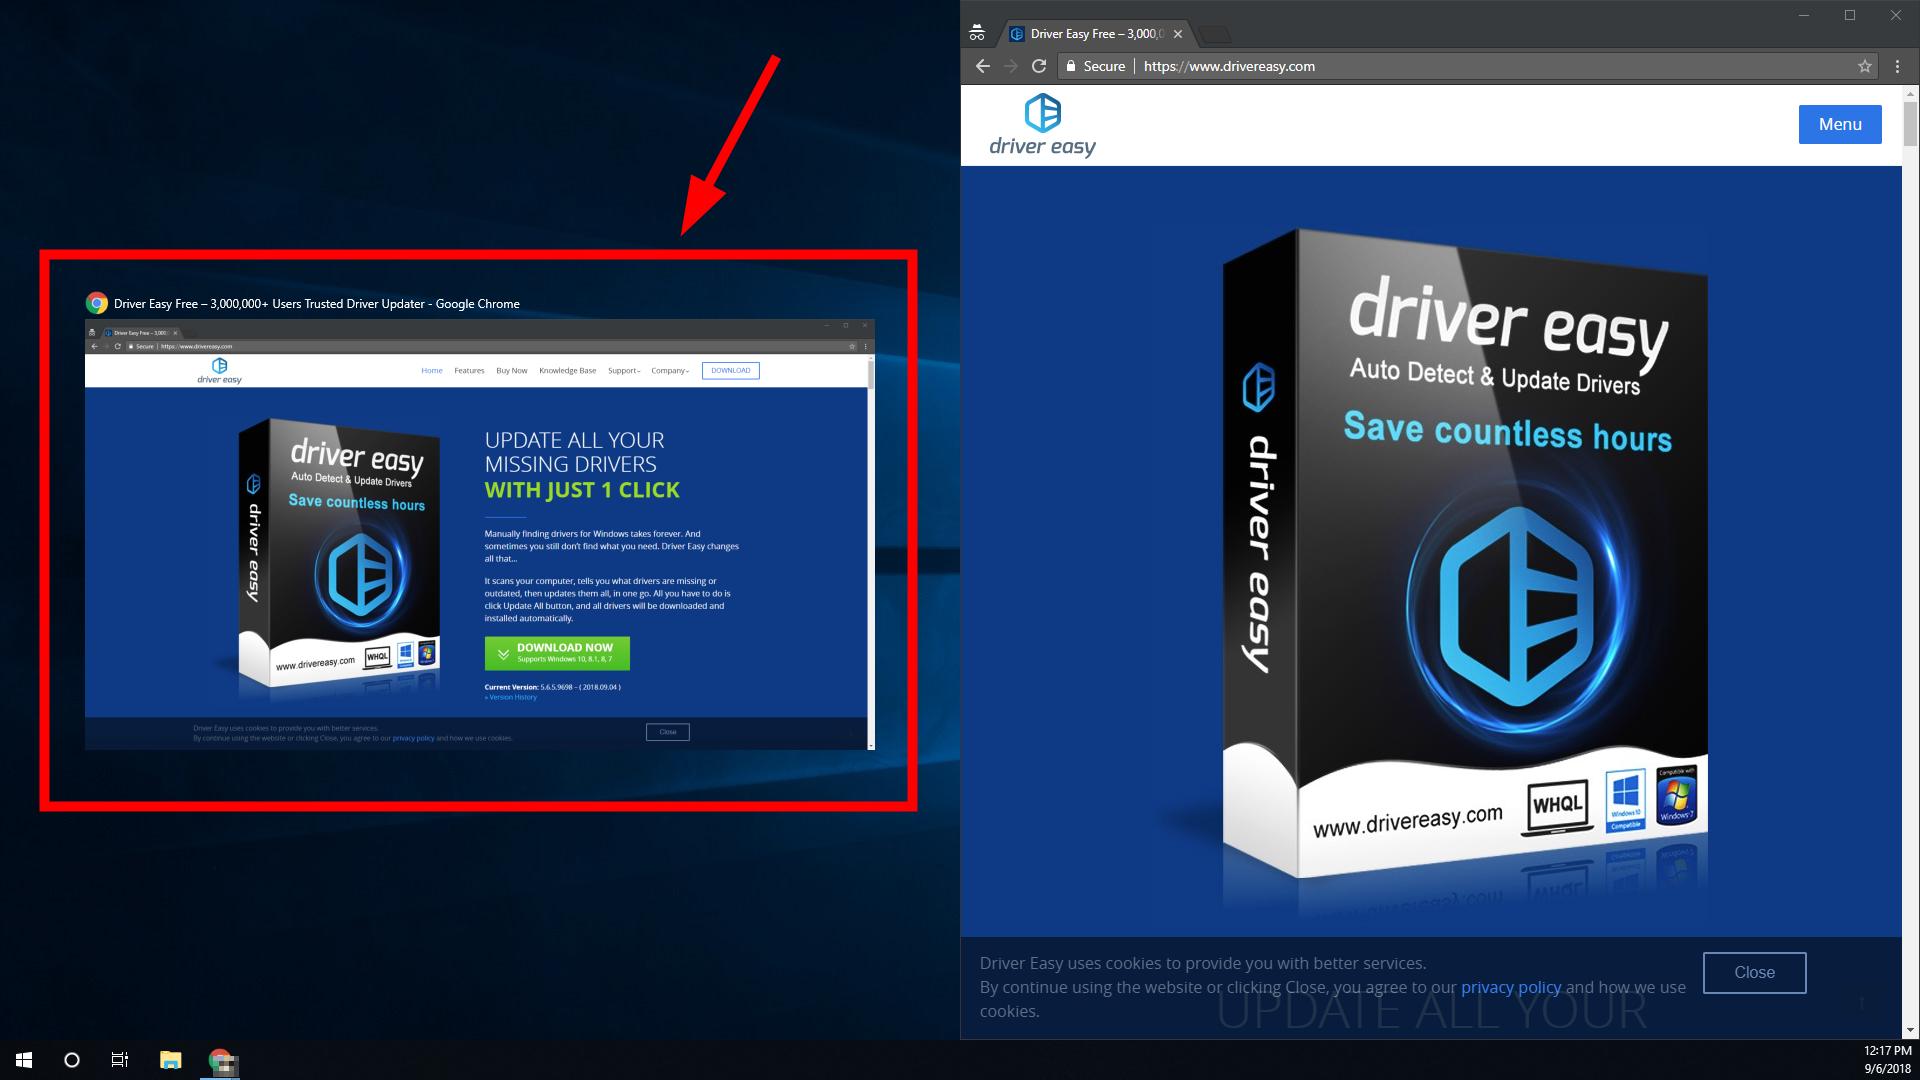
Select the other window to display it on the other side of your desktop.
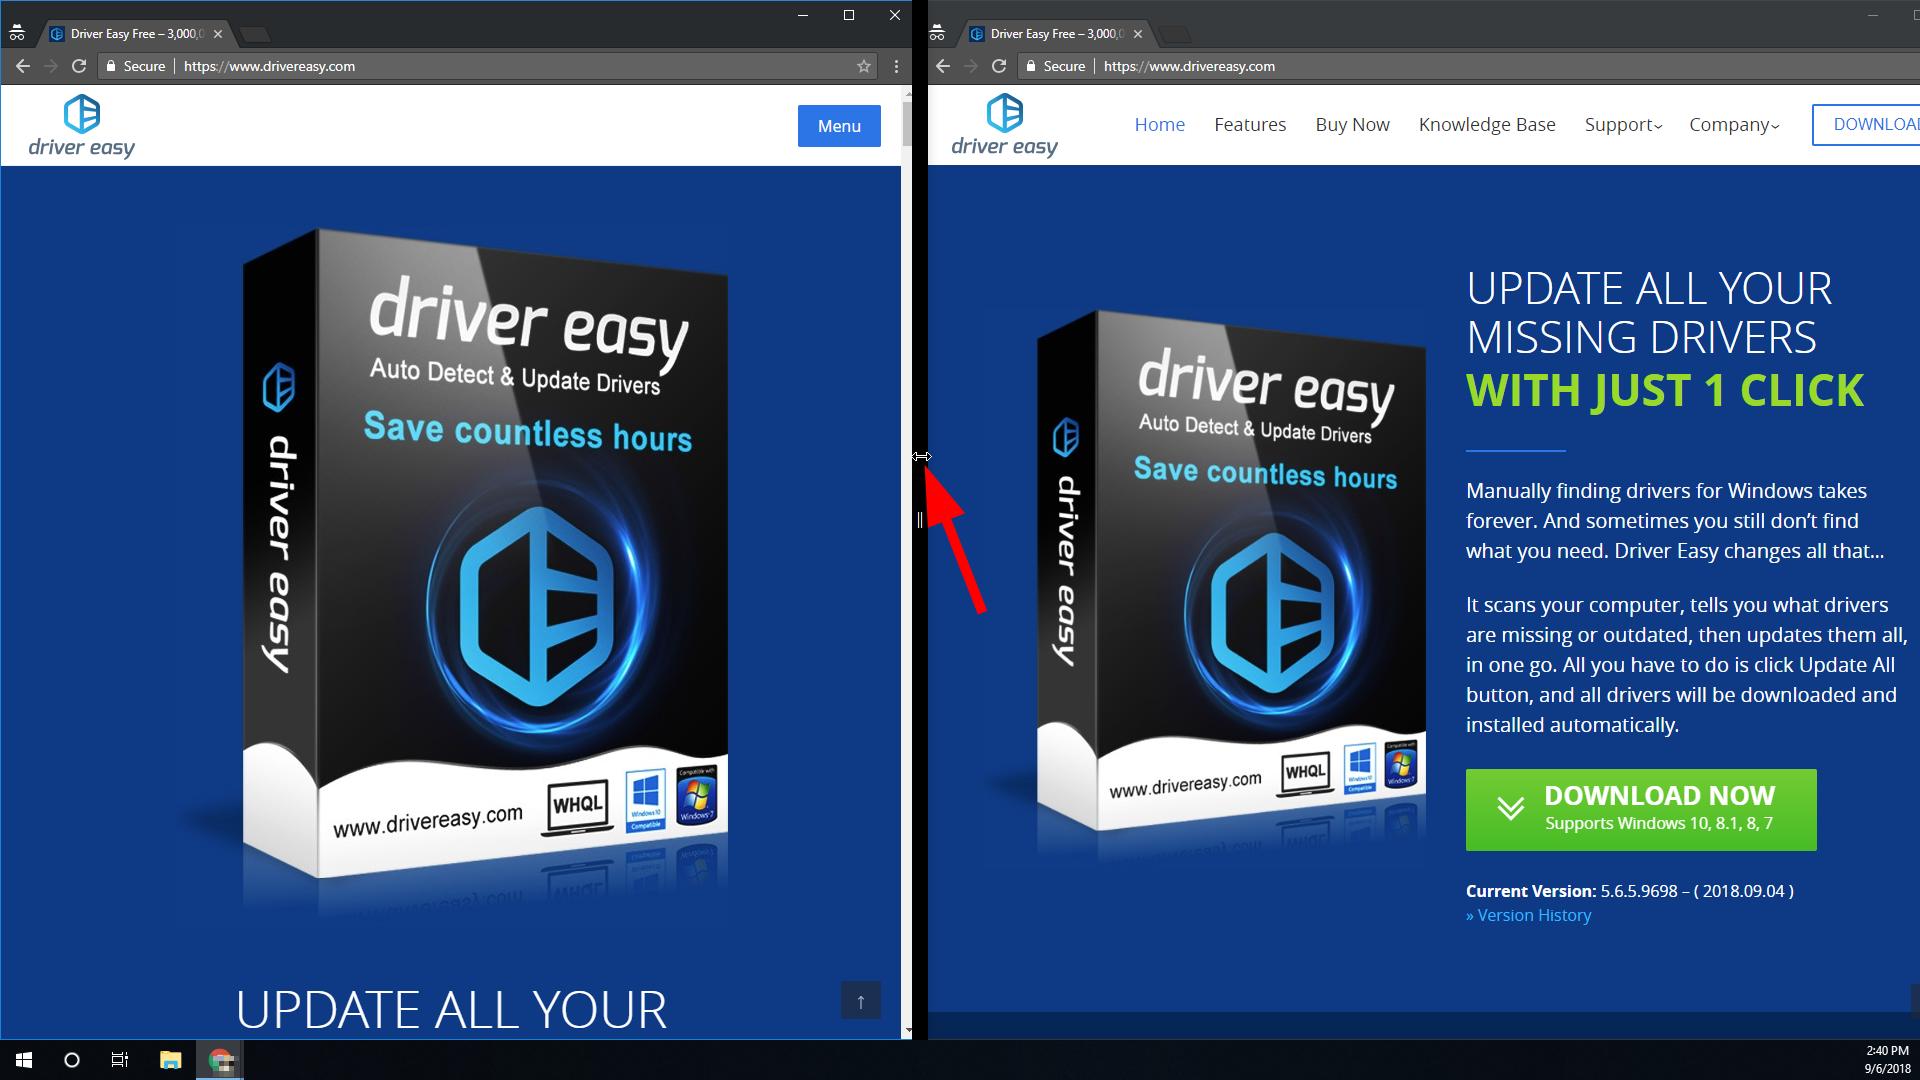
Now both windows are displayed side by side.
If you’re going to resize these two windows, move your mouse pointer over their common border, then, when the pointer becomes a double arrow pointer, click and drag to resize both windows horizontally.
Click and drag the common border to resize.
Now you’re able to view and resize two windows on the same screen.
2. Display three or more windows on a screen
You can also display three or four program windows at the same time. Here’s how you can do it:
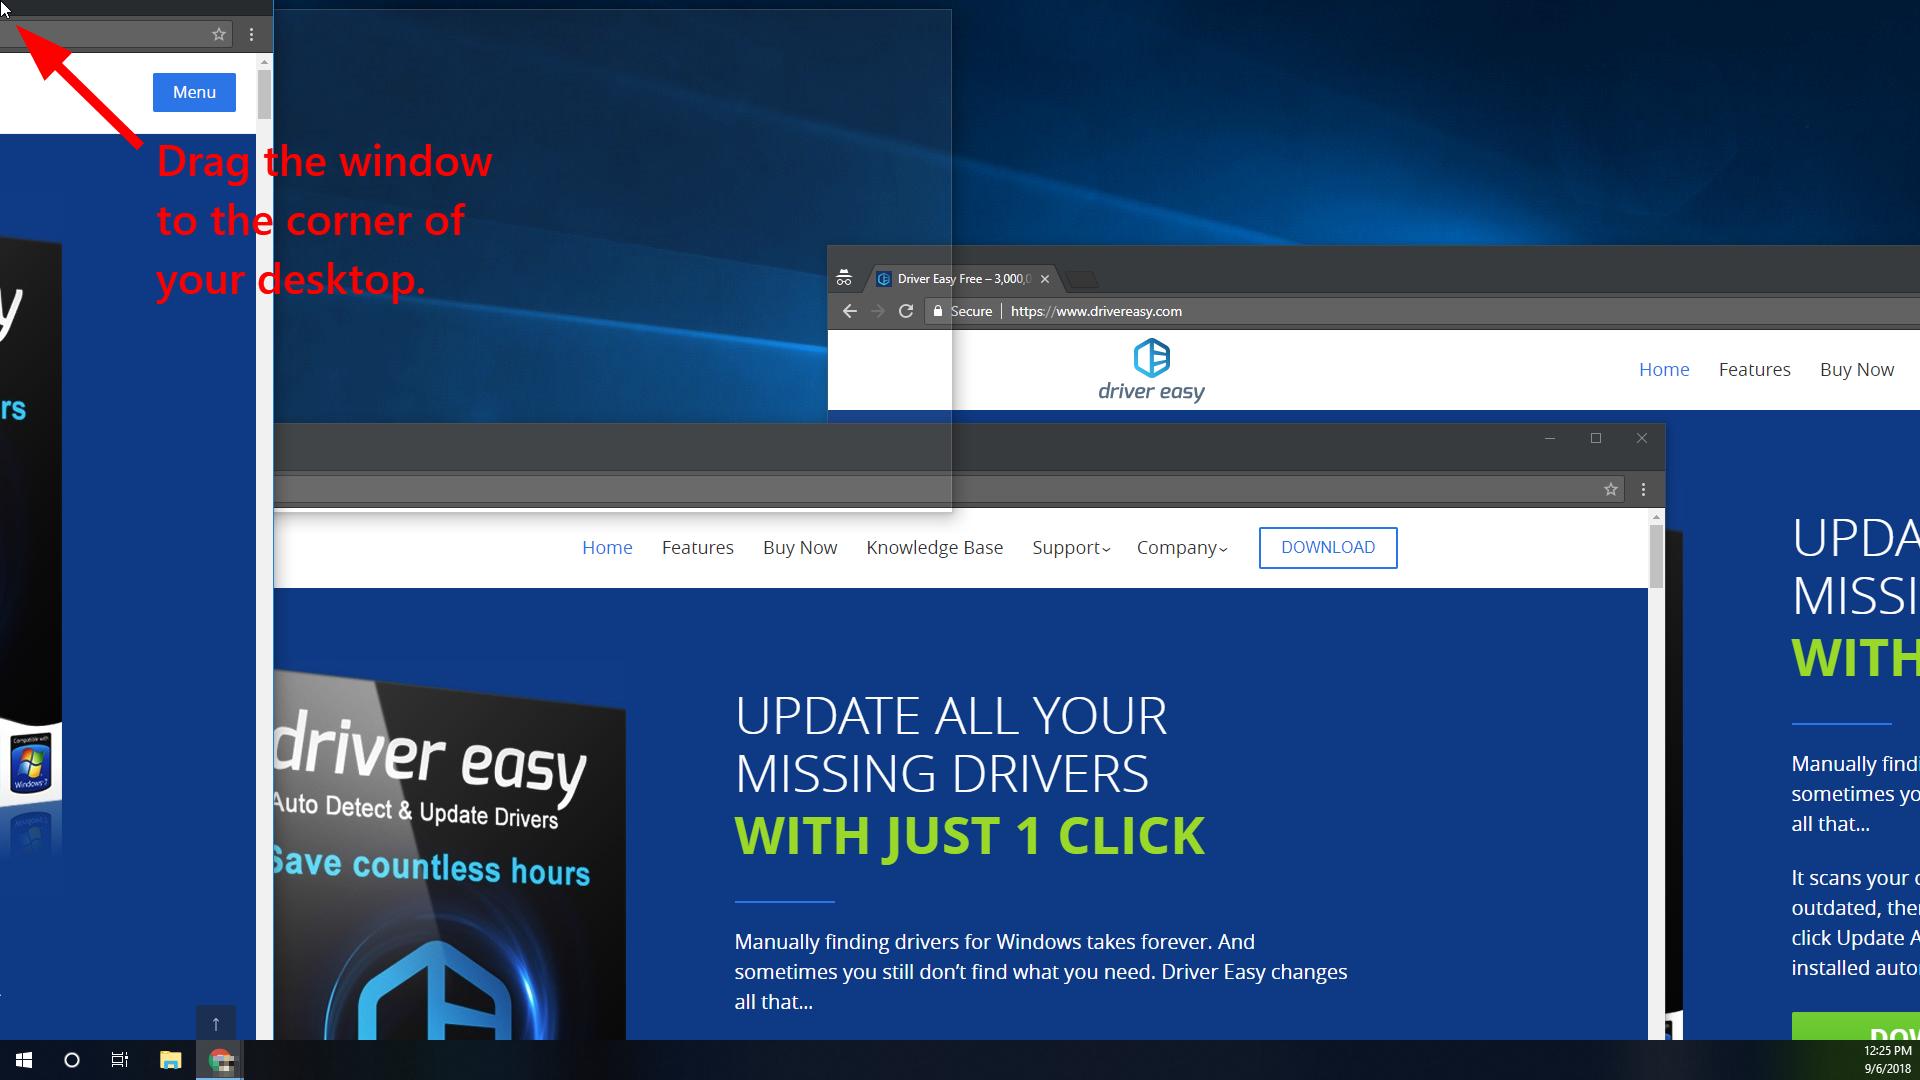
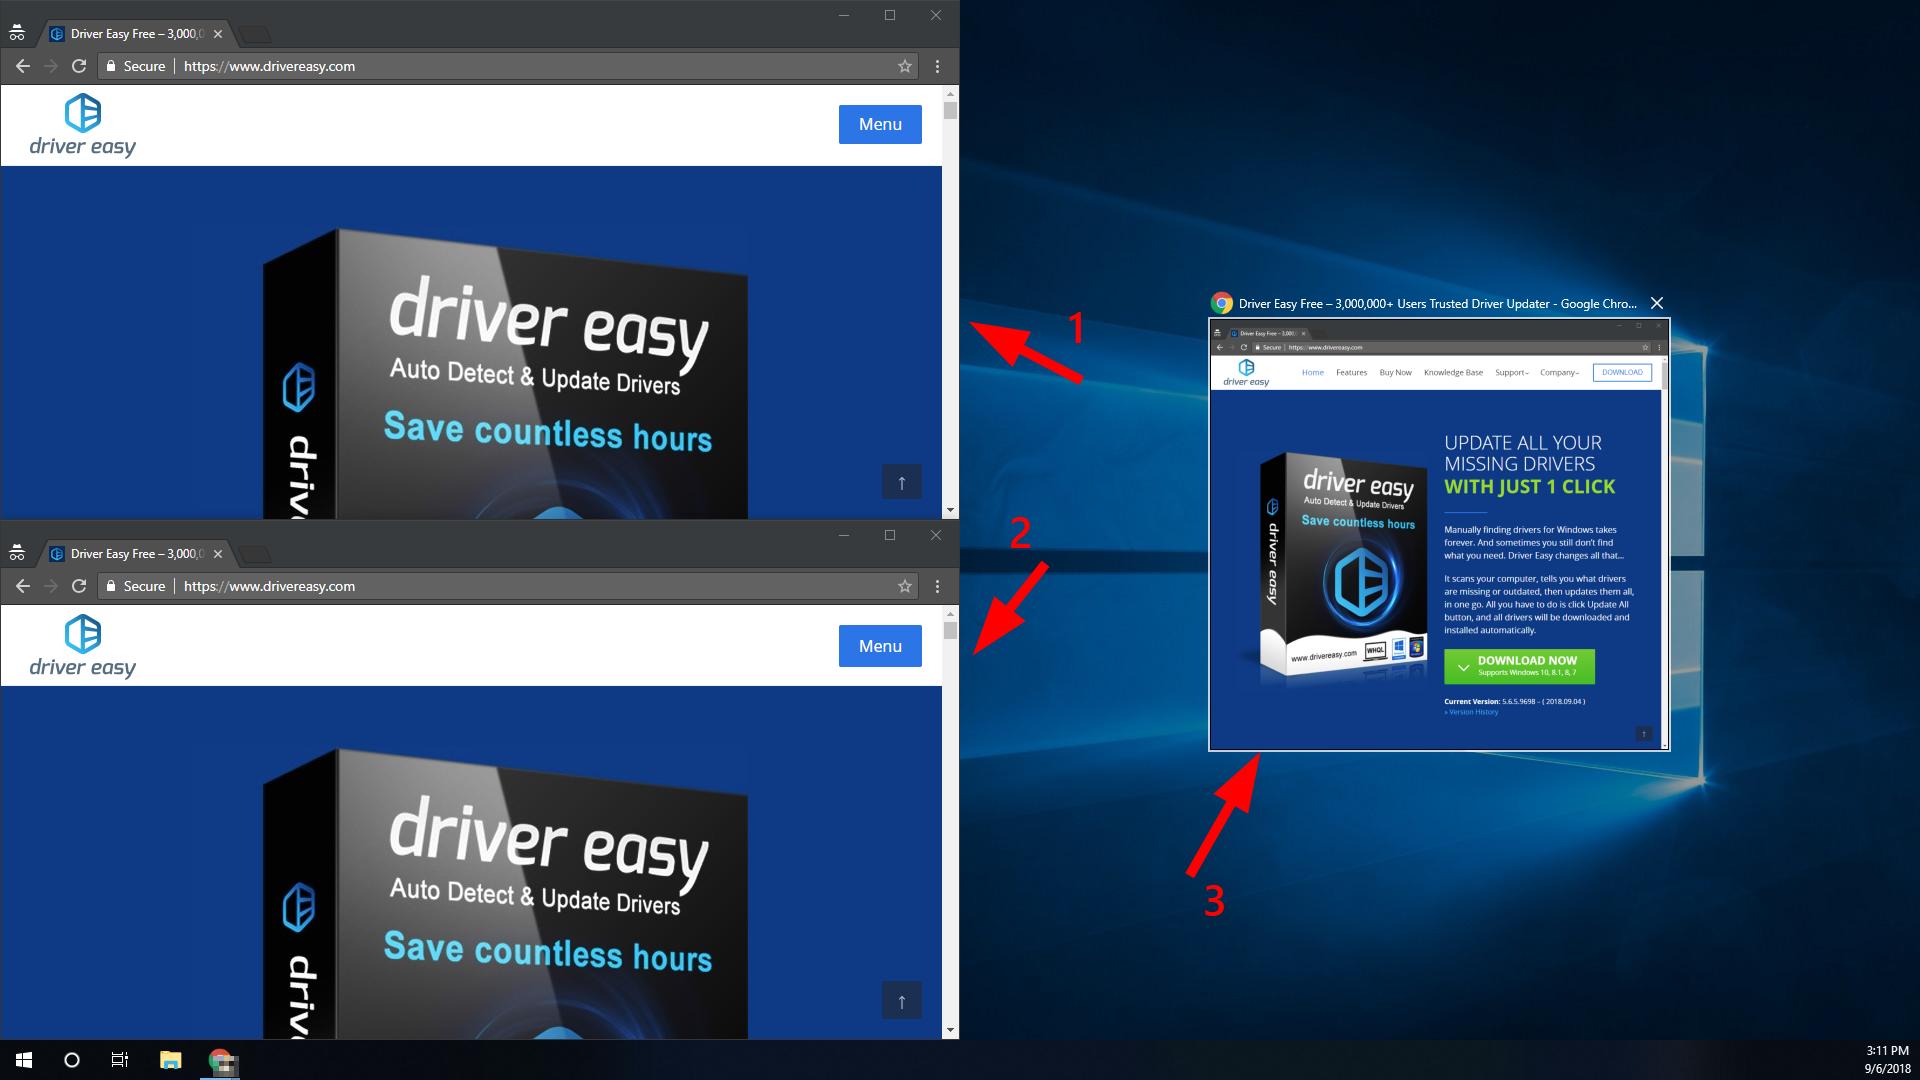
Click and drag a window to a corner of your screen, then when a transparent box appear, release your mouse button. (The window will be automatically put into that quarter of your screen.)
A transparent box will appear indicating you’re snapping the window to that corner of your desktop.
Configure the multiple window display you want:
If you want to display three windows, click and drag two windows to the two corners on one side, then select the final window to put in on the other side.
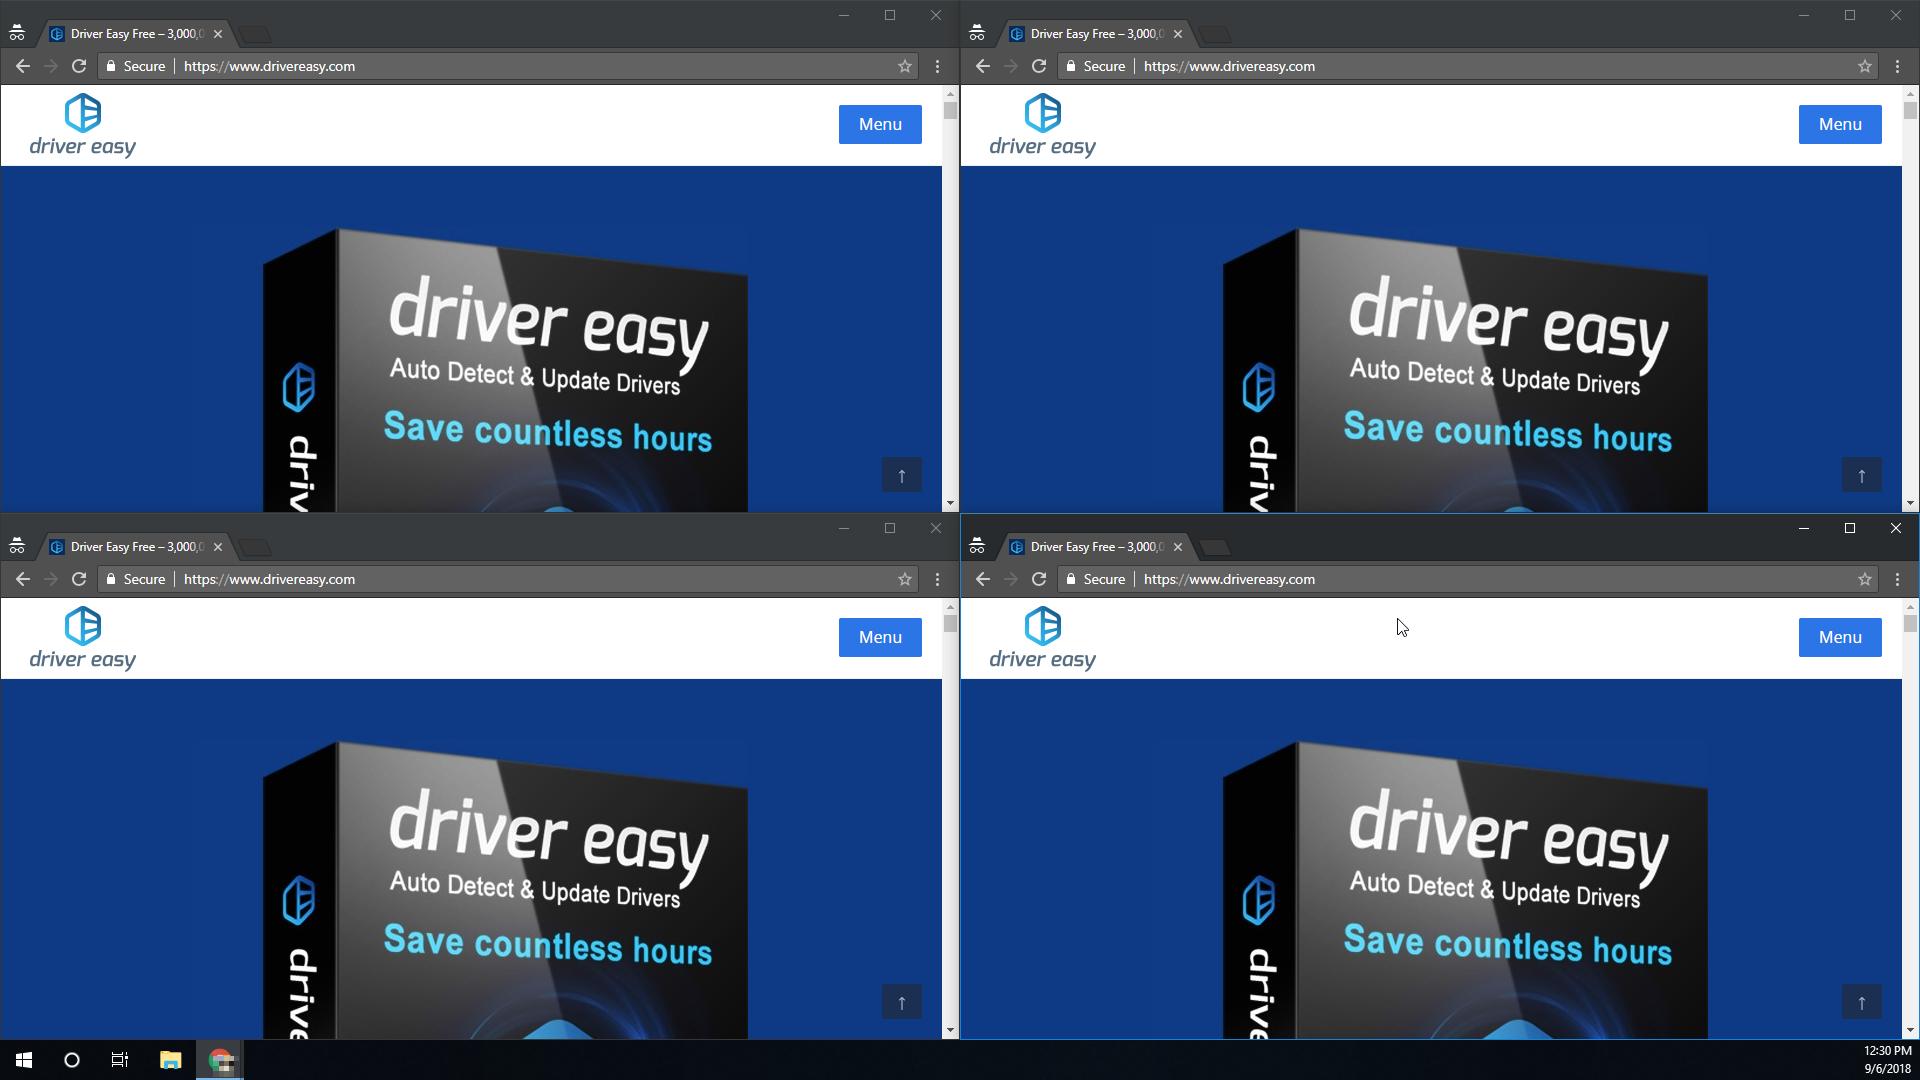
To display four windows on your desktop, click and drag one window to a corner, and then do this for the other three windows.
Your system may automatically put one of your windows on the side of your desktop. Just ignore it and drag that window to a corner.
Hopefully, this helps you display more than two program windows at a time.
To check and change your Windows 10 Snap settings
If you want to check or change the settings of “snapping” on your Windows 10 computer:
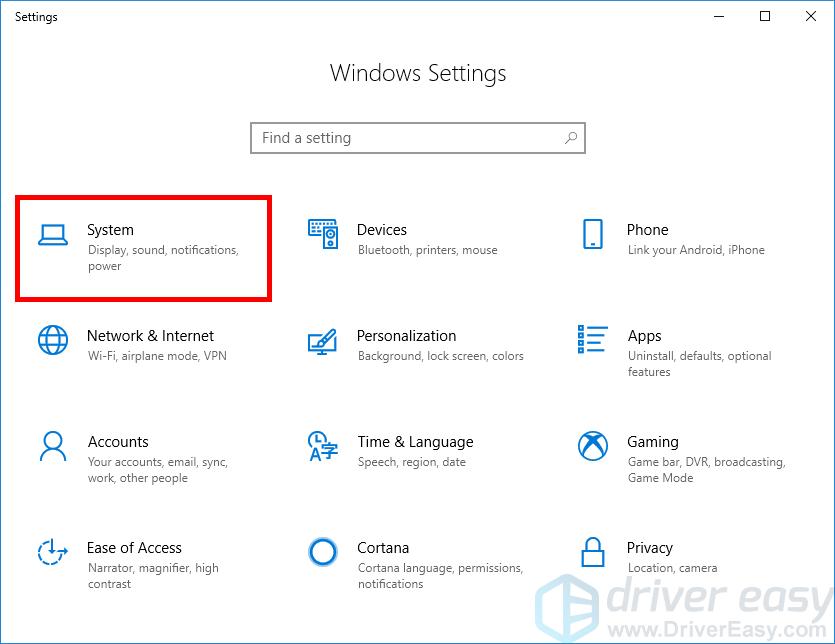
Press the Windows logo key and i on your keyboard at the same time to open the Settings window.
Click System.
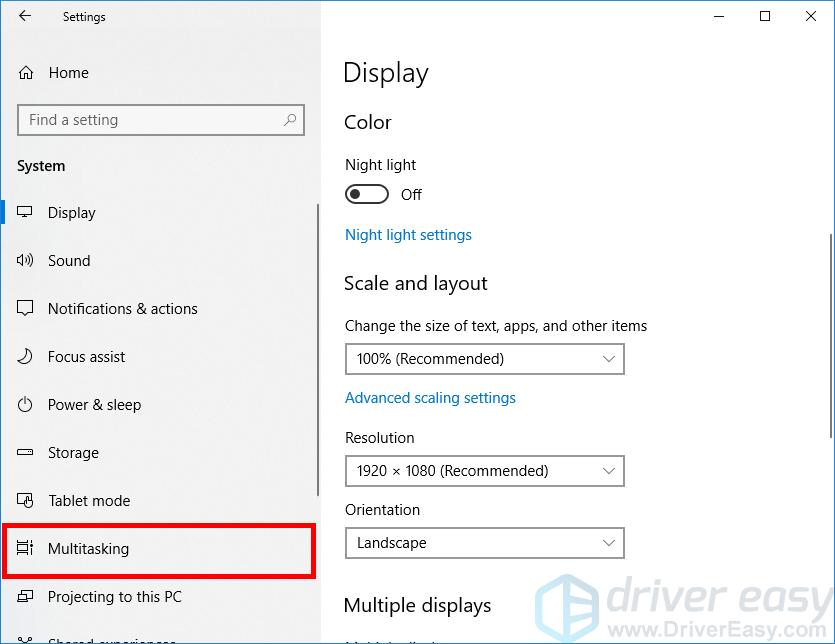
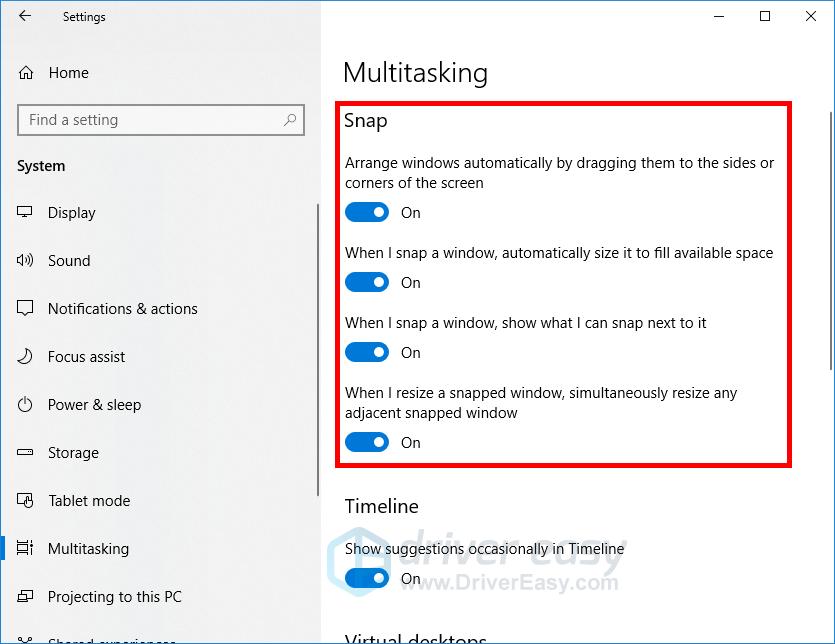
Click Multitasking.
Check the settings in the Snap section. Read the description of each item and turn it on or off according to your need.
You’ll see the changes you made come into effect the next time you snap program windows
That’s it! You should now be able to “split your screen” and set up your multiple window display on your Windows 10 computer. If you have any questions, leave us a comment below.