


Don’t know how to take screenshots on your Lenovo laptop, desktop or tablet? you’ve come to the right place. It’s very easy!
In this article, we’ll show you how to take screenshots on your Lenovo devices.
Try these methods:
- Use Snagit (Recommended)
- Take screenshots with the Windows screenshot feature (Free but limited)
Method 1: Use Snagit to take a screenshot
If you want to take your screenshot more easily & quickly and edit your image with more powerful tools, you can use Snagit.
You can follow the instructions below to take a custom screenshot using Snagit:
- Download and install Snagit.
- Run and sign in Snagit, then click the Capture button.
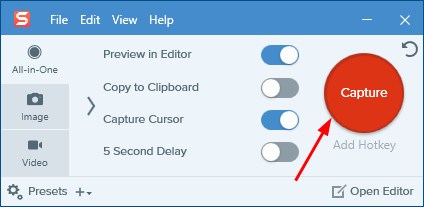
- Click and drag to select a custom area, then release your mouse button.
- Click the camera icon to capture the selected area.

- Edit your screenshot on the pop-up Snagit Editor. You can add shapes, text, effects, or make adjustments to your screenshot.

- On your keyboard, press Ctrl and S to save this screenshot.
Method 2: Take a screenshot with the Windows screenshot feature
If you just need to take a simple screenshot on your Lenovo PC or taptop, you can use the Windows screenshot feature to do so.
1. Take a screenshot of the whole screen
There are two ways to take a screenshot of the whole screen on your Lenovo computer:
- Press the PrtSc key to take a screenshot of the whole screen
- Press the Windows logo key and the PrtSc key to take a screenshot of the whole screen
Press the PrtSc key to take a screenshot of the whole screen
- On your keyboard, press PrtSc. The complete current screen will be copied to your clipboard.
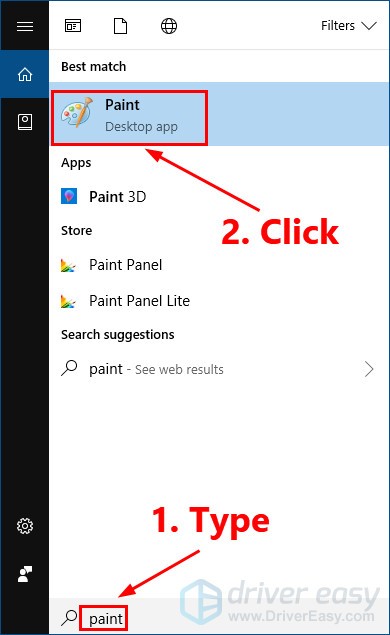
- Press the Windows logo key and type paint. In the list of search results, click the Paint program to open it.
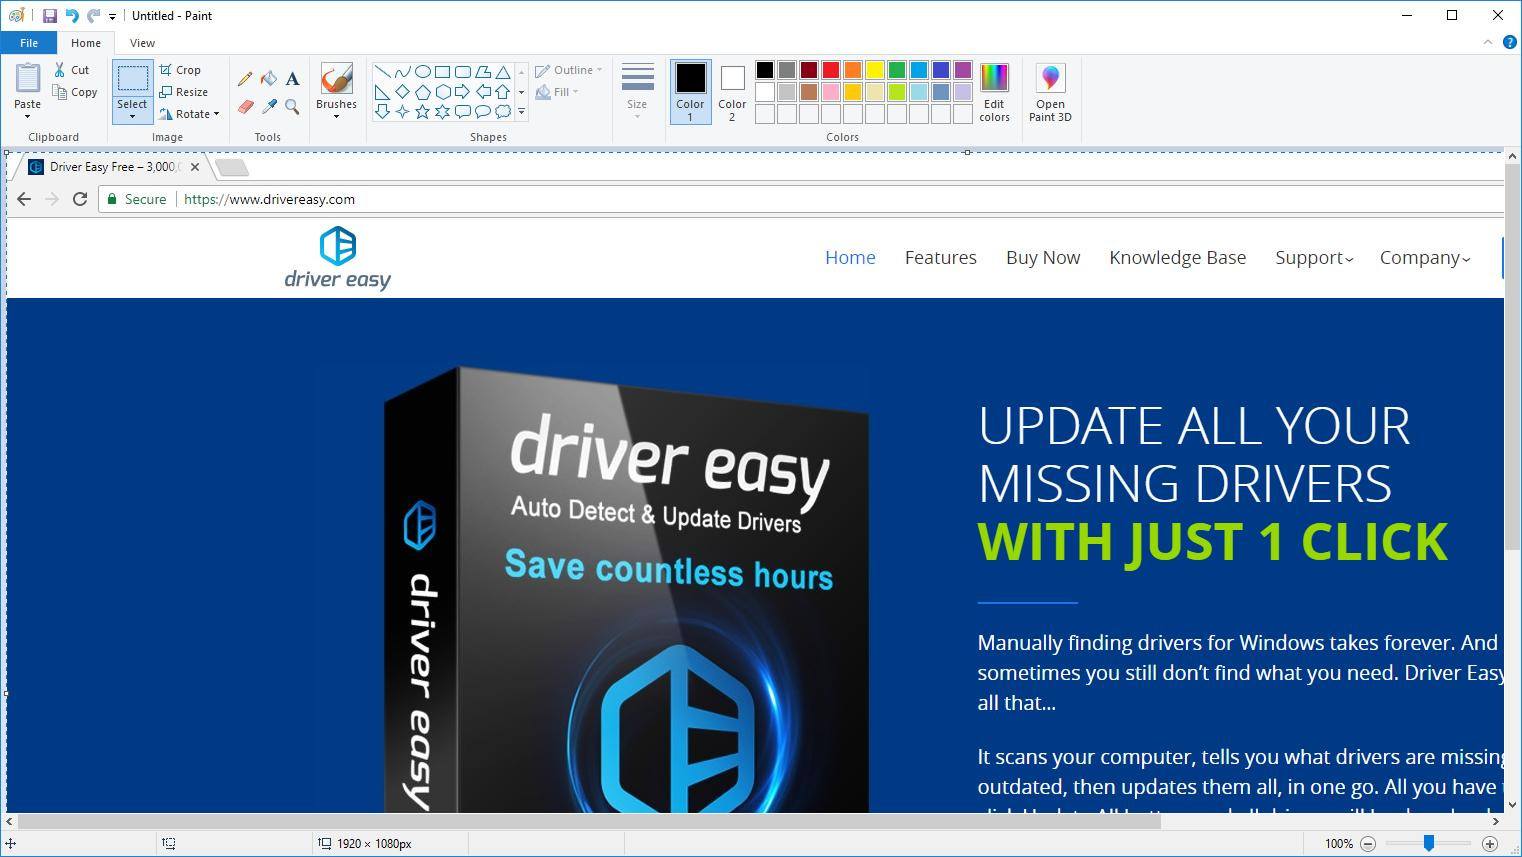
- On your keyboard, press Ctrl and V at the same time to paste the screenshot into the Paint program.
- On your keyboard, press Ctrl and S at the same time to save this screenshot.
Press the Windows logo key and the PrtSc key to take a screenshot of the whole screen
- On your keyboard, press the Windows logo key and the PrtSc key at the same time to take a screenshot of the whole screen.
This screenshot will be copied to your clipboard and be automatically saved in the path C:Users[Your Name]PicturesScreenshots.
- Go to C:Users[Your Name]PicturesScreenshots to view this screenshot.
- You can also paste it into the Paint program to edit it.
Now, you have taken a screenshot of the whole screen and saved it on your Lenovo computer.
2. Take a screenshot of an active window
To take a screenshot of an active window (the window currently in use) on your Lenovo computer:
- Click anywhere of the window to make it the active window.
- On your keyboard, press Alt and PrtSc at the same time to take a screenshot of it.
- Press the Windows logo key and type paint. Click the Paint program to open it.

- On your keyboard, press Ctrl and V at the same time to paste the screenshot into the Paint program.
- On your keyboard, press Ctrl and S at the same time to save this screenshot.
The active window is now captured and saved to your computer.
3. Take a custom screenshot
If you want to take a screenshot of a certain area, there are three methods for you to try:
- Method 1: Take a custom screenshot using your keyboard (Windows 10 Only)
- Method 2: Take a custom screenshot using Snipping tool
Take a custom screenshot using Snip & Sketch
If the current operating system of your Lenovo computer is Windows 10 version1809 or newer, you can press the Windows logo key, Shift and S at the same time to invoke the built-in Snip & Sketch app in Windows 10.
- On your keyboard, press the Windows logo key, Shift and S at the same time. A toolbar will appear on the top of Syour screen:

- Select the snipping tool you’d like to use:
-Rectangular: take a screenshot in a rectangular shape.
-Freeform: take a screenshot in any shape you like.
-Fullscreen: take a screenshot of your entire screen - Click and drag your mouse cursor to select a certain area of your screen you’d like to take a screenshot. Then release the mouse button.
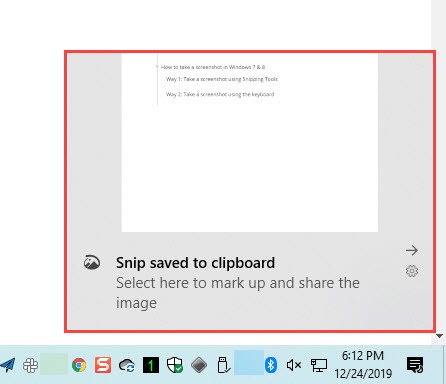
- Once you’ve taken a screenshot, the screenshot will be saved to clipboard. You can also click the notification to view your screenshot.
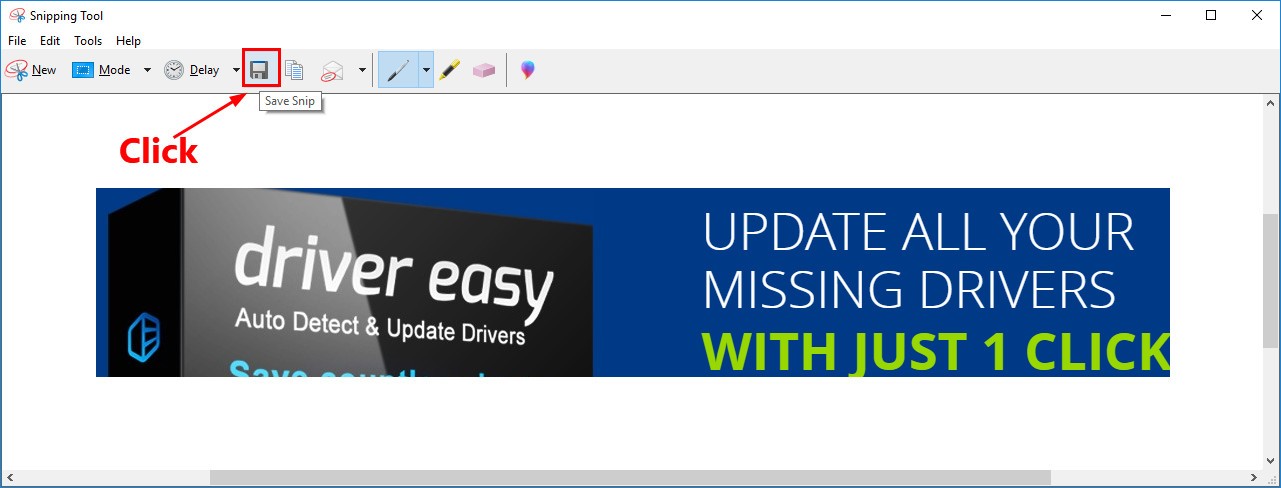
Take a custom screenshot using Snipping Tool
The Windows built-in Snipping Tool can also be used to take a custom screenshot. Follow the steps below to take a custom screenshot using your Snipping Tool:
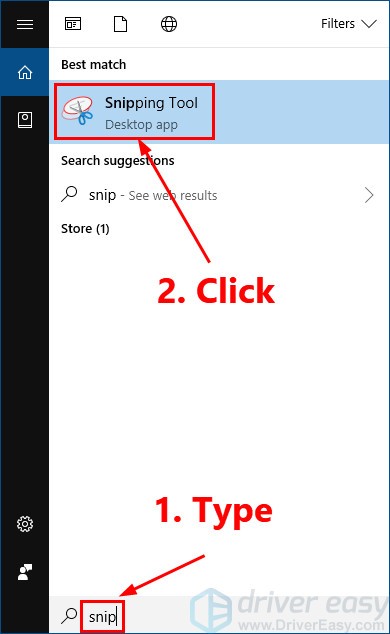
- On your keyboard, press the Windows logo key and then type snip. Click Snipping Tool in the list of search results.
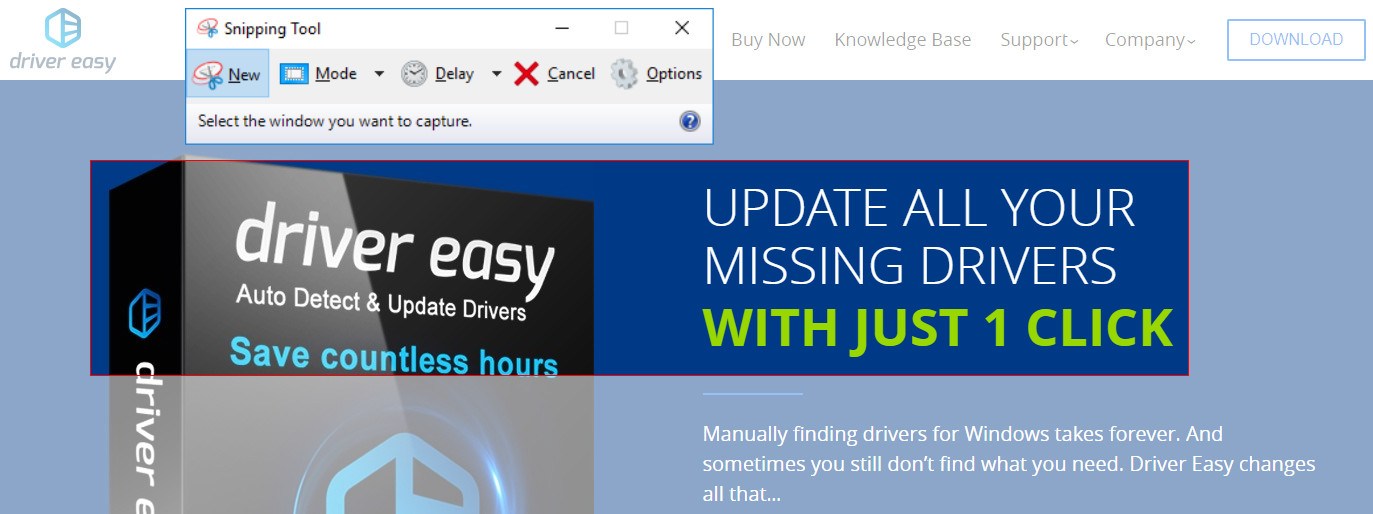
- On Snipping Tool, click New.
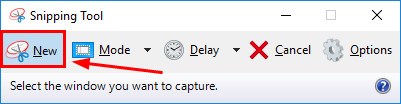
- Click and drag your mouse to select a certain area of your screen. Then release the mouse button.
- In the pop-up window, click the Save Snip icon to save this custom screenshot.
Tips: Take a screenshot on your Windows tablet
If you are using a Lenovo Windows tablet, press and hold the On/Off button and the Volume down (-) button at the same time to take a screenshot.
Hopefully after reading this article, you’ve learned how to take screenshots on your Lenovo devices. If you have any questions or suggestions on this topic, you’re more than welcome to leave us a comment below. Thanks for reading!