


You wish to uninstall/rollback a Windows 10 update for one of the reasons listed above, but don’t know how? Well, read on and you’ll be on your way to getting the answer.
There are two different types of updates in Windows 10 – major updates(or builds) and typical updates. And in this article you’ll learn:
- How to uninstall major build updates
- How to uninstall typical Windows updates
- Pro tip – What to do next after uninstalling Windows 10 updatesJust to be on the safe side, you may want to back up your data before you begin.
1.1. How to uninstall major build updates via Settings
Builds, or major build updates, are like new versions of Windows. You can only uninstall a build within the first 10 days after installing it. So if it’s more than 10 days since you installed the latest build, it’s possible that you can’t find the Go back to the previous version of Windows 10 section in Settings, which is mentioned below.
To roll back a build in Windows 10, you can:
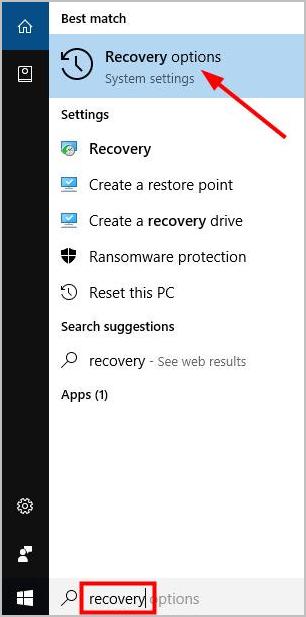
- Type recovery in the Windows search box, and select Recovery options.
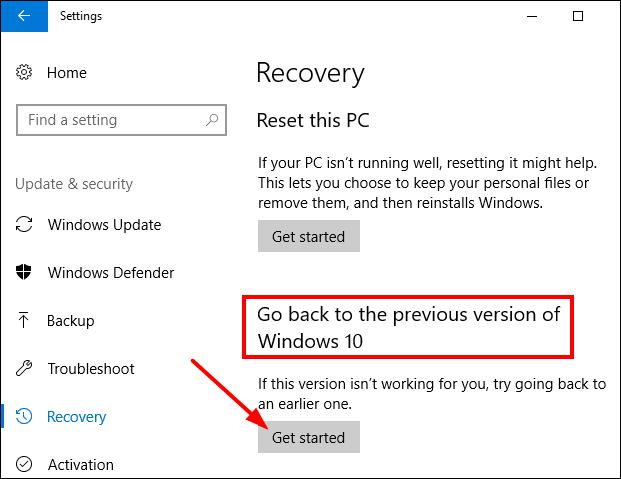
- Under the Go back to the previous version of Windows 10 section, click on the Get started button.Note: if you don’t see the Go back to the previous version of Windows 10 section (see screenshot below), you can then try the next method or try uninstalling typical Windows updates instead.
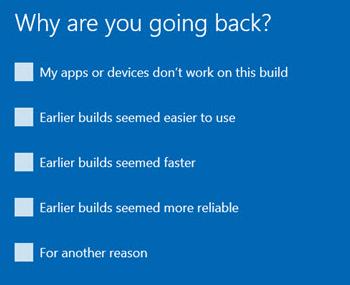
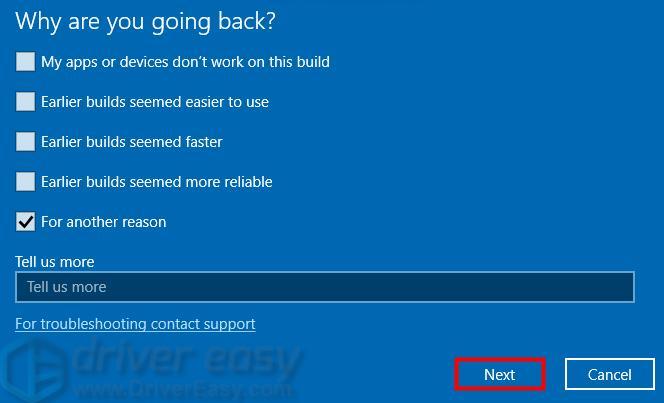
- Select a reason why you’re going back to the previous version of Windows 10, and click Next.
Click No, thanks.
Note: you can click Check for updates if you want to check for updates instead.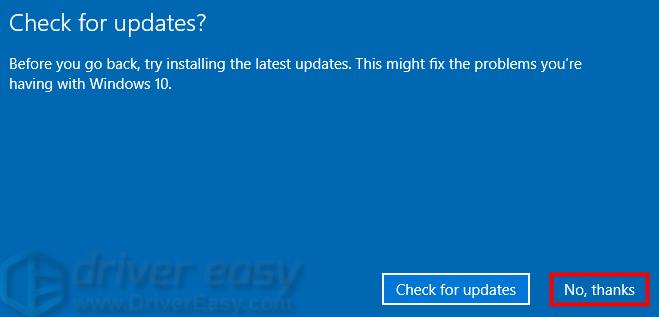
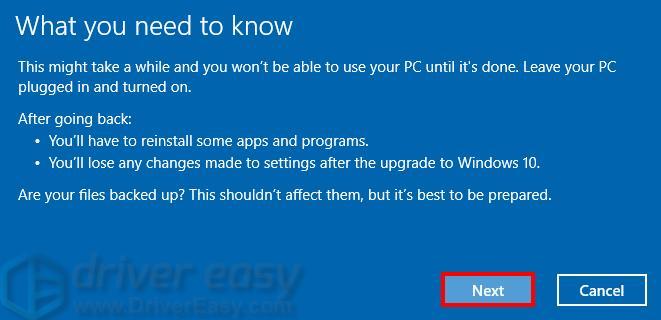
Click Next.
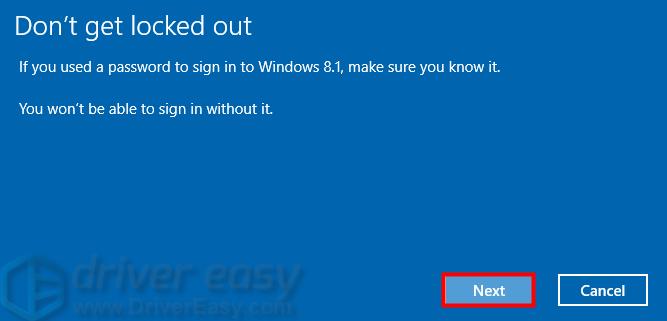
Click Next.
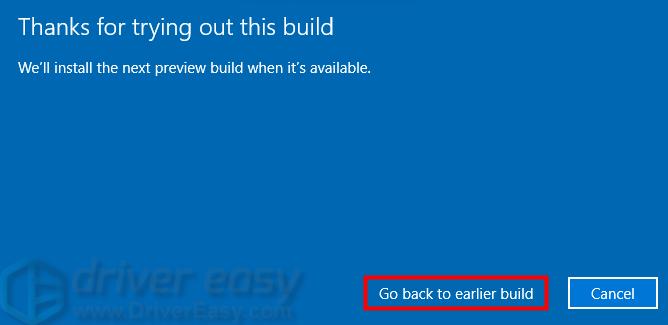
Click Go back to the earlier build and Windows will begin to restore.
1.2. How to uninstall major build updates via Windows RE
In addition, you can also enter Windows 10 WinRE(Windows Recovery Environment) to undo Windows 10 update.
- Click on the Start

button and the power icon

.
- Hold down the Shift key on your keyboard and click on Restart.
- When the Choose an option screen appears, select Troubleshoot.
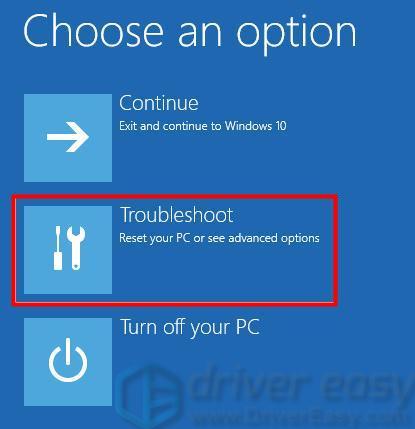
- Select Advanced options.
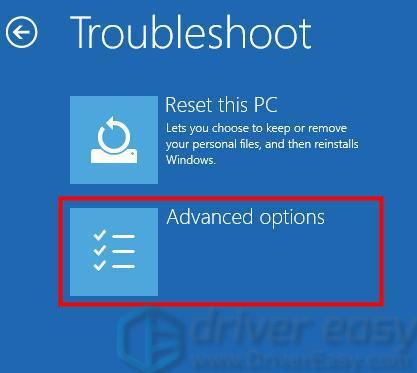
- Select Go back to the previous version.
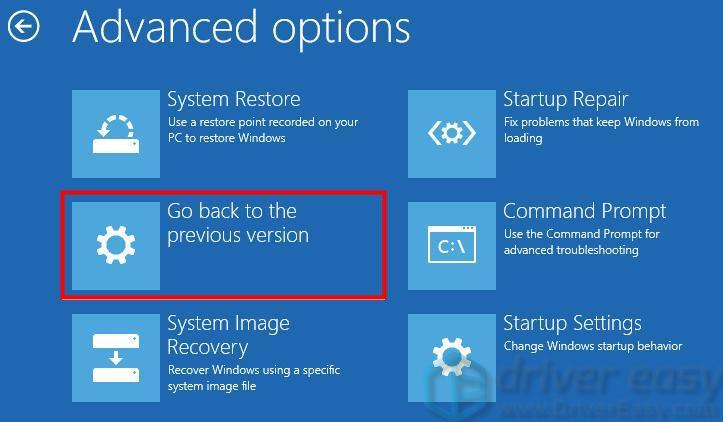
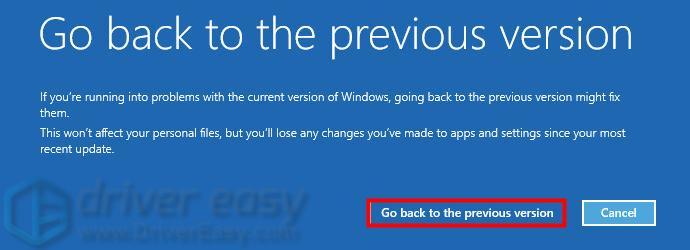
- Click Go back to the previous version to begin the process.
2.1. How to uninstall typical Windows updates via Settings
In addition to some major build updates, Windows also releases minor updates regularly. If necessary, you can also choose to uninstall these typical Windows updates. See the steps here.
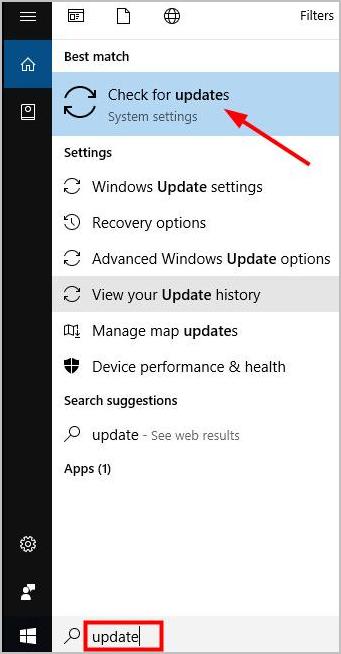
- Type update in the Windows search box, and select Check for updates from the results.
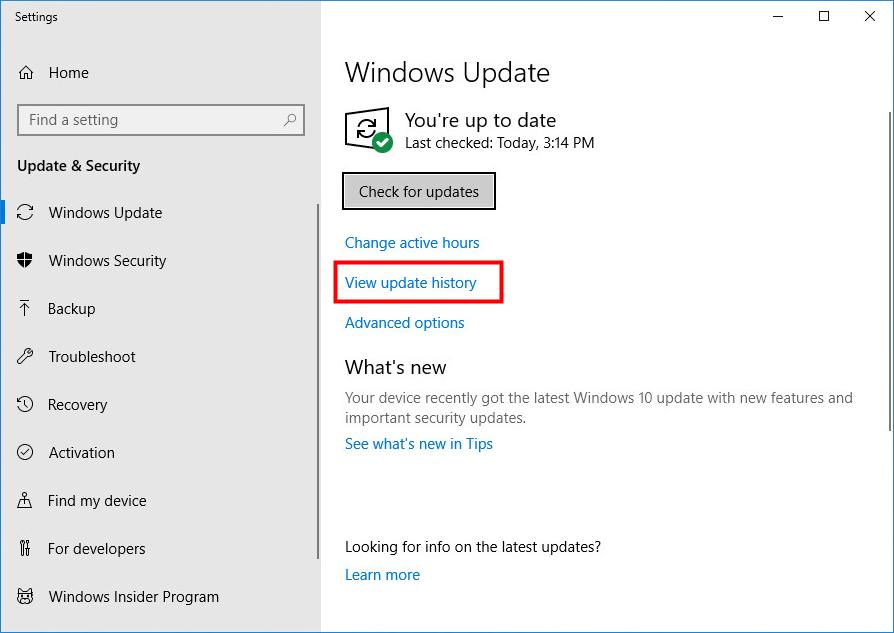
- In the Settings window, click on View update history in the right pane.
- Click on Uninstall updates.

- In the Microsoft Windows section, right-click on the Windows update you wish to uninstall and select Uninstall.
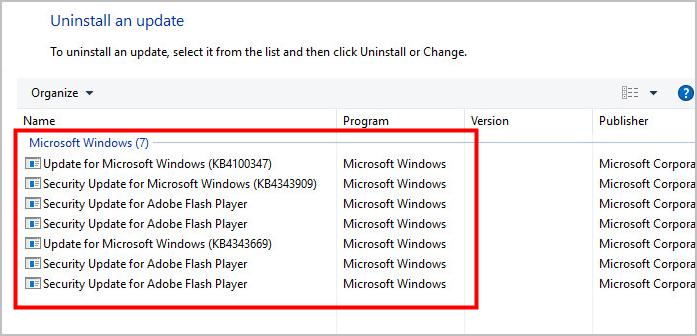 Note: By this way, you are only allowed to remove the updates installed after the latest “build”.
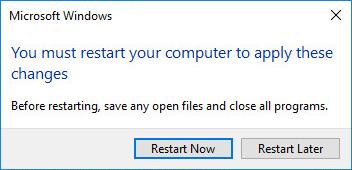
 - Save any open files and close all programs, and click Yes.

- Click Restart Now.
2.2. How to uninstall typical Windows updates via Command Prompt
Another way to uninstall typical Windows updates is through Command Prompt. It’s a bit complicated, compared with other methods above. You may follow the instructions below.
- In the Windows search box, type cmd
- From the results, right-click on Command Prompt and select Run as administrator.

- In Command Prompt, type or coy-paste the following command:
wmic qfe list brief /format:table
and press Enter to view a list of all installed Windows Update packages (like the screenshot below).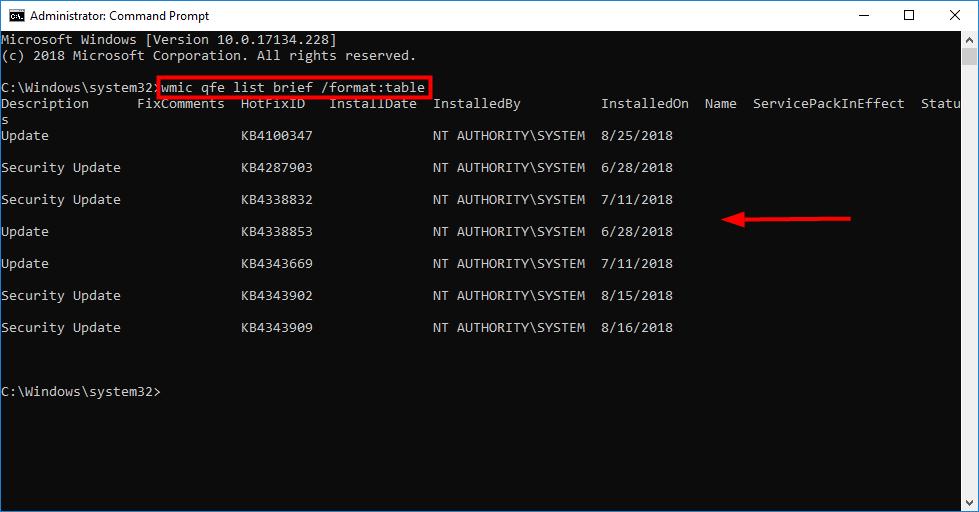
- Type the command you want to use below, and press Enter.
- Command: wusa /uninstall /kb:updateID
Meaning: Uninstall update and prompt to confirm uninstall and restart computer. - Command: wusa /uninstall /kb:updateID /quiet
Meaning: Silently uninstall update without user interaction. Automatically restart computer as needed - Command: wusa /uninstall /kb:updateID /quiet /norestart
Meaning: Silently uninstall update without user interaction, and will not restart computer. You will need to manually restart computer later. - Command: wusa /uninstall /kb:updateID /quiet /warnrestart:seconds
Meaning: Silently uninstall update and warn user for so many specified seconds before automatically restarting computer - Command: wusa /uninstall /kb:updateID /quiet /promptrestart
Meaning: Silently uninstall update and prompt to restart computer as needed - Command: wusa /uninstall /kb:updateID /quiet /forcerestart
Meaning: Silently uninstall update without user interaction. Forcefully close applications and restart computerSubstitute updateID in the commands above with the actual KB number of the update you want to uninstall.
Substitute seconds in the warn command above with how many seconds you want to be warned before automatically restarting the computer.
For example: wusa /uninstall /kb:3058109 /quiet /warnrestart:30
- Command: wusa /uninstall /kb:updateID
- You may be prompted to restart your PC to finish uninstalling the update.
And now you’ve uninstalled Windows 10 updates by yourself. Feel good, right? Yet, to fully enjoy you Windows PC, there’s something else you’d better check for. Read on and find it out in Pro tip.
3. Pro tip – What to do next after uninstalling Windows 10 updates
Uninstalling Windows updates could lead to some driver updates automatically removed from your PC. And outdated drivers could create various problems. To lessen the risk of driver issues, you’d better keep all the drivers on you computer up to date. You can do so by looking for one driver after another on the device manufacturer’s website and follow their instructions, which requires time and computer skills.
If you don’t have the time, patience or computer skills to update your drivers manually, you can do it automatically with Driver Easy.
Driver Easy will automatically recognize your system and find the correct drivers for it. You don’t need to know exactly what system your computer is running, you don’t need to risk downloading and installing the wrong driver, and you don’t need to worry about making a mistake when installing.
You can update your drivers automatically with either the FREE or the Pro version of Driver Easy. But with the Pro version it takes just 2 clicks:
- Download and install Driver Easy.
- Run Driver Easy and click the Scan Now button. Driver Easy will then scan your computer and detect any problem drivers.

- Click Update All to automatically download and install the correct version of all the drivers that are missing or out of date on your system (this requires the Pro version – you’ll be prompted to upgrade when you click Update All).

Note: You can do it for free if you like, but it’s partly manual.If you have any issue with Driver Easy, please contact Driver Easy’s support team at support@drivereasy.com for advice. You should attach the URL of this article so they can help you better.
All the best!