


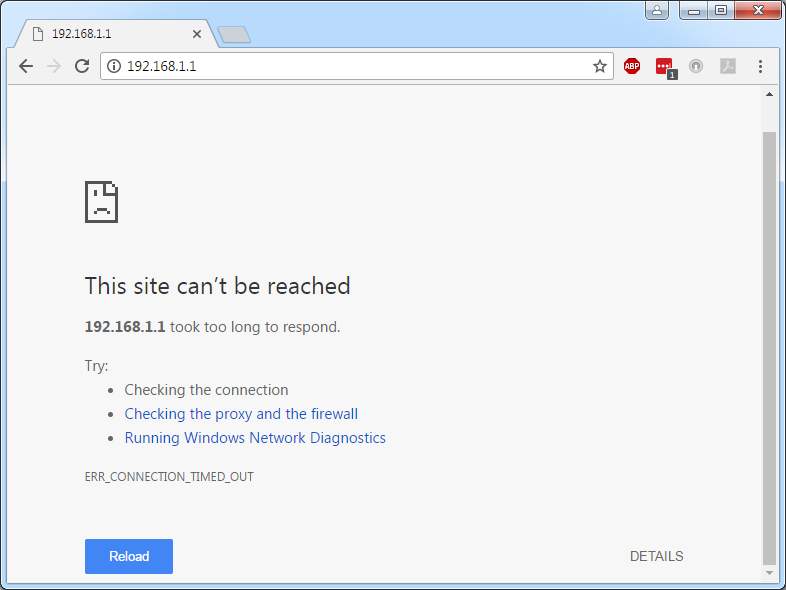
This post is for users who cannot access 192.168.1.1.
Being one of the most commonly used platform and preferred as the gateway of most wireless routers or ADSL modems, 192.168.1.1 is visited when we want to change some settings on our router and check if the network connection is working well. However, there are some who struggle to logon to this website.
There are various reasons why you cannot logon to HTTP 192.168.1.1:
- this is not the default gateway address of your router
- your router is off
- your LAN or Wi-Fi network card is disabled
- your firewall is blocking your network connection
- your network drivers issue
To solve this issue, here are some effective options that you can have a try.
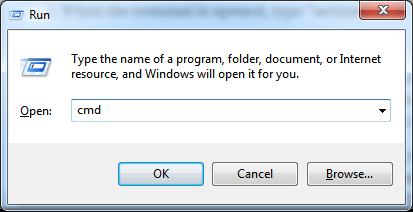
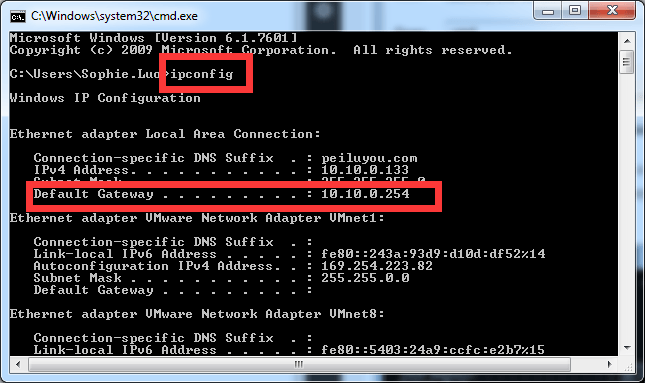
Step 1: Check your default IP address
To make sure that 192.168.1.1 is the default IP address of your router and that you are not making a mistake by going to the wrong website.
1) On your keyboard, press Windows key and R at the same time, and then type in cmd and hit Enter.
2) Type in ipconfig and you will see a list of items popping up. Locate the category of Default Gateway. It shows the correct website that you should logon to.
If you are sure that you have 192.168.1.1 as your default gateway and the problem persists, then please follow the instructions below to get it solved.
Step 2: Turn on your router
Look at the back of your router, and you should be able to see a power button which might not be so obvious. You can use a pen to press and push power button to turn off your router. Wait for at least 1 minute. Then press the power button to start your router again.
This is to make sure that your router is on and not the cause of this issue.
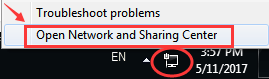
Step 3: Enable your Network Card
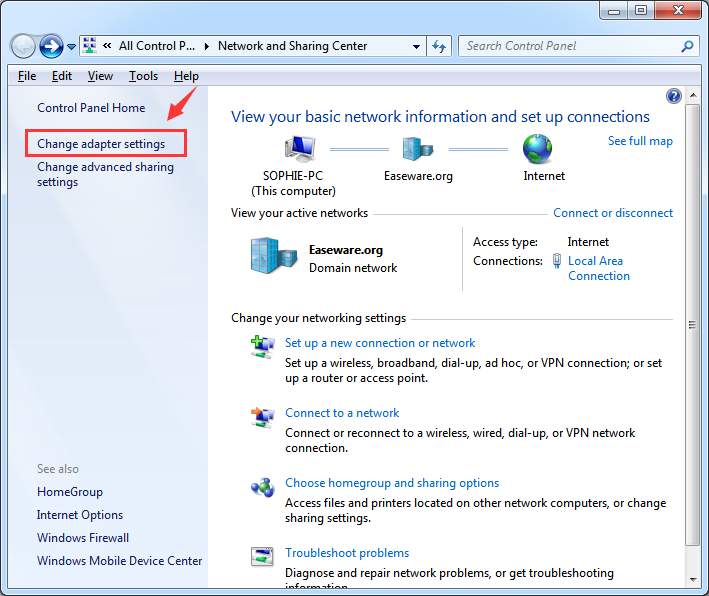
1) Right click the network connection icon on the bottom right corner of your desktop and choose Open Network and Sharing Center.
2) On the left side of the pane, choose Change adapter settings.
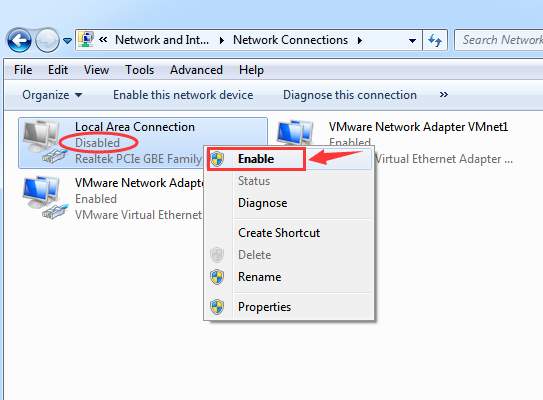
3) Make sure that your network card is Enable. If your network is down, you should be able to see Disable here. Just right click the network card you have and choose Enable to revive it.
Step 4: Update Network Driver
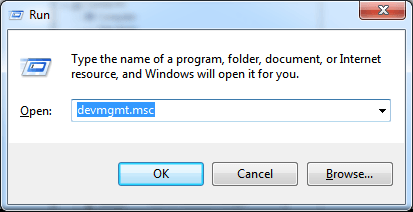
1) Press Win+R leys at the same time. Then type devmgmt.msc in the run box and click on Enter button. The Device Manager window will pop up.
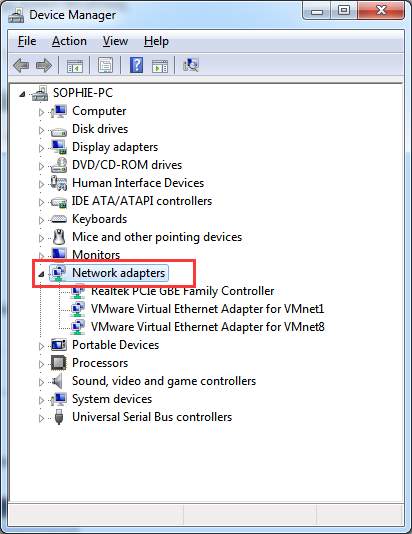
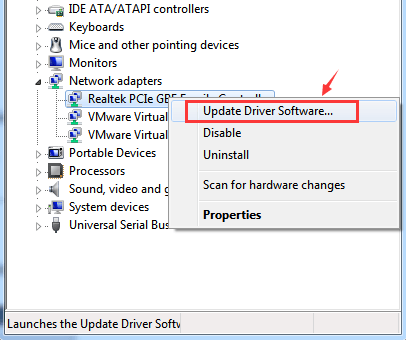
2) In Device Manager, expand Network adapters category.
3) Right click the network card driver that you have and choose Update Driver Software….
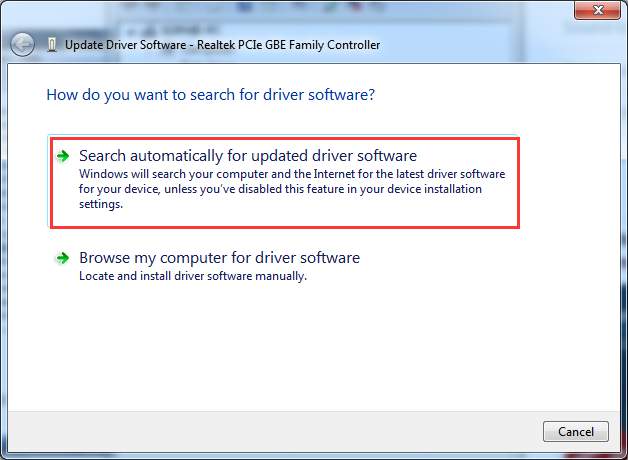
4) Choose Search automatically for updated driver software.
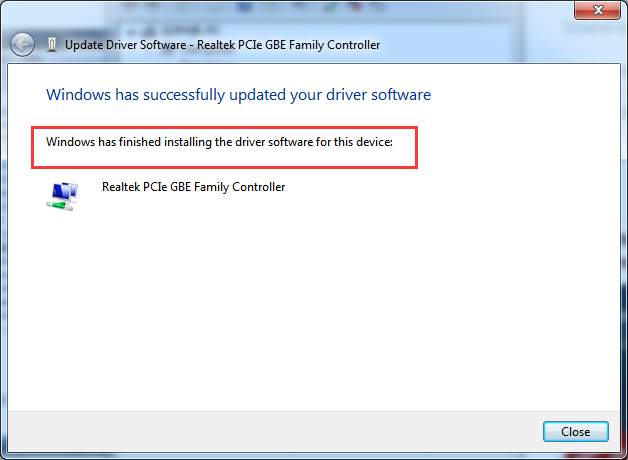
5) Wait for Windows to update the network card driver for you.
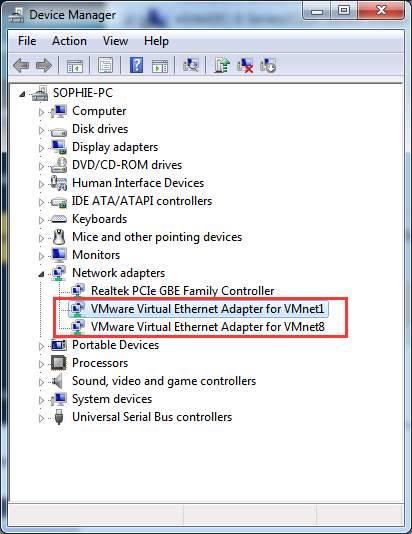
6) Repeat the update with the other network card driver that you see here.
If the problem persists, then the update from Windows might not do a good job helping you locate the best-matched and latest network card driver. In such case, you need to update network card driver by yourself.
To do so, you need to go to the manufacturer website of your network card and then search for the available driver for your machine.
For example, we are using network card driver from Realtek, so we will go to the official website of Realtek and search for the driver that suits our operating system.
When we finish downloading the network card driver, we will install it on our PC as instructed.
You need to repeat it for all your network card drivers available. If you don’t have the time, patience or computer skills to update your drivers manually, you can do it automatically with Driver Easy.
Driver Easy will automatically recognize your system and find the correct drivers for it. You don’t need to know exactly what system your computer is running, you don’t need to risk downloading and installing the wrong driver, and you don’t need to worry about making a mistake when installing.
You can update your drivers automatically with either the FREE or the Pro version of Driver Easy. But with the Pro version it takes just 2 clicks (and you get full support and a 30-day money back guarantee):
1) Download and install Driver Easy.
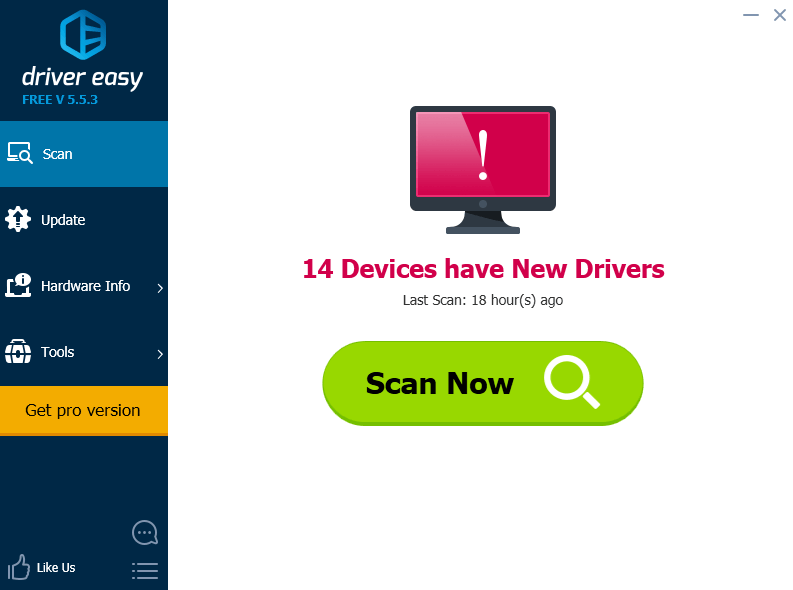
2) Run Driver Easy and click Scan Now button. Driver Easy will then scan your computer and detect any problem drivers.
3) Click the Update button next to a flagged network card driver to automatically download and install the correct version of this driver (you can do this with the FREE version).
Or click Update All to automatically download and install the correct version of all the drivers that are missing or out of date on your system (this requires the Pro version – you’ll be prompted to upgrade when you click Update All).
