If you don’t know how to install the ADB (Android Debug Bridge) Driver on your Windows PC, you’ve come to the right place!
In this article, we’ll show you how to install the ADB Driver on your Windows PC step by step! Just follow the instructions and you’ll be able to install the ADB Driver on your Windows PC easily!
What is the Android Debug Bridge (ADB)?
Here are the steps:
- Check if your PC has installed the ADB Driver
- Prepare the ADB Driver file
- Enable USB Debugging on your Android device
- Install the ADB Driver with Device Manager
- Bonus tip for Samsung Android smartphones
Step One: Check if your PC has installed the ADB Driver
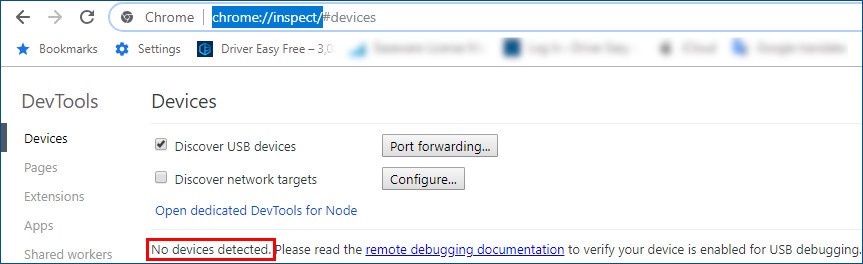
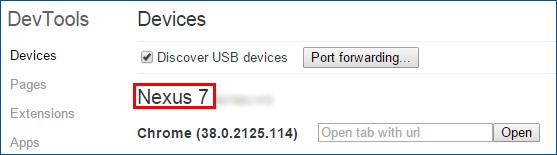
You should check if your PC has installed the ADB Driver. You can perform a test on your Google Chrome to check if your PC can recognize and communicate with your Android device:
- Connect your Android device to your PC via a USB cable.
- Open Google Chrome. Type chrome://inspect into the URL bar and press Enter on your keyboard.

- If the test fails, it suggests that you haven’t installed the ADB Driver on your PC. You will see:
- If Chrome shows you the name of your Android device, it indicates you’ve already installed the ADB Driver.
- If the test fails, it suggests that you haven’t installed the ADB Driver on your PC. You will see:
Step Two: Prepare the ADB Driver file
You need to prepare the ADB Driver file before you install it. Normally, the manufacturer of your Android device will provide the ADB Driver file. You can download the ADB Driver file from its official website. If you’re using a Google Nexus device, follow the instruction below to download the Google USB Driver.
- Click here to visit the official website of Android Studio.
- Click the download link to download the Google USB Driver ZIP file.
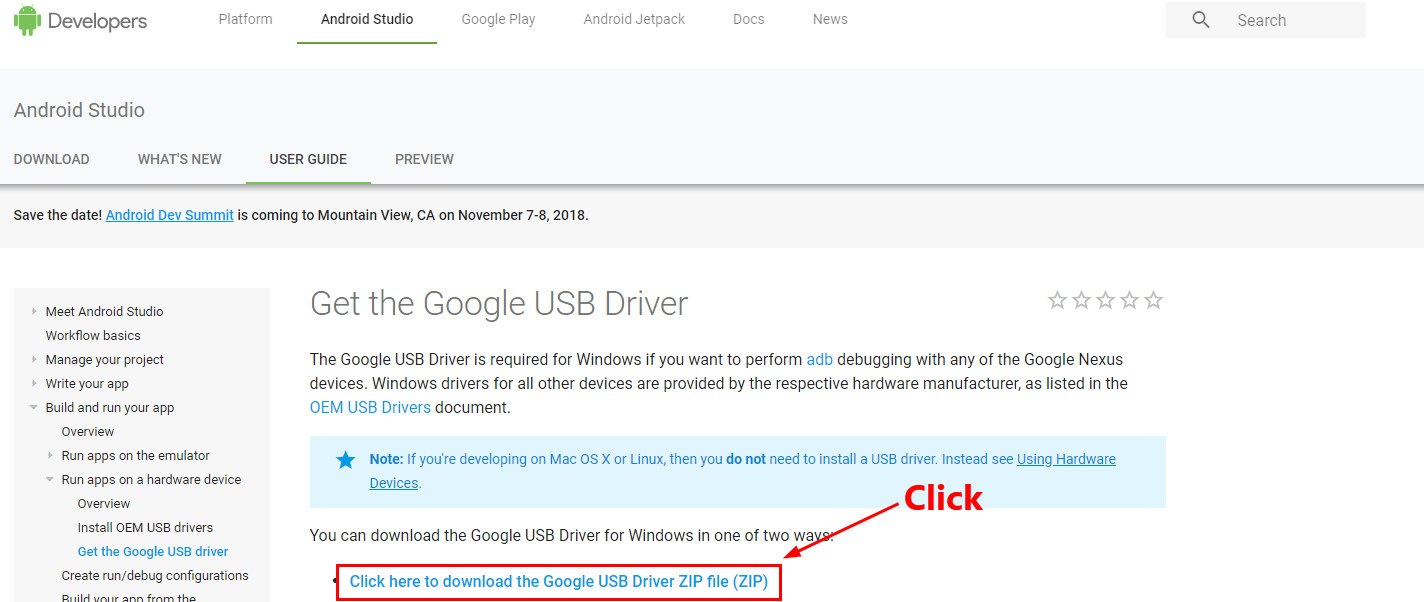
- Extract the .zip file on your PC.
Step Three: Enable USB Debugging on your Android device
After you downloaded the ADB Driver file, you also need to ensure that the function of USB Debugging on your Android device is enabled. If you want to control your Android device by the Android Debug Bridge, this function must be enabled. Here is how to do it:
- On your android device, go to Settings.
- Scroll down the screen and tap About or About phone.
- Tap the Build number seven times to make Developer options available.
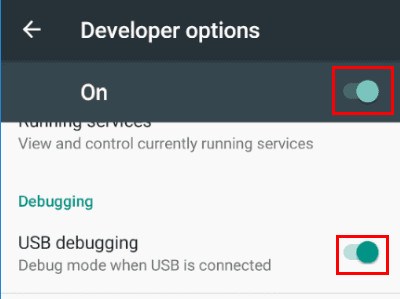
- Make sure the toggle at the top is set to On, then turn on the toggle next to USB debugging to enable it.
- Reconnect your Android device to your PC, then you will see the message “Allow USB Debugging?” on your Android device. Check the box next to Always allow from this computer and click OK.

Step Four: Install the ADB Driver with Device Manager
You can install the ADB Driver with Device Manager. In this part, we will use Google Nexus 7 as an example to show you how to do it. The steps for other Android devices are similar.
- Connect your Android device to your PC.
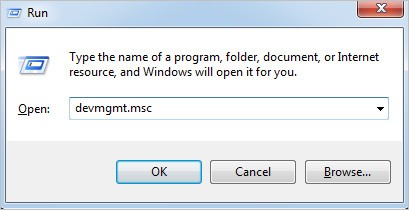
- On your keyboard, press the Windows logo key and R at the same time to open the Run dialog. Then type devmgmt.msc and press Enter to open Device Manager.
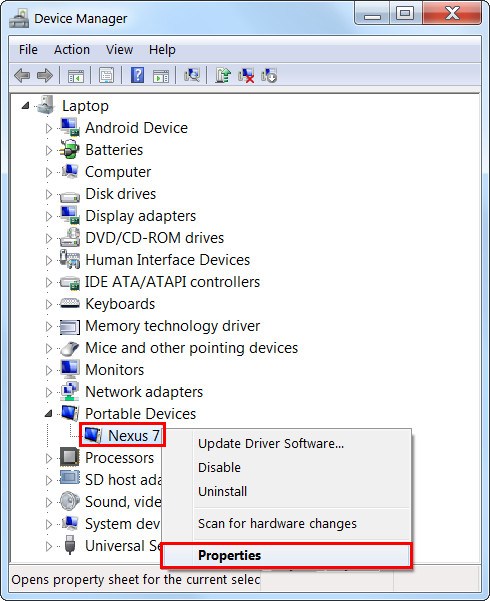
- Right-click your Android device and then select Properties.
 You may see a yellow warning icon next to your Android device if the driver is not installed correctly.
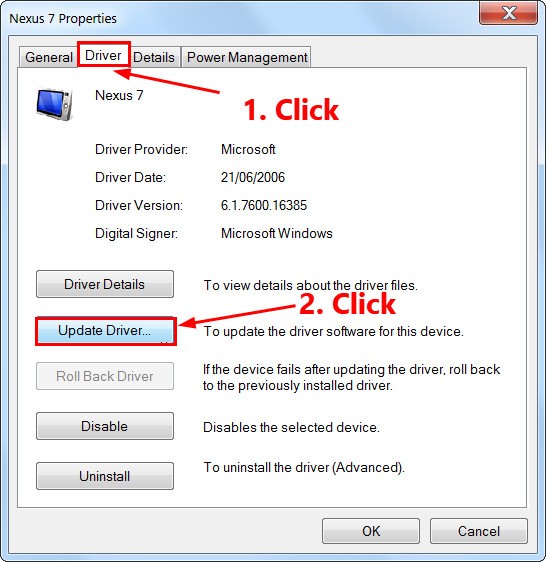
 - Navigate to the Driver tab, then click Update Driver.
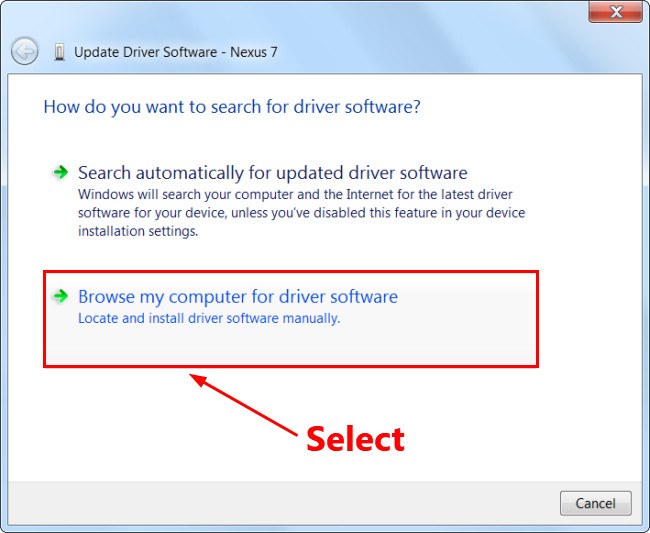
- In the pop-up window, select Browse my computer for driver software.
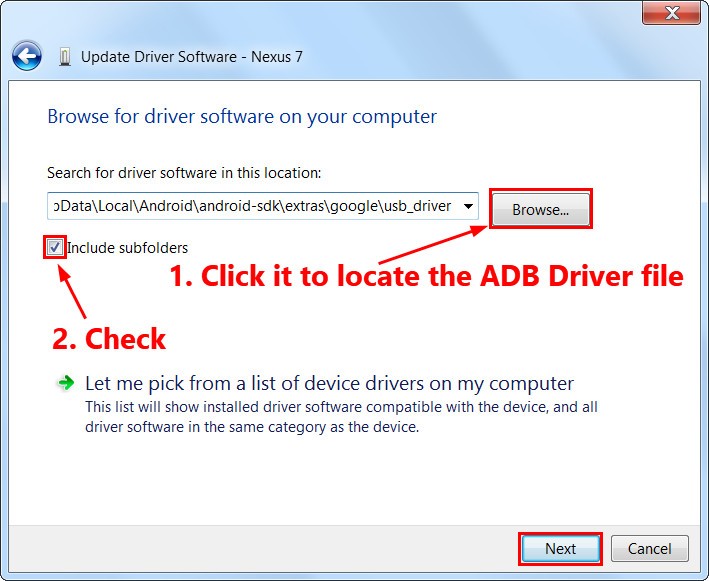
- Click Browse… to locate the ADB Driver file you downloaded before. Then check the box next to Include subfolders and click Next. Device Manager will begin to install the ADB Driver for you.
Just wait for a minute or two and the ADB Driver will be installed on your Windows PC.
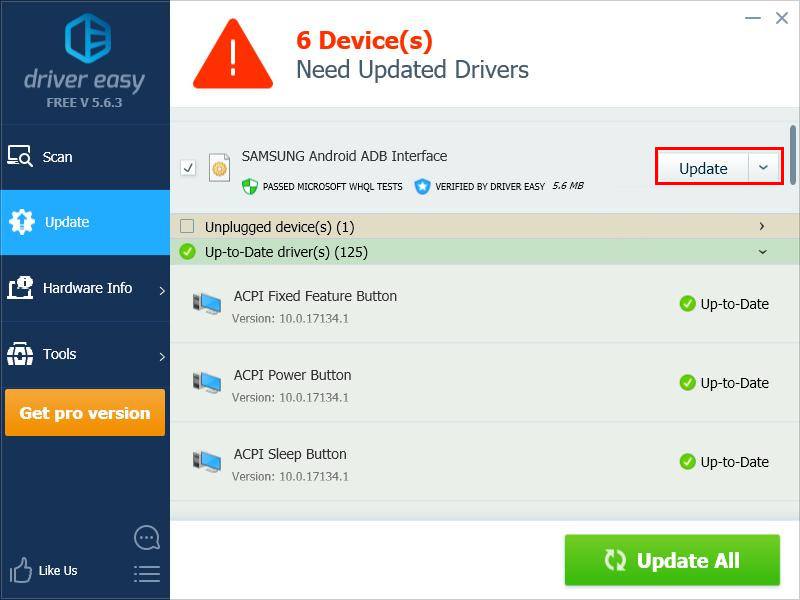
Bonus tip for Samsung Android smartphones:
If you’re using a Samsung Android smartphone, and if you don’t have the time, patience or computer skills to install and update the ADB driver manually, you can do it automatically with Driver Easy.
Driver Easy will automatically recognize your system and find the correct driver for it. You don’t need to know exactly what system your computer is running, you don’t need to risk downloading and installing the wrong driver, and you don’t need to worry about making a mistake when installing.
- Download and install Driver Easy.
- Run Driver Easy and click Scan Now button. Driver Easy will then scan your computer and detect any problem drivers.
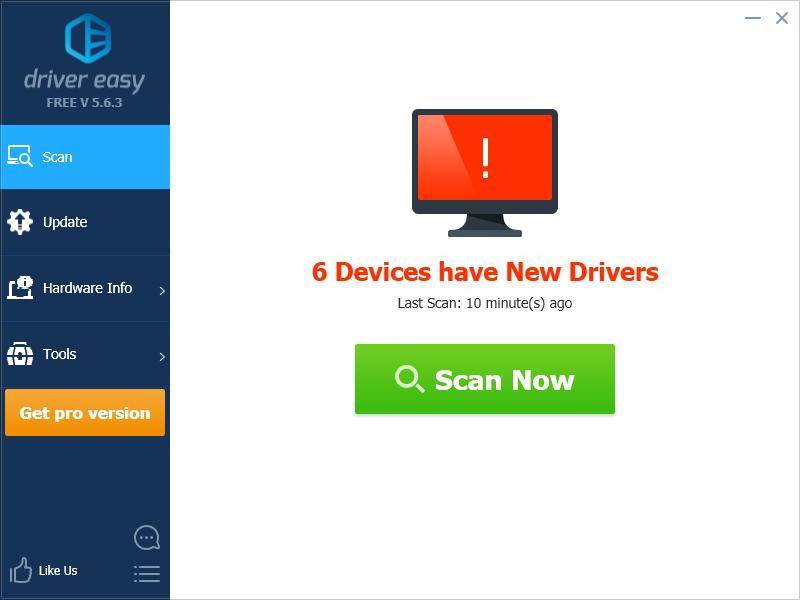
- Click the Update button next to the ADB driver to automatically download and install the correct version of this driver. Or click Update All to automatically download and install the correct version of all the drivers that are missing or out of date on your system (this requires the Pro version – you’ll be prompted to upgrade when you click Update All).