


If you’re on Windows 10 and you can’t see your iPhone in the File Explorer when you plug your device in, you’re not alone. Many Windows 10 users are reporting this problem as well. No worries, we’re here to help, and this problem is possible to fix.
Here are 4 solutions for you to try. You may not need to try them all; just work your way down until you find the one works for you.
- Install Windows updates
- Update Apple Mobile Device USB Driver (Recommended)
- Switch active driver in Device Manager
- Ensure you have full control over the iTunes folder
Before we begin
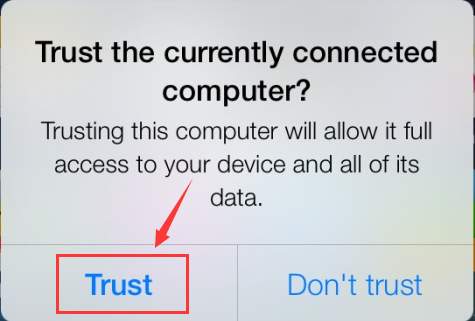
Please make sure that your iTunes is the latest version and that you have checked Trust the computer you are plugging into.
1: Install Windows updates
Missing the following two Windows update files can be the cause of this problem. To fix it, you can download them from:
https://support.microsoft.com/en-us/kb/3010081
https://support.microsoft.com/en-us/kb/3099229
After the download, install them as instructed.
2: Update Apple Mobile Device USB Driver (Recommended)
One of the first things you need to consider is whether you have the latest Apple Mobile Device USB driver updated in your computer. Outdated drivers are among the most likely causes for your suddenly not working hardware. So we recommend that you get this clear out before you move on the further solutions.
Manual driver update – You can update the Apple Mobile Device USB driver manually by going to Apple support and search for the most recent correct driver. Be sure to choose the driver that is compatible with your variant of Windows 10.
Automatic driver update – If you don’t have the time, energy, or you’re not confident playing around with drivers manually, you can do it automatically with Driver Easy. Driver Easy will automatically recognize your system and find the correct Apple Mobile Device USB driver for it. You don’t need to know exactly what system your computer is running, you don’t need to risk downloading and installing the wrong driver, and you don’t need to worry about making a mistake when installing.
You can update your drivers automatically with either the FREE or the Pro version of Driver Easy. But with the Pro version it takes just 2 clicks (and you get full support and a 30-day money back guarantee):
1) Download and install Driver Easy.
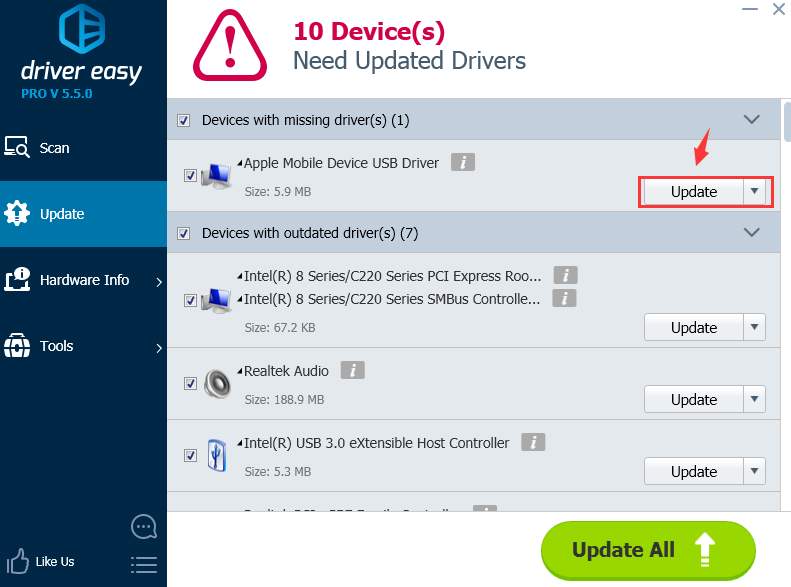
2) Run Driver Easy and click the Scan Now button. Driver Easy will then scan your computer and detect any problem drivers.

3) Click the Update button next to the flagged Apple Mobile USB device to automatically download and install the correct version of its driver (you can do this with the FREE version).
Or click Update All to automatically download and install the correct version of all the drivers that are missing or out of date on your system (this requires the Pro version – you’ll be prompted to upgrade when you click Update All).
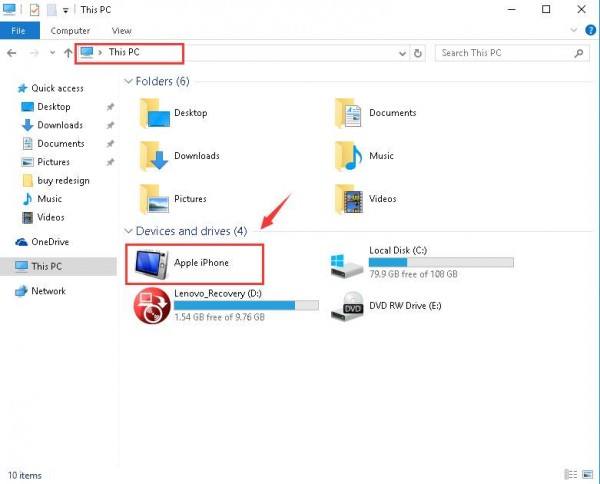
4) Check if your iPhone shows up in the File Explorer in Windows 10 now.
3: Switch active driver in Device Manager
Expect for an outdated driver, a faulty one could also trigger your iPhone not showing up in the File explorer. But no worries, just a simple twitch will fix this problem for you. Here is how you do it:
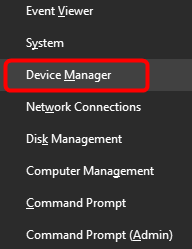
1) On your keyboard, press the Windows logo key and X at the same time, then click Device Manager.
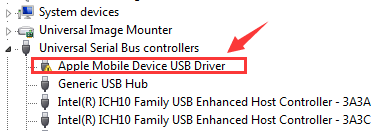
2) Expand Universal Serial Bus controllers. Then double-click Apple Mobile Device USB Driver.
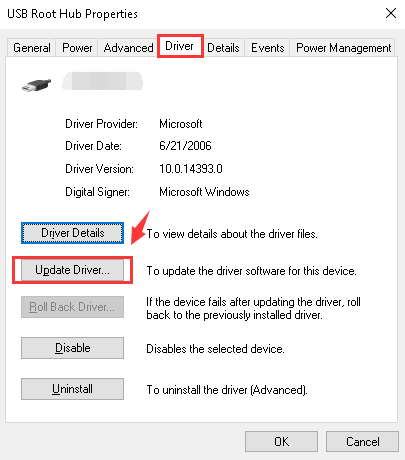
3) Under the Driver tab, click Update Driver….
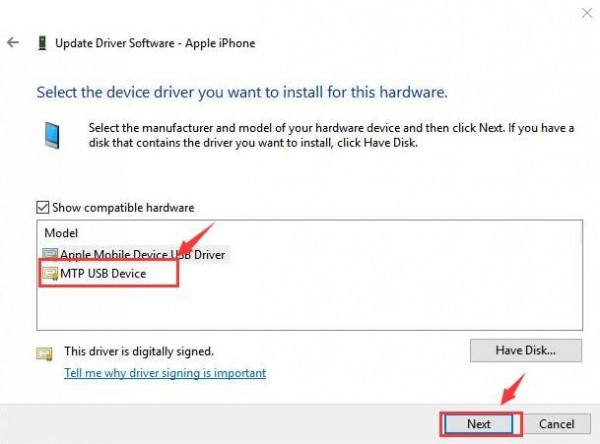
4) Click Browse my computer for driver software > Let me pick from a list of device drivers on my computer. Click MTP USB Device and Next to continue.
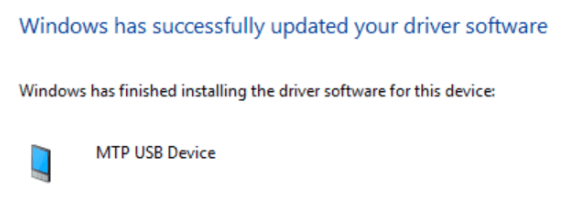
5) If you can see the notification, your iPhone will show up as a mapped driver. Reboot your computer if necessary.
4: Ensure you have full control over the iTunes folder
If you don’t have full control to your iTunes folder, you’re not likely to be able to see iPhone showing up in your Windows Explorer. To fix it:
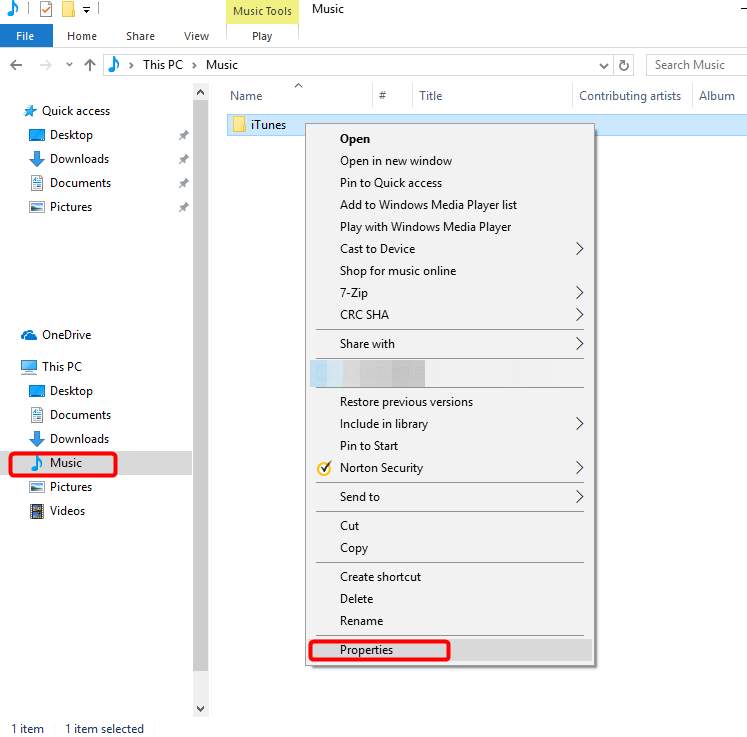
1) On your keyboard, press the Windows logo key and E at the same time.
2) Click Music. Right-click iTunes and click Properties.
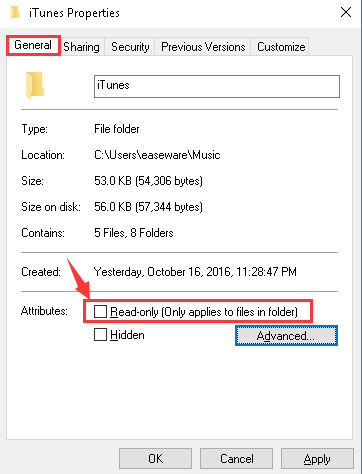
3) Under General bar, un-tick Read Only(Only applies to files in folder). Click Apply and OK to save and exit.
4) If problem persists, just make sure that you have full control over the iTunes folder. Go to iTunes properties window again. This time, go to Security bar. Click Edit….
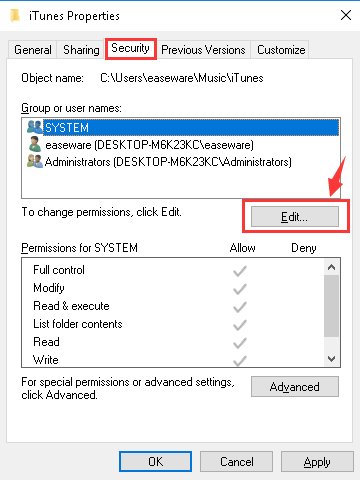
5) Please make sure that you have Full control then click Apply to save the change and exit.

Feel free to let us know if you need any assistance. You can also tell us which one of the above methods fix the problem for you: we believe it would be of great help to other readers.