


Genesis is one of the most popular add-ons in Kodi, with which you can enjoy thousands of free movies and TV shows. This post will show you how to install Genesis on Kodi step by step.
How to install Genesis for Kodi
First things first
Before getting started, kindly note that neither Driver Easy nor Kodi encourages the piracy. You should use Kodi and its add-ons legally.
Allow unknown sources to Kodi
As we know, Kodi is an open source media player, so sometimes you will need to install add-ons on Kodi to have various video sources to watch videos. Kodi is not allowed to install unknown sources for security concerns, so you may need to allow unknown source so that you can access to various content bringing by the add-ons.
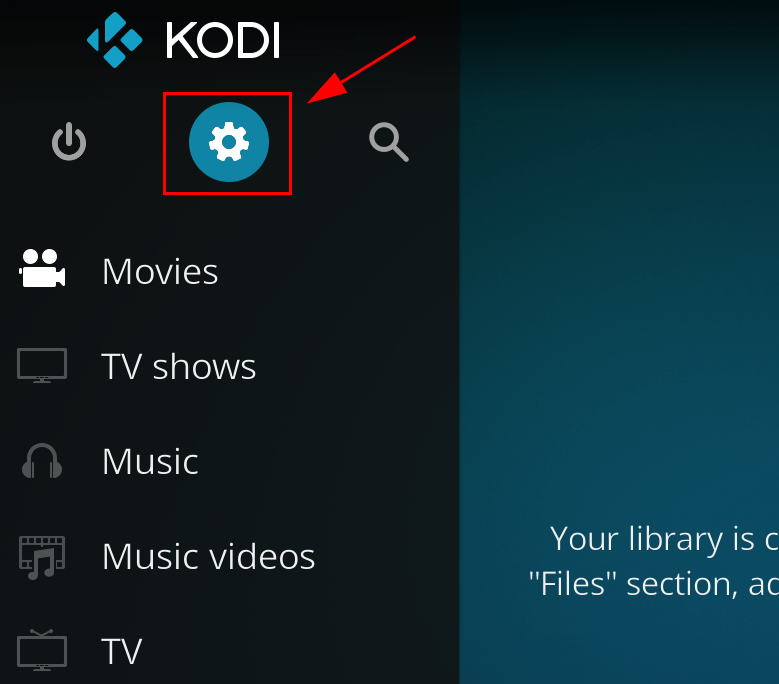
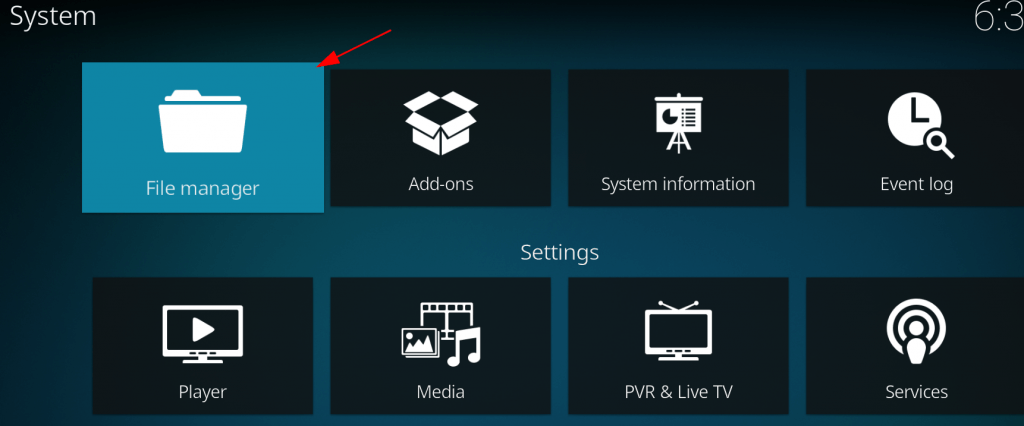
1) Open Kodi, and click Settings.
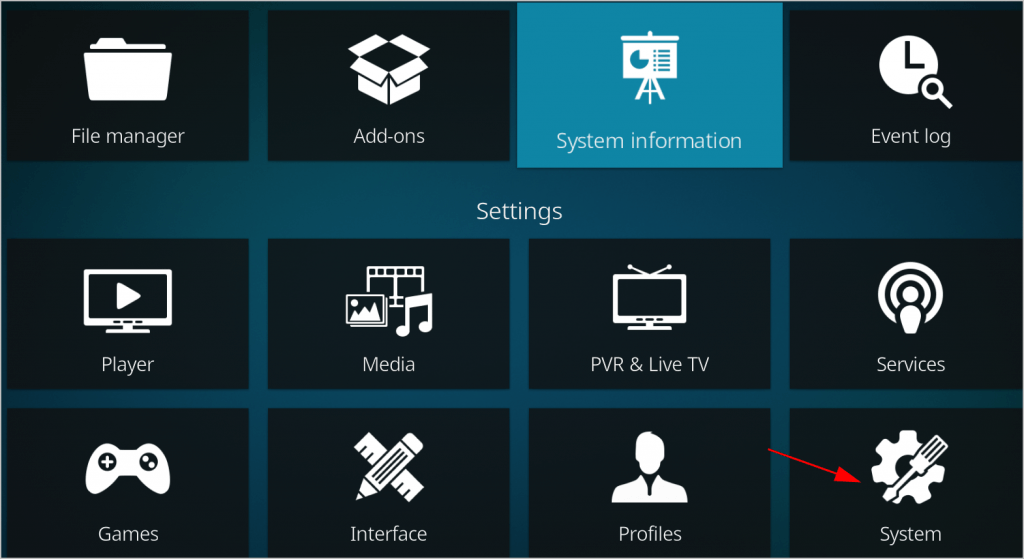
2) Click System (or System settings).
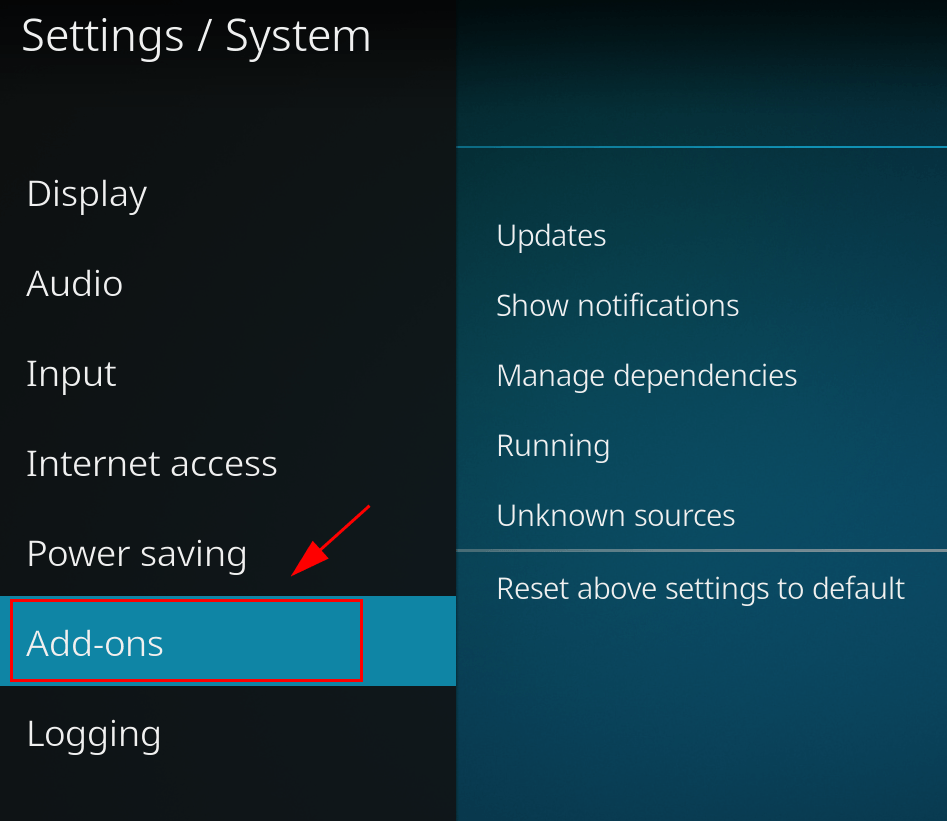
3) Click Add-ons on the left.
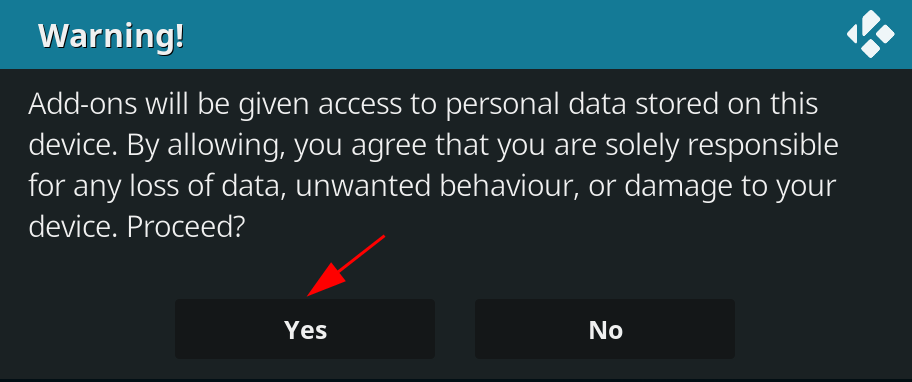
4) Tap the button next to Unknown sources.
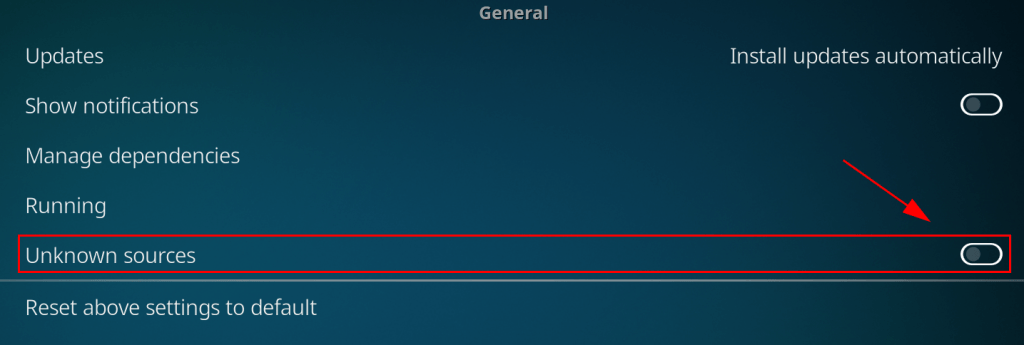
5) Click Yes to confirm your changes.
Use a VPN
It’s recommended to use a VPN when using Kodi and streaming videos.
To prevent any possible problems like add-on not working, you should install a Virtual Private Network (VPN). A VPN will mask the video, so your ISP won’t recognize it as a Kodi video and, as a result, won’t block it.
To find a VPN, just search VPN in your browser, then pick the one with the best reputation. If you don’t have time or patience, you can try NordVPN.
NordVPN helps you bypass geo-restrictions to get all add-ons desired, keeps you protected from snooping eyes, and secures your data to keep your online activity private. It’s safe and easy to use!
Click NordVPN coupon to get NordVPN coupon code first, then you’ll be redirected to NordVPN homepage.
1) Download NordVPN in your device.
2) Run NordVPN and open it.
3) Connect to a server in a chosen location.
All set. Now you can start installing Genesis in Kodi.
Install Genesis on Kodi
Since you have set your Kodi to allow unknown sources and use a VPN already, you can now install Genesis add-on on Kodi (be sure Kodi has upgraded to Kodi 17 Krypton or Kodi 18 Leia).
To install Genesis for Kodi, follow these steps:
1) Open Kodi in your device, and click Settings (the gear icon).

2) Click File Manager.
3) Double click Add Source, then click None.
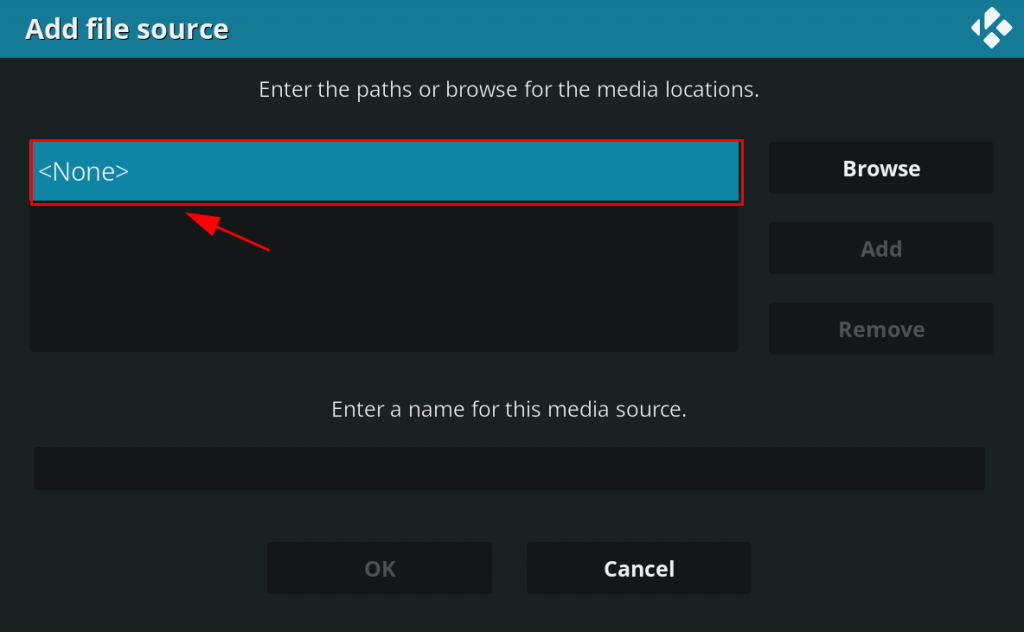
4) Type the following URL, or copy and paste the URL in your Kodi, then click OK.
http://lvtvv.com/repo/
5) Enter a name for this source media (in my case I enter KODIUKTV), then click OK.
6) Back to the Kodi home page, click Add-ons.

7) Then click the Package icon on the upper left.
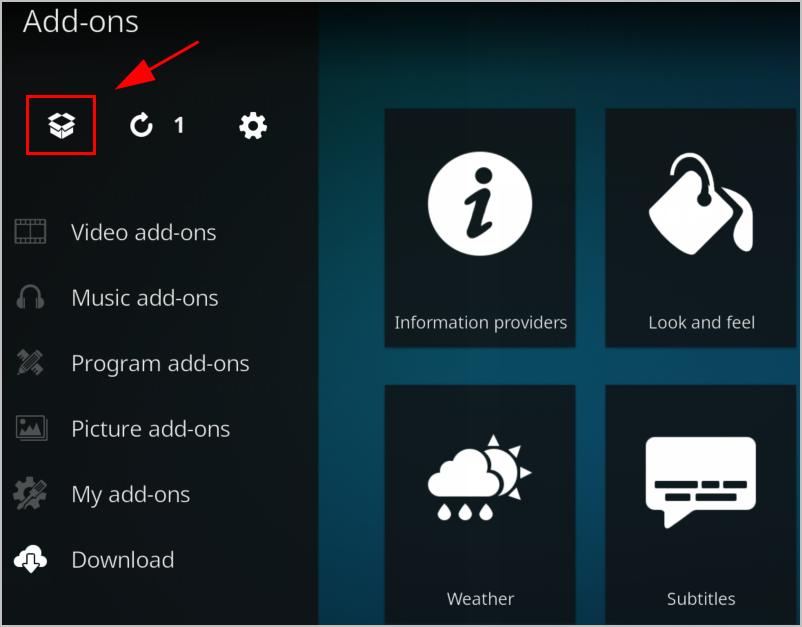
8) Select Install from zip file.
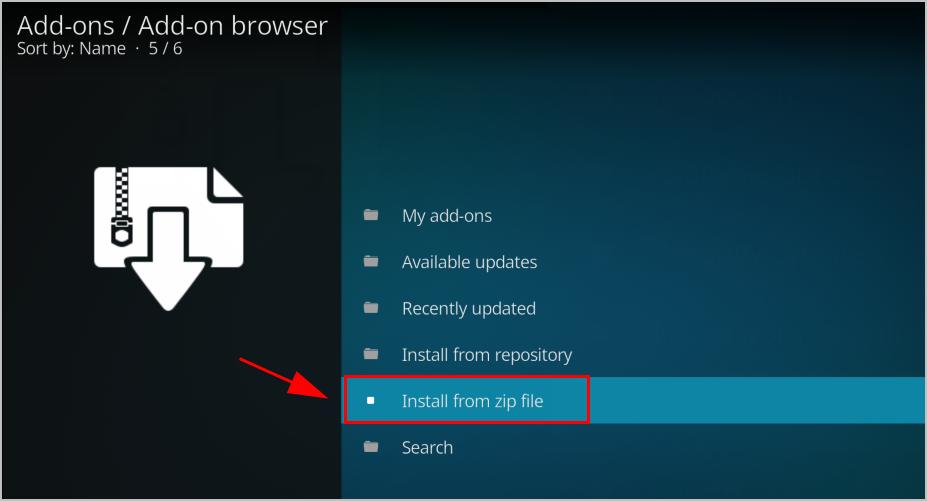
9) Click the name that you just entered (in my case I click KODIUKTV).
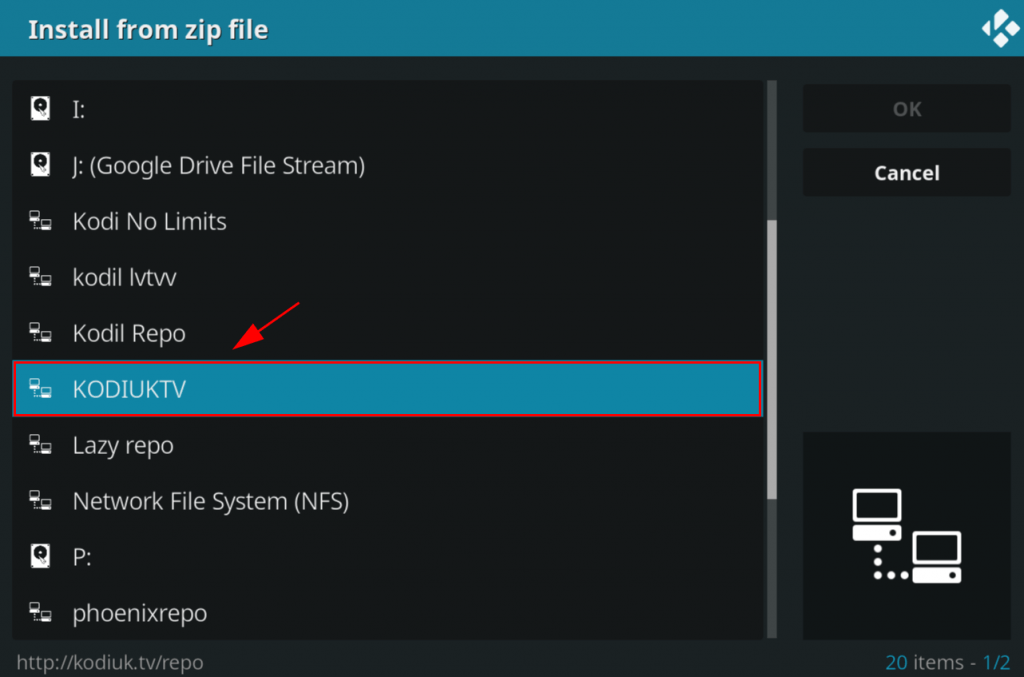
10) Click repository.kodiuktv-X.X.X.zip.
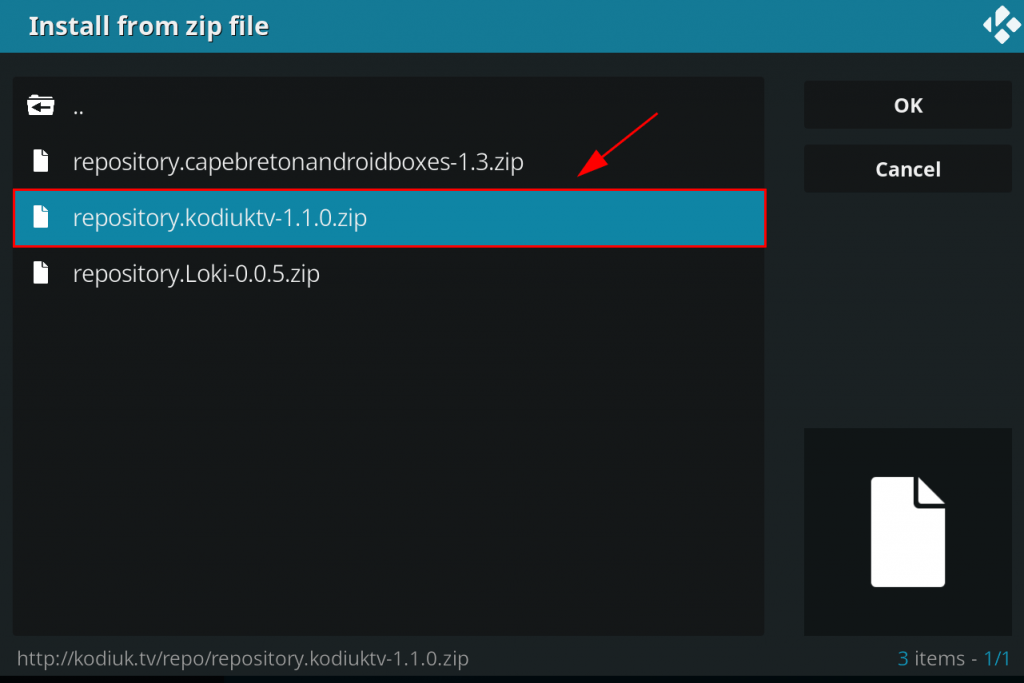
11) Kodi will install the repository and wait until you see Add-on installed notification pop up on the upper right corner.

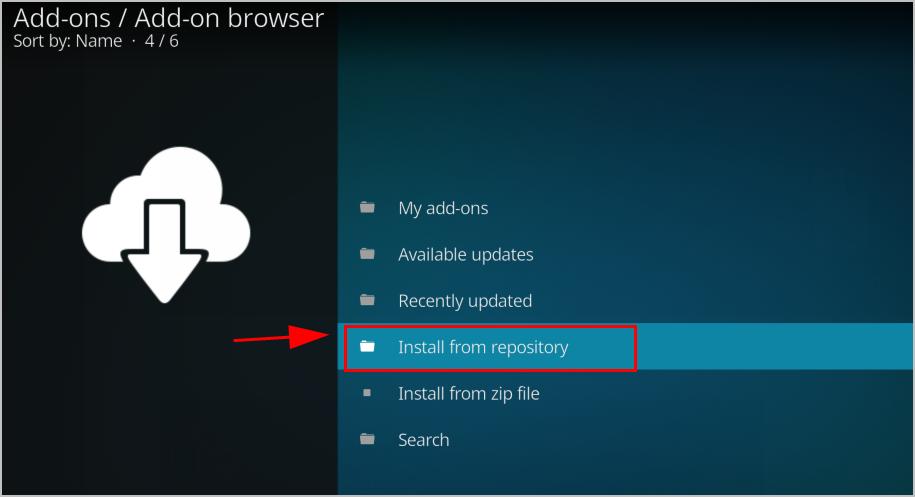
12) Click Install from repository.
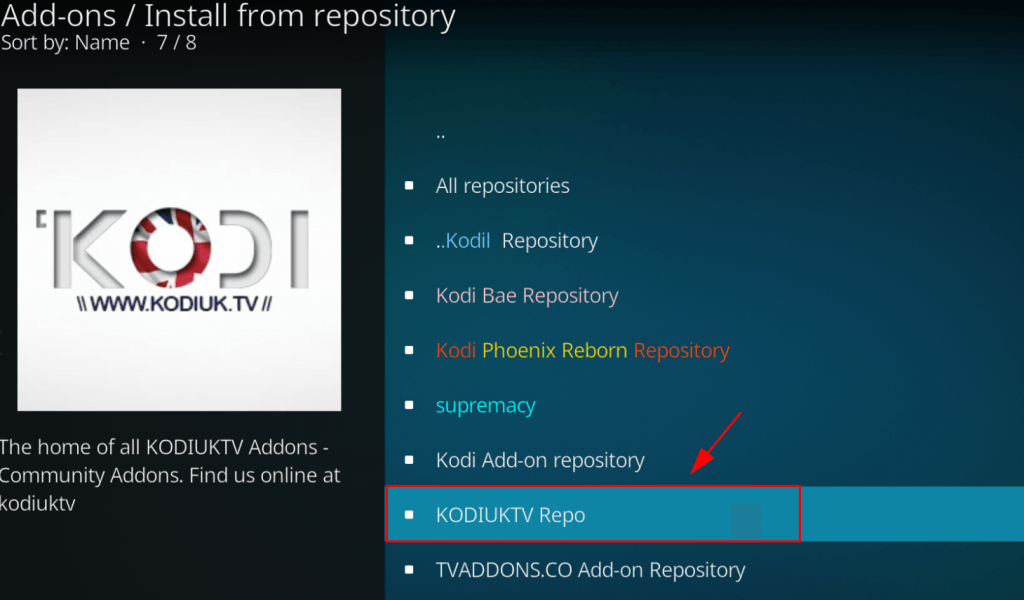
13) Click KODIUKTV Repo.
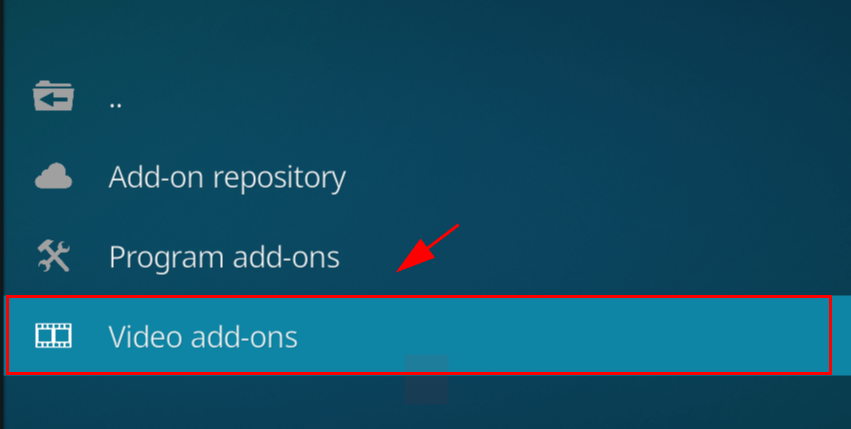
14) Click Video add-ons.
15) Click Genesis.
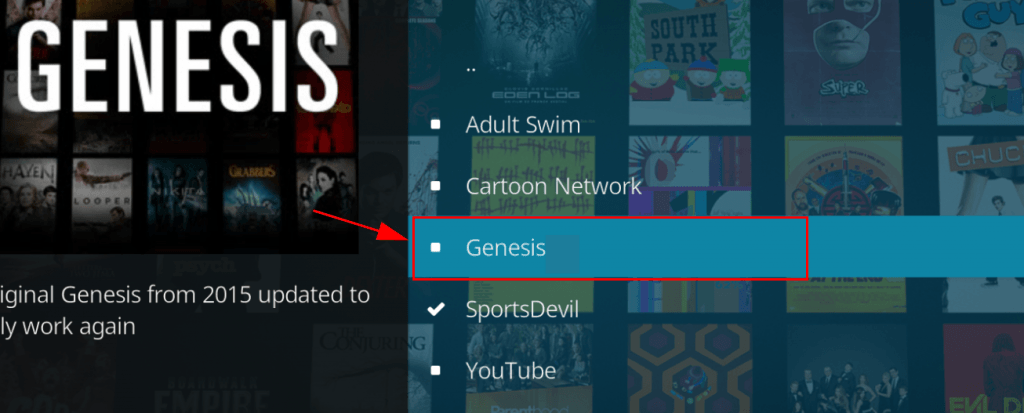
16) Click Install at the bottom.
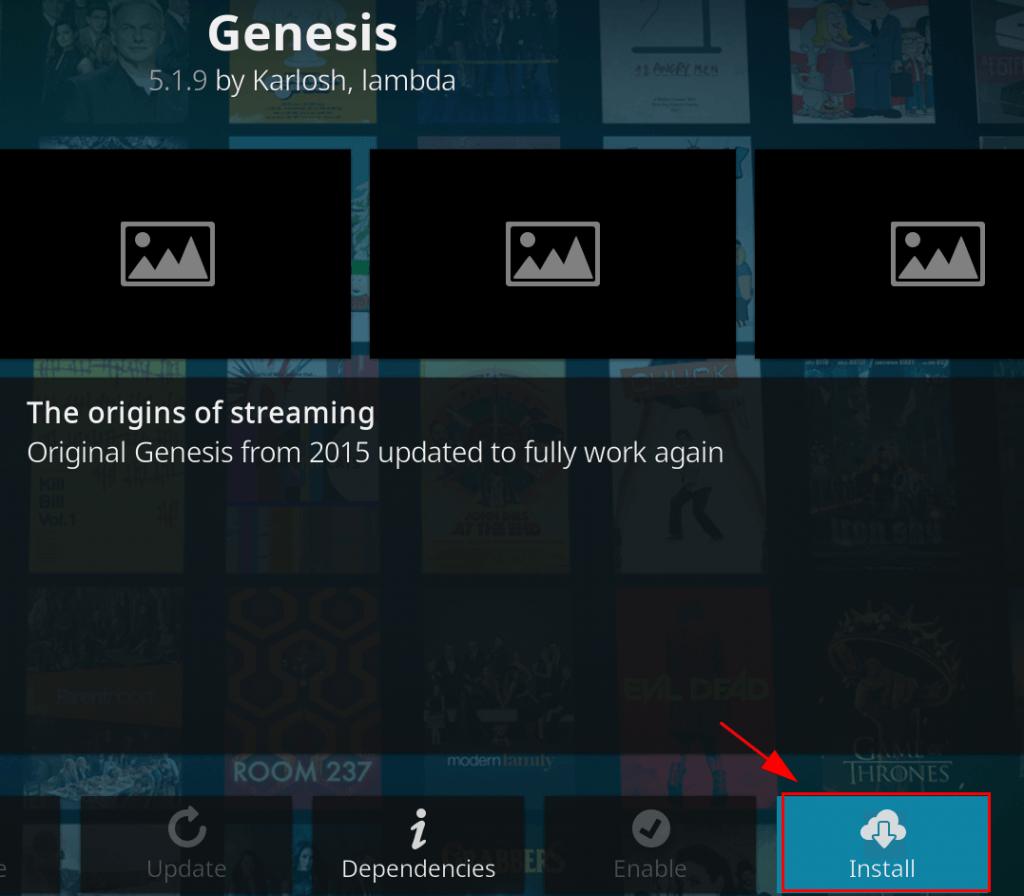
17) Wait for the notification popping up on the upper right corner and Genesis add-on should have been installed.
Then open Genesis by navigating to Home page > Add-ons > Video add-ons > Genesis.
There you go. Hope this post helps you install Genesis on Kodi. If you have any questions, feel free to leave us a comment below.