


If you find the fingerprint reader on your Lenovo laptop doesn’t work any more, don’t panic. It’s often quite easy to fix…
Fixes for Lenovo Fingerprint Reader Not Working in Windows issue
Here are 5 fixes that have helped other users resolve the Lenovo Fingerprint Reader Not Working on Windows problem. Just work your way down the list until you find the fix that does the trick.
- Check the fingerprint scanner
- Update your fingerprint reader driver
- Uninstall Lenovo Fingerprint Manager and use the default fingerprint driver
- Re-enroll your fingerprints
- Restore system files
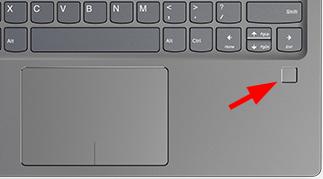
Fix 1: Check the fingerprint scanner
Before addressing the fingerprint reader not working problem, you might want to check the fingerprint scanner for possible hardware issues.
- Check if there’s any grease or dust on the scanner. If yes, then gently wipe it off with a piece of clean cloth.
- Check if there are any scratches on the sensor. If it’s been badly scratched, then send it to a trustworthy computer repair shop or the computer vendor for repair. If the sensor is in good condition but the fingerprint reader doesn’t work, please move on to Fix 2, below.
Fix 2: Update your fingerprint reader driver
This problem may occur if you are using the wrong fingerprint reader driver or it’s out of date. So you should update your fingerprint reader driver to see if it fixes your problem. If you don’t have the time, patience or skills to update the driver manually, you can do it automatically with Driver Easy.
Driver Easy will automatically recognize your system and find the correct drivers for it. You don’t need to know exactly what system your computer is running, you don’t need to risk downloading and installing the wrong driver, and you don’t need to worry about making a mistake when installing. Driver Easy handles it all.
You can update your drivers automatically with either the 7-day free trial or the Pro version of Driver Easy. It takes just 2 clicks, and you get full support and a 30-day money-back guarantee with the Pro version:
- Download and install Driver Easy.
- Run Driver Easy and click the Scan Now button. Driver Easy will then scan your computer and detect any problem drivers.

- Click the Activate & Update button next to the flagged device to automatically download and install the correct version of this driver.
Or click Update All to automatically download and install the correct version of all the drivers that are missing or out of date on your system (You’ll need the Pro version for this – when you select Update All, you’ll get a prompt to upgrade. If you’re not prepared to purchase the Pro version yet, Driver Easy provides a 7-day trial at no cost, granting access to all Pro features like fast downloads and easy installation. No charges will occur until after your 7-day trial period ends.)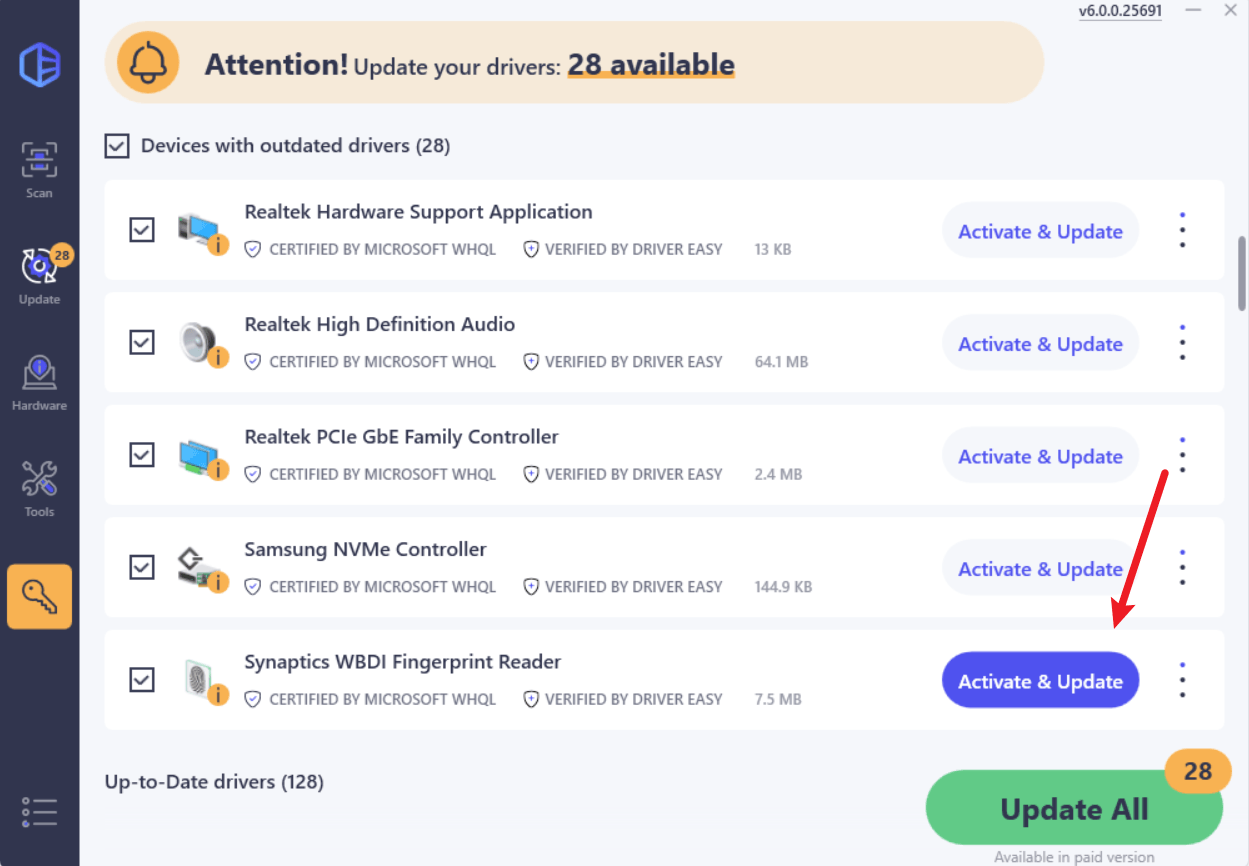
- After updating, restart your computer to take effect.
Restart your computer and see if the fingerprint reader works properly this time. If it works, then great. But if it doesn’t, move on to Fix 3, below.
Fix 3: Uninstall Lenovo Finerprint Manager and use the default fingerprint driver
If Fix 2 doesn’t work for you, then you’d probably have to uninstall the lenovo fingerprint software and the fingerprint driver (so that Windows will install the default generic one for you) to see if it works.
Here’s how:
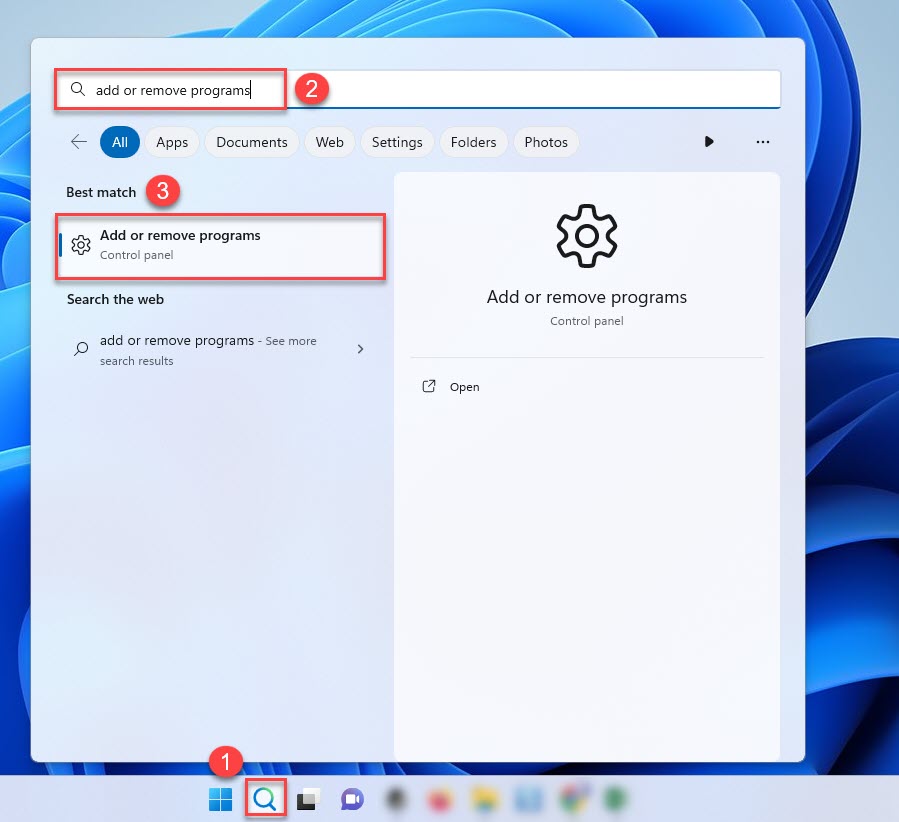
- On your keyboard, press the Windows logo key, then type add or remove programs and click on Add or remove programs.
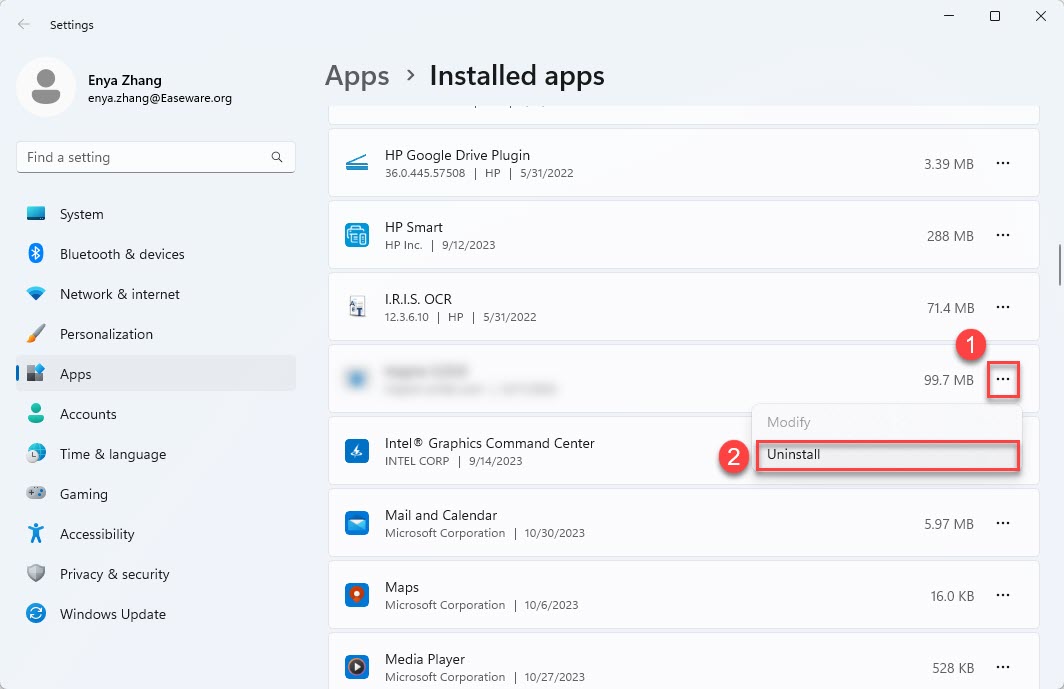
- Locate and click on Lenovo Fingerprint Manager (or, Lenovo Finerprint Manager Pro)and click Uninstall.

- Click Uninstall to confirm, then follow the on-screen instructions to finish the uninstall process.
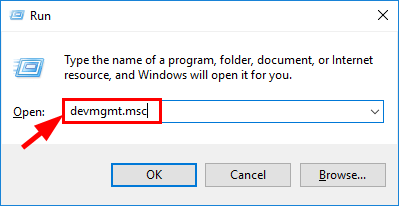
- On your keyboard, press the Windows logo key and type devmgmt.msc, then press Enter.
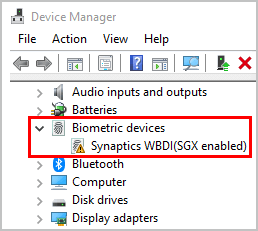
- Double-click on Biometric devices and then right-click on your Lenovo fingerprint device and click Uninstall device.
- Click Uninstall to confirm.
- Restart your computer, then test to see if the fingerprint reader not working problem has been solved.
Fix 4: Re-enroll your fingerprints
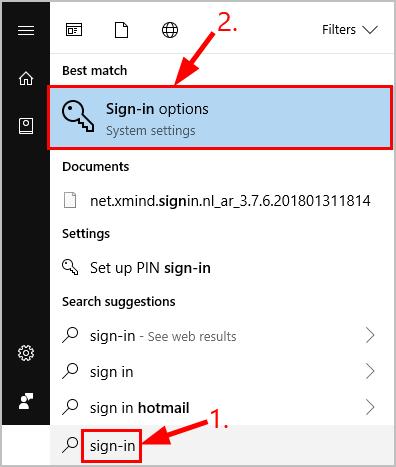
- On your keyboard, press the Windows logo key and type sign-in, then click on Sign-in options.
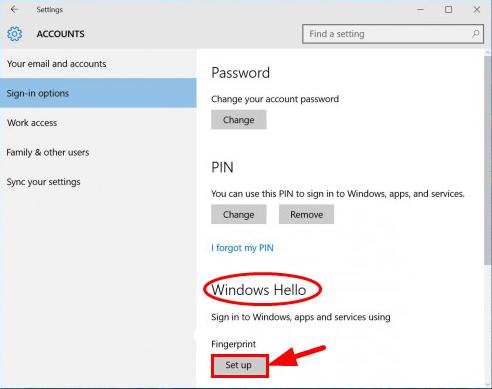
- Scroll down to Windows Hello, and click Set up under the Fingerprint section.
- Follow the on-screen instructions to set up the fingerprint login.
- Don’t forget to test if the fingerprint reader works normally this time.
Fix 5: Repair system files
Missing, corrupt, or damaged system files may cause Lenovo fingerprint reader to stop working. To eliminate this issue as a possible cause, you can try the fix below to repair possible system file issues.
System File Checker (SFC) is a handy feature in Windows that helps scan your system files and repair missing or corrupted system files. To run the SFC scan:
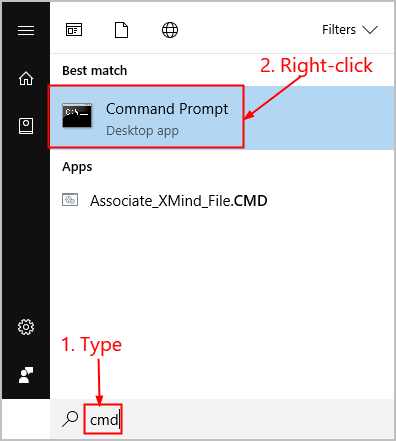
1) On your keyboard, press the Windows logo key and type cmd. Then right-click on Command Prompt and click Run as administrator.
2) Click Yes when prompted to confirm.
3) In the command prompt window, type sfc /scannow and press Enter.
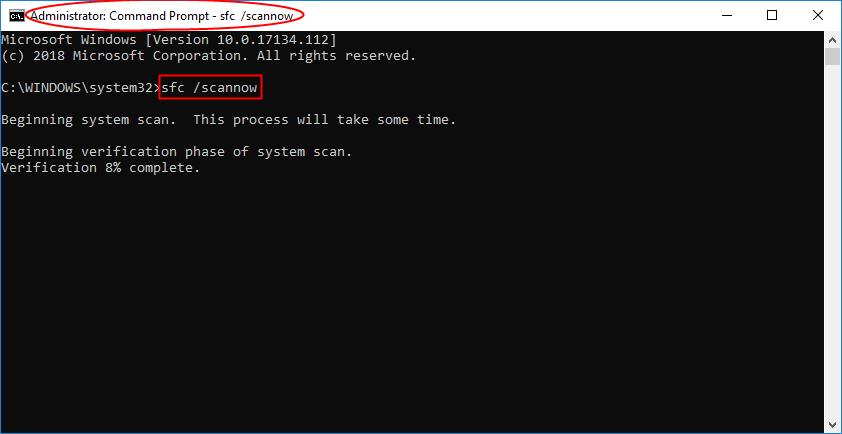
It’ll take some time for the SFC to replace the corrupted system files with new ones if it detects any, so please be patient.
4) Restart your computer for the changes to take effect.
5) Check your computer to see if the problem has been fixed.
How have the fixes above helped you with your troubleshooting? Do you have any experiences or ideas to share with us? Feel free to leave us a comment below and let us know your thoughts.
Featured image by Olena Sergienko on Unsplash