


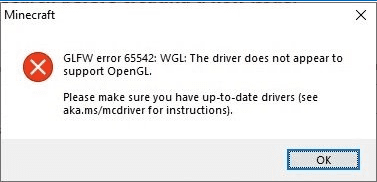
Quite a number of players have run into the GLFW error 65542: WGL: The driver does not appear to support OpenGL error as they try to start the Minecraft launcher.
If you’ve encountered the same problem, don’t worry. It can be easily fixed…
How to fix GLFW error 65542 The driver does not appear to support OpenGL
Here are 4 fixes that have helped other players resolve GLFW error 65542. Just work your way down the list until you find the one that solves the problem for you.
- Update your graphics driver
- Manually add the OpenGL.DLL
- Uninstalling DisplayLink
- Install the latest Windows updates
Before we move further…
The GLFW Error 65542 error with Minecraft could tell you that your computer doesn’t meet the minimum system requirements to run the game.
The Java edition of Minecraft requires that your processor should be at least newer than Intel Core i3-3210 3.2 GHz or AMD A8-7600 APU 3.1 GHz, and that your graphics card should be newer than Intel HD Graphics 4000 or AMD Radeon R5.
If you’re on Windows 10, your system version should be at least 19041.0 or higher; your processor should be newer than Intel Celeron J4105 and AMD FX-4100; and your graphics card should be newer than Intel HD Graphics 4000 and AMD Radeon R5.
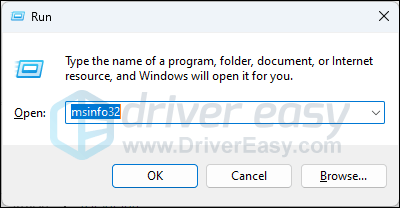
If you’re not sure how to check your computer specs, you can press the Windows key and the R key on your computer at the same time, then type msinfo32 to check your system specs in detail:
When you’re sure that your machine meets the system requirements to run Minecraft, but GLFW Error 65542 error remains, please move on to the fixes below.
Fix 1: Update your graphics driver
The GLFW Error 65542 error is likely to happen if you have the wrong, corrupt or outdated graphics driver on your computer. So you should update your graphics driver to see if it fixes the problem.
If you don’t have the time, patience or skills to update the driver manually, you can do it automatically with Driver Easy.
Driver Easy will automatically recognize your system and find the correct drivers for it. You don’t need to know exactly what system your computer is running, you don’t need to be troubled by the wrong driver you would be downloading, and you don’t need to worry about making a mistake when installing. Driver Easy handles it all.
- Download and install Driver Easy.
- Run Driver Easy and click the Scan Now button. Driver Easy will then scan your computer and detect any problem drivers.

- Click Update All to automatically download and install the correct version of all the drivers that are missing or out of date on your system (this requires the Pro version – you’ll be prompted to upgrade when you click Update All).
Alternatively, you can start a 7-day Free Trial, which gives you access to all premium features. After the trial, you can upgrade to the Pro version.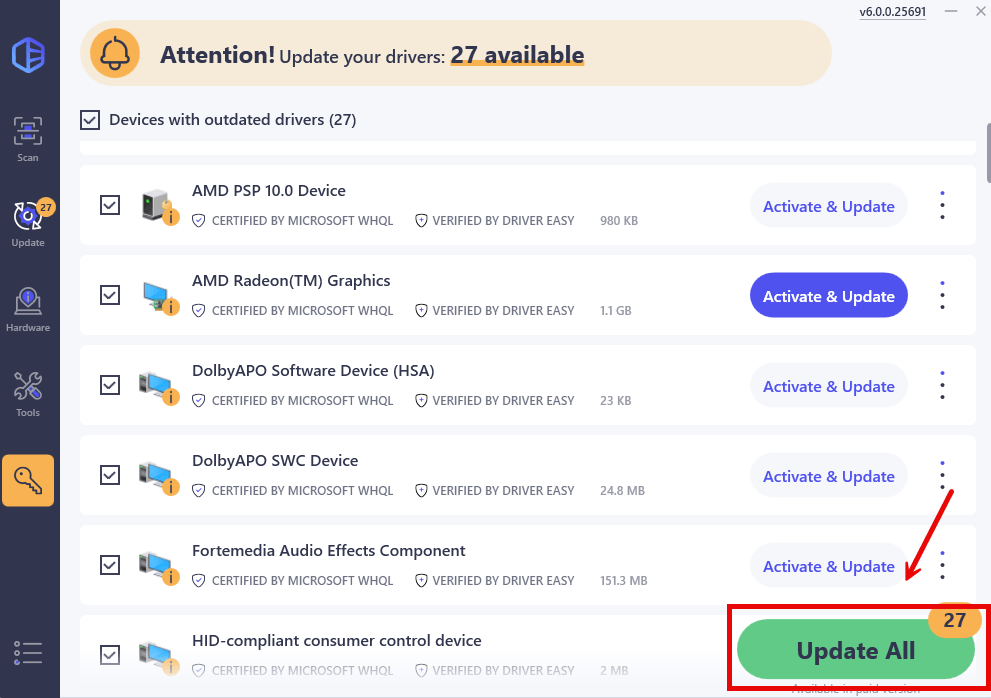
- Restart your computer for the changes to take effect.
Launch the game again and see if the error is fixed. If yes, then great! If it persists, please try Fix 2, below.
Fix 2: Manually add the OpenGL.DLL
The error may also be triggered by a missing opengl32.dll file. So you can try adding the OpenGL.DLL manually to the Java and JRE folder. Once you have made sure Minecraft can use OpenGL, you can test to see if the The driver Does Not Support OpenGL error is resolved.
Here is how to do it:
- Navigate to dll-files.com to download the latest version of the opengl.dll file.
- Extract the downloaded zip file to a folder.
- On your keyboard, press the Windows logo key and E at the same time, then type C:Program FilesJava*Your JRE Version*in into the address bar and press Enter.
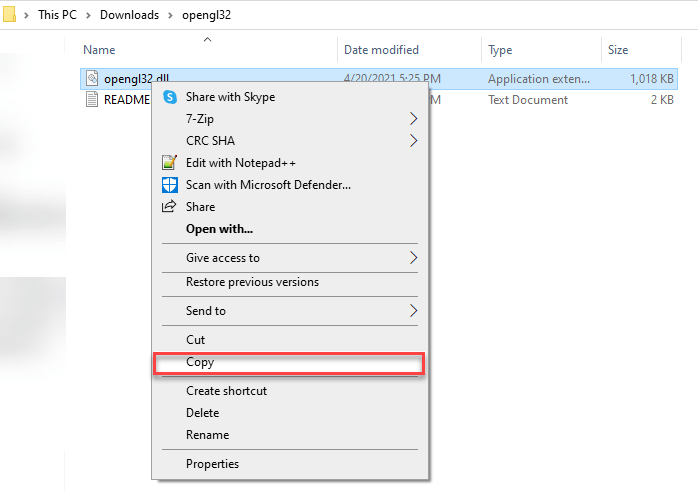
Please note that *Your JRE Version* represents the version of JRE. - Open the extracted folder, right-click on opengl32 and click Copy. After that, paste the opengl32 file into the environment.
- Once done, restart your computer.
- Fire up Minecraft to see if the problem is solved. If yes, congrats! If it’s still no joy, please move on to Fix 3, below.
Fix 3: Uninstalling DisplayLink
If you have installed DisplayLink Graphics driver and used it actively, try uninstalling the software. The driver is reported to conflict with Minecraft Java and may be the culprit of the GLFW Error 65542.
To remove DisplayLink driver:
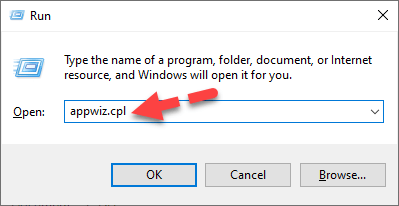
- On your keyboard, press the Windows logo key and R at the same time, then type appwiz.cpl and press Enter to bring up the Programs and Features menu.
- In the list of programs you’ve installed, locate DisplayLink Graphics driver. Then right-click on it and click Uninstall.
- Follow the on-screenn instructions until the software is fully removed from your computer.
- Don’t forget to restart your computer.
- Re-launch Minecraft and see if it runs properly this time.
The driver does not appear to support OpenGL still lingers on? Please try Fix 4, below.
Fix 4: Install the latest Windows updates
The The driver does not appear to support OpenGL issue can be an unresolved bug of a previous Windows version and may have been solved through a new update. You can check Windows update to see if there are new releases to help with the issue. Here’s how:
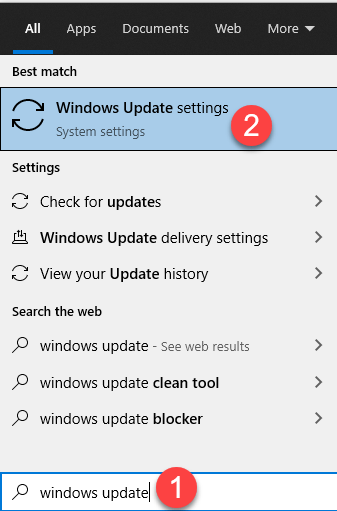
- On your keyboard, press the Windows logo key and type windows update, then click on Windows Update settings as it pops up as a matching result.
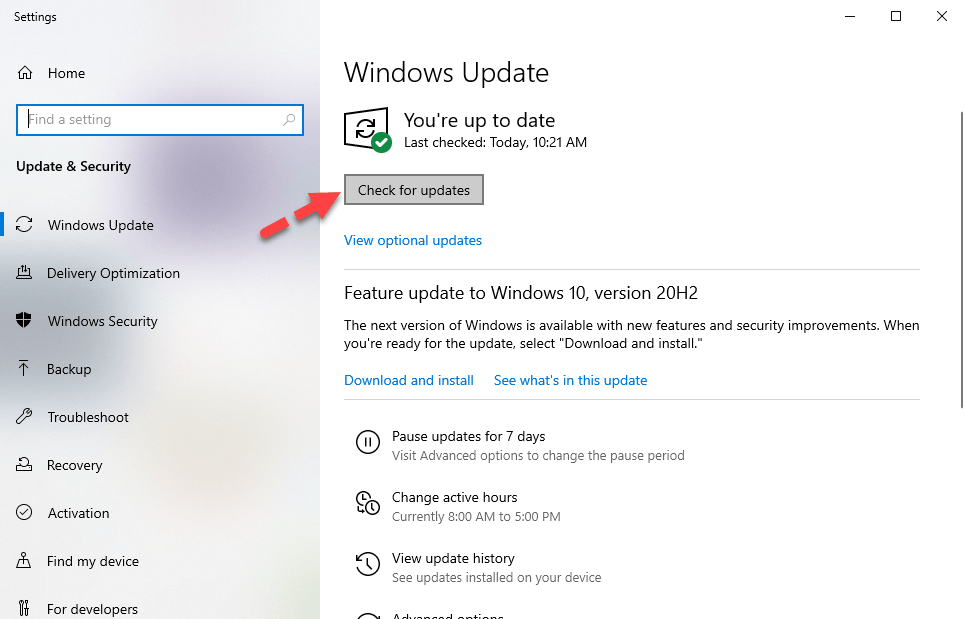
- Click Check for updates. It will automatically start to scan available updates for your computer.
- Wait a while for Windows to check and automatically install the updates for you.
- Restart your computer.
- Check to see if the error is fixed.
That’s it – hopefully this post helped. If you have any questions, ideas, or suggestions, you’re more than welcome to leave us a comment below.