


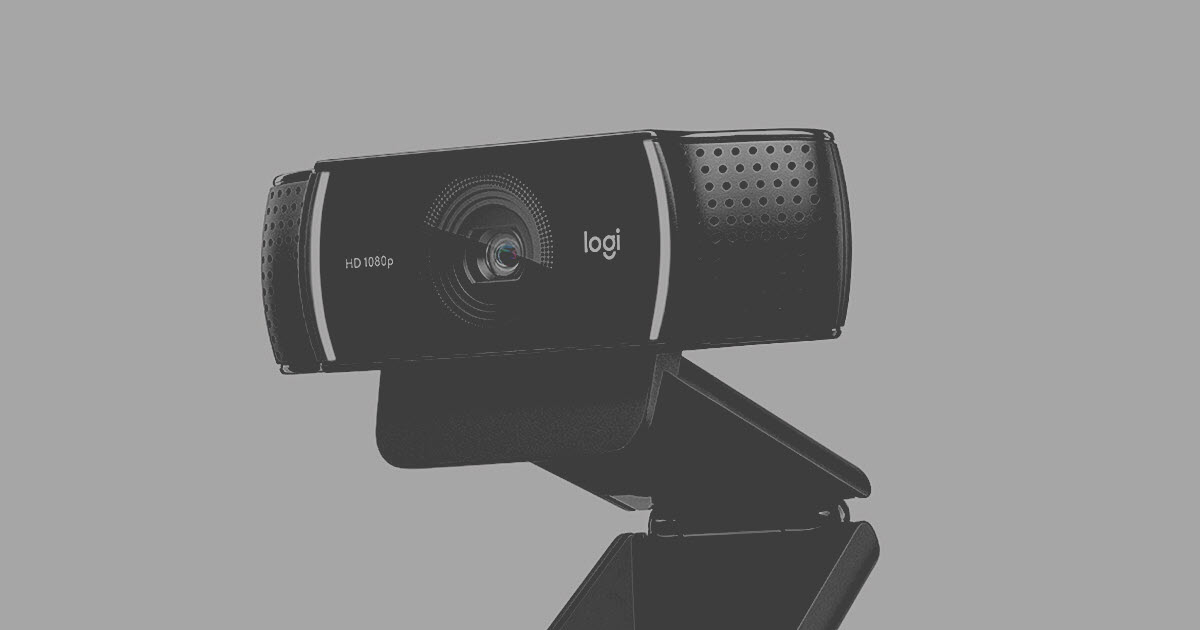
Logitech C922 Pro Stream Webcam supports 1080p at 30 FPS and 720p at 60 FPS, so it’s always an excellent choice for the streamers. It’s a blessing when your webcam works just fine, but don’t worry if it doesn’t. In this article, you should be able to fix Logitech C922 not working / not detected by yourself.
Try these fixes
You don’t have to try them all; just work your way down the list until you find the one that works for you.
- Allow camera access for your device
- Enable your webcam in Device Manager
- Update your Logitech webcam driver
- Install the latest Windows updates
- Choose your webcam device
- Close other apps
1. Allow camera access for your device
The most possible cause of your Logitech C922 not working is the wrong privacy settings. Follow these steps to allow your device to access your camera:
- On your keyboard, press the Windows logo key + I and click Privacy.
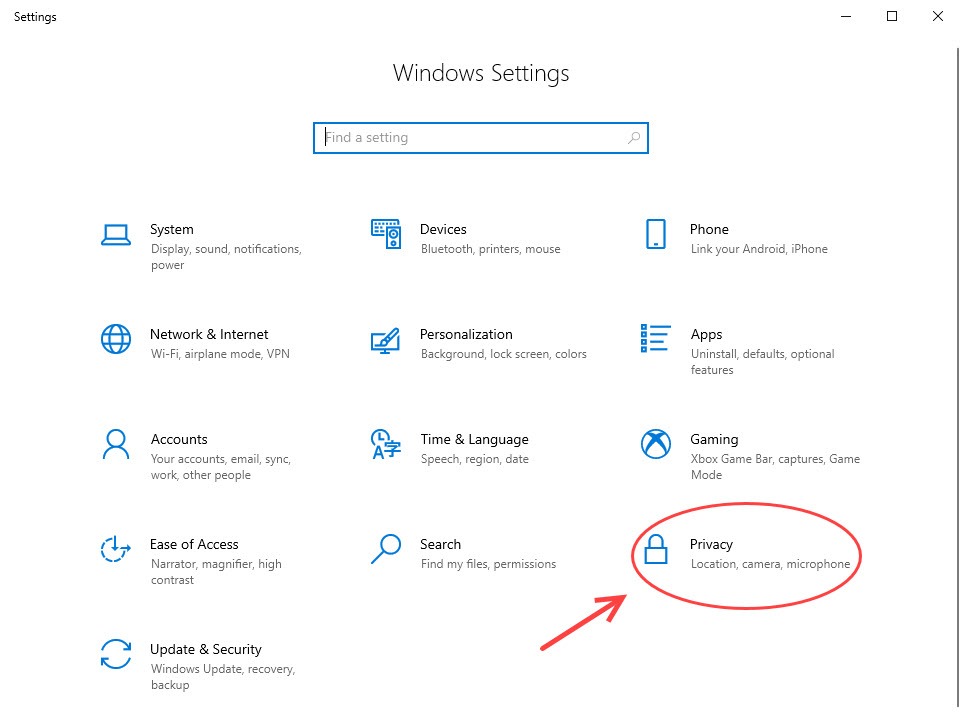
- In the left pane, click Camera.
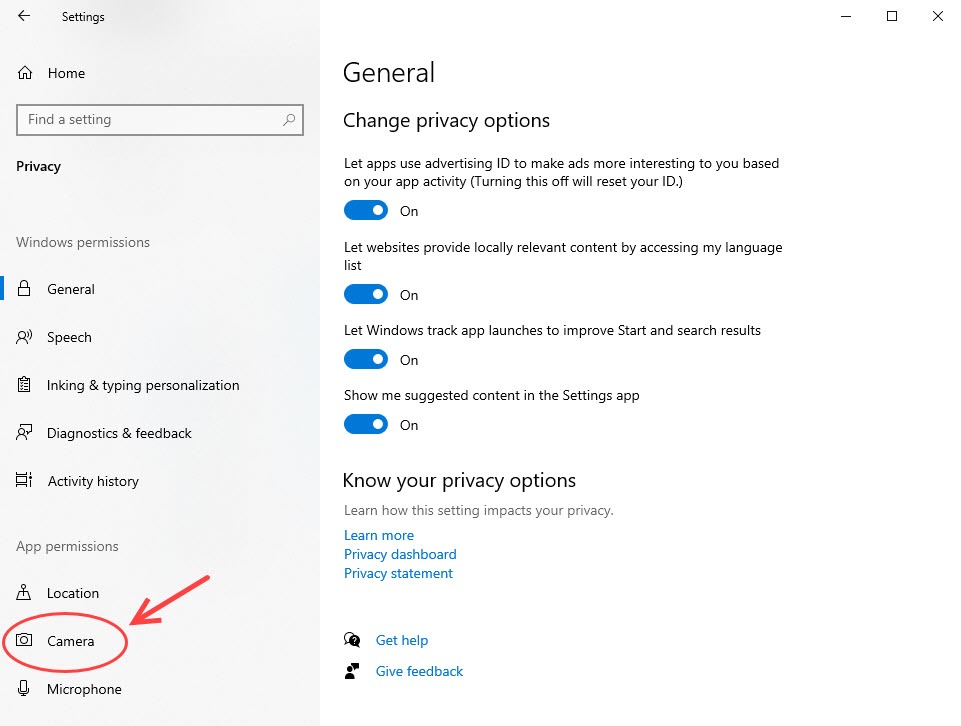
- First, make sure the Allow access to the camera on this device and Allow apps to access your camera are both on.
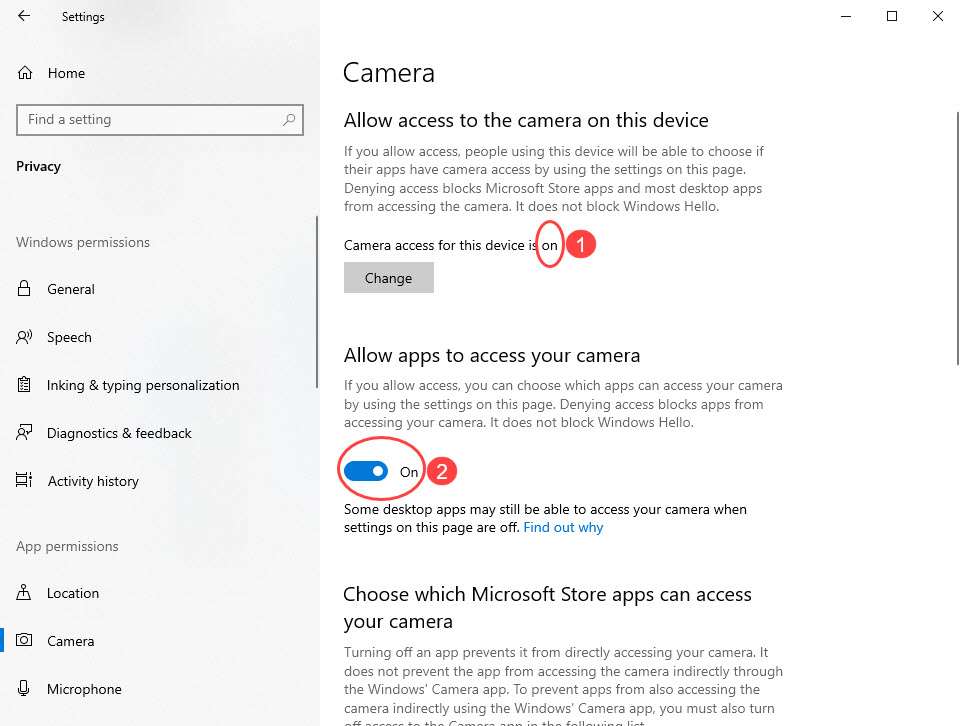
- Scroll down to allow camera access for the apps you want to use.
2. Enable your webcam in Device Manager
Another reason why your Logitech C922 not working is your webcam is accidentally disabled. To fix it, you can follow these steps:
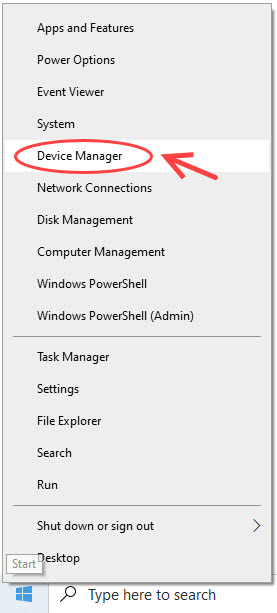
- Right-click the Start menu and select Device Manager.

- Double click Cameras (or Imaging devices) to locate your Logitech C922 webcam.
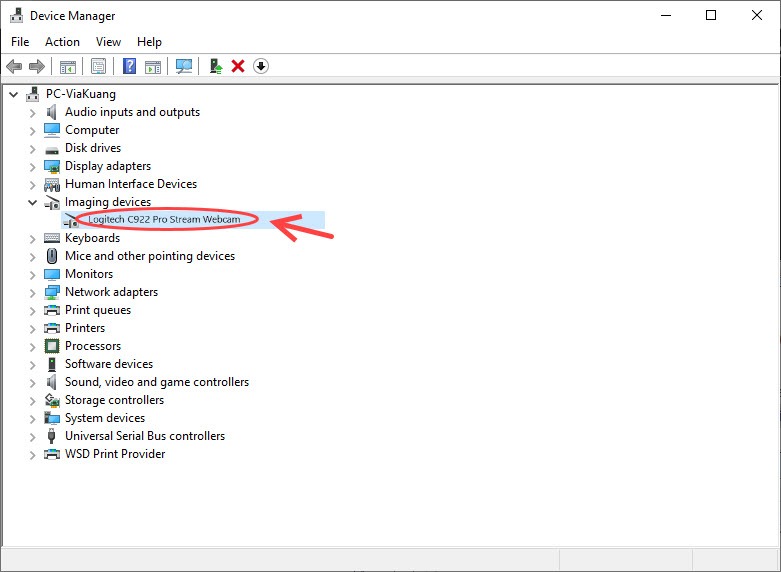
- See if it’s working properly — no question mark, exclamation mark, or red cross signal. If it’s disabled (shows a down arrow signal), right-click the device, and select Enable device.
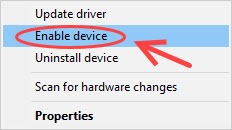
- Try your webcam again to test the issue.
3. Update your Logitech webcam driver
Logitech C922 Pro webcam offers plug-and-play features, which means Windows will automatically install the driver for your webcam. Most of the time, it works just fine. But sometimes, the webcam driver might be outdated, corrupted, and cause webcam issues. To fix it, you should update your Logitech C922 webcam driver (or perhaps your USB drivers, too):
There are two ways you can update your drivers: manually and automatically.
Option 1 – Manually– You’ll need some computer skills and patience to update your drivers this way because you need to find exactly the right driver online, download it and install it step by step.
OR
Option 2 – Automatically (Recommended)– This is the quickest and easiest option. It’s all done with just a couple of mouse clicks – easy even if you’re a computer newbie.
Option 1 – Update the driver manually
Manually updating your webcam driver takes time and computer skills. First, you’ll need to install the latest G HUB software. If you already have installed one, you’d better uninstall it first. Here’s how:
- On your keyboard, press the Windows key + R to invoke the Run box.
- Type appwiz.cpl and press Enter.
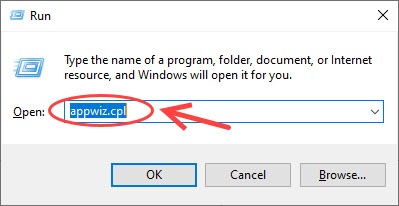
- Right-click your Logitech G Hub and select Uninstall.

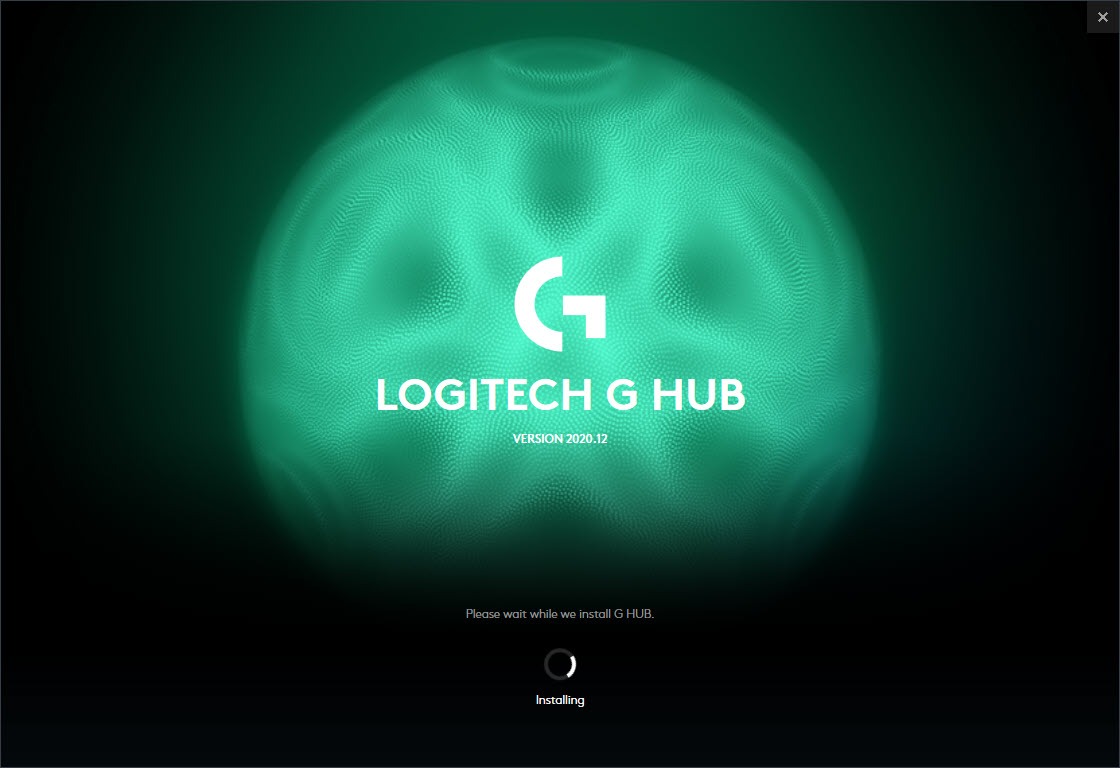
- Download the latest Logitech G HUB software from Logitech Support.
- Follow the on-screen prompts to install.
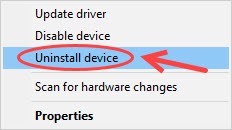
- Right-click the Start menu, and select Device Manager.
- Expand Cameras (or Imaging devices). Right-click your Logitech C922, and select Uninstall device.
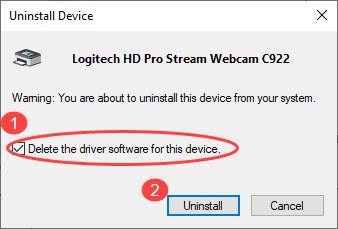
- Check Delete the driver software for this device and then click Uninstall.
- Unplug the webcam and plug it back into a different USB port. It should re-enumerate and be detected in G HUB.
- G HUB should then download the latest driver for your device.
Option 2 – Automatically update all your device drivers
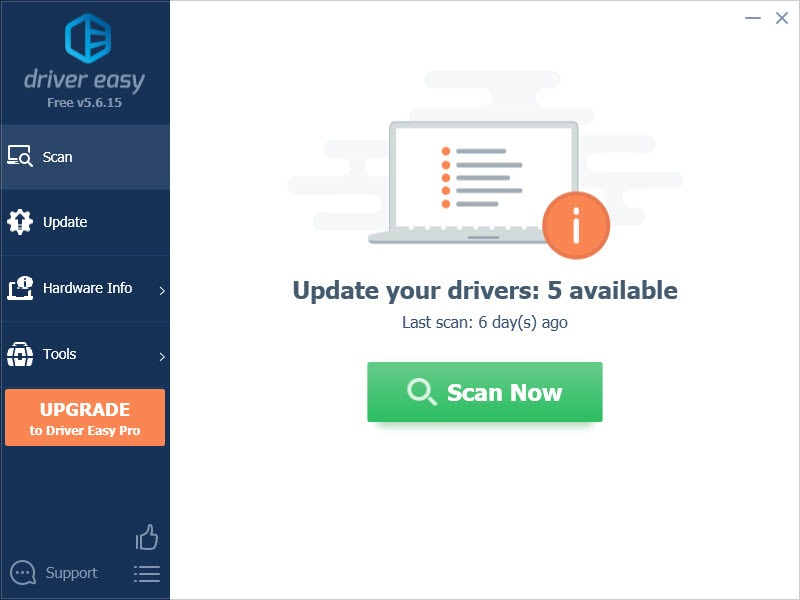
If you don’t have time or patience to manually update drivers, you can do it automatically with Driver Easy. Updating all your drivers can all be done within 2 clicks.
Driver Easy will automatically recognize your system and find the correct drivers for it. You don’t need to know exactly what system your computer is running, you don’t need to risk downloading and installing the wrong driver, and you don’t need to worry about making a mistake when installing.
You can update your drivers automatically with either the FREE or the Pro version of Driver Easy. But with the Pro version it takes just 2 clicks (and you get full support and a 30-day money back guarantee):
- Download and install Driver Easy.
- Run Driver Easy and click the Scan Now button. Driver Easy will then scan your computer and detect any problem drivers.
- Click the Update button next to the flagged driver to automatically download the correct version of that driver, then you can manually install it (you can do this with the FREE version).

Or click Update All to automatically download and install the correct version of all the drivers that are missing or out of date on your system. (This requires the Pro version which comes with full support and a 30-day money back guarantee. You’ll be prompted to upgrade when you click Update All.) - Restart your computer for the changes to take effect.
4. Install the latest Windows updates
If you have tried the possible solutions listed above but still your Logitech C922 doesn’t work, you may want to check for updates:
- Select Start , then select Settings > Update & Security > Windows Update > Check for updates.
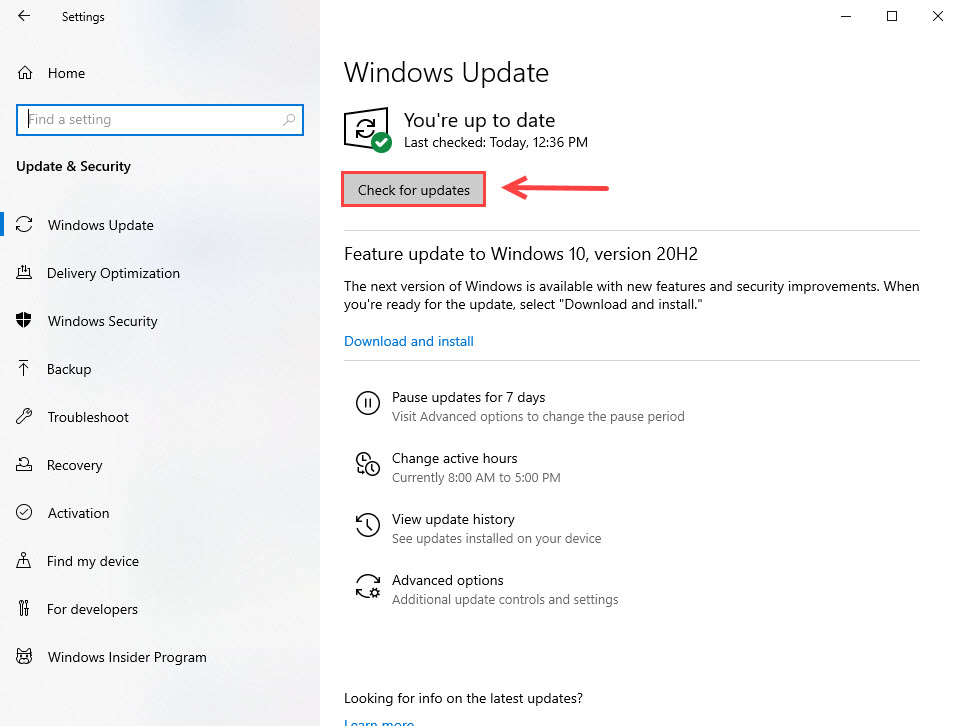
- Click Download and install if there are updates available for the operating system. Allow available updates to install, then restart your device when it’s ready.
- Test your webcam with the Camera app.
5. Choose your webcam device
If the drivers are up to date, and Windows isn’t blocking your webcam, another possible cause is your webcam settings in the application you’re trying to use.
You may need to configure webcam settings in the application you’re using. For example, in Skype, click menu > Settings > Audio & Video and select Logitech C922 Webcam from Camera.
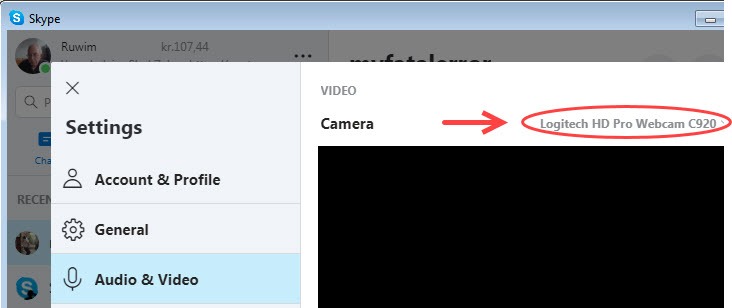
If you don’t see your Logitech HD Pro Webcam C922, you can uninstall the application (especially for Skype), and install the downloadable version.
6. Close other apps
If you have too many apps running in the background, this could slow down your PC and hold back your application from recognizing or activating your camera.
Press Ctrl + Shift + Esc to open Task Manager, and close unnecessary applications.
Relaunch your application again, and see if this solved your Logitech C922 webcam not working.
Logitech C922 Webcam still not working
If you have tried all the fixes above, but your Logitech C922 webcam is still not working, you can try connecting it to other PCs and see if it works.
And if you’re within your webcam’s warranty period, contact Logitech Support and see if it can fix your problem.
Did these fixes above help you solve the problem? Feel free to leave us a comment if you have any suggestions or questions.