


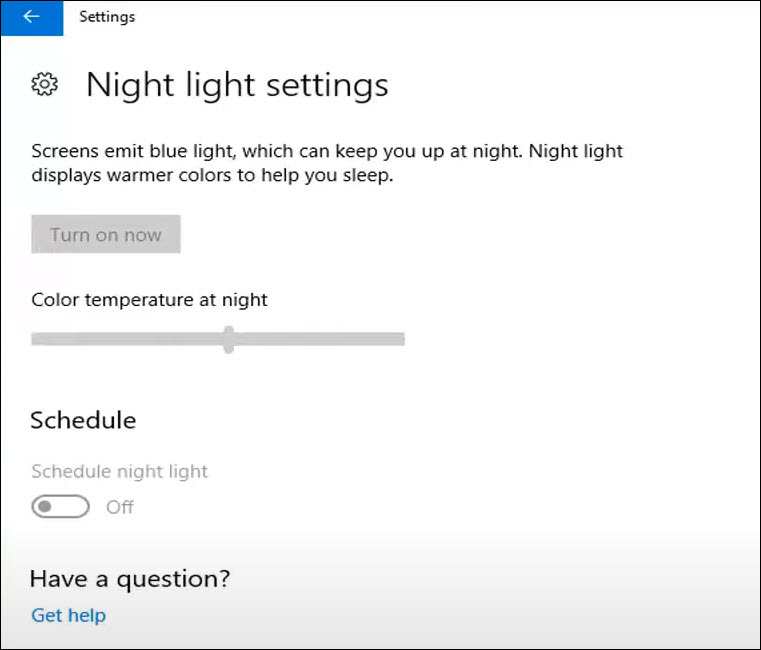
Windows 10 and 11 have a built-in blue light filter, called Night Light. By enabling this feature, your display will show warmer colors at night to help you reduce eye strain and get to sleep. However, many users are experiencing problems with this feature. Some users reported that they couldn’t turn on the Night Light as this option is grayed out. Others said that the Night Light couldn’t turn off no matter what they did. If you happen to be one of them, don’t worry. Here are some working fixes you can try.
6 Fixes for Night Light not working
You might not need to try them all. Just work down the list until you find the one that does the trick.
- Sign out of your account and sign back in
- Update your display driver
- Reset Night Light settings manually
- Check date and time settings
- Turn on Location services
- Check for Windows updates
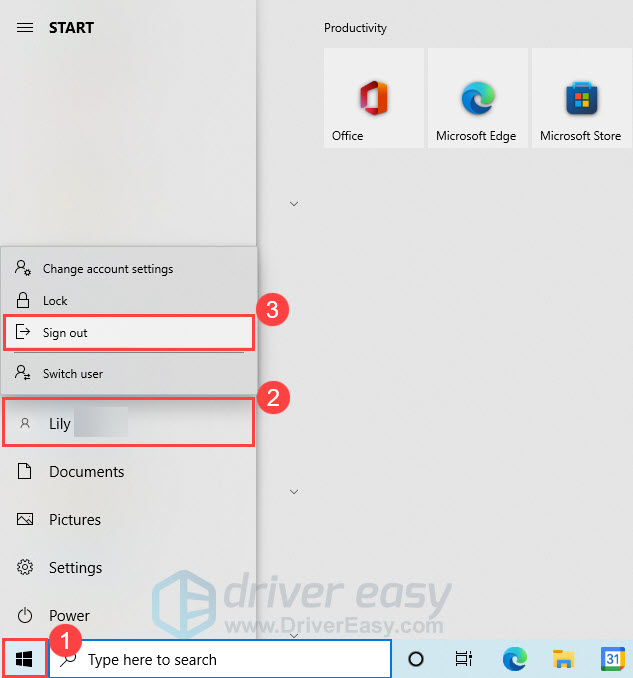
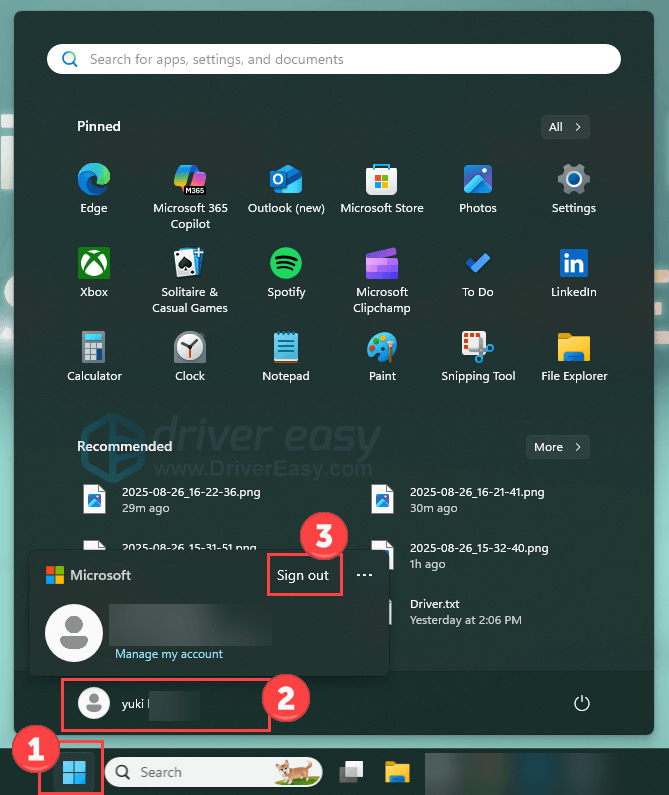
Fix 1: Sign out of your account and sign back in
Sometimes, the Night Light not working issue could be caused by a temporary glitch. If that’s the case, you can try to fix the problem by signing out of your account and then signing back in.
Windows 10:
Windows 11:
Check if the Night Light starts working again. If your issue persists, go ahead and try the next fix.
Fix 2: Update your display driver
One of the most common causes of the Night Light not working is that you’re using a faulty or outdated display driver. So you should update your display driver to see if it fixes your problem.
There are mainly two ways to update your display driver: manually or automatically.
Manual driver update – You can update your display drivers manually by going to the manufacturer’s website (NVIDIA, AMD or Intel), and searching for the most recent correct driver. Be sure to choose only drivers that are compatible with your Windows version.
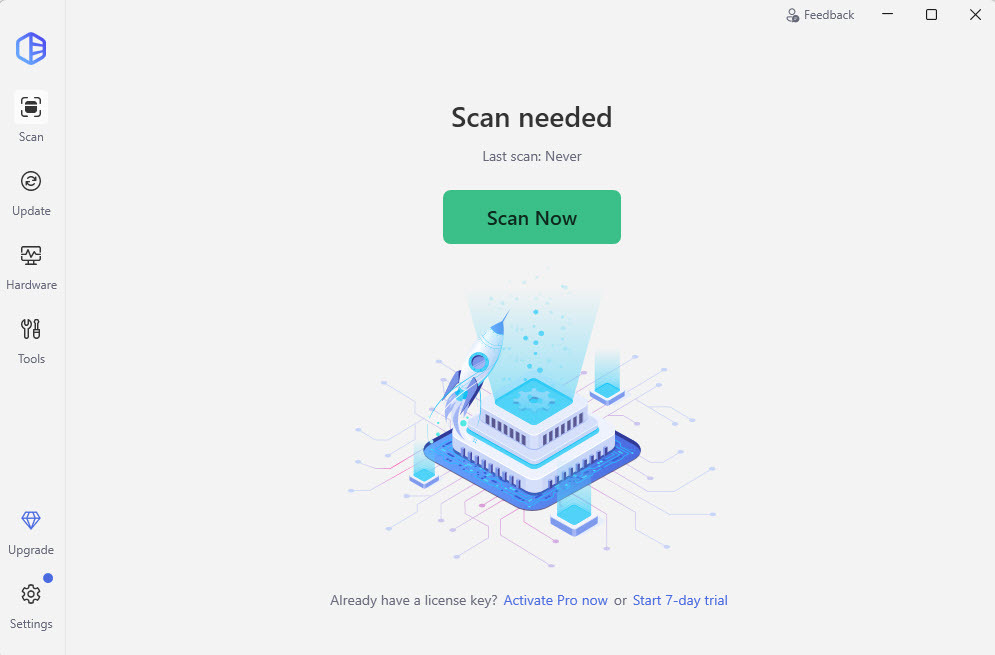
Automatic driver update – If you don’t have the time, patience, or computer skills to update your display drivers manually, you can, instead, do it automatically with Driver Easy. Driver Easy will automatically recognize your system and find the correct drivers for your exact display adapter, and your Windows version, and it will download and install them correctly:
- Download and install Driver Easy.
- Run Driver Easy and click the Scan Now button. Driver Easy will then scan your computer and detect any problem drivers.
- Click Update All to automatically download and install the correct version of all the drivers that are missing or out of date on your system. (This requires the Pro version — you’ll be prompted to upgrade when you click Update All.)

After updating your display driver, restart your computer and check if the Night Light works properly.
If your issue remains, check out the next fix.
Fix 3: Reset Night Light settings manually
If the Night Light option on your PC is grayed out, you can try resetting this feature by editing the Windows registry. Here’s how to do it:
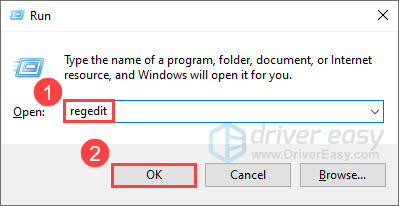
- On your keyboard, press the Windows logo key and R at the same time to invoke the Run dialog. Then type regedit and click OK to open Registry Editor.
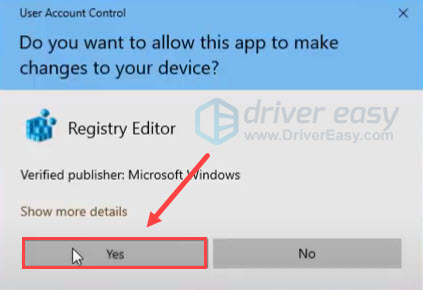
- Click Yes if prompted by User Account Control.
- In Registry Editor, paste the following path into the address bar and press Enter.
Computer\HKEY_CURRENT_USER\SOFTWARE\Microsoft\Windows\CurrentVersion\CloudStore\Store\DefaultAccount\Cloud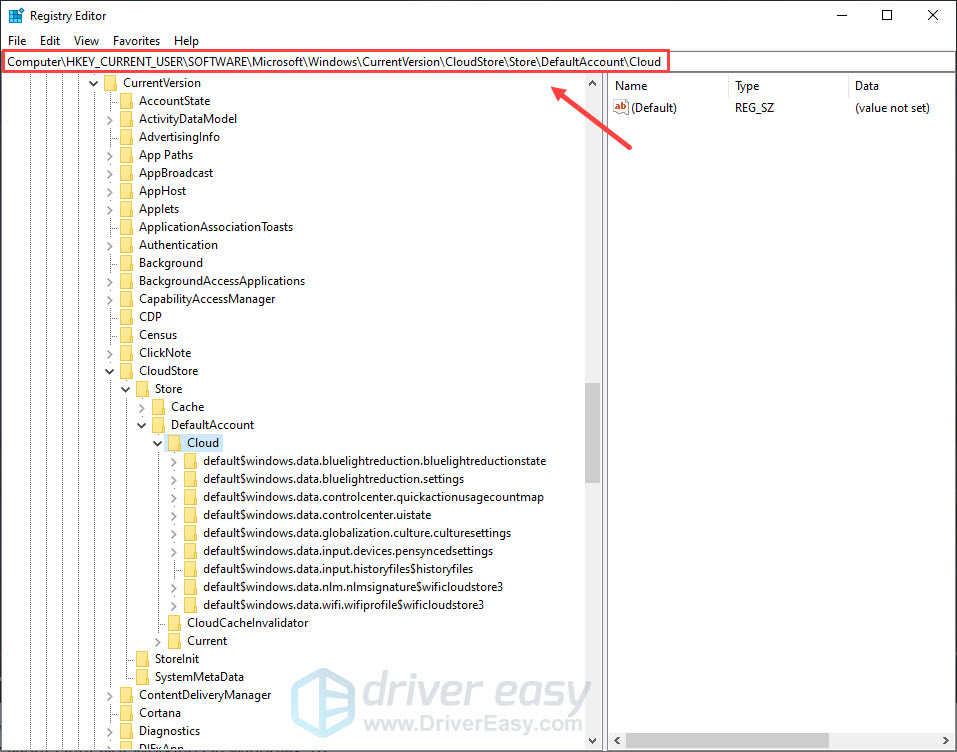
- Under the Cloud key, right-click and delete the first two registry keys one by one.
default$windows.data.bluelightreduction.bluelightreductionstatedefault$windows.data.bluelightreduction.settings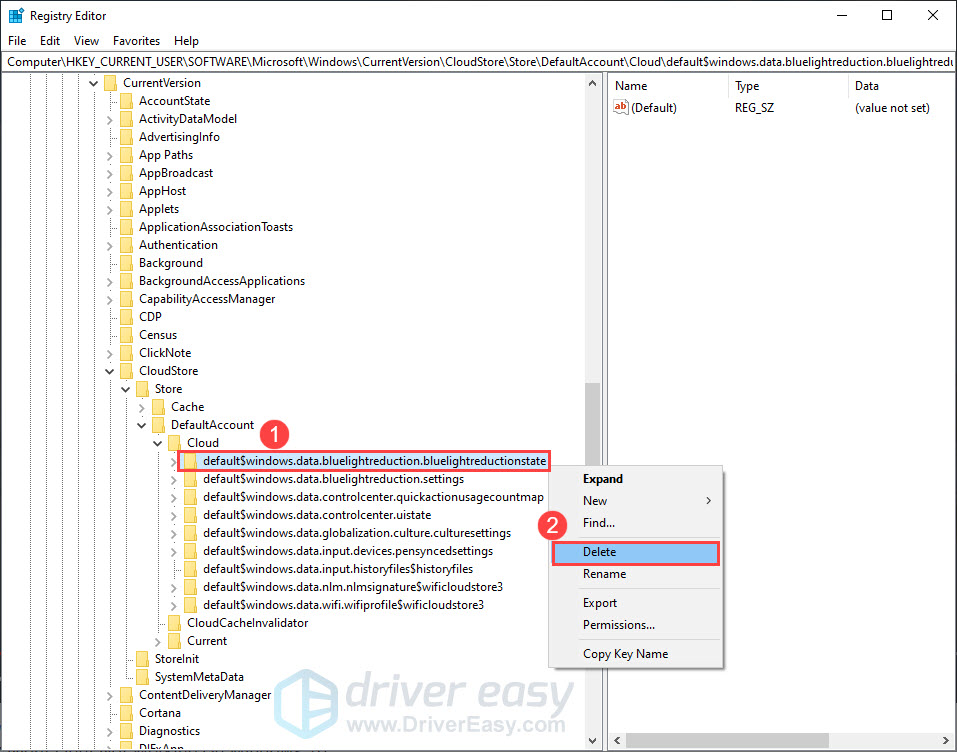
- Once done, close and exit Registry Editor.
- Restart your PC and check if your problem has been resolved.
If the Night Light still doesn’t work properly, continue with the next fix.
Fix 4: Check date and time settings
Windows allows you to set a schedule to turn on and turn off the Night Light feature. If the date and time settings on your PC are set incorrectly, you might be unable to use this feature properly. To check your PC’s date and time settings:
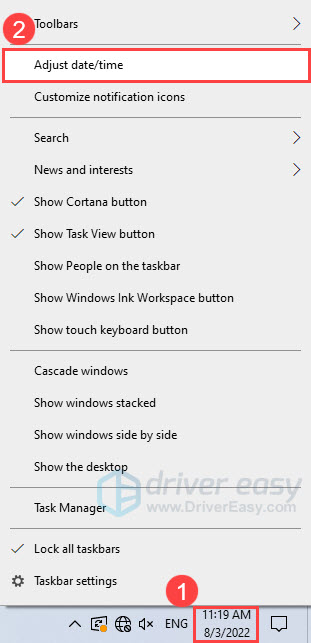
- On your taskbar, right-click the time and select Adjust date/time.
- In the pop-up window, make sure the date and time on your device are set correctly for your time zone. If not, you can click the Change button to change the date and time.
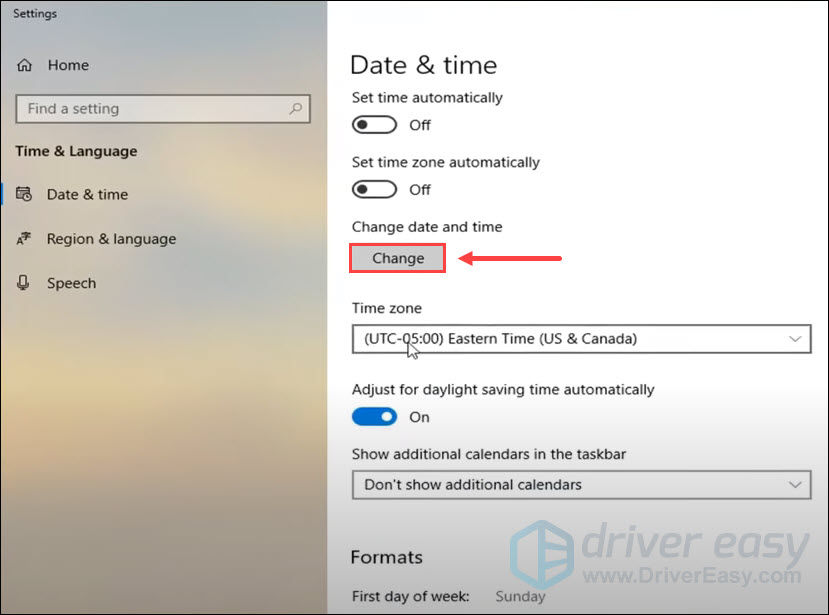
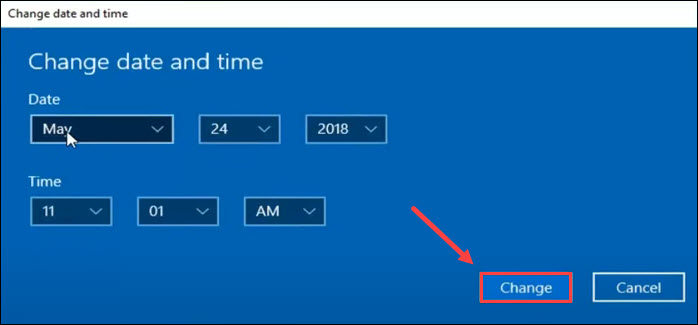
Note: the options for Set time automatically and Set time zone automatically must be set to Off to make this change. - Change the date and time according to your need, then click Change.
If the date and time are correct and you still encounter the Night Light not working issue, you may need to check Location services.
Fix 5: Turn on Location services
If you want to schedule the night light from sunset to sunrise, you need to turn on Location services, as the exact time of sunset and sunrise depends on your location and date. Here’s how to do it:
Windows 10:
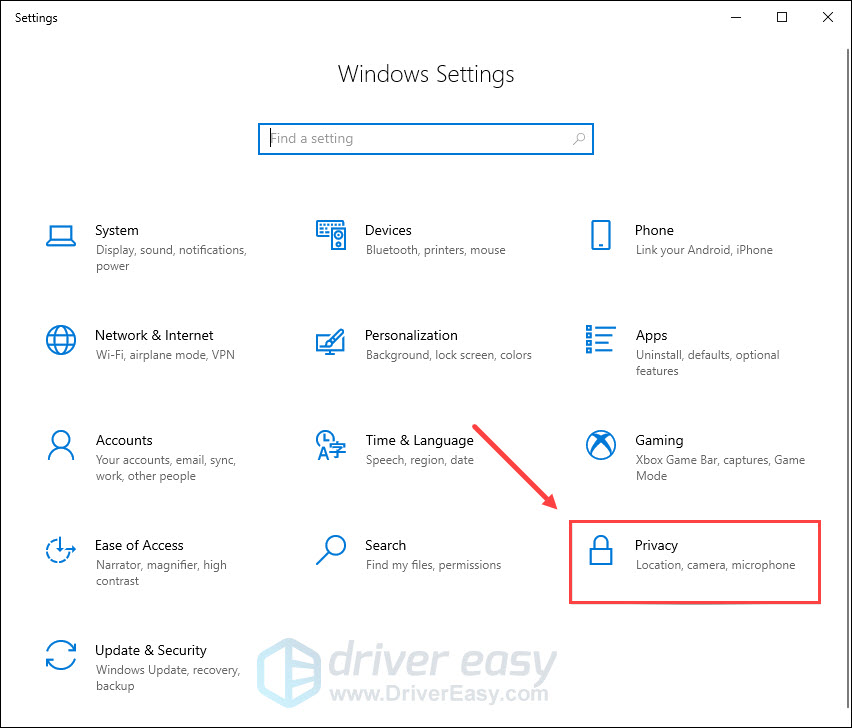
- On your keyboard, press the Windows logo key and I together to open Windows Settings. Then click Privacy.
- In the left panel, select Location.
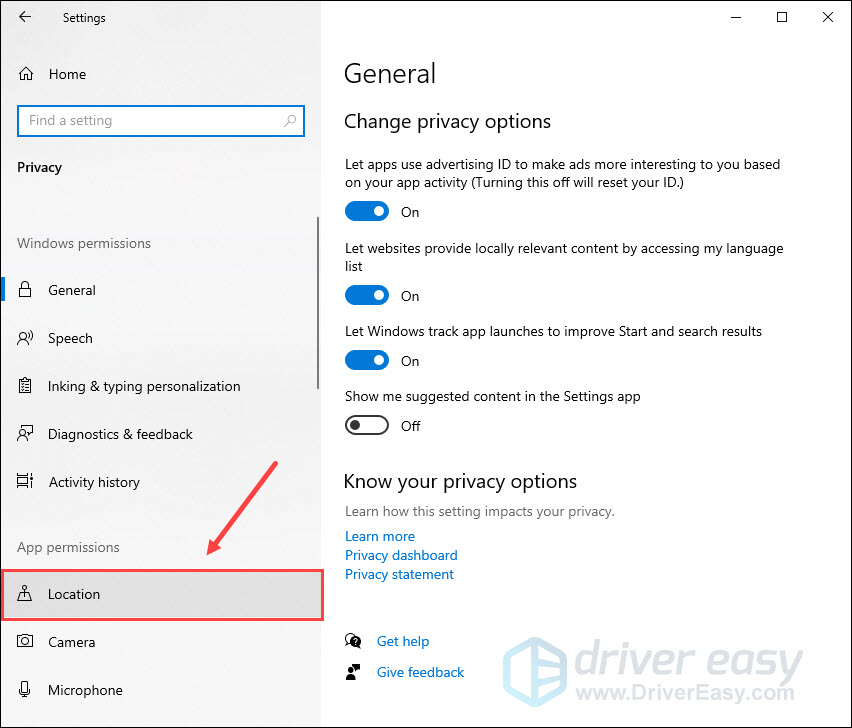
- Make sure the Location for this device is On. If not, you can click the Change button to turn it on. Also, make sure that Allow apps to access your location is set to On.

Windows 11:
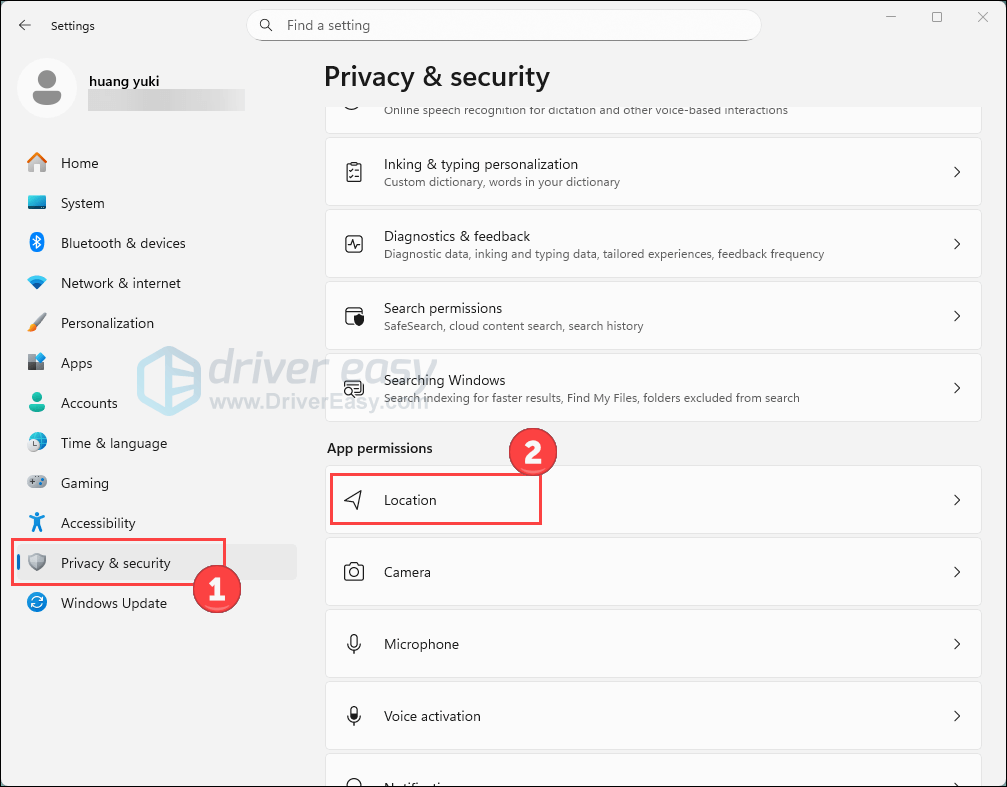
- On your keyboard, press the Windows logo key and I together to open Windows Settings.
- Select Privacy & security on the left and click Location on the right.
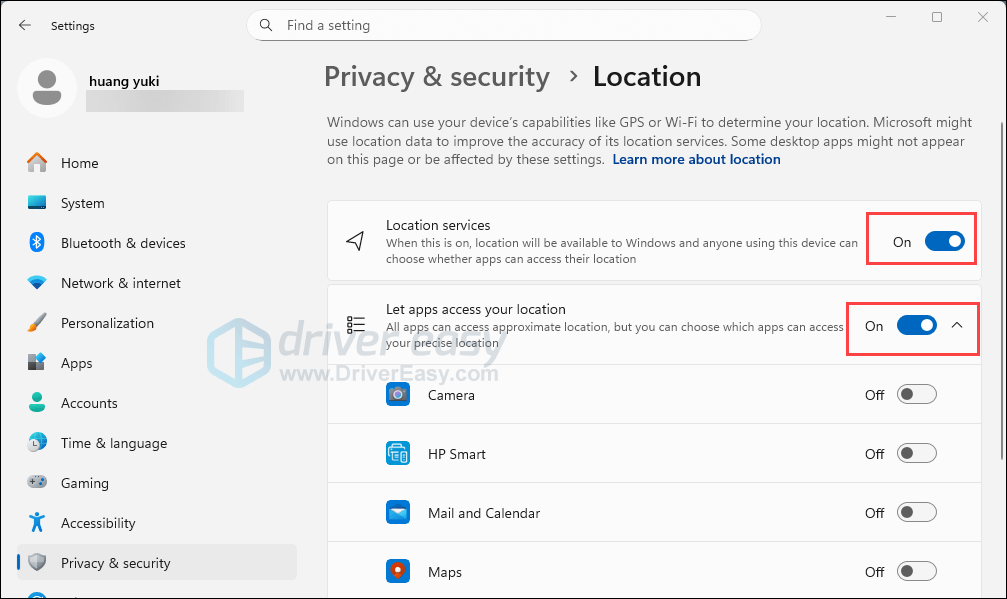
- Make sure the Location services and Let apps access your location are On.
Now try to use the Night Light feature again and see if it works properly.
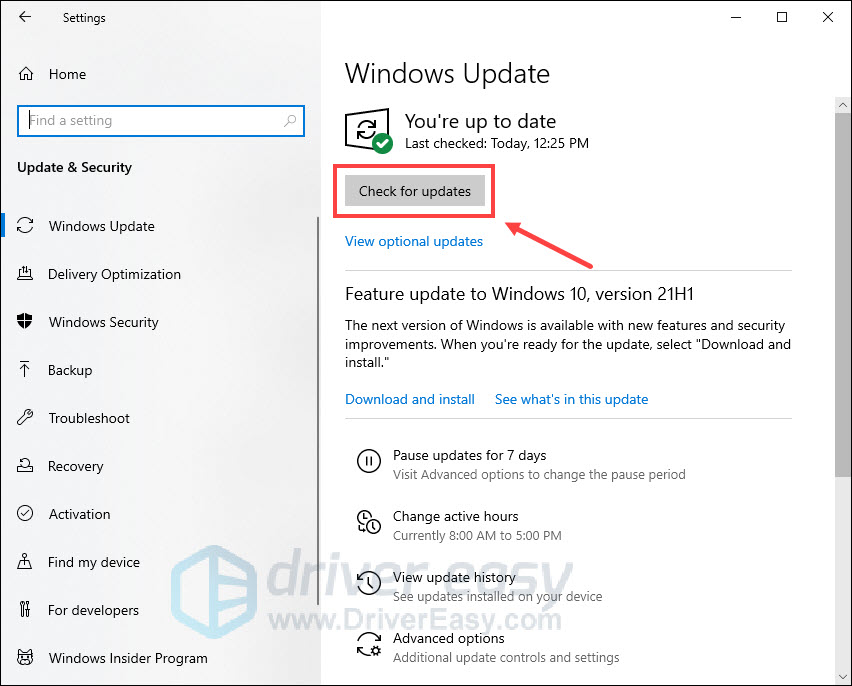
Fix 6: Check for Windows updates
Windows updates often include bug fixes, security patches, and some new features. So chances are that your problem can be solved by installing the new updates. To check for Windows updates:
- In the search field on your taskbar, type check for updates. Then select it from the search results.
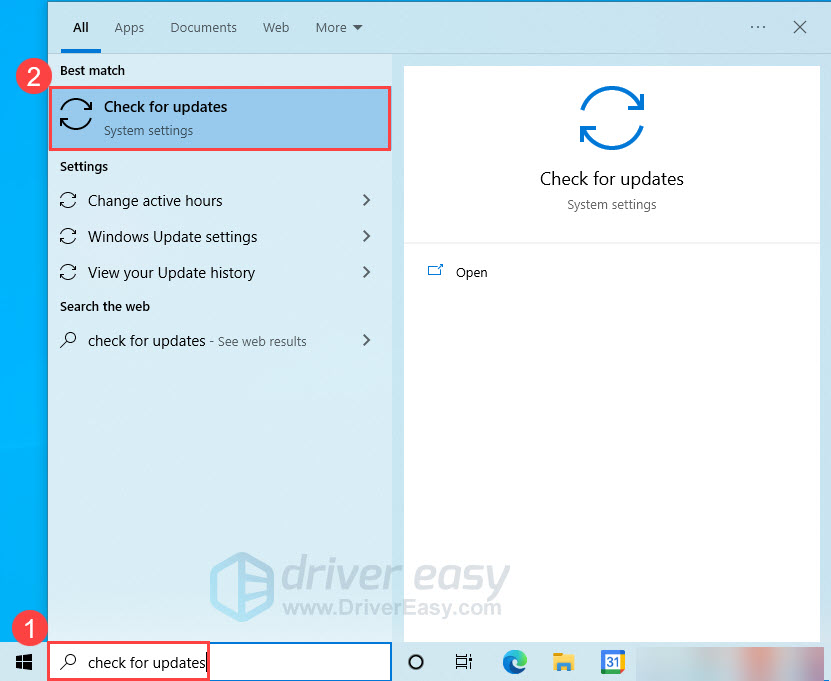
- In the new window, click Check for updates. Windows will automatically download and install all pending updates if available.
Once you’ve installed all updates, restart your PC and check if your issue has been resolved.
If you’ve tried all fixes listed above and still can’t get the Night Light to work, consider using a third-party app like f.lux to do the same work for you.
That’s all for now. Hopefully, this post helped. If you have any further questions or suggestions, feel free to leave us a comment below.