


Want to know more than just one NVIDIA video card on your computer? Try NVIDIA’s SLI. From this post, you’ll know what SLI is and how to set it up.
What is SLI?
SLI is a technology that allows its users to use multiple (up to four) NVIDIA video cards on one computer.
Short for Scalable Link Interface, SLI is developed by NVIDIA. This technology connects all the video cards together to produce a single video output. With SLI, you can get up to 100% graphics performance boost from each of your GPUs (Graphics Processing Unit, the core of your video card).
All video cards under an SLI system share the rendering information in the same environment. To organize all these GPUs, SLI uses a rendering mode called Alternate Frame Rendering (AFR). Basically, it means each GPU renders one of N frames respectively (“N” here represents how many cards you use). This is designed to enable every GPU to work independently and maximize the power of the SLI system.
How to set up SLI?
Setting up and configuring SLI is easily. Here’s how you can do this:
Step 1: Check if your computer is SLI-compatible
The first thing you should do before SLI setup is to make clear whether your graphics cards, motherboard, CPU and RAM, power supply, etc. support SLI.
Video cards:
In fact, NOT ALL models of NVIDIA video card support SLI. There are several ways to identify an SLI-supported video card:
Method 1: Check out the NVIDIA graphics card shop website to find out more information about the SLI capability of a specific graphics card.
Method 2: Check your video card box. If there is something like “SLI Ready” on the box, your card supports SLI.
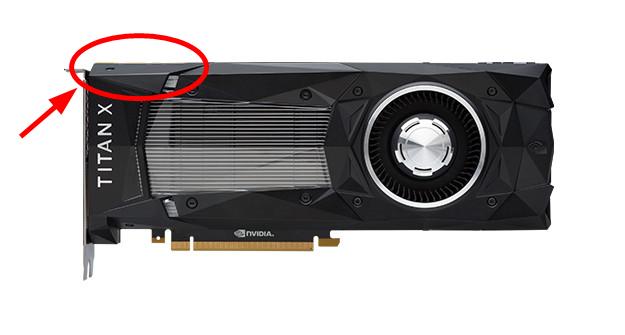
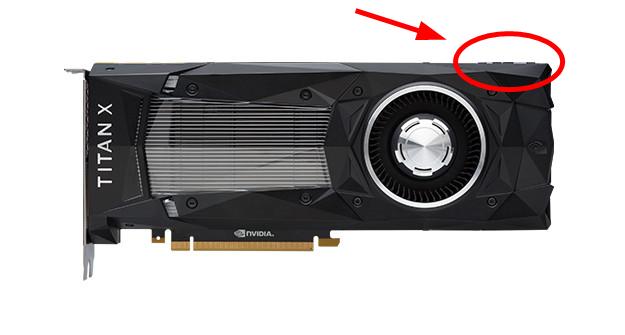
Method 3: Check if there is an SLI connector on the top edge (next to the metal panel) of your video card. If so, your video card is ready for SLI.
Motherboard:
To use SLI, your motherboard also has to support this functionality. A motherboard is certified by NVIDIA as supporting SLI has an “SLI Ready” certification. You can check the box that contained your motherboard or the manual for this certification. Or you can go to its official website and view detailed information on your motherboard compatibility with SLI.
CPU and memory:
An SLI system can remarkably improve performance. With that said, the graphics power can still be bottlenecked by your CPU and computer memory. In order for your SLI configuration to release its full power, it is suggested that you use a powerful CPU (Intel i7 processor or equivalent recommended) and increase your computer memory (8 GB or above recommended).
Power supply:
A powerful video card requires a huge amount of electric power, let alone multiple ones. Calculate the amount of power your machine requires before building an SLI system, then replace your power supply when necessary.
When everything is ready, then move on to the next step, below.
Step 2: Install your video cards
To install your video cards:
1) Turn off your computer and unplug the power cable from it.
2) Remove the cover of your computer case.
3) Remove the slot covers next to the PCI-Express x16 slots you are using on the back of your computer case.
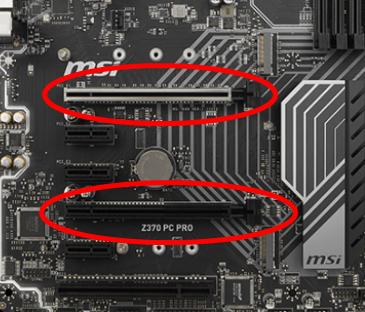
4) Plug the video cards into the PCI-Express x16 slots.
5) Connect your video cards with an SLI bridge connector that come with your motherboard or you got from NVIDIA.
6) Connect the power connectors (8-pin) from your power supply to your video cards.
7) Reinstall the covers of your computer case and reconnect all the cables to your system.
8) Turn your computer on.
Now your hardware is ready for SLI. It’s time to enable the SLI feature on your Windows system.
Step 3: Configure SLI on your Windows system
The final step is to install or update your graphics driver and then enable SLI on your NVIDIA Control Panel.
1. Install drivers for your graphics card:
Your video cards need a driver to work properly on your computer. And your SLI system won’t be able to run smoothly if your graphics driver is wrong or out of date. You should install the latest graphics driver on your computer. If you want to do this easily and automatically, you can use Driver Easy.
Driver Easy will automatically recognize your system and find the correct drivers for it. You don’t need to know exactly what system your computer is running, you don’t need to risk downloading and installing the wrong driver, and you don’t need to worry about making a mistake when installing.
You can update your drivers automatically with either the FREE or the Pro version of Driver Easy. But with the Pro version it takes just 2 steps (and you get full support and a 30-day money back guarantee):
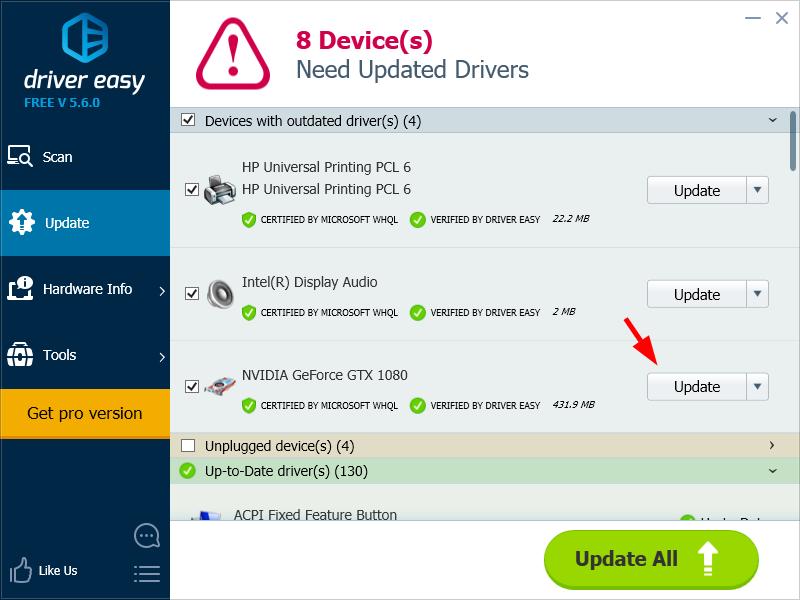
1) Download and install Driver Easy.
2) Run Driver Easy and click the Scan Now button. Driver Easy will then scan your computer and detect any problem drivers.

3) Click the Update button next to your graphics driver to automatically download and install the correct version of this driver (you can do this with the FREE version). Or click Update All to automatically download and install the correct version of all the drivers that are missing or out of date on your system (this requires the Pro version – you’ll be prompted to upgrade when you click Update All).
Enable SLI
You can turn on SLI on the NVIDIA Control Panel. To do so:
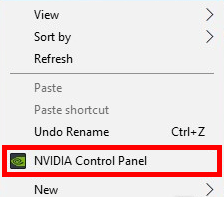
1) On your Windows system, right-click an empty area of your desktop, then click NVIDIA Control Panel.
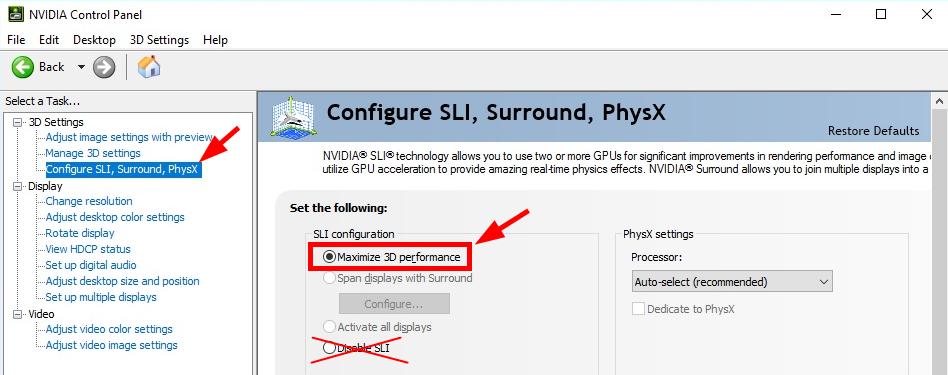
2) Click Configure SLI, Surround, PhysX in the left pane. Then select Maximize 3D performance.
Now your SLI system is ready. Enjoy its superpower.
If you have any questions or suggestions about SLI, feel free to leave us a comment below.