


When you run into sound issues on Windows, such as no audio, crackling or popping sound, reinstalling the audio driver could be one of the most effective solutions. In this tutorial, we will show you how to reinstall the sound driver on Windows step-by-step. You can easily reinstall the audio driver even if you don’t have any computer skills.
First, you need to uninstall the audio driver from Device Manager. After uninstalling the driver, you can simply restart your PC to allow Windows to reinstall the audio driver.
2 ways to reinstall your audio driver
You’ll need some computer skills and patience to update your drivers this way because you need to find exactly the right driver online, download it and install it step by step.
This is the quickest and easiest option. It’s all done with just a couple of mouse clicks – easy even if you’re a computer newbie.
1. Reinstall audio driver manually
You can follow the steps below to reinstall your audio driver manually. First you’ll need to uninstall the audio driver.
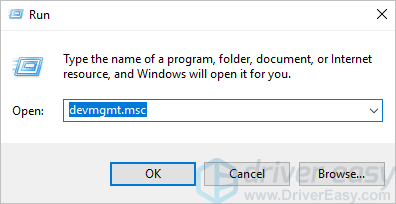
- On your keyboard, press Win+R (the Windows logo key and the R key) at the same time to invoke the Run box.
- Type devmgmt.msc in the Run box and click OK to open Device Manager.
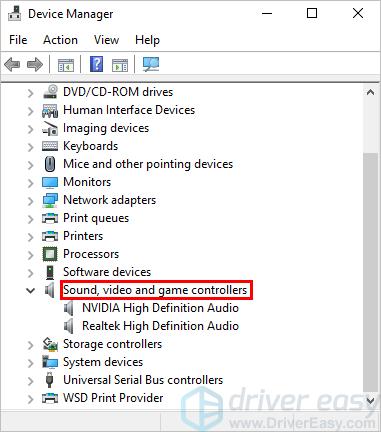
- Expand the category Sound,video and game controllers.
- Right-click on the sound device and click Uninstall device (in some cases, this could be just Uninstall). In the below example, the sound device is Realtek High Definition Audio.
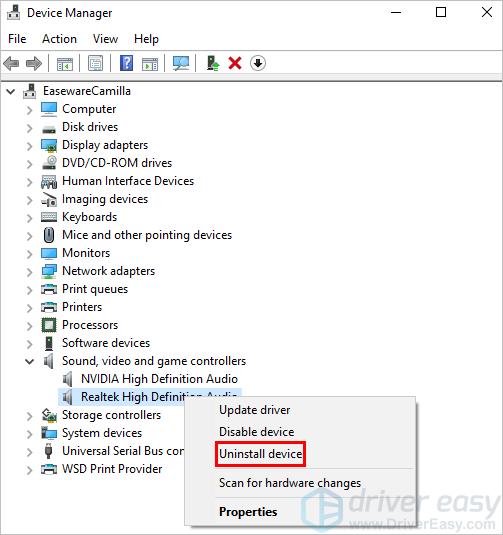
- On the Uninstall confirm dialog box, select the Delete the driver software for this device option, then click Uninstall.
 The option Delete the driver software for this device allows you to delete the driver package from the Driver Store (For more information you can visit Driver Store in Microsoft. If you don’t see this option on the Uninstall confirm dialog box, the driver package may have been removed. In this case, just click Uninstall to uninstall the driver.
 - Restart your computer. Usually, Windows will install an audio driver automatically when your computer is connected to the internet. (It may not give you the latest drivers — so if you found the issue persists, you can take the following methods to automatically check for driver issues or updates.)
2. Reinstall audio driver automatically (Recommended)
The above steps may help resolve your no sound issues, but if they don’t, you can install a new audio driver automatically with Driver Easy.
Driver Easy will automatically recognize your system and find the correct drivers for it. You don’t need to know exactly what system your computer is running, you don’t need to risk downloading and installing the wrong driver, and you don’t need to worry about making a mistake when installing.
Though it’s a paid software, it offers a 7-day free trial so you can be sure it’s right for you. With Driver Easy, updating drivers only takes 2 clicks (and you get full support plus a 30-day money-back guarantee):
- Download and install Driver Easy.
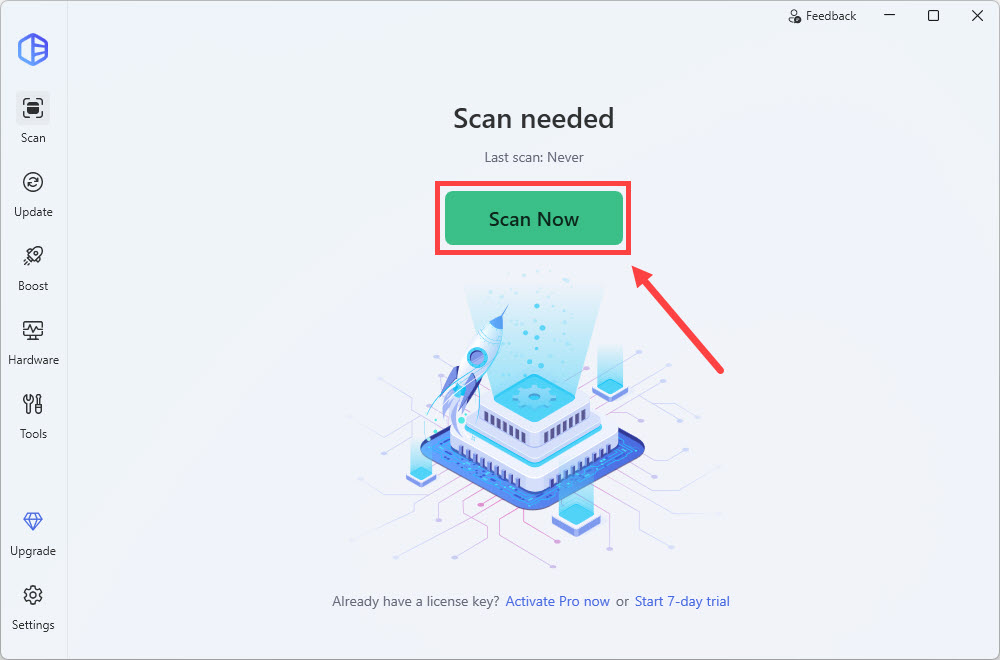
- Run Driver Easy and click Scan Now. Driver Easy will then scan your computer for any outdated or faulty drivers.
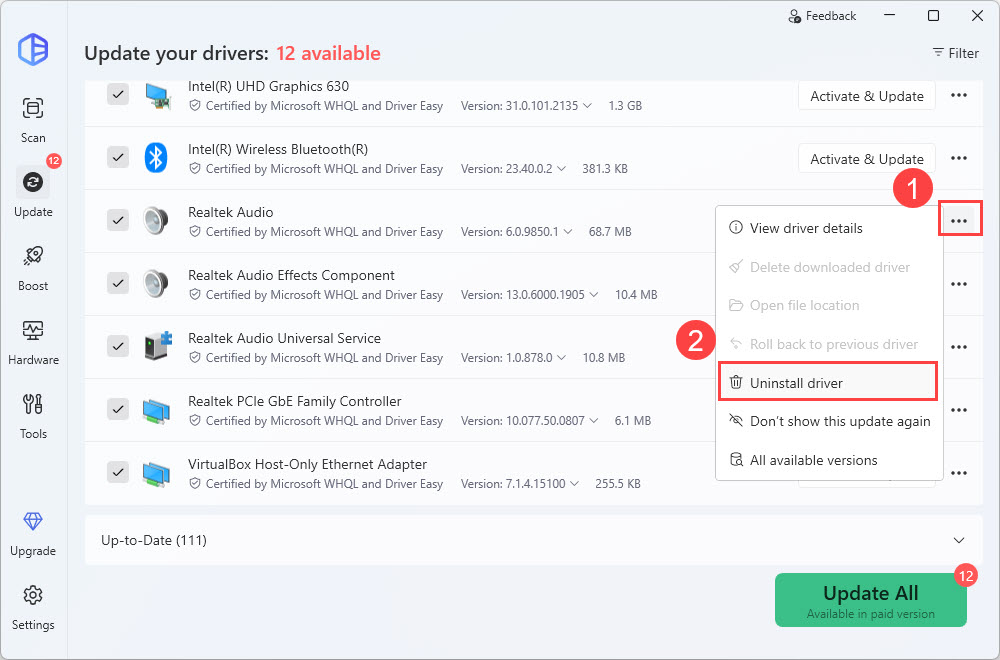
- Click the three dots icon next to an audio driver and select Uninstall driver (this requires the Pro version). Since replacing the old driver with a newer one may solve the audio issues, you can also choose to update all your drivers with one click to keep your PC drivers up-to-date.
Hopefully, you can reinstall the audio driver in Windows 10 with the above steps. If you have any questions, feel free to leave your comments down below.
