With the increasing demand for the telecommuting, it becomes obviously important to connect remotely. That’s where Remote Desktop connection comes in, so you can work from your home by remotely connecting to the office computers.
This post will show you something you should know about Remote Desktop, such as what is Remote Desktop, where is Remote Desktop in Windows and how to set it up.
What is Remote Desktop
The Remote Desktop Service is one of the Microsoft Windows services, which allows you to take control of a remote computer or virtual machine over a network connection.
To simple put, with Remote Desktop you can connect to other devices under the private network, then access to the files, applications and services on that device as you’re sitting in front of it.
The remote desktop connection is supported by most of the Windows versions:
- Windows 10 Enterprise
- Windows 10 Education
- Windows 8.1 Pro
- Windows 8.1 Enterprise
- Windows 8 Enterprise
- Windows 8 Pro
- Windows 7 Professional
- Windows 7 Enterprise
- Windows 7 Ultimate
- Windows Vista Business
- Windows Vista Ultimate
- Windows Vista Enterprise
- Windows XP Professional
With that being said, the Windows Home edition doesn’t support the remote desktop feature.
How to setup remote desktop connection in Windows 10
Since you’ve understand what the remote desktop is, now you can start to setup remote desktop connection in your Windows 10 computer.
Step 1: Allow remote access to your computer
To set up Remote Desktop on your computer, you’ll need to enable Remote Desktop feature on Windows computers. Here’s what you need to do:
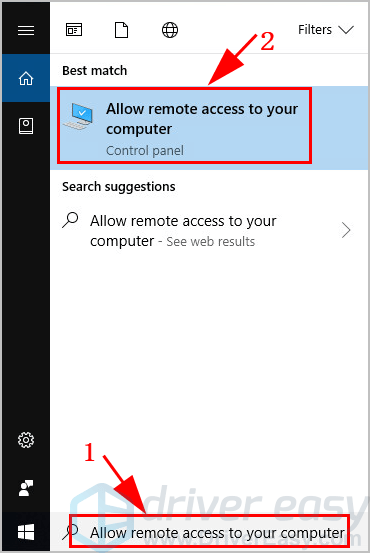
1) In the search box on your desktop, type “Allow remote access to your computer“, then click Allow remote access to your computer.
2) The System Properties pane pops up. Under the Remote tab, check the box next to Allow Remote Assistance connections to this computer.
Note: if you don’t see this settings, which usually happen to Windows 7 and early versions of Windows 10, you can download the Microsoft Remote Desktop Assistant, then install it in your computer.
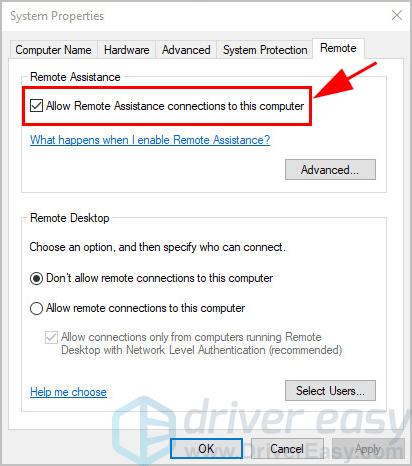
3) Under the Remote Desktop section, for Windows 7 users choose Allow connections from only from computers running Remote Desktop with Network Level Authentication (more secure).
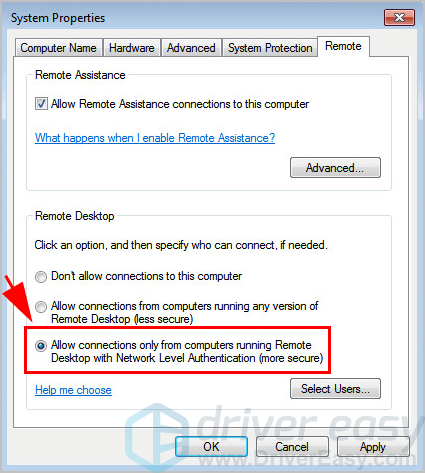
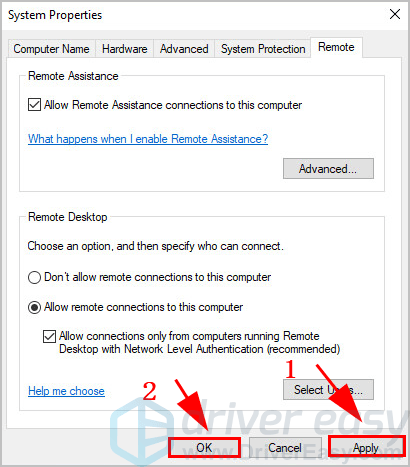
And for Windows 8.1 and Windows 10 users choose Allow remote connections to this computer, and check the box next to Allow connections only from computers running Remote Desktop with Network Level Authentication (recommended).

4) Click Apply and OK to save your changes.
Step 2: Set up Remote Desktop connection in your computer
Since you’ve enabled Remote Desktop in your computer, you can now start set up the remote desktop connection.
There are two options to set up Remote Desktop connection:
Option 1
If you want to establish the remote connection between Windows computers or laptops over the LAN network or the same domain, try these steps:
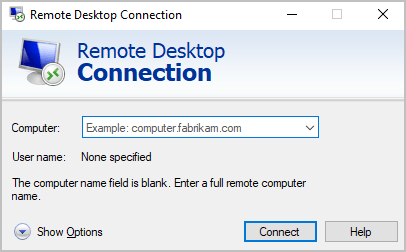
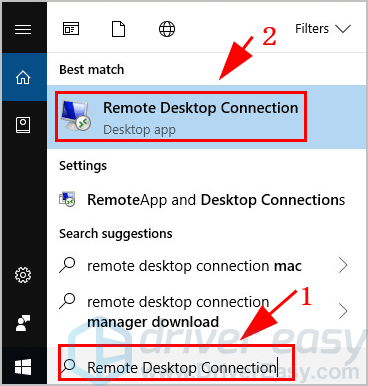
1) In the search box on your desktop that you want to remote connect from, Type “Remote Desktop Connection“, then click Remote Desktop Connection.
2) The application pops up. You should enter the full computer name or IP address of the computer that you want to connect to, then click Connect.

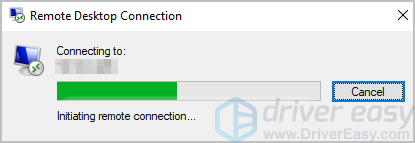
3) Remote Desktop Connection app will initialize the remote connection.
4) Enter the user account and password of that computer you want to connect to.
Then you should have connect successfully and be able to access to the content.
Option 2
If you want to remotely connect to a PC from almost anywhere, you’ll need to do it with the Microsoft Remote Desktop.
To do so:
1) Download the Remote Desktop client and install it in your computer.
2) Click Settings to fill in your information by clicking the + icon:
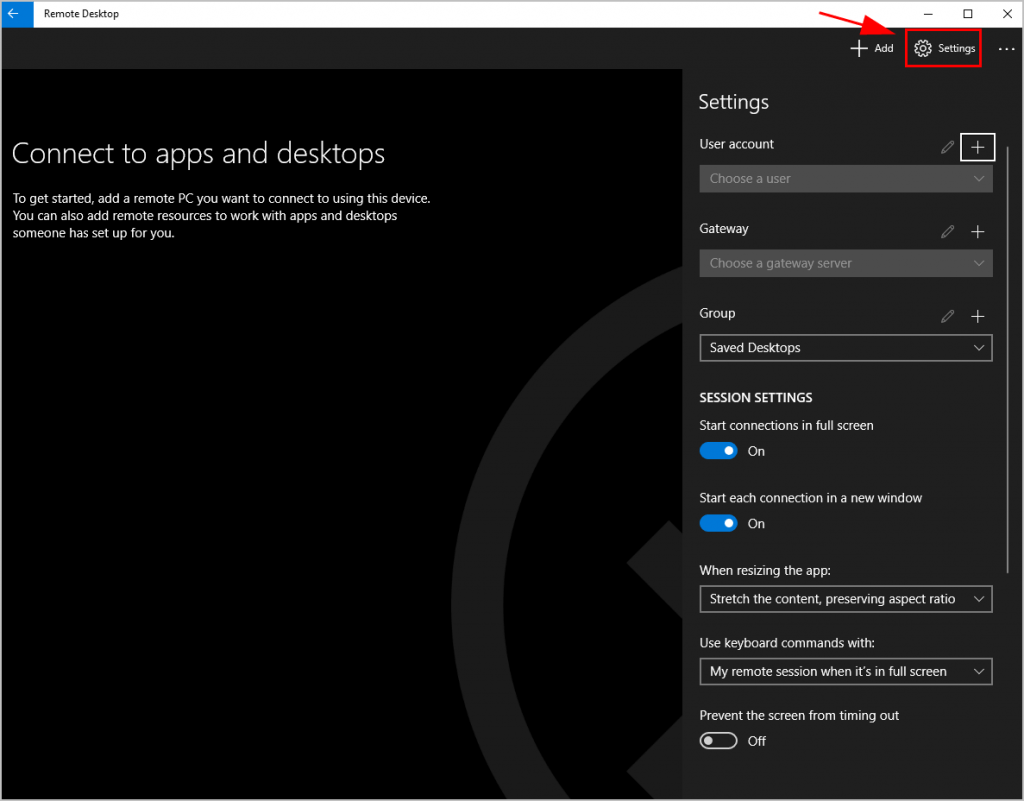
- User account: The user account to use to access the remote PC
- Gateway: You can get the information from your system admin.
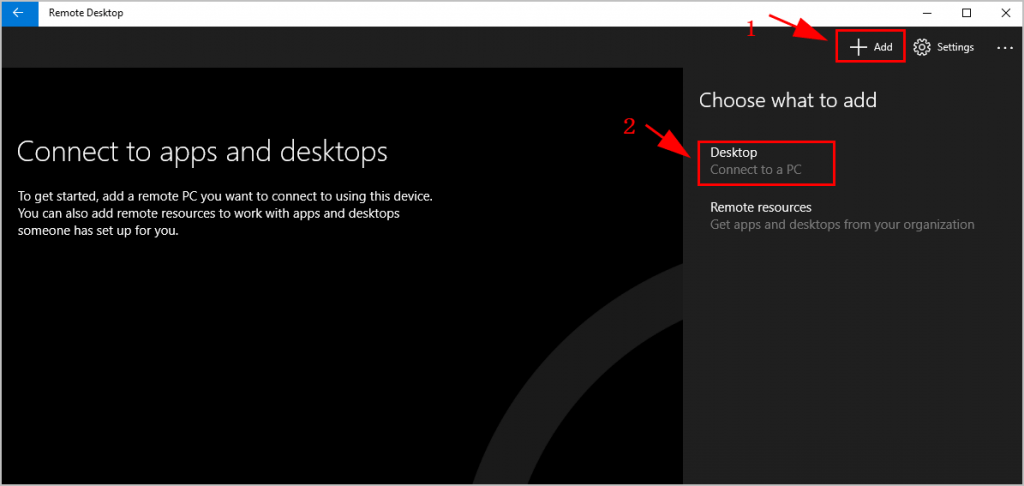
3) Launch the Remote Desktop client, and click Add on the upper right, then choose Desktop to connect remotely to a PC.
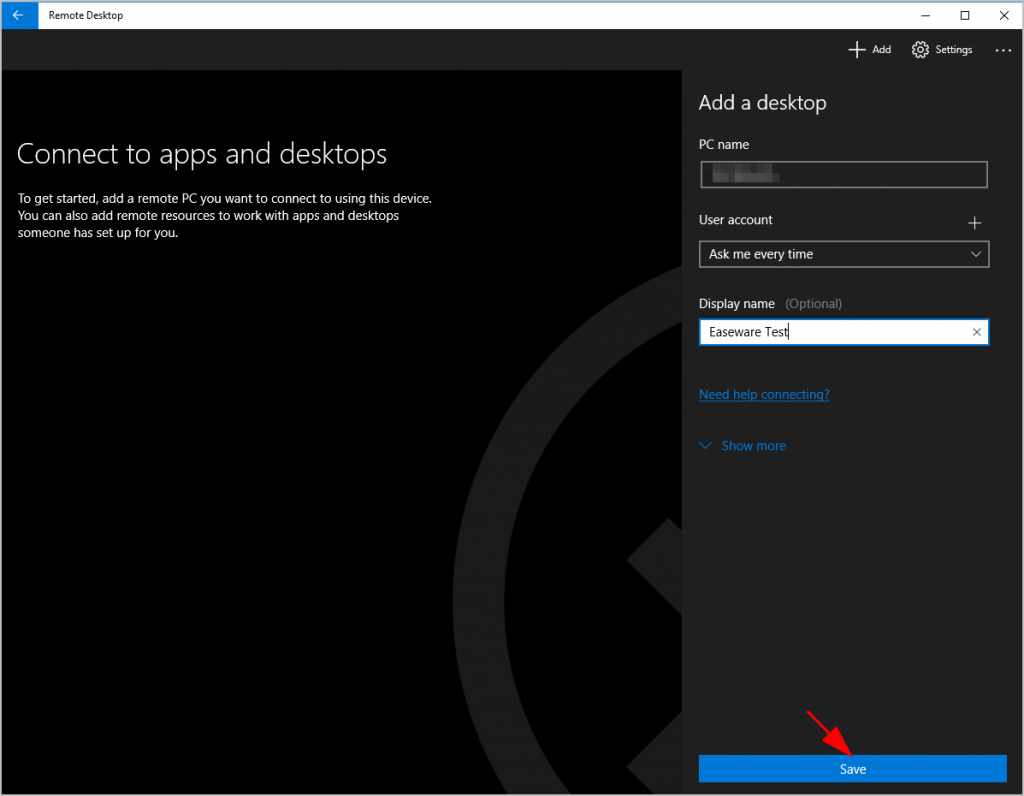
4) Enter the IP address or formal name of the computer that you want to remote connect to.

5) Choose Ask every time under the User account section.

6) Choose a Display name to easily remember for the connection. It’s optional.

7) Click Save.
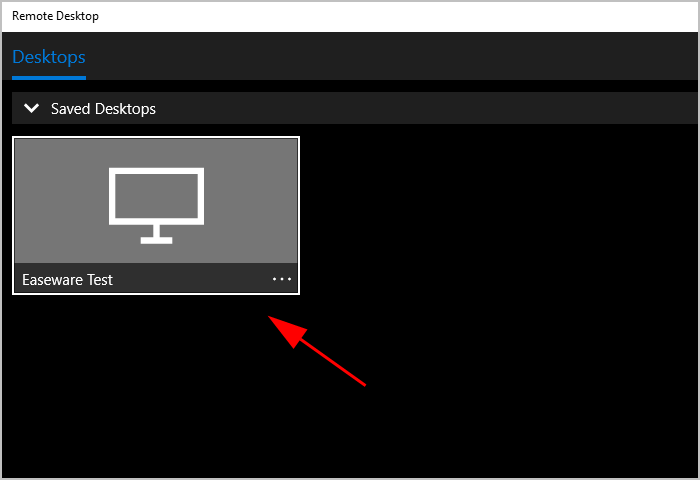
8) Then you’ll see the connection on the control panel on the left. Click the connection to connect.