


 OneDrive, many users choose it as their cloud storage software on Windows 10. If you also use OneDrive, you can find its entry on the left pane in File Explorer. But how if you want to remove OneDrive from File Explorer?
No worry! Go with the steps below, you can remove it quickly and easily.
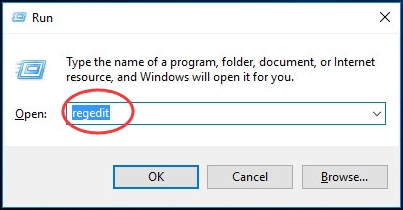
1) Open Run dialog box by hit Win + R (Windows logo key + R key) at the same time.
Then type regedit in the box and hit Enter.
OneDrive, many users choose it as their cloud storage software on Windows 10. If you also use OneDrive, you can find its entry on the left pane in File Explorer. But how if you want to remove OneDrive from File Explorer?
No worry! Go with the steps below, you can remove it quickly and easily.
1) Open Run dialog box by hit Win + R (Windows logo key + R key) at the same time.
Then type regedit in the box and hit Enter.
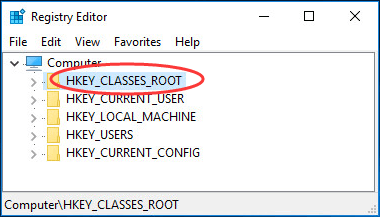
 Click Yes when prompted by UAC (User Account Control).
2) Click HKEY_CLASSES_ROOT on left pane.
Click Yes when prompted by UAC (User Account Control).
2) Click HKEY_CLASSES_ROOT on left pane.
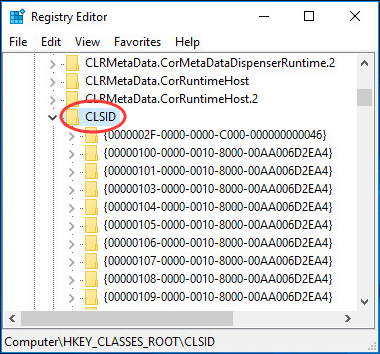
 2) Scroll down to find and click CLSID.
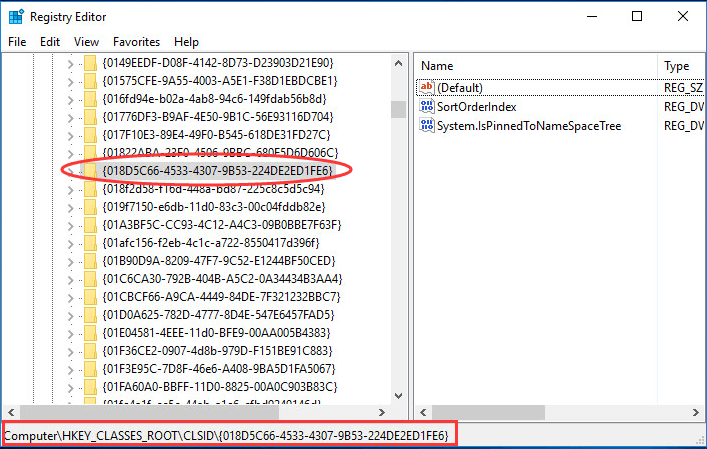
 3) Scroll down to find and click {018D5C66-4533-4307-9B53-224DE2ED1FE6}.
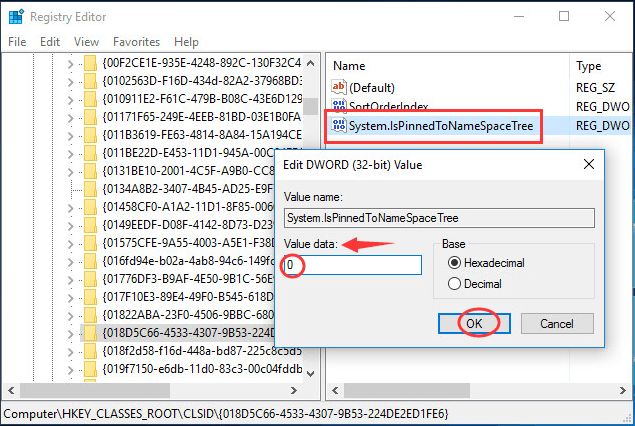
 4) Double-click System.IsPinnedToNameSpaceTree on the right pane.
Then change the value data from 1 to 0.
Click OK and close Registry Editor window.
4) Double-click System.IsPinnedToNameSpaceTree on the right pane.
Then change the value data from 1 to 0.
Click OK and close Registry Editor window.
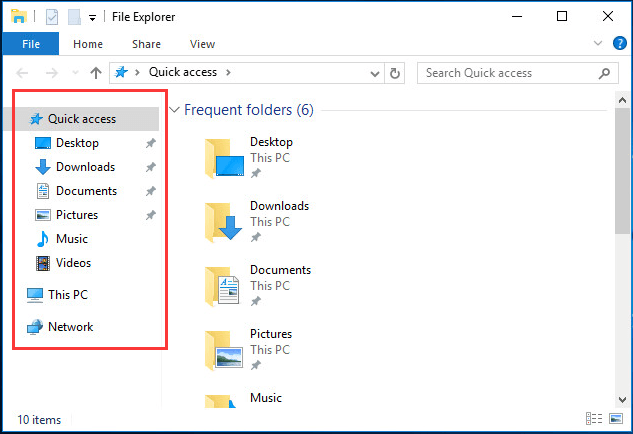
 Now you can find OneDrive is removed from File Explorer.
 Note: If you want to get OneDrive back to File Explorer, just follow the same steps above, and set the value data to be 1.
Have a try now! And leave a comment below if you have any questions.
Note: If you want to get OneDrive back to File Explorer, just follow the same steps above, and set the value data to be 1.
Have a try now! And leave a comment below if you have any questions.
6
6 people found this helpful
1 Comment
Most Voted