


A slow laptop can always drive you nuts, especially when you’re in a hurry. But there’s no need to worry too much (unless you’re using a brand new machine) because every computer – whether it’s a laptop or desktop – has a tendency to slow down over time. The only meaningful course is to maintain your computer on a regular basis so that it can run smooth for as long as possible, namely extending its life span.
If you’re a user of Dell laptop and it’s running extremely slow, this tutorial will guide you through how to fix this irritating problem. Before you take your laptop to a local computer repair shop or simply purchase a new one, why not try out the several fixes below? They won’t take you much time and more importantly, may be able to save you a fortune. OK, enough intro. Let’s dig in.
11 Fixes to try…
Here’s a list of fixes that have proved useful to many Dell laptop users. We recommend you try all of the first 9, even if you start seeing performance improvements right after finishing number 1. They should all help. Treat numbers 10 and 11 as a last resort – do them if nothing else works.
Fix 1: Close resource-hungry programs
Fix 2: Disable startup programs
Fix 3: Turn off unnecessary animations
Fix 4: Run a full scan for viruses
Fix 5: Update your device drivers
Fix 6: Uninstall unwanted programs
Fix 7: Clear temporary/junk files
Fix 8: Increase your virtual memory
Fix 9: Verify the integrity of your hard disk
Fix 10: Reinstall your Windows system
Fix 11: Upgrade your hardware devices
Fix 1: Close resource-hungry programs
If you have too many programs open at the same time, that will definitely slow down your computer. Usually you’ll get direct knowledge of which programs are now eating up your resource via Task Manage – a built-in tool of Windows that displays all the running processes (tasks) and their system resource usage directly relating to performance. Here’s how:
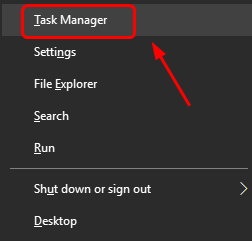
1) On your keyboard, press the Windows logo key and X at the same time, then click Task Manager.
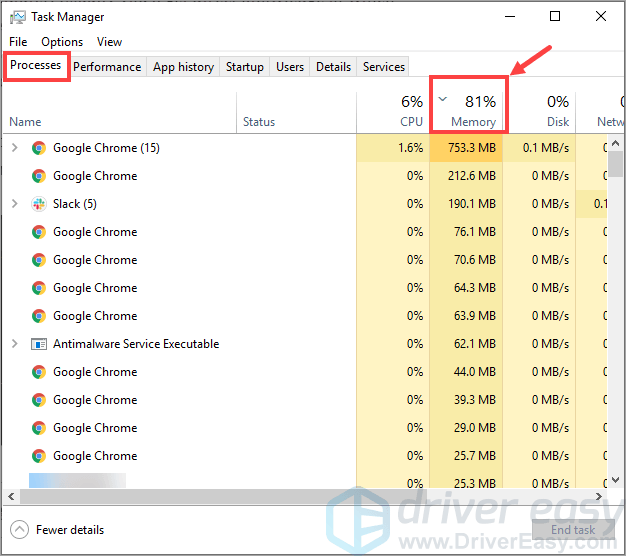
2) In the Task Manager window, on the Processes tab, click the Memory column header to sort the programs by memory usage. You can also click CPU and Disk respectively to view the state of CPU and disk usage.
3) After finding out the programs that are hogging your system resource, you should shut them down completely to speed up the laptop unless you need them.
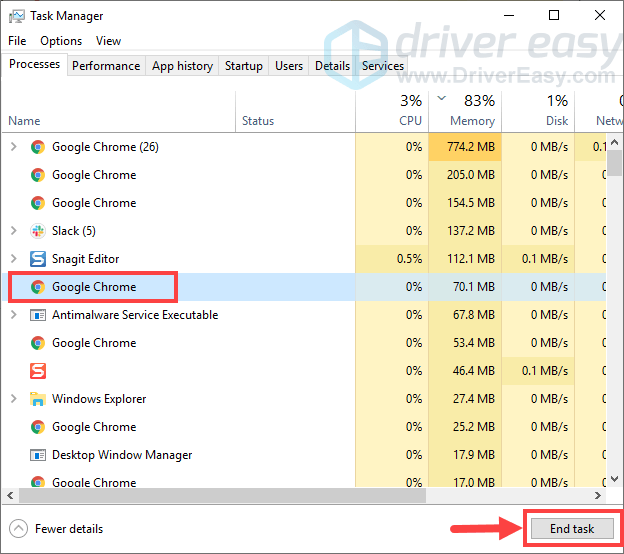
To close a program via Task Manager, simply select it and click End task. (If it’s a program you’re using, e.g. Microsoft Word, make sure you save any unsaved work first.)
Fix 2: Disable startup programs
Some of the modern applications installed on your PC may have been set to start when Windows launches, which significantly slows down the boot time of your Dell laptop. If that’s indeed the problem for you, you should check whether there’re too many start-up programs and disable them if possible. Here’re the steps:
1) On your keyboard, press the Windows logo key and X at the same time, then click Task Manager.
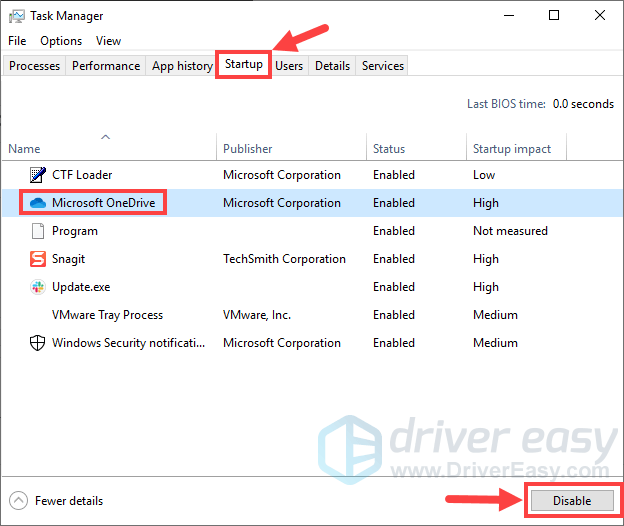
2) In the Task Manager window, on the Startup tab, select the program you don’t want to start when Windows boots, then click Disable. Also remember not to disable any unfamiliar programs.
After you prevent those unwanted programs from running on startup, your Dell laptop should boot much faster than before. Go and check it!
Fix 3: Turn off unnecessary animations
Visual effects such as animated windows and fading menus may look great, but they can also slow down your Dell laptop, especially if it has limited RAM. Fortunately, you can easily turn off these animations:
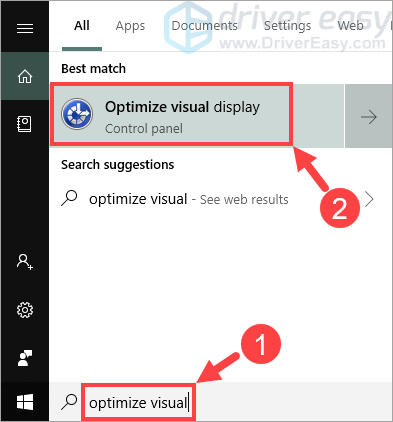
1) On your keyboard, press the Windows logo key and S at the same time. Type optimize visual and click Optimize visual display.
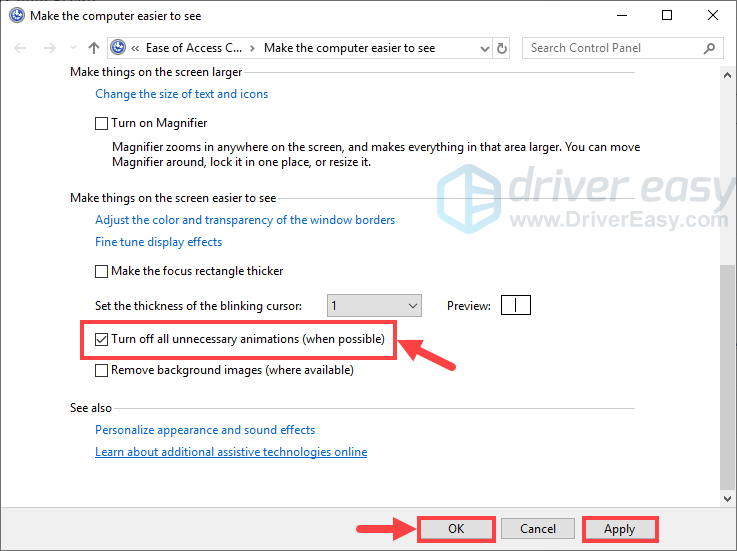
2) Scroll down until you’ve found this check box – Turn off all unnecessary animations (when possible). Make sure you select this option and click Apply > OK.
Fix 4: Run a full scan for viruses
If your Dell laptop has been infected by viruses or malware, not only will it be exposed to great security risk but also slow to a crawl. To find out whether it’s the viruses/malware that caused you trouble, you should run a full scan with your antivirus software.
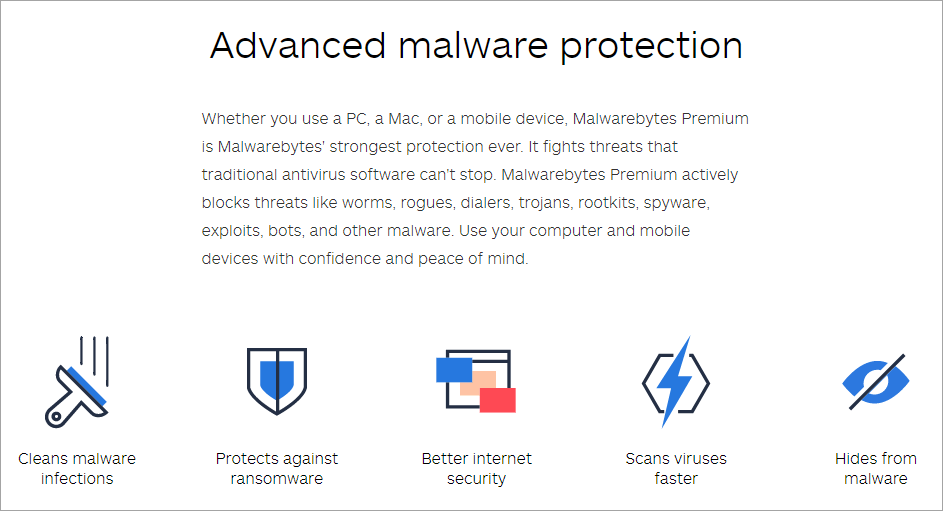
In case you don’t have an antivirus except Windows Defender, we recommend using Malwarebytes to safeguard your Dell laptop. It can block malware, hackers, viruses, ransomware, and malicious websites that traditional antivirus isn’t smart enough to stop. If you’re interested in the benefits of Malwarebytes, click here to visit its official website!
Also, you shouldn’t install more than one antivirus program on your computer because there may be a confliction between the different antivirus programs, effectively weakening your defenses against viruses and malware. It’s just too much of a good thing.
Fix 5: Update your device drivers
Out-dated drivers will also render your Dell laptop slow. If you’re not sure whether all your device drivers (e.g. CPU, video card, network card, sound card) are up to date, you should check.
You can do this in Windows Device Manager, one device at a time. But this takes a lot of time and patience, and if any of your drivers do happen to be out of date, you’ll need to manually update them, which is difficult and risky. If you don’t have the time, patience or computer skills to update your device drivers manually, you can do it automatically with Driver Easy.
Driver Easy will automatically recognize your system and find the correct drivers for it. You don’t need to know exactly what system your computer is running, you don’t need to risk downloading and installing the wrong driver, and you don’t need to worry about making a mistake when installing. Driver Easy takes care of everything.
You can update your drivers automatically with either the FREE or the Pro version of Driver Easy. But with the Pro version it takes just 2 clicks:
1) Download and install Driver Easy.
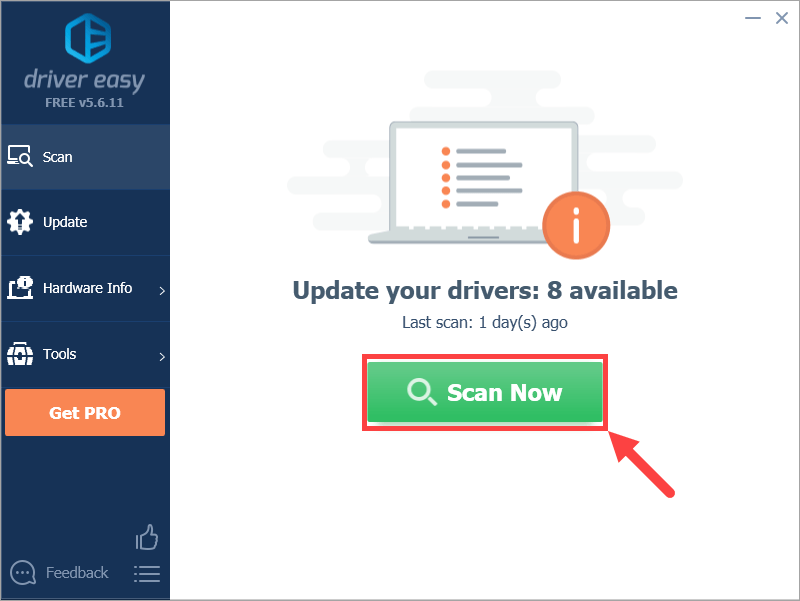
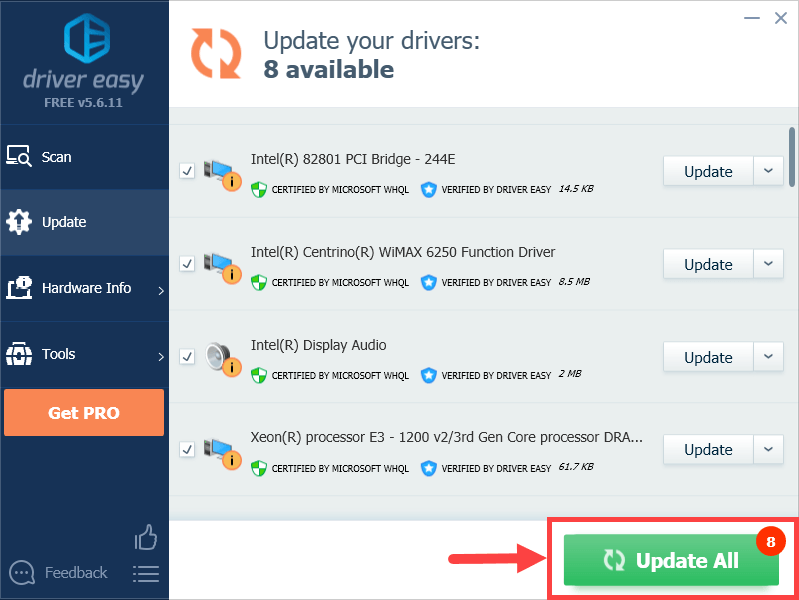
2) Run Driver Easy and click the Scan Now button. Driver Easy will then scan your computer and detect any problem drivers.
3) Click the Update button next to a flagged driver to automatically download the correct version of that driver, then you can manually install it (you can do this with the FREE version).
Or click Update All to automatically download and install the correct version of all the drivers that are missing or out of date on your system. (This requires the Pro version which comes with full support and a 30-day money back guarantee. You’ll be prompted to upgrade when you click Update All.)
Fix 6: Uninstall unwanted programs
If your computer is running out of storage or memory, it will have limited processing power to deal with multiple tasks at one time, hence getting really slow as you try to open one or more programs. Just make sure your Dell laptop has enough storage/memory when you decide to install a new app. If you spot too many unneeded programs, you should uninstall them using the following procedure:
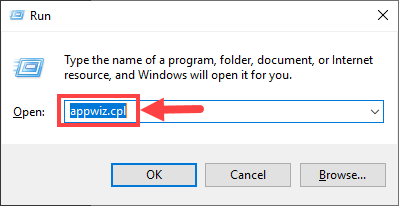
1) On your keyboard, press the Windows logo key and R at the same time. Type appwiz.cpl and press Enter.
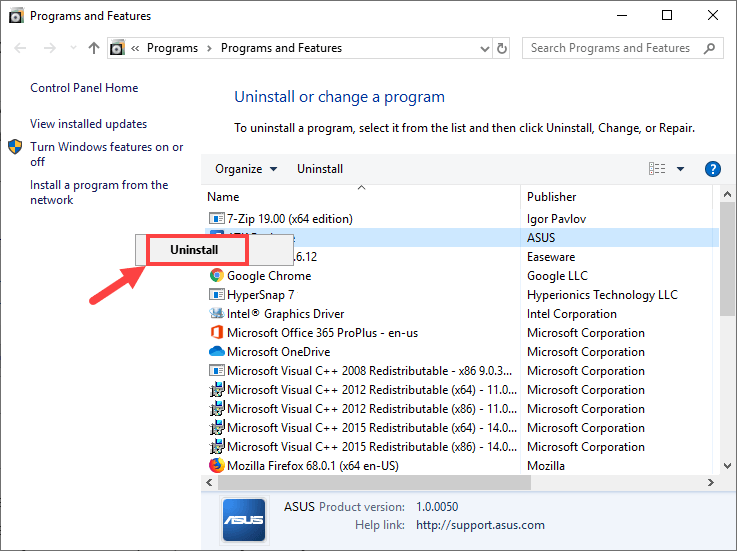
2) In Programs and Features, right-click on the program that you want to uninstall and click Uninstall.
3) Repeat the steps above to uninstall all the unnecessary apps installed on your laptop.
Fix 7: Clear temporary/junk files
Lots of people don’t have the habit of clearing temporary and junk files in their computers periodically. However, these files can be the culprits that caused your Dell laptop to slow down so you should remove them from your computer right away.
There’re two ways you can clear your temporary and junk files:
Option 1 – Automatically (Recommended) – This is the quickest and easiest option. It’s all done with just a couple of mouse clicks – easy even if you’re a computer newbie.
Option 2 – Manually – You’ll need some computer skills and patience to clean up the files this way. Besides, this option may not be comprehensive enough to cover every temp/junk file you should delete.
Option 1 – Automatically clear the temporary/junk files
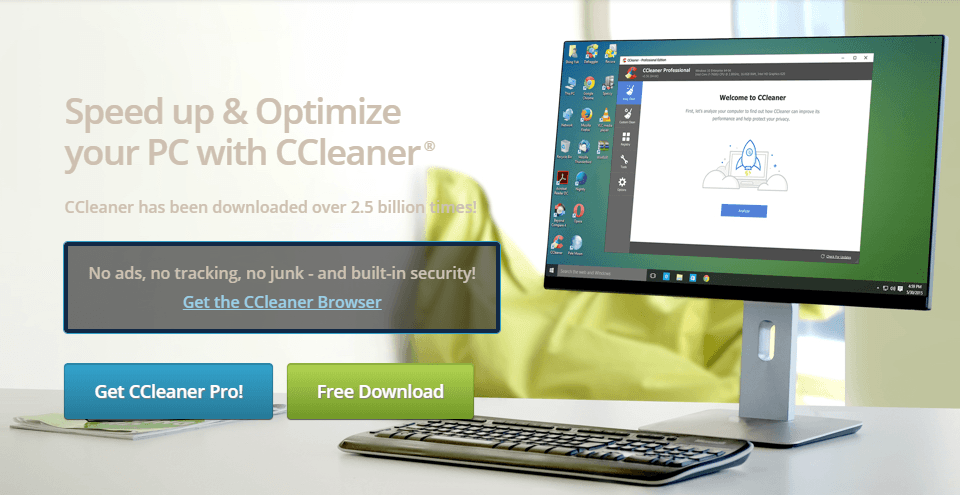
Sometimes it’s rather time-consuming and error-prone to clear useless files (such as computer cache) in your Dell laptop. You may have to spend much time locating and removing them, or risk deleting the wrong files. In this case, we strongly recommend CCleaner to you – a powerful and reliable utility that helps you clean potentially unwanted files and invalid Windows Registry entries from the computer. A few simple clicks is all it takes to do a sweep of your laptop and resolve any problems found.
To clear computer cache with CCleaner, here’re the steps:
1) Download and install CCleaner.
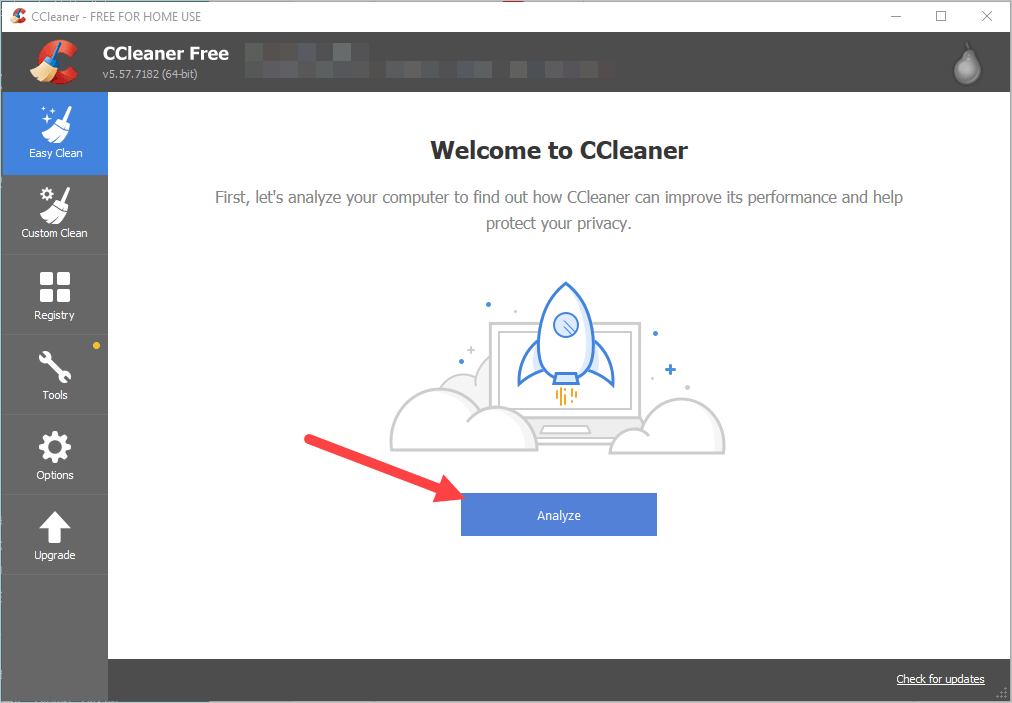
2) Run CCleaner, then click Analyze.
3) Click Clean All.

Now the cached files in your laptop should have been removed.
CCleaner also has quite a few features in addition to clearing temp/junk files, so if you want to make the most of it, go on to explore more about this app!
Option 2 – Manually clear the temporary/junk files
To get rid of the temp/junk files manually, you should perform the following procedure:
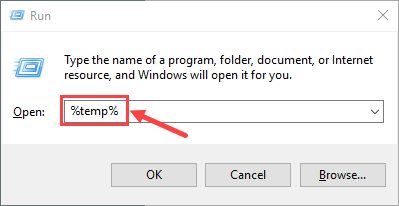
1) On your keyboard, press the Windows logo key and R at the same time to invoke the Run dialog box. Type in %temp% and hit Enter.
When Windows asks for permission, click Continue to open the folder.
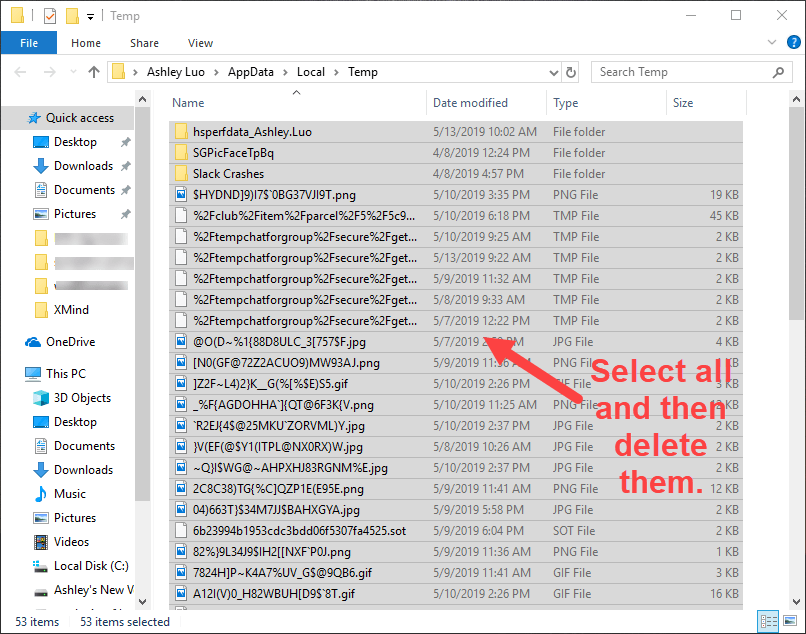
2) Press Ctrl + A to select all the files. Then hit the Delete button on your keyboard. (This won’t affect your personal files.)
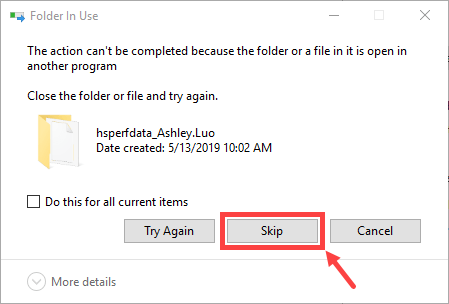
3) Click Skip if you’re presented with a notification that says “the folder or a file in it is open in another program.”
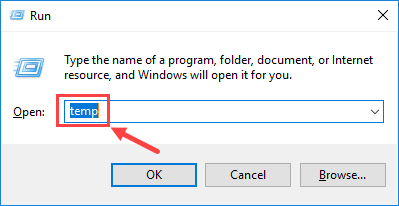
4) On your keyboard, press the Windows logo key and R at the same time to invoke the Run dialog box again. Type in temp and hit Enter.
If prompted about permission, click Continue to open the folder.
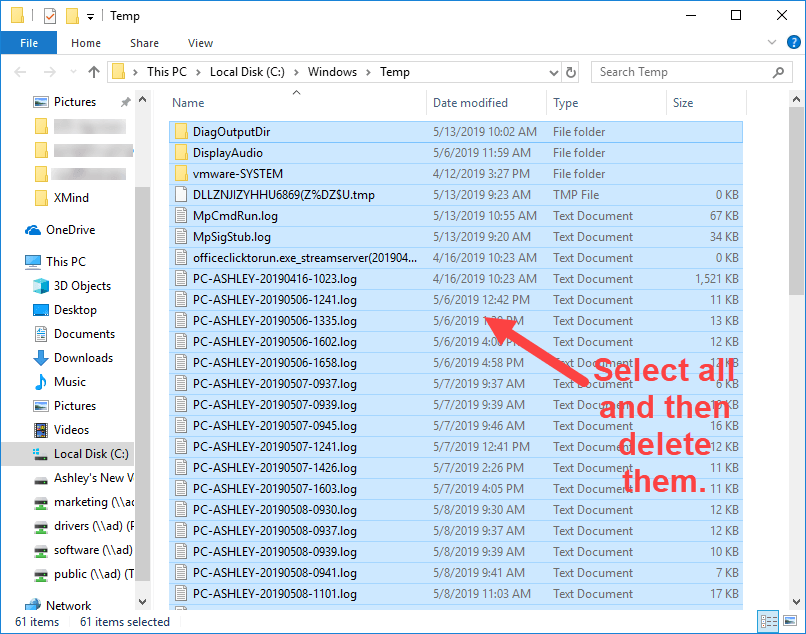
5) Select all the files and delete them. (This won’t affect your personal files.)
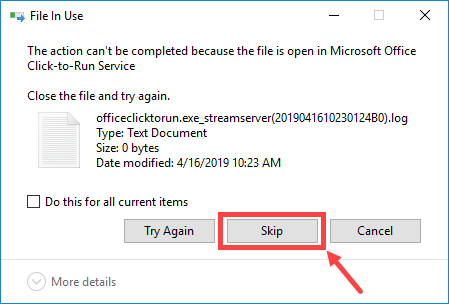
6) Click Skip if you’re presented with a notification that says “the folder or a file in it is open in another program.”
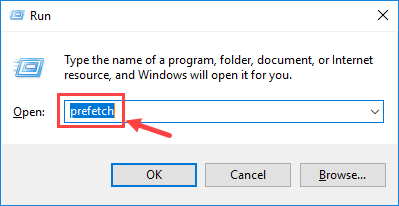
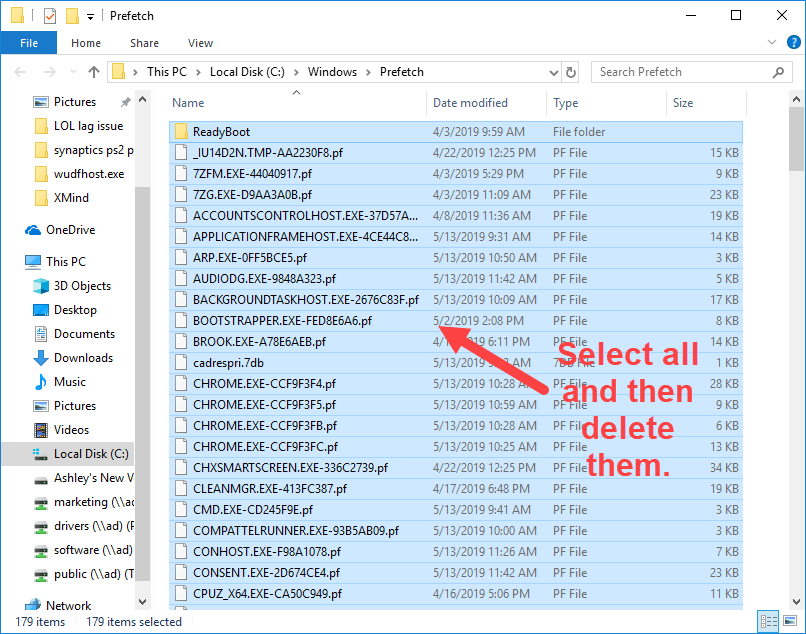
7) On your keyboard, press the Windows logo key and R at the same time to invoke the Run dialog box again. Type in prefetch and hit Enter.
If prompted about permission, click Continue to open the folder.
8) Select all the files and delete them. (This won’t affect your personal files.)
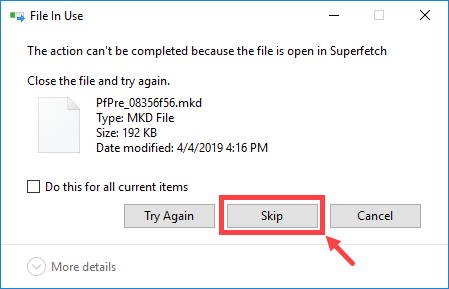
9) Click Skip if you’re presented with a message that says “the folder or a file in it is open in another program.”
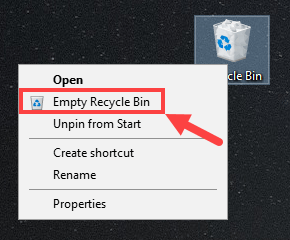
10) After sweeping all the temporary/junk files off your laptop, right-click on the Recycle Bin and select Empty Recycle Bin.
Fix 8: Increase your virtual memory
If your Dell laptop is running slow, adding more virtual memory can help speed it up. Virtual memory supplements the physical RAM installed on your computer, so you don’t run out of memory as often. This makes accessing files and programs faster.
To add more virtual memory, follow these steps:
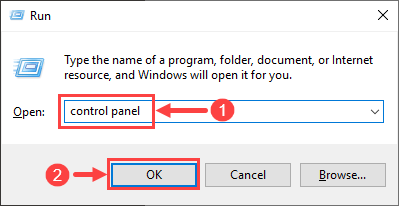
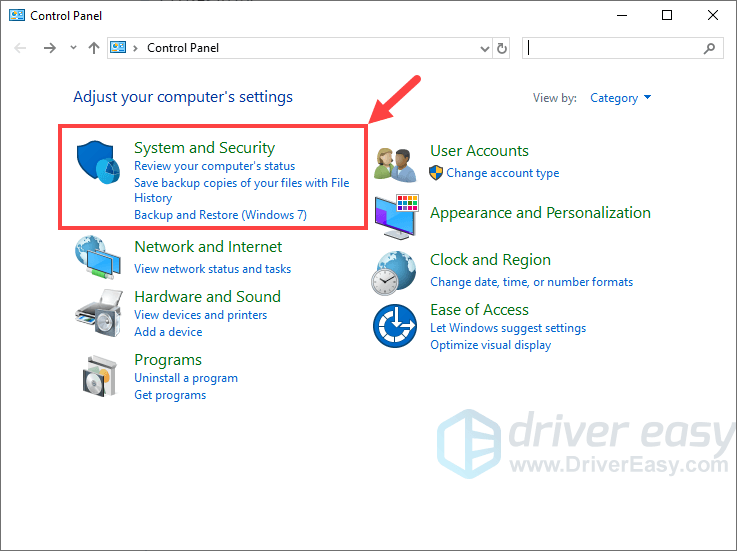
1) On your keyboard, press the Windows logo key and R at the same time to open the Run dialog box. Type control panel and click OK.
2) Click System and Security.
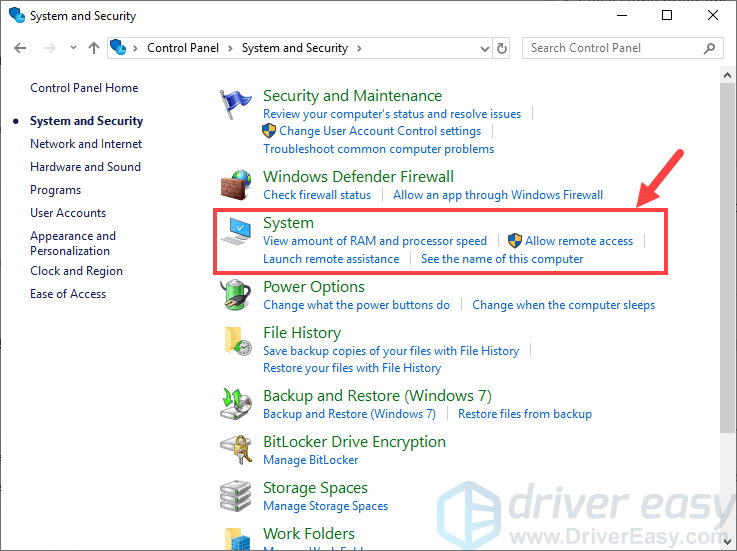
3) Click System.
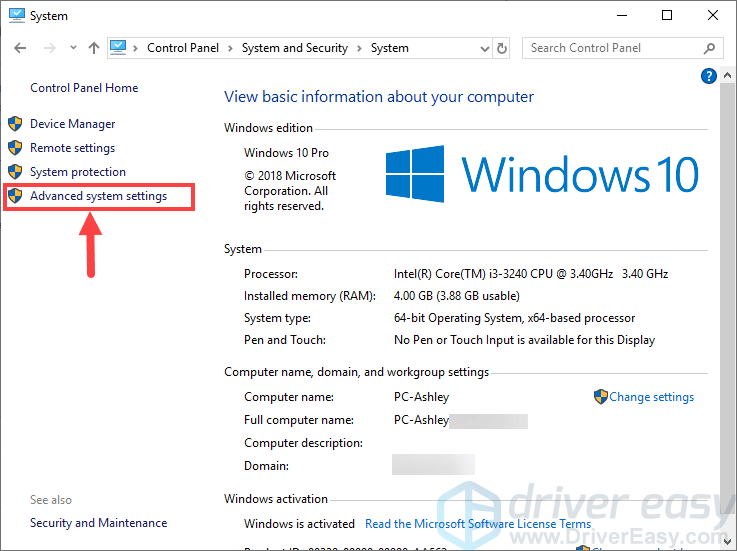
4) In the left pane, click Advanced system settings.
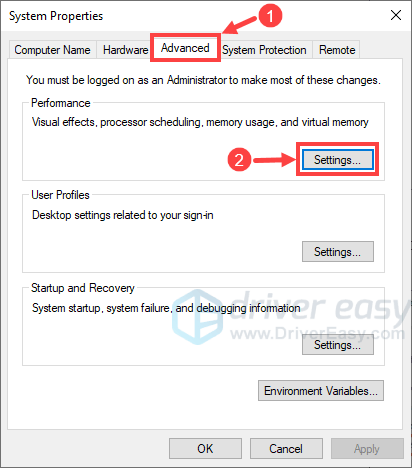
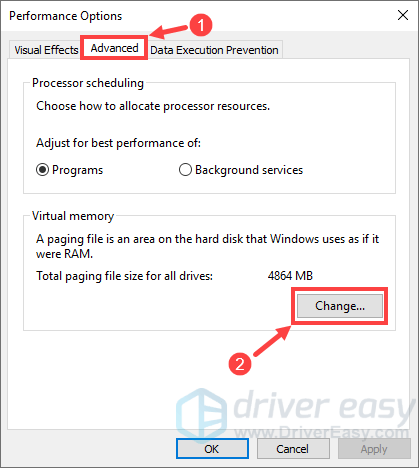
5) On the Advanced tab, click Settings in the Performance section.
6) Go to the Advanced tab, and click Change….
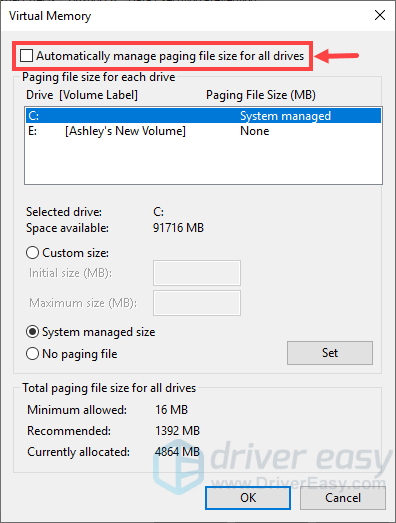
7) Make sure you uncheck Automatically manage paging file size for all drivers.
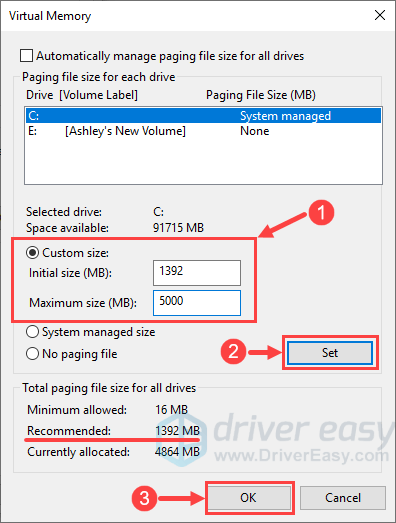
8) Select your Windows drive (the hard drive or partition that has Windows installed on it – usually C:), then click Custom size and enter an Initial size and Maximum size for your virtual memory:
- Initial size – This value varies, depending on your computer. If you’re not sure what value to use, just enter whatever the number is in the Recommended category.
- Maximum size – Don’t set this value too high. It should be about 1.5 times the size of your physical RAM. e.g. A PC with 4 GB (4096 MB) of RAM should have no more than about 6,144 MB virtual memory (4096 MB x 1.5).
Once you’ve entered your virtual memory values, click Set and then OK.
9) Reboot your Dell laptop for the changes to be fully implemented.
Fix 9: Verify the integrity of your hard disk
As your hard disk is aging over time, it’ll be more likely to develop faults and errors in its file system that slow down the Dell laptop. To pinpoint and fix the problems for your disk, you should perform the following steps:
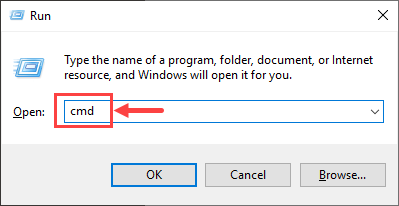
1) On your keyboard, press the Windows logo key and R simultaneously to invoke the Run dialog box. Type in cmd and then press Ctrl+Shift+Enter on your keyboard to open the elevated command prompt.
When Windows asks for permission, click Yes.
2) In the black window, type chkdsk and press Enter. The disk scan will then start.
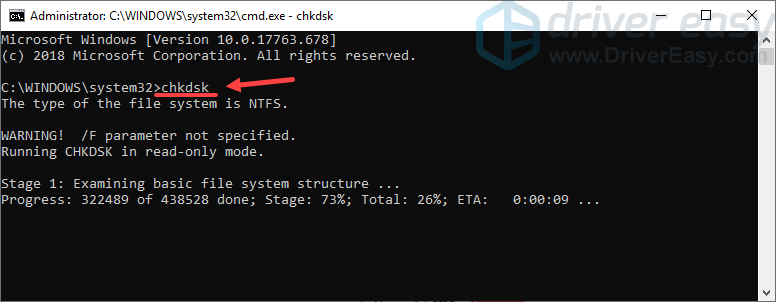
3) Wait for the scan to be complete. If it has actually detected any problem, you should probably consider replacing your hard disk.
Fix 10: Reinstall your Windows system
If none of the fixes above worked out, then perhaps you should reinstall your Windows operating system. However, there’s a lot of hassle for a novice computer user to perform the whole reinstall alone. In case you don’t have the necessary skills, contact a local technician for assistance.
You can either reset your Windows system or perform a clean install:
Resetting Windows will revert your system to its initial state as if it’s your first time to turn on the computer. It removes all the apps that didn’t come with your PC, but you can decide whether to retain your personal data or not. Besides, you don’t need any external storage devices to perform the resetting, because Windows will complete the whole process by itself.
A clean install of Windows will erase everything (including all the apps you installed and your personal data) from the drive where your system is installed. You need an external storage device, e.g. a USB drive, to perform the clean install. Compared with the above option, clean install seems more complex, yet more impactful.
Listed below are some useful articles that teach you how to reset or reinstall Windows 10 step by step:
- To reset your PC, please refer to:
https://www.drivereasy.com/knowledge/how-to-reinstall-reset-windows-10-the-easy-way/ - To perform a clean install of Windows 10, please refer to:
https://www.drivereasy.com/knowledge/how-to-do-a-clean-install-of-windows-10-quickly-and-easily/
To view more details about how to reset/clean install Windows 10, you can take a look at this post from Microsoft Support.
Fix 11: Upgrade your hardware devices
The last thing you can do other than purchasing a new computer is to upgrade some hardware. For example, if your Dell laptop is still using hard disk drive (HDD), consider replacing it with a solid-state drive (SSD) which will significantly speed up your machine.
However, such replacements seem way too hard for a computer newbie to carry out so if you don’t have much interest in learning some expertise, you should probably contact your local computer repair shop or consultant for assistance.
Hopefully this post helped you resolve your Dell laptop slow issue. If you have any follow-up questions or ideas, please feel free to leave a comment below. Thanks for reading!
Featured image by Lisa Fotios from Pexels.