


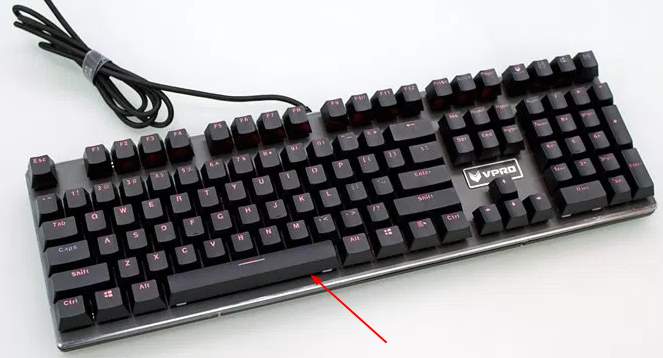
The backspace key on your keyboard just now stops working. You can’t make any backspace now. I totally understand how frustrated you’re cause I also encountered this problem before. But don’t worry, you CAN fix this problem.
Here’re 3 easy and quick solutions you can try to fix this problem. You may not have to try them all; just work your way down the list until you fix your problem.
Solution 1: Turn off the Sticky Keys and the Filter Keys feature
Solution 2: Reinstall your keyboard
Solution 3: Update your keyboard driver [Recommended]
Solution 1: Turn off the Sticky Keys and the Filter Keys feature
Sticky Keys and Filter keys are two accessibility functions in the Windows operating system. Sticky Keys allows you to press one key at a time for keyboard shortcuts; Filter Keys tells the keyboard to ignore your brief or repeated keystrokes. If these two keyboard functions are enabled, sometimes your backspace key cannot work fine.
Follow these steps to turn off these two features to get your backspace to work again:
Window 10
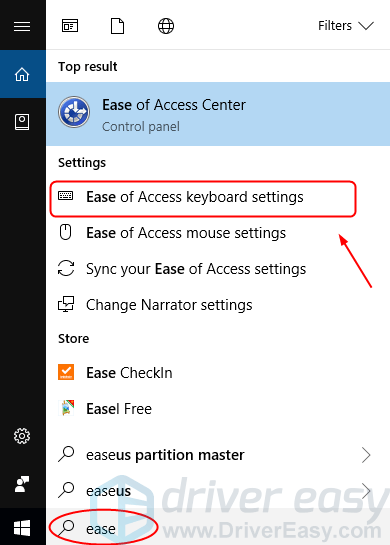
1) Type ease in the search box from Start. Then click Ease of Access keyboard settings.
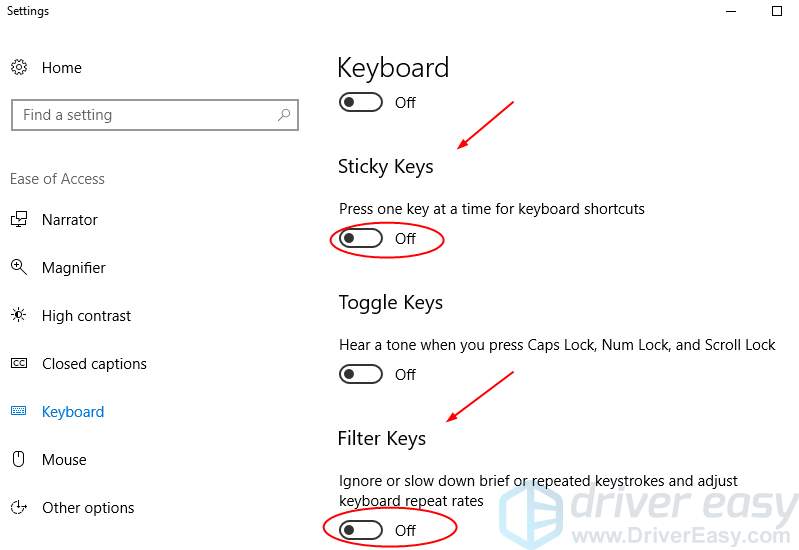
2) Make sure the status of Sticky Keys and Filter Keys are all set to Off. If you see On, switch to Off.
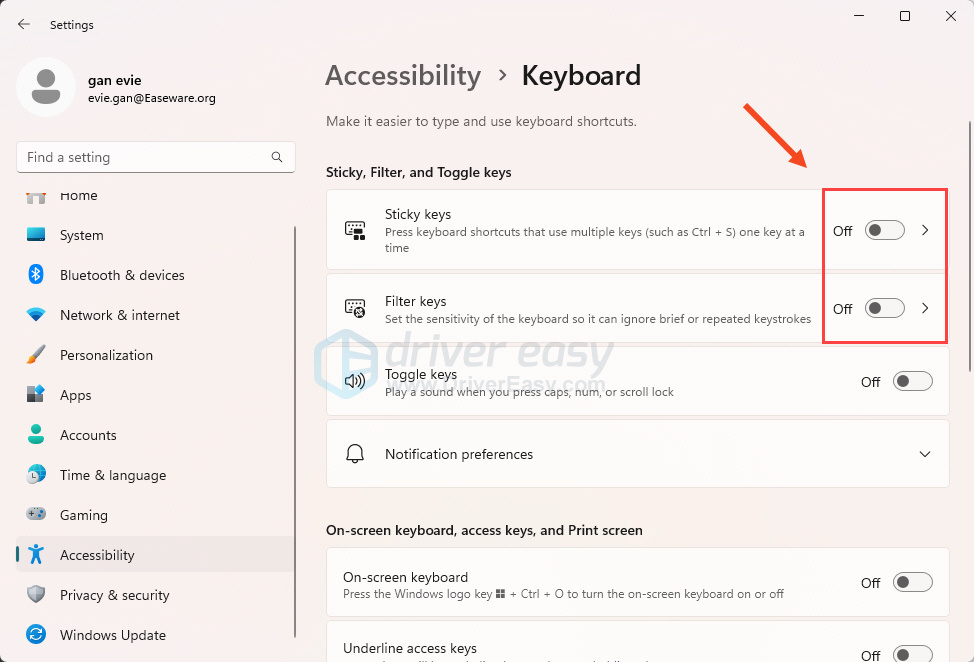
Windows 11
- Press the Windows logo key and R simultaneously to open Settings.
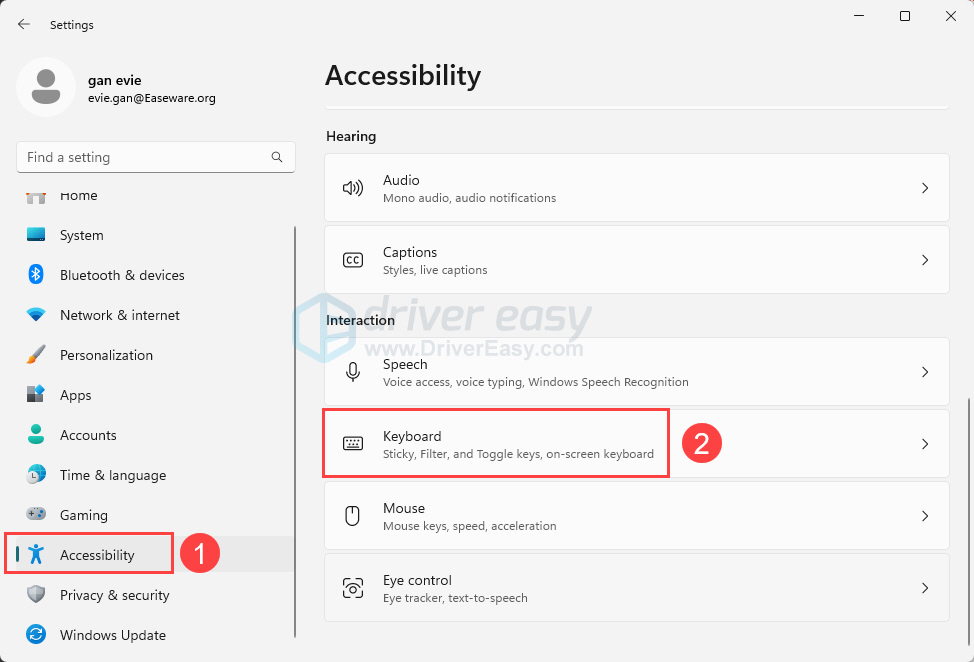
- Select Accessibility on the left panel, then scroll down the list on the right and click Keyboard under the Interaction section.
- Under the Sticky, Filter, and Toggle keys section, make sure the status of Sticky Keys and Filter Keys are all set to Off. If you see On, switch to Off.
Your backspace key should work now. Check to see if it works. If unfortunately not, please try the next solution.
Solution 2: Reinstall your keyboard
The corrupted connection between your keyboard and your Windows operating system could also make the backspace key stop working. You can reinstall your keyboard to solve it.
Follow these:
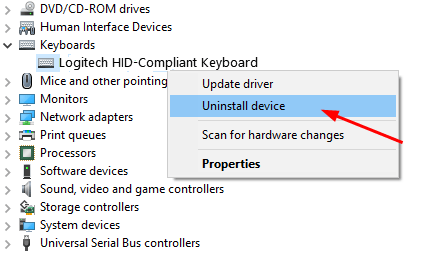
1) On your keyboard, press the Windows logo key ![]() and R at the same time to invoke the Run box.
and R at the same time to invoke the Run box.
2) Type devmgmt.msc and press Enter.

3) Right-click on your keyboard software in the Keyboards section. Then click Uninstall device.
4) Reboot your computer; Windows should then reinstall your keyboard automatically. Then check to see if your backspace key works.
Solution 3: Update your keyboard driver
The solutions above could solve your problem, but if they don’t, please update your keyboard driver. Because a corrupted, wrong or missing keyboard driver could make your backspace key not function.
You can download the latest keyboard driver from your keyboard manufacturer’s website or from your computer manufacturer’s website. If you have no time, no patience, or if you are not computer savvy, let Driver Easy help you then. With its help, you can say goodbye to driver headaches and delays forever.
Driver Easy will automatically recognize your system and find the correct drivers for it. You don’t need to know exactly what system your computer is running, you don’t need to risk downloading and installing the wrong driver, and you don’t need to worry about making a mistake when installing.
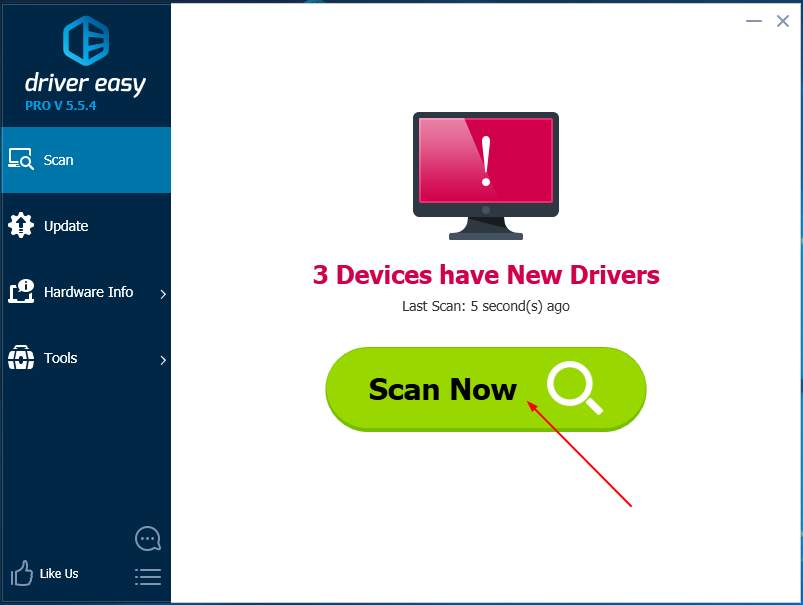
1) Download and install Driver Easy. Then run it on your Windows.
2) Click Scan Now. All driver problems of your computer would be detected in less than 1 min. Your keyboard driver is no exception.
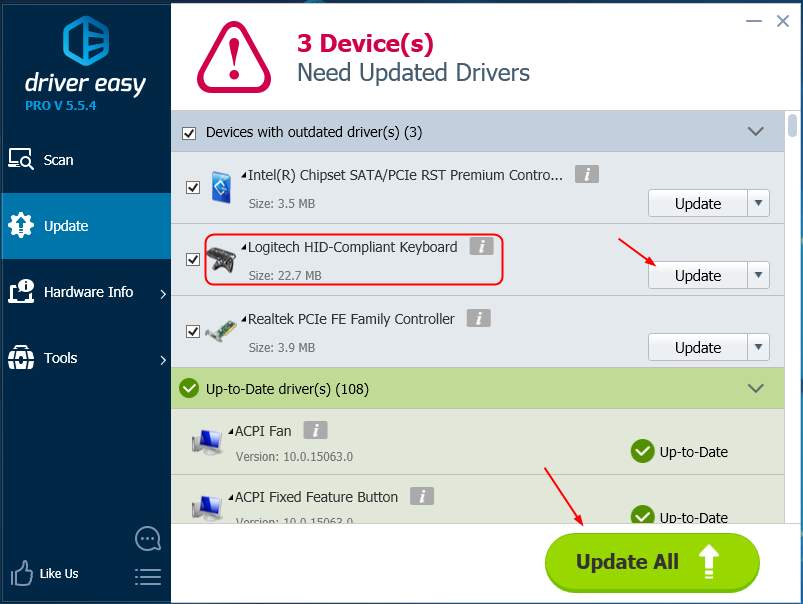
3) If you try the Free version, click Update next to your flagged keyboard driver to automatically download and install the correct version of this driver.
Or if you use the Pro version, click Update All to automatically download and install the correct version of all the drivers that are missing or out of date on your system.
4) Reboot your computer and check to see if your backspace key works.