


Auto-pilot for all your passwords
Access and manage your digital life from anywhere, on any device.
The auto sign-in feature of Google Chrome has brought great convenience to its users. With this handy tool, you’ll be able to sign in to websites using stored passwords – completely free from the complex mix of numbers and letters needed to be remembered in the old days. However, Chrome may sometimes run into glitches and stop the feature from functioning properly. If that’s your problem, please read on and find possible solutions for yourself.
How to fix Chrome not saving passwords
Here’re a few fixes that have helped other users solve their problems. You don’t have to try them all; just work your own way down and list until you find the one that works like a charm.
Fix 1: Log in and out of your Google account
This is a quick fix for you when there are no other solutions in sight. Simply log out of your Google account (supposing you have already logged in) and then log back in. If it works for you, that probably suggests you’re just having a hiccup in Chrome. No big deal.
If you are not sure how to sign out of your account, here are the steps:
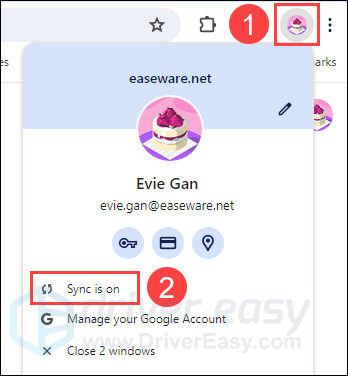
1) Click your profile at the top right corner of your Chrome browser. Then select Sync is on.
2) Click the Turn off button.
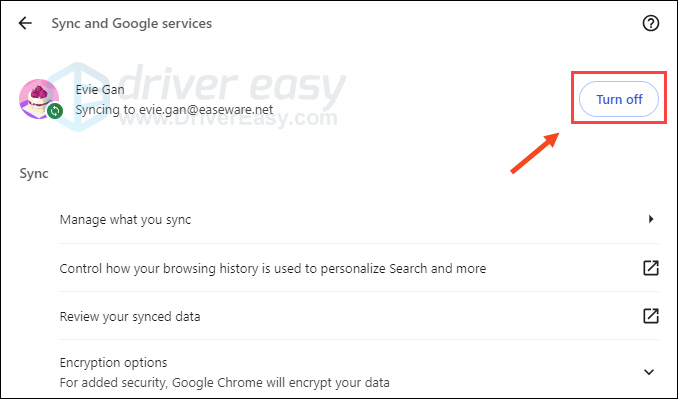
Then confirm in the pop-up message window.

3) Wait a while and sign back in.
Now you should check to see whether the feature of auto-filling passwords has gone back to normal. If not, please move on to the next fix below.
Fix 2: Use a password manager
If the fix above didn’t work for you, then perhaps you should consider using another password manager instead to take care of all your important passwords.
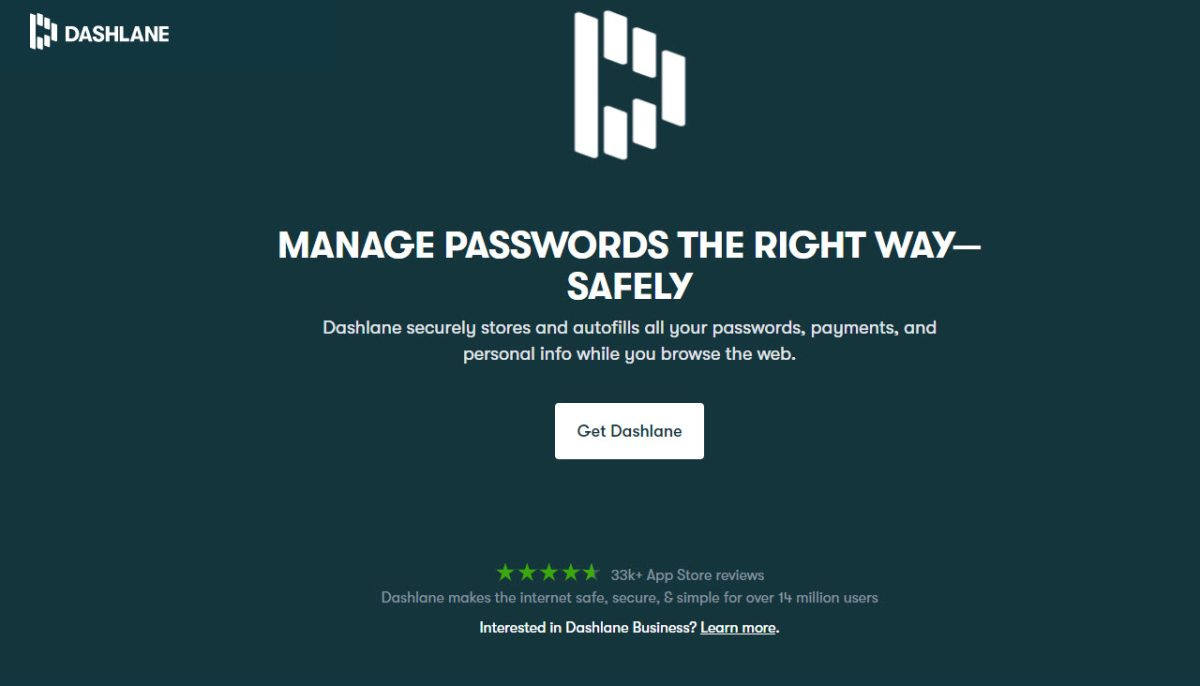
You may not have heard of any other password managers before except the auto-filling tool in Google Chrome. However, it’s not as convenient and secure to use as its counterparts of other standalone applications. Among all the password managers on the market, we recommend Dashlane to you – a reliable and powerful product that keeps track of any passwords you have.
1) Download and install Dashlane.
2) Set up your account.
3) Dashlane will automatically fill in online logins, forms, and payment information.
All you need to remember is the password for your Dashlane account, and then it’ll do the rest for you.
Fix 3: Check your “Passwords” settings
Sometimes the incorrect “Passwords” settings of Chrome can be the culprit for your trouble. Maybe you have once disabled the auto-filling feature but forgot to enable it again. In this case, you should check the related settings in your browser and see if there’s any problem within.
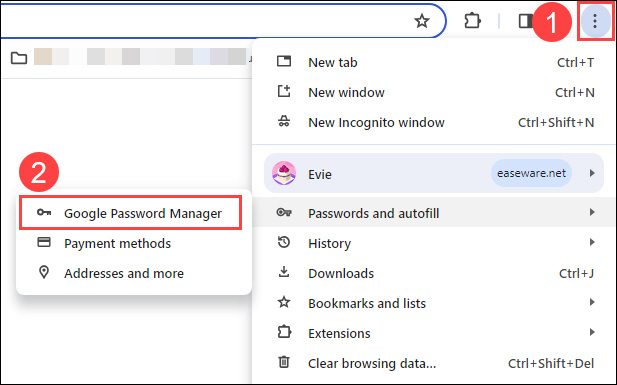
1) Click the three-stacked-dots icon at the top right corner of your Chrome browser. Place your cursor over Passwords and autofill and then select Google Password Manager from the menu.
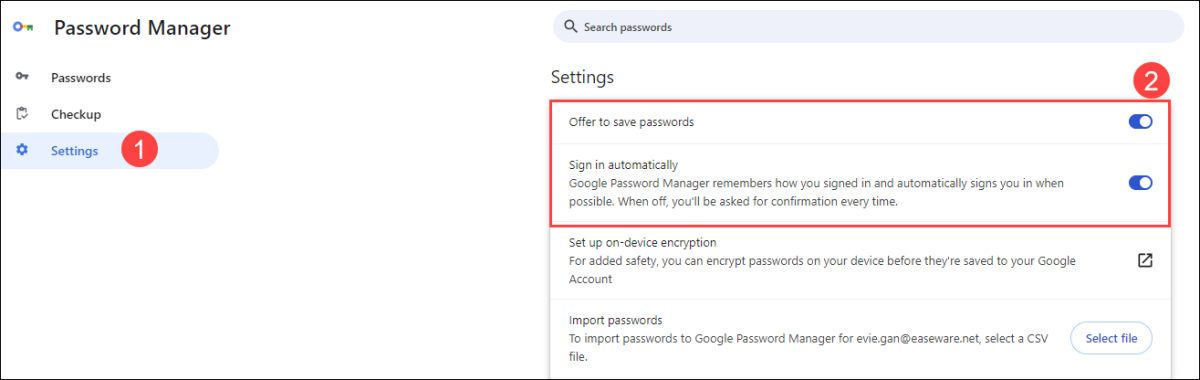
2) Select the Settings tab. Then make sure you turn on these two toggles:
- Offer to save passwords
- Sign in automatically.
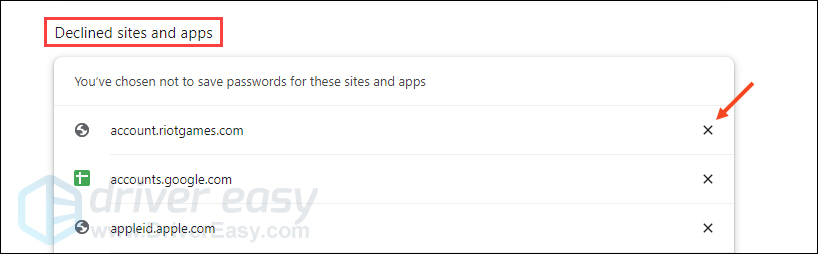
3) Scroll down the page and take a look at the Declined sites and apps section. If you notice any sites banned from saving your passwords – which is not what you want – simply remove it from the list by clicking the Cancel icon.
Unable to find anything abnormal in your settings? Don’t worry, there’re still other fixes awaiting your try.
Fix 4: Clear cache and cookies
At the sight of Fix 3, you may wonder why clearing cache and cookies can solve this problem. Sounds a bit weird, but it does have something to do with your passwords-not-saving issue – this is possibly because the overload of cache has interfered with the normal functioning of your Chrome password manager.
Incidentally, if you cannot open any pages via Google Chrome with a notification that reads “this site can’t be reached,” you can also try to clear up your browsing data and see whether that helps you regain access to websites. But this is not our focal point here, so let’s just turn back to the original topic.
To clear the cache and cookies stored in Chrome, you may perform the following procedure:
1) Open your Chrome browser, and press Ctrl + Shift + Del.
2) In the pop-up window, you’ll see three options under the Basic tab:
- Browsing history
- Cookies and other site data
- Cached images and files.
Make certain you check them all. Then, click Clear data.
If this didn’t help you, you may check out the next fix.
Fix 5: Remove unwanted programs
To rule out the possibility that some malware has prevented Chrome from saving your passwords, you can rely on Chrome’s built-in component to remove suspicious or unwanted programs (ones that may cause issues with the browser) for you.
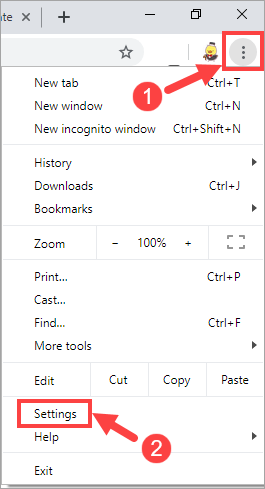
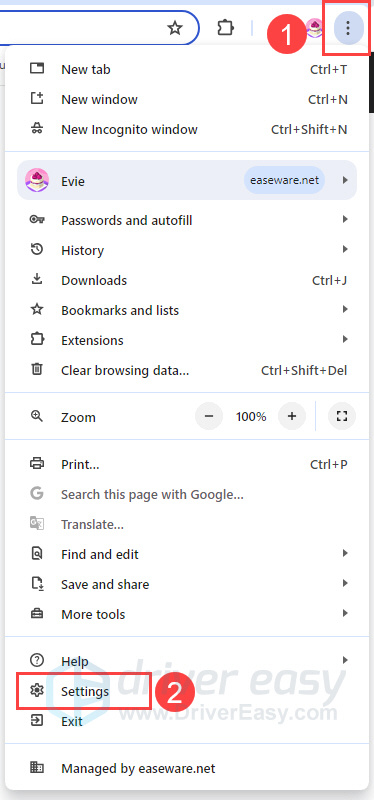
1) Click the three-stacked-dots icon at the top right corner of your Chrome browser. Then select Settings.
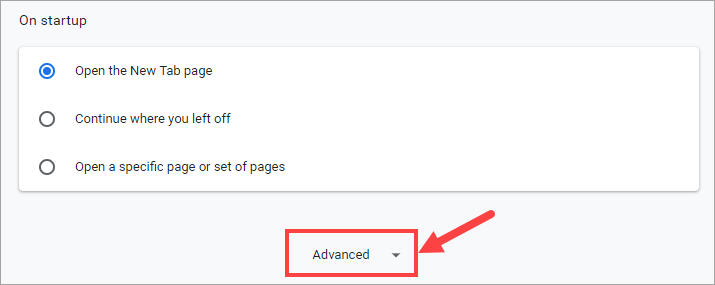
2) On the pop-up page, scroll down to the bottom and click Advanced.
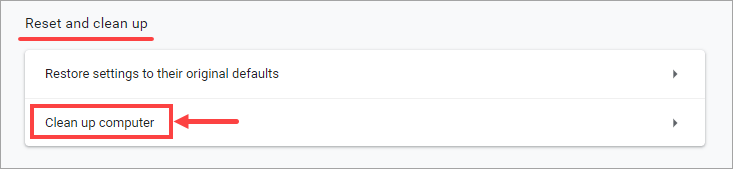
3) Under Reset and clean up, click Clean up computer.
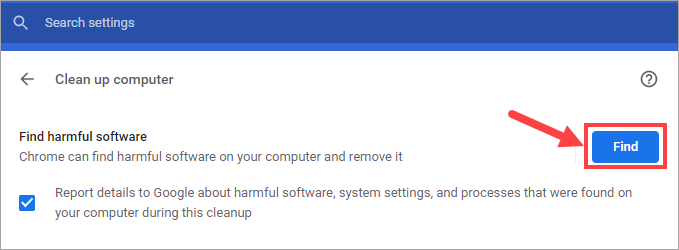
4) Click Find.
5) When prompted for removal, click Remove. Then, Chrome will erase the harmful programs automatically for you. You may be asked to restart your computer for the changes to take effect.
6) Open your Chrome and check whether the problem persists. Beware of the extensions that may trigger malfunctions in your Chrome password manager. If your problem disappears after all extensions are disabled, you should now enable them one by one and find out which has caused you the trouble. Turn it off once you’ve found out the problematic one.
Please proceed to the next fix if your issue still gets in the way.
Fix 6: Reset the browser to default settings
It’s worth trying to reset your Google Chrome to its original defaults. Before you perform the following procedure, don’t forget to back up your browser settings in case you lose any data during the restoration process.
To restore your Chrome settings to its defaults, take the following steps:
1) Click the three-stacked-dots icon at the top right corner of your Chrome browser. Then select Settings.
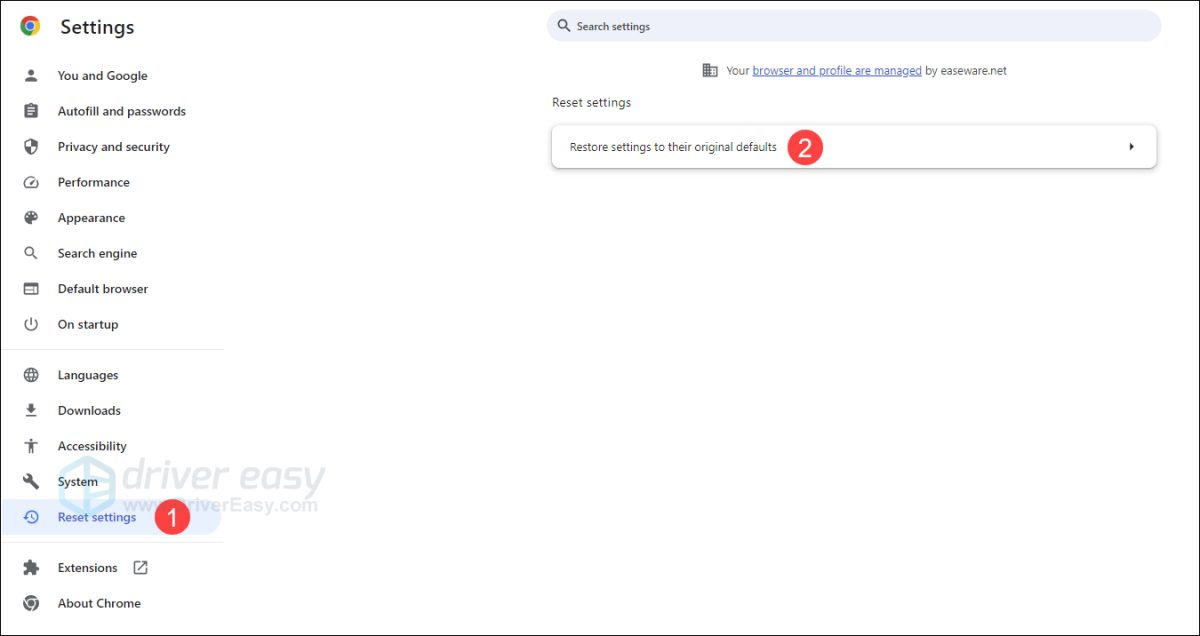
2) Select Reset settings and then click Restore settings to their original defaults on the right.
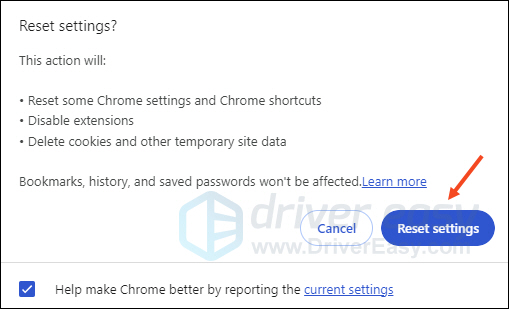
3) Click Reset settings.
Once your settings have been restored, check to see whether your problem remains. If it does, try out the next method.
Fix 7: Check for Chrome updates
Google Chrome will search for the latest update and install it automatically in most cases, though, it may fail to do so at times and thus give rise to unknown errors. Try to update your Chrome manually and see whether you can get through the problem by this way.
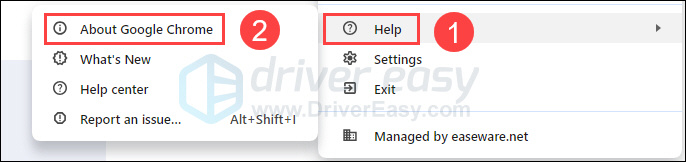
1) Click the three-stacked-dots icon at the top right corner of your Chrome browser. Then select Help > About Google Chrome.
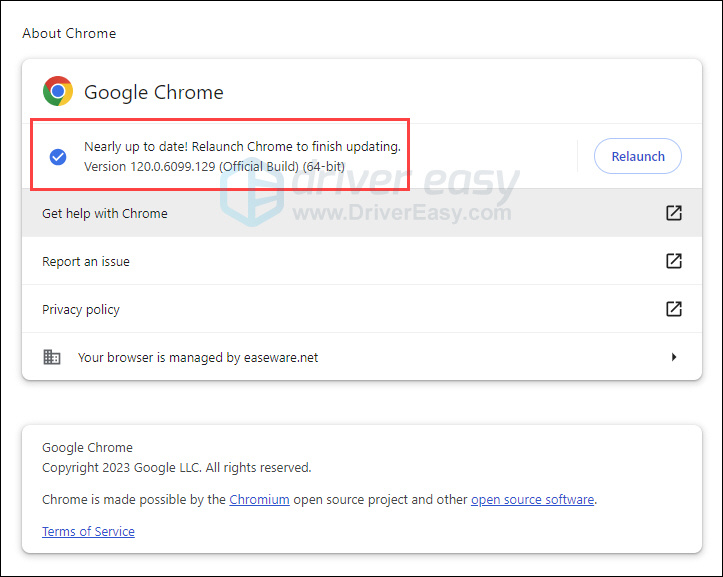
2) On the next page, you’ll see the version of you Chrome. The browser will check for available updates instantly and install them by itself.
There you go – 7 fixes to solve your Chrome-not-saving-passwords issue! Please let us know if you have any questions or ideas by dropping a comment below. Thanks for reading!