


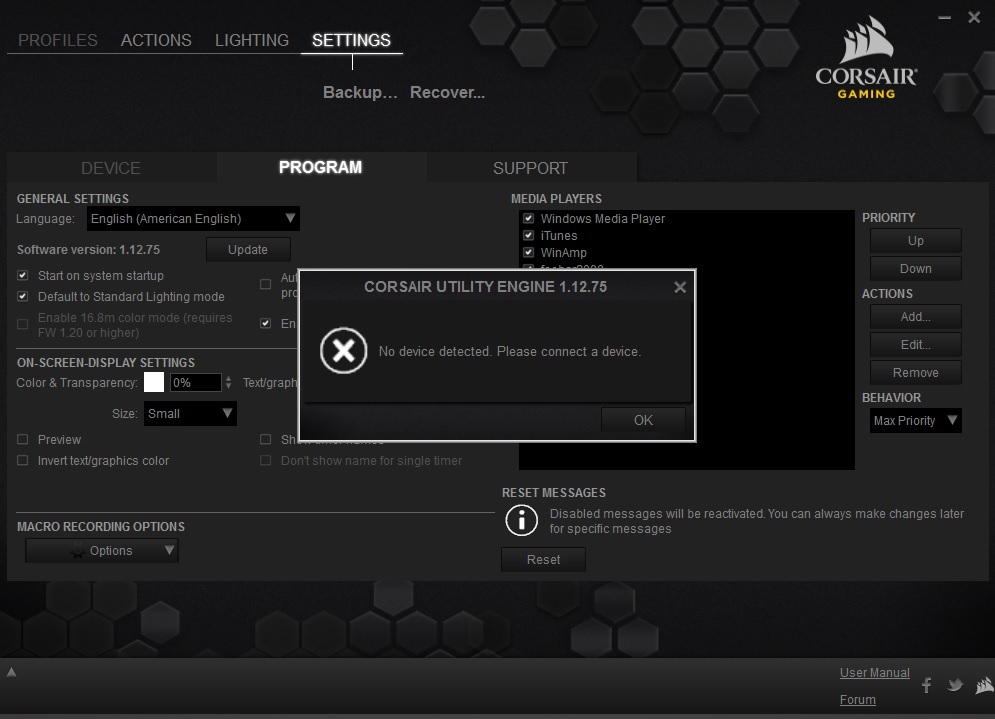

You must be vexing when you bought a Corsair Gaming keyboard but were welcomed with a “NO DEVICE DETECTED. PLEASE CONNECT A DEVICE“. You are unable to customize the profiles and LEDs on the keyboard due to the device tabs both being greyed out and unclickable which was a big selling point. Don’t worry, you’re not alone. And here’s methods that can help you fix this issue.
Try these fixes:
There are common fixes and more complicated ones. You don’t need to try them all but it’s recommended to try the common fixes first. If these can’t help, try other fixes one by one to find the one that works for you.
Common fixes:
- Use another USB port.
- Reinstalling Corsair Utility Engine does not help, try to quit the software and rerun it.
- Disconnected the keyboard and held the ESC key while plugging back in.
- Press the Windows key + F1 on the keyboard at the same time to do a hard reboot.
- Open Task Manager by pressing Ctrl + Shift + Esc together. Choose CorsairHID.exe and click End task, then restart Corsair Utility Engine.
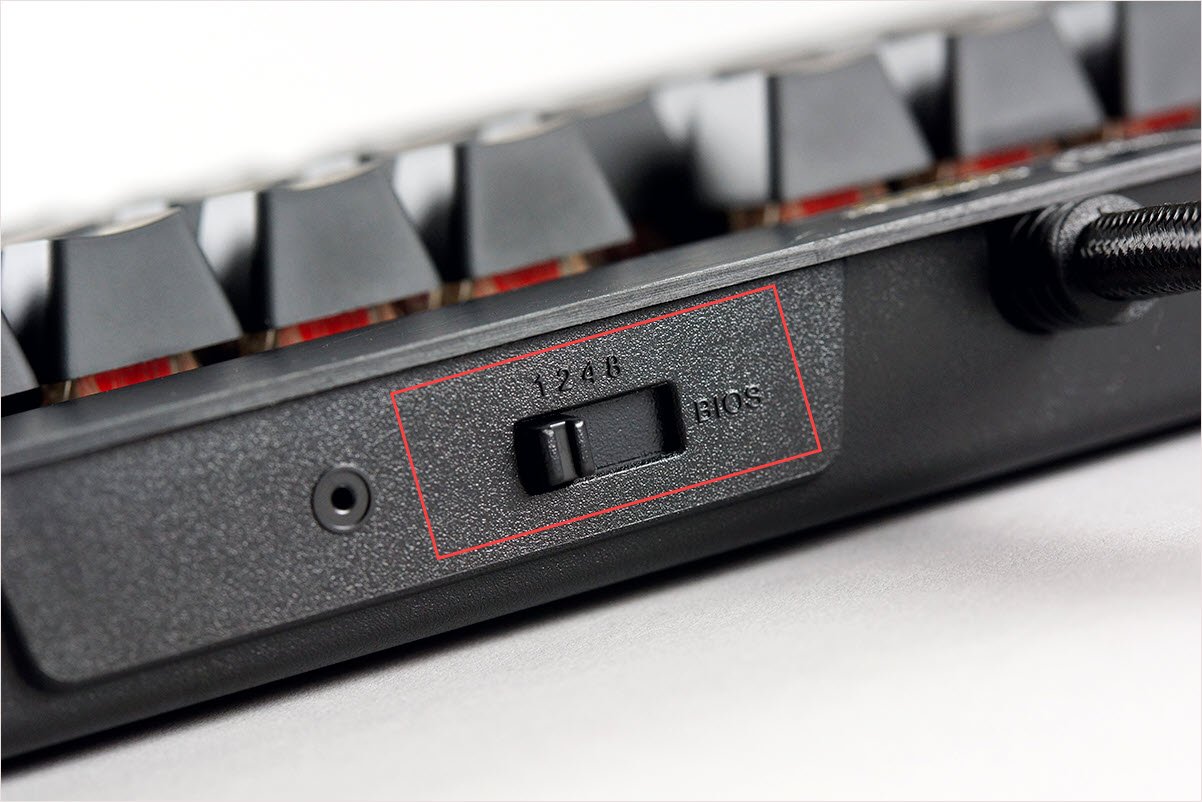
- In the back of the keyboard, there’s the BIOS button. You can switch it to a different number for a try. You may see it suddenly detects the keyboard.
If none of these work, you can move to the next method.
Method 1: Redownload the firmware files
For this method, you have to uninstall the software first. Because we want to make sure your computer won’t interfere with corrupted install files.
- Download the latest iCUE software.
- Connect keyboard.
- Install iCUE.
- Right-click iCUE and click Run as Administrator.
- Download the firmware which has given by iCUE at launch.
- Install firmware.
Method 2: Disable other related devices
There’s one thing you can try is to shut down other programs which are related to Corsair and its iCUE. This may be because other third-party programs may interfere with Corsair and cause the problem.
- Disconnect the keyboard.
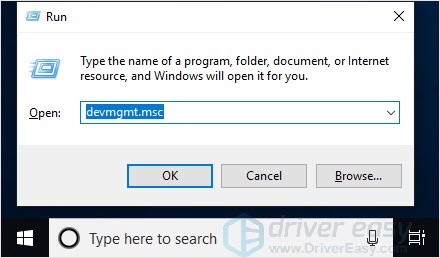
- Press Windows logo key + R together to open the Run box.
- Type “devmgmt.msc” and press Enter.
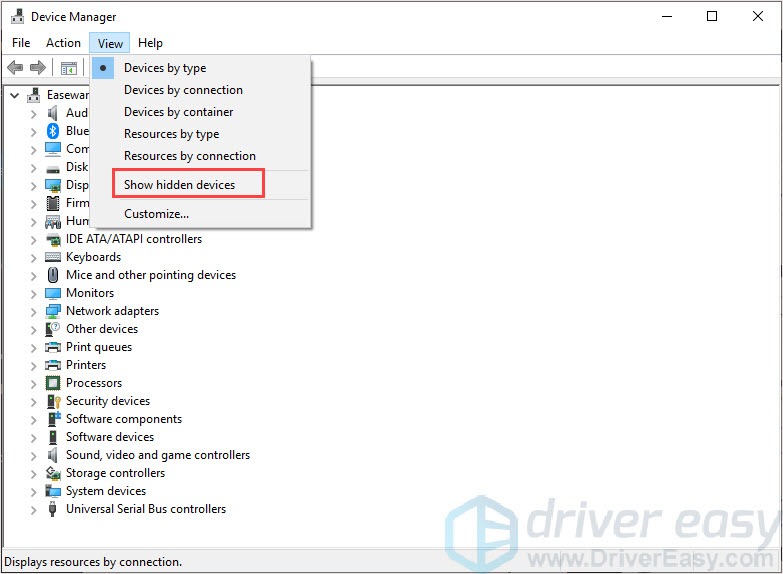
- Click View and choose Show hidden devices.
- Expand Keyboard and then uninstall every hidden device below.
- Open Control Panel and click Uninstall a program.
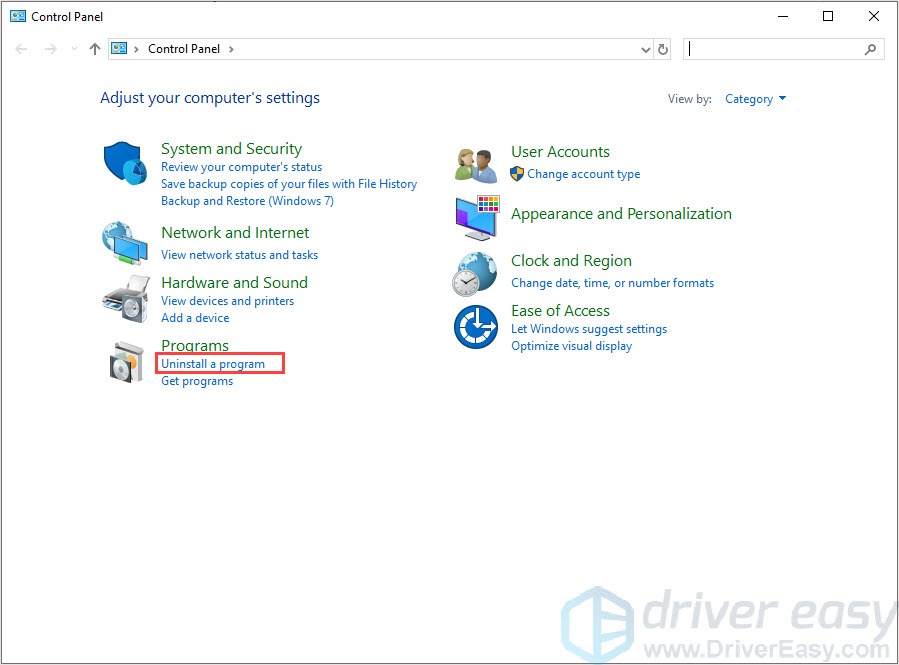
- Uninstall Corsair Utility Engine.
- Connect your keyboard back to PC.
- Run iCUE and the keyboard should appear.
Method 3: Update your drivers
If you uninstall other applications before this issue happened, it’s possible you may uninstall USB or related drivers accidentally. The outdated or missing drivers can cause problems to your computer and it’s important to keep your drivers up-to-date for a better user experience.
There’re two ways to update your drivers: manually and automatically.
Option 1 – Manually – You’ll need some computer skills and patience to update your drivers this way, because you need to find exactly the right driver online, download it and install it step by step.
OR
Option 2 – Automatically (Recommended)– This is the quickest and easiest option. It’s all done with just a couple of mouse clicks – easy even if you’re a computer newbie.
Option 1 – Download and install the driver manually
You can download products drivers from its manufacturer official website. You have to search your model name to find the correct model and choose your specific flavor of Windows system (Window 10 64-bits or etc.) Then download the driver manually.
Option 2 – Automatically update devices drivers
If you don’t have the time, patience or computer skills to update drivers manually, you can do it automatically with Driver Easy.
Driver Easy will automatically recognize your system and find the correct drivers for it. You don’t need to know exactly what system your computer is running, you don’t need to risk downloading and installing the wrong driver, and you don’t need to worry about making a mistake when installing.
You can update your drivers automatically with either the FREE or the Pro version of Driver Easy. But with the Pro version it takes just 2 clicks (and you get full support and a 30-day money back guarantee):
- Download and install Driver Easy.
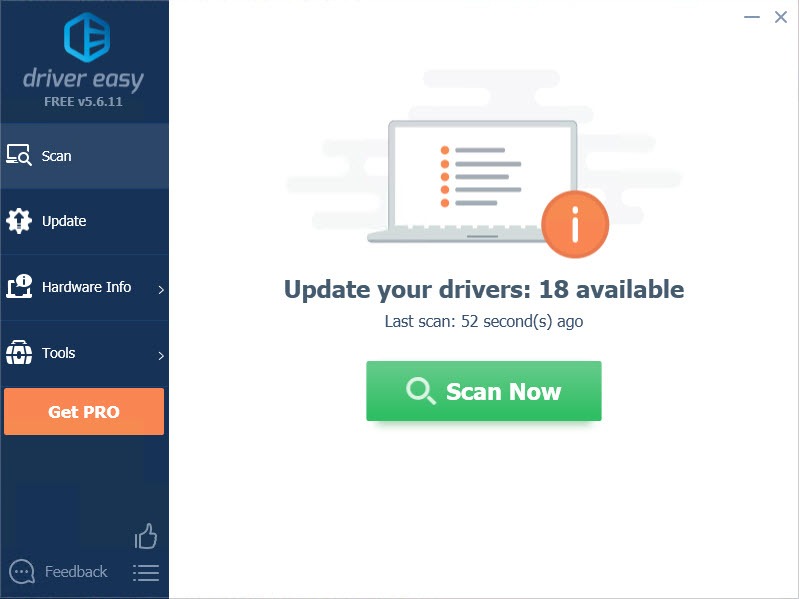
- Run Driver Easy and click Scan Now button. Driver Easy will then scan your computer and detect any problem drivers.
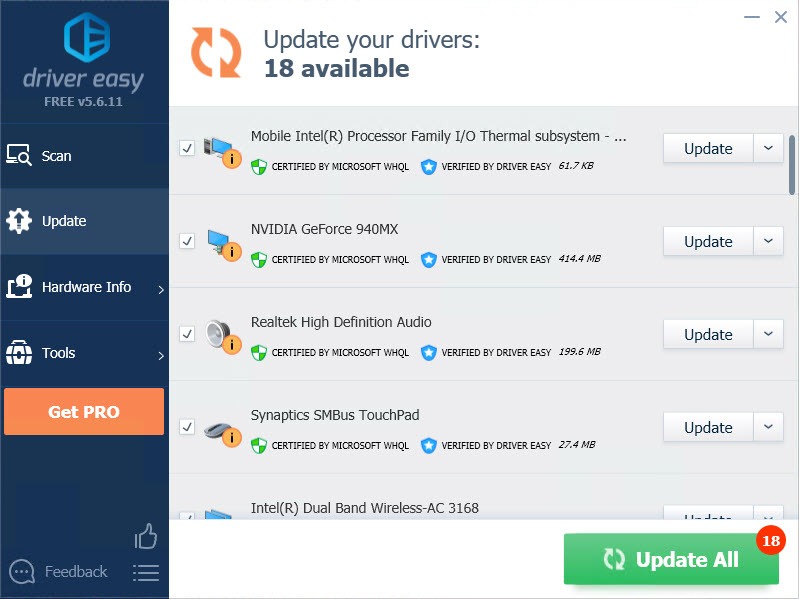
- Click the Update button next to the driver to automatically download and install the correct version of this driver (you can do this with Free version). Or click Update All to automatically download and install the correct version of all the drivers that are missing or out of date on your system (this requires the Pro version – you’ll be prompted to upgrade when you click Update All).
Thanks for reading. Hope this article meets your need. And you are welcome to leave comments below.