


You sit in front of your Dell laptop and turn it on as usual. When your laptop get access to Windows system, you notice that you cannot type anything. Wired, it works all fine last time.
Rest assured. You’re not alone. Many Dell users has the same problem with you. More importantly, you can fix this issue easily by yourself. Read on this guide and follow the step-by-step guide to troubleshoot the problem on your laptop.
How do I fix my Dell laptop keyboard not working?
Your laptop keyboard not working issue could be caused by different reasons. Here we will be telling you 3 easy but helpful solutions:
Try one at a time:
- Restart your laptop
- Uninstall your Dell laptop keyboard driver
- Update your Dell laptop keyboard driver
Solution 1: Restart your laptop
One of the easy quick solution to solve your keyboard not working problem is to restart your laptop. Some users found that restart really made their keyboard work again at once. Thus try to restart your laptop firstly. If your keyboard still doesn’t work, no panic, try other solutions listed below.
Solution 2: Uninstall your Dell laptop keyboard driver
Your laptop keyboard not working error is usually caused by driver issues. In this case, try to reinstall your keyboard driver.
Since your keyboard doesn’t work, connect your laptop with a mouse either wired or bluetooth one. Then go on with the following steps.
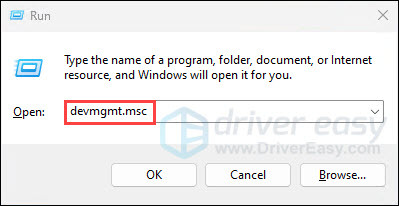
1) On your keyboard, press the Windows logo + R keys simultaneously to open the Run box.
2) Type or paste devmgmt.msc and hit Enter.
3) Find and expand the Keyboards section. Then right-click on your keyboard driver software and click Uninstall device.
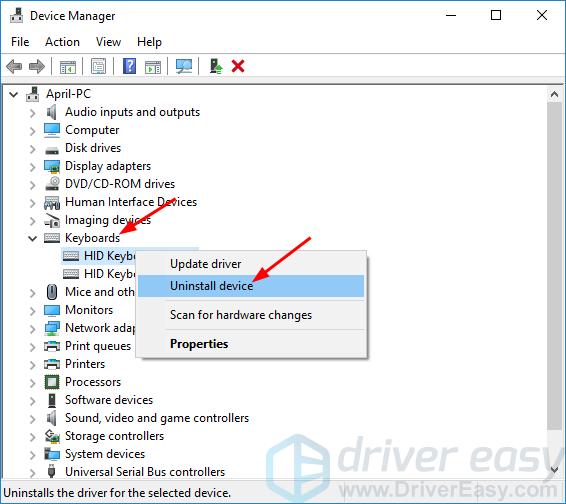
3) When it completes uninstalling, restart your Dell laptop. Then Windows will reinstall the keyboard driver automatically. Check if your keyboard could work properly.
If unfortunately, your keyboard still stops working, follow the next solution to completely update your keyboard driver.
Solution 3: Update your Dell laptop keyboard driver
If Windows doesn’t load the keyboard driver for your laptop automatically, you can update the keyboard driver in these alternative ways: manually or automatically.
Manual driver update — You can update your keyboard driver manually by going to the official Dell website and searching for the most recent correct driver for your keyboard. Be sure to choose only drivers that are compatible with your variant of the Windows version.
Automatic driver update — If you don’t have the time, patience, or computer skills to update your keyboard driver manually, you can, instead, do it automatically with Driver Easy. Driver Easy will automatically recognize your system and find the correct driver for your exact keyboard, and your variant Windows version, and it will download and install them correctly:
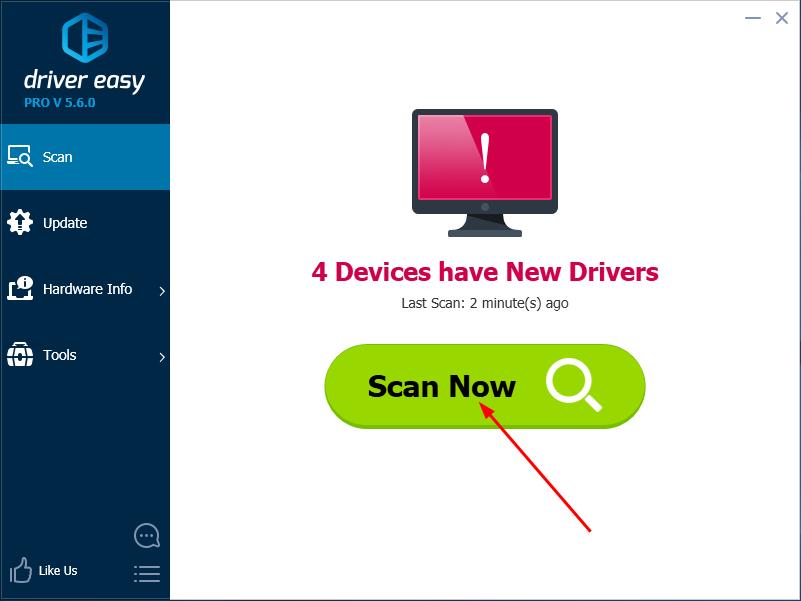
1) Download and install Driver Easy.
2) Run Driver Easy and click the Scan Now button. Driver Easy will then scan your computer and detect any problem drivers.
3) Click Update All to automatically download and install the correct version of all the drivers that are missing or out of date on your system. (This requires the Pro version which comes with full support and a 30-day money-back guarantee. You’ll be prompted to upgrade when you click Update All.)
Note: You can do it for free if you like, but it’s partly manual.
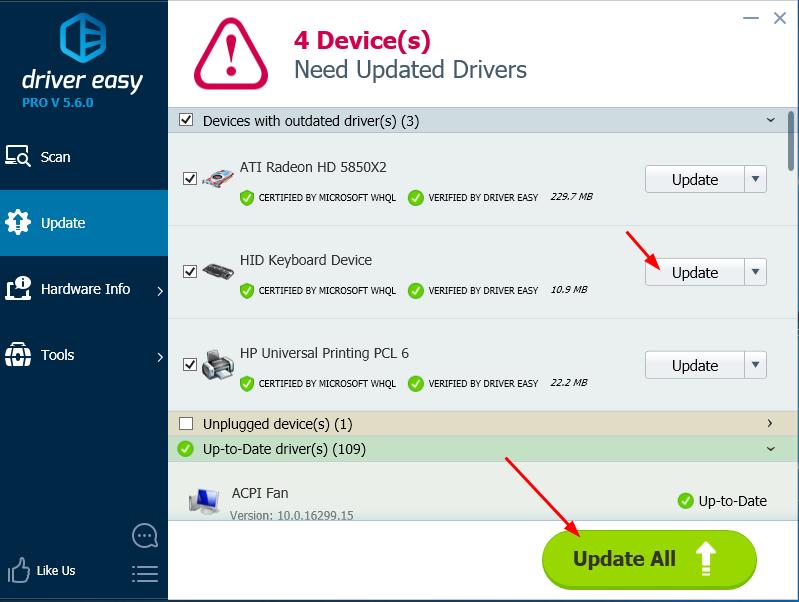
4) Restart your laptop to make the new driver take effect and try to press any key on your keyboard to see if your keyboard works.