


When you pay the money and look forward to enjoying the game but find that the game is stuck on initializing. You must be annoyed. Don’t worry, you’re not alone. There are ways to solve this problem.
Before you start, check your connections first. If this problem is not caused by internet connections, you can try the below methods to solve this issue.
Try these methods:
- Rename the Destiny 2 folder
- Reinstall the Battle.net app
- Change Blizzard Settings
- Run your Blizzard client as administrator
- Check your antivirus software
- Set the Windows Secondary Logon is set to automatic
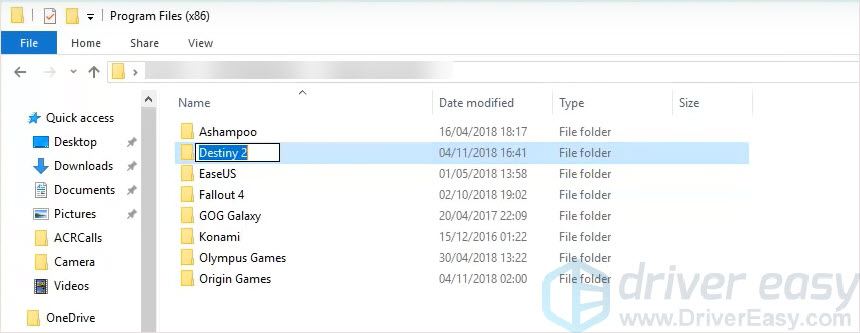
Method 1: Rename the Destiny 2 folder
To solve Destiny 2 stuck on initializing problem, this method is the first to go. Many users have proven its effective.
- Pause the initializing process and close Battle.net.

- Navigate to your Destiny 2 folder location. Usually, it’s in C:\Program Files (x86)\. Then rename the Destiny 2 folder.
- Open Battle.net and click Install.
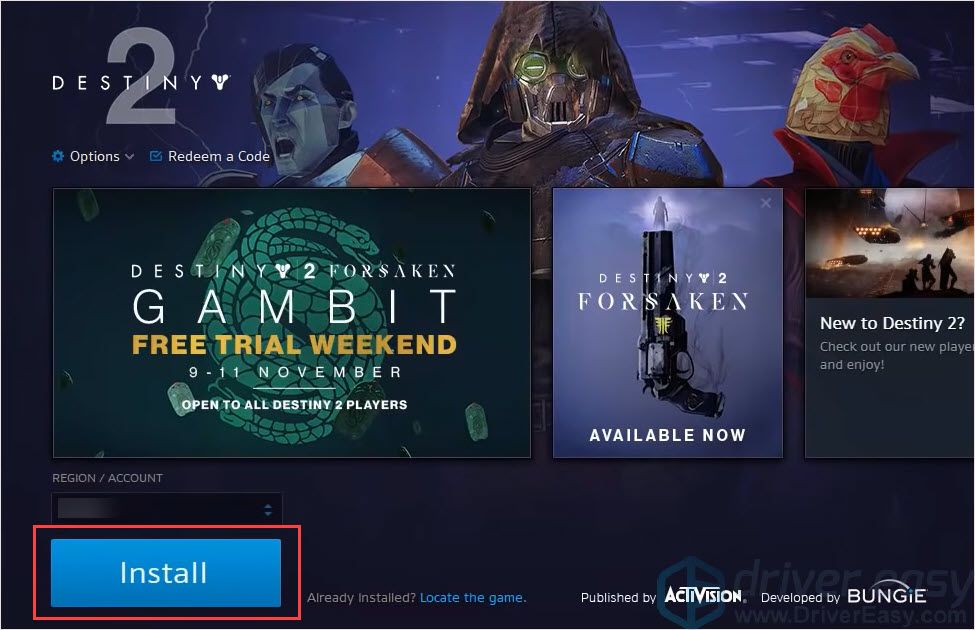
- Change the folder name back to Destiny 2.
- Click Start install.
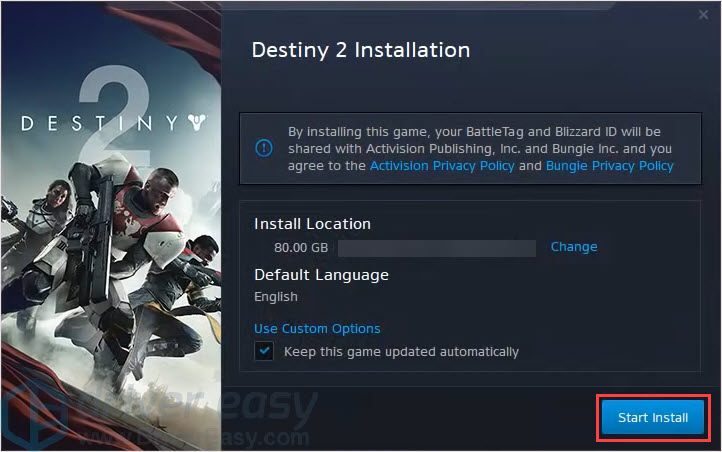
- Be patient, the process will resume from where you left off after verifying the files that are already there. Then you’re good to go.
After downloading the program successfully, it is recommended to update your driver to improve your gaming performances.
Method 2: Reinstall the Battle.net app
Reinstall the Battle.net can may help you solve the issue.
- Uninstall the Battle.net app.
- Reinstall Battle.net app and load the game. The update will stay on ‘Initialising’ for maybe 3-5min and will then start ‘Finalizing’.
- After finalizing, you should be able to play the game.
Method 3: Change Blizzard Settings
Change the Blizzard’s download settings may help you increase the download speed.
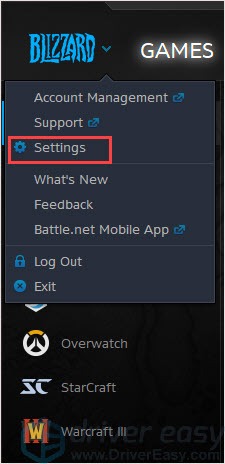
- Click on the Blizzard logo on the upper right side. Then select Settings.
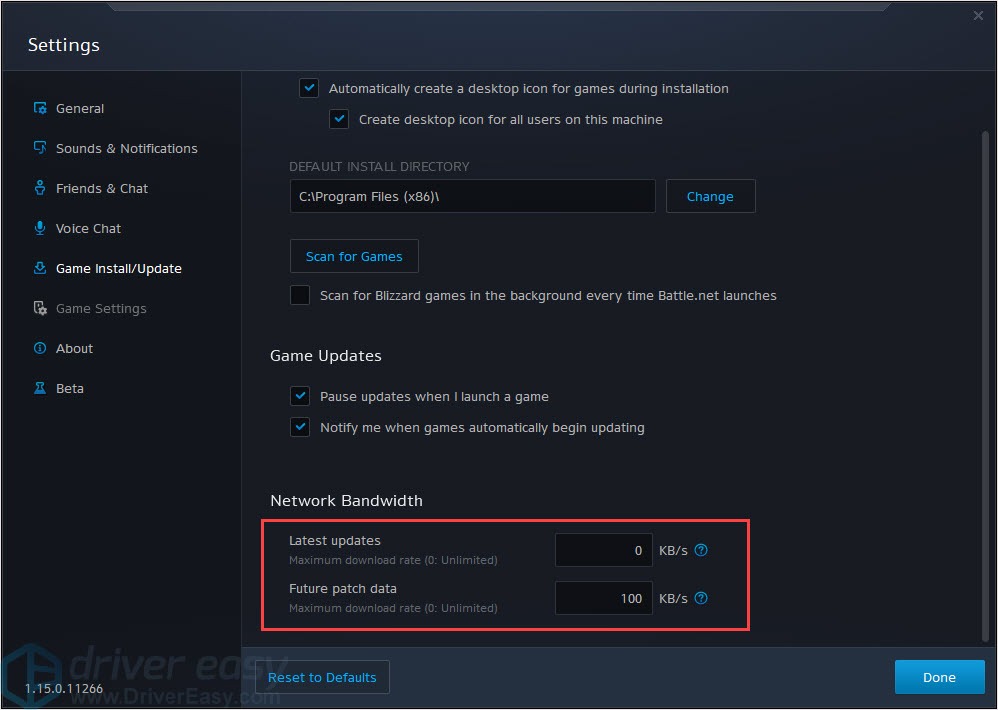
- Select the Game Installs/Update. Scroll down to find the Network Bandwidth.
- Change the Max Download rate by setting the Latest Updates and Future Patch updates to 0 to get the max download rate. Then Press Done to apply the settings.
- Download Destiny 2 to see whether it can help.
Method 4: Run your Blizzard client as administrator
The privilege issue might be the reason for this problem. With high integrity access, Blizzard can make full use of its features, so run Blizzard as an administrator to see if this fixes your issue.
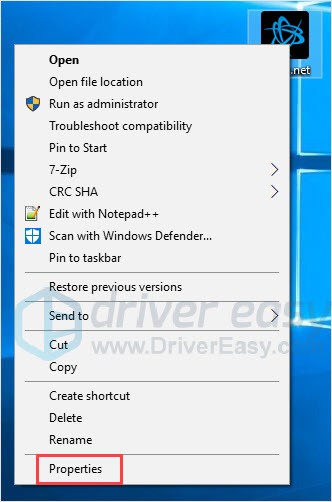
- Exit Blizzard.
- Right-click on the Blizzard icon and click Properties.
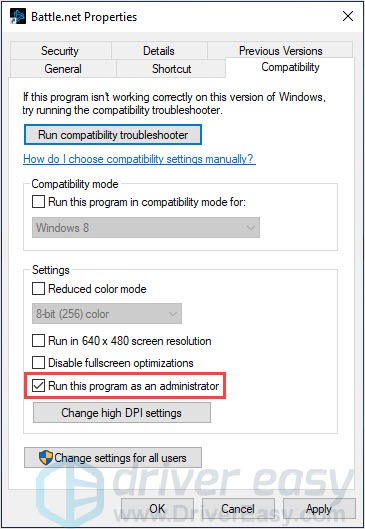
- Under the Compatibility tab, tick Run this program as an administrator. Then click OK.
- Run Blizzard and check whether the problem is solved or not.
Method 5: Check your antivirus software
Sometimes your antivirus software may be the reason for the Destiny 2 stuck on initializing. So disable your antivirus software and try downloading again to check if the issue persists.
If this resolves your problem, you may need to replace your antivirus software or contact the vendor of the software for advice.
Method 6: Set the Windows Secondary Logon is set to automatic
Windows Secondary Logon allows administrators to log on with a non-administrator account to perform administrative tasks without logging off. The Secondary Logon service must be enabled for Blizzard games to install and run.
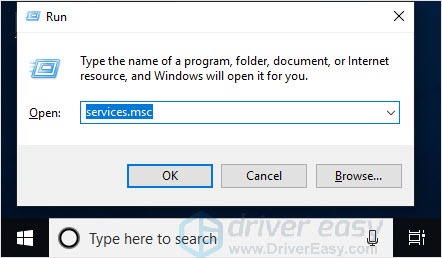
- Press the Windows logo key + R to open the Run box.
- Type “services.msc” and press Enter.
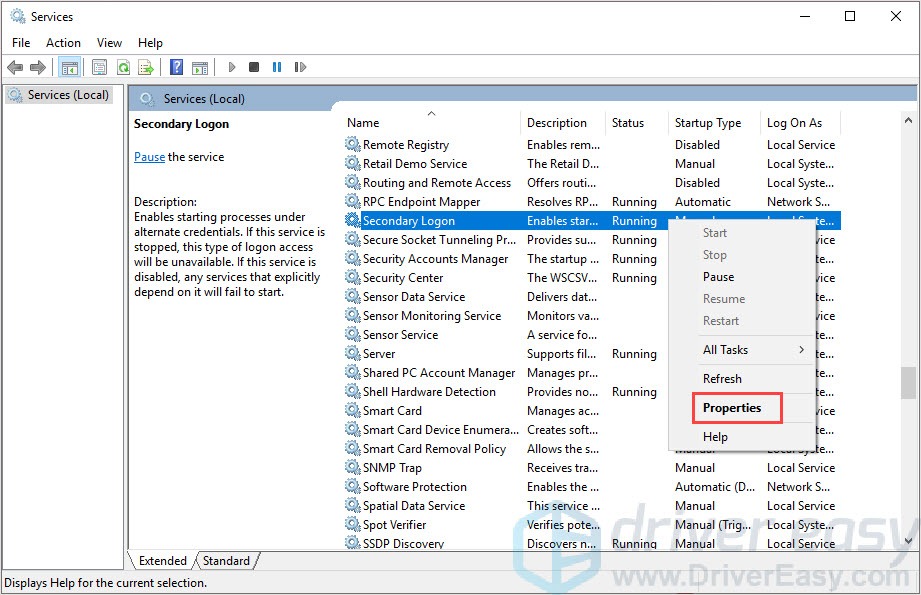
- Locate and right-click Secondary Logon in the right pane.
- Select Properties.
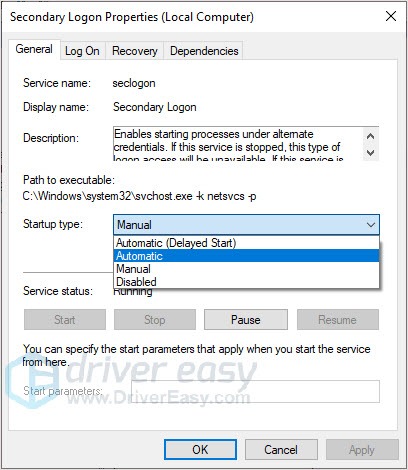
- Find Startup type and select Automatic in the dropdown menu. Then click OK.
Bonus: Update your drivers
To have a better gaming experience, updating your drivers always a good option. The outdated or wrong drivers for your graphics card, network card, sound card, etc. may cause problems.
Option 1 – Manually – You’ll need some computer skills and patience to update your drivers this way, because you need to find exactly the right the driver online, download it and install it step by step.
OR
Option 2 – Automatically (Recommended) – This is the quickest and easiest option. It’s all done with just a couple of mouse clicks – easy even if you’re a computer newbie.
Option 1 – Download and install the driver manually
Devices keep updating drivers. To get them, you need to go to the manufacturer website, find the drivers corresponding with your specific flavor of Windows version (for example, Windows 32 bit) and download the driver manually.
Once you’ve downloaded the correct drivers for your system, double-click on the downloaded file and follow the on-screen instructions to install the driver.
Option 2 – Automatically update drivers
If you don’t have the time, patience or computer skills to update your drivers manually, you can do it automatically with Driver Easy.
Driver Easy will automatically recognize your system and find the correct drivers for it. You don’t need to know exactly what system your computer is running, you don’t need to risk downloading and installing the wrong driver, and you don’t need to worry about making a mistake when installing.
You can update your drivers automatically with either the FREE or the Pro version of Driver Easy. But with the Pro version it takes just 2 clicks (and you get full support and a 30-day money back guarantee):
- Download and install Driver Easy.
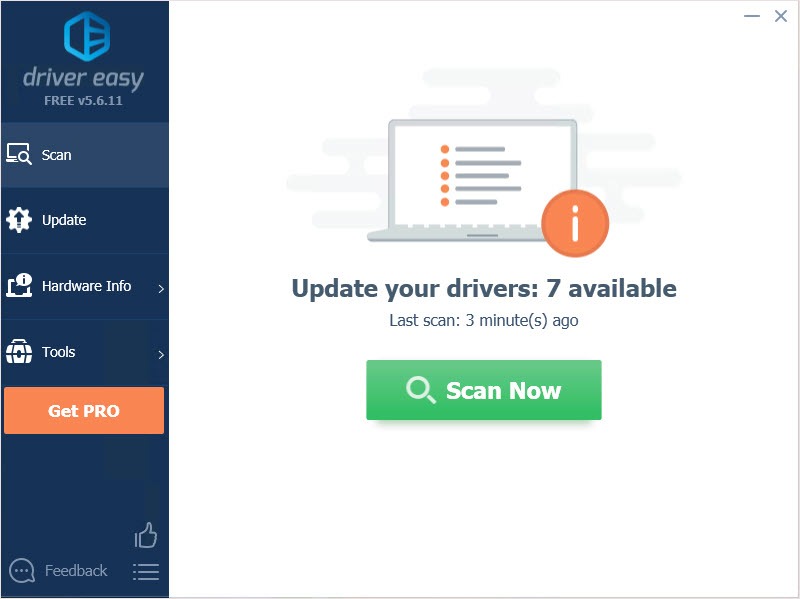
- Run Driver Easy and click Scan Now button. Driver Easy will then scan your computer and detect any problem drivers.
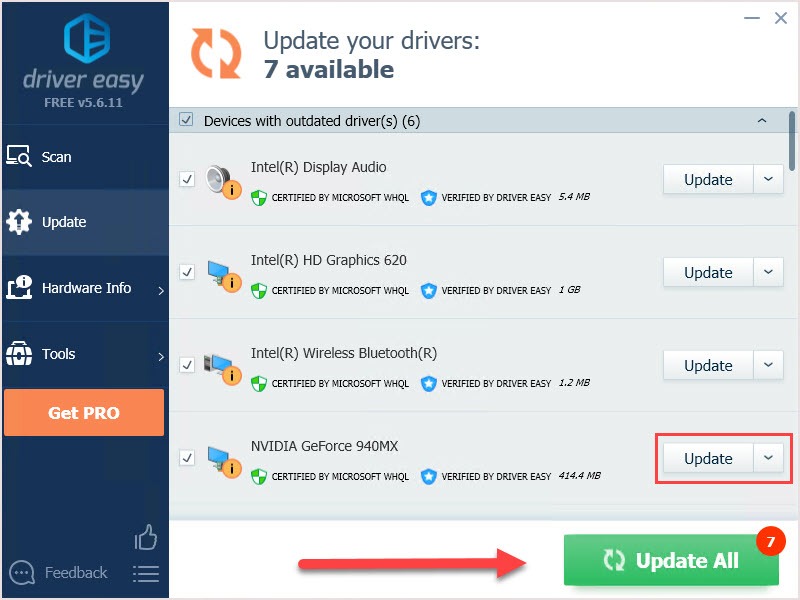
- Click the Update button next to the driver to automatically download and install the correct version of this driver (you can do this with Free version). Or click Update All to automatically download and install the correct version of all the drivers that are missing or out of date on your system (this requires the Pro version – you’ll be prompted to upgrade when you click Update All).
We hope you find the above information helpful. And if you have any ideas, suggestions, or questions, feel free to leave a comment below.