


Despite being an older operating system, Windows 7 still holds a special place among many users for its familiarity and compatibility with legacy software. If you’re looking to give your Windows 7 computer a fresh start but don’t have a CD handy, you’re in the right place! This article will walk you through the steps to factory reset your Windows 7 system, and so you can enjoy a clean slate. Let’s dive in!
2 ways to factory reset Windows 7:
There are 2 methods to reset your Windows 7 device. You don’t have to try them all. Just choose the method you need.
Method 1: Reset your computer from your recovery partition
Some computers may have a recovery partition that allows users to restore their system to default factory settings. Follow the instructions below to see how to do it:
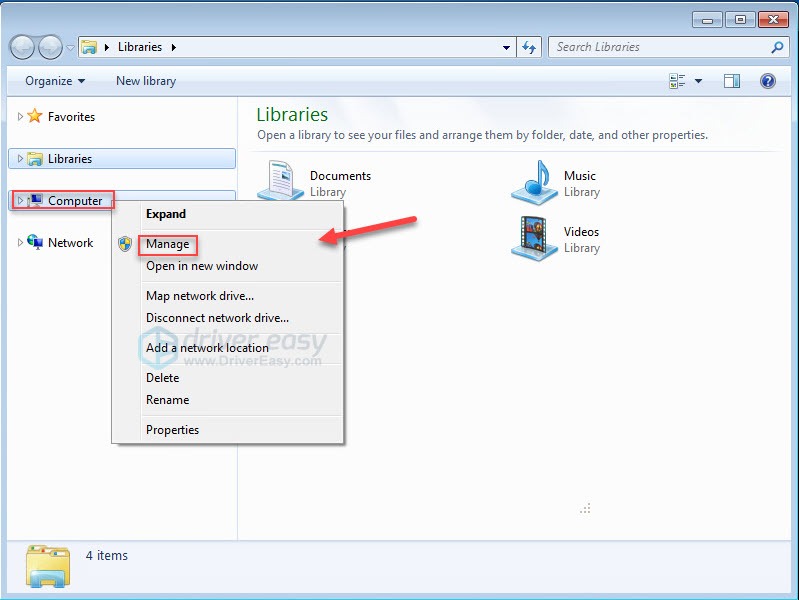
1) On your keyboard, press the Windows logo key and E at the same time to open the File Explorer.
2) Right-click Computer, then select Manage.
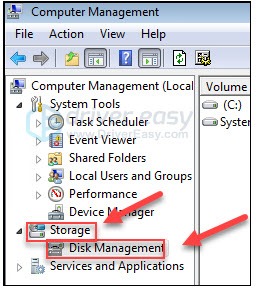
3) Click Storage, then Disk Management.
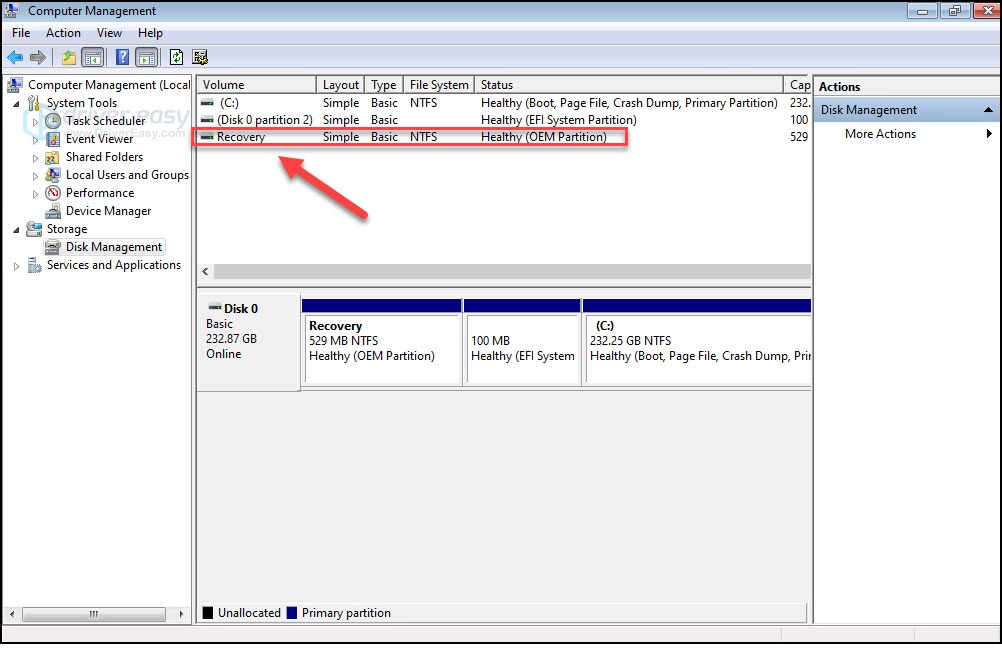
4) Check if you have a recovery partition on your computer.
5) Turn off your computer, then disconnect all peripherals from your computer (except for your monitor, keyboard, and mouse).
6) Press the power button to turn on your computer, then, before the Windows logo appears, repeatedly press the Recovery Key on your keyboard.
The Recovery key may vary depending on different computers. Here is how to access the recovery partition for the most popular brands:
| Brand | Command |
| Acer | F10 or Alt + F10 or Ctrl + F |
| Advent | F10 |
| Asus | F9 |
| Dell | Ctrl+F11 |
| HP / Compaq | F11 |
| IBM – Lenovo | F11 |
| LG | F11 |
| MSI | F3 |
| Samsung | F4 |
| Sony Vaio | F8 or10 |
| Toshiba | F8 or 0 |
7) Follow the on-screen instructions to reset your computer.
Method 2: Reinstall Windows 7 on your PC
Another way to factory reset your computer is by reinstalling your Windows 7. To do this, the easiest way is using the installation disc which comes with your computer. If you have the disc, see how to reinstall Windows 7 using the installation disc. If you don’t have the disc, here’s how to reinstall Windows 7 with a USB/DVD recovery drive.
Option 1 – Reinstall Windows 7 using the installation disc
1) Turn off your computer and disconnect all peripherals from your computer (except for your monitor, keyboard, and mouse).
2) Turn on your computer.
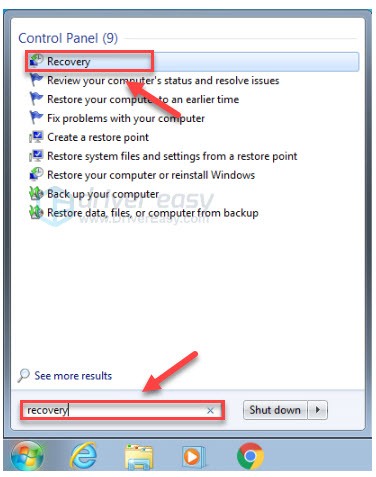
3) On your keyboard, press the Windows logo key and type recovery. Then, select Recovery.
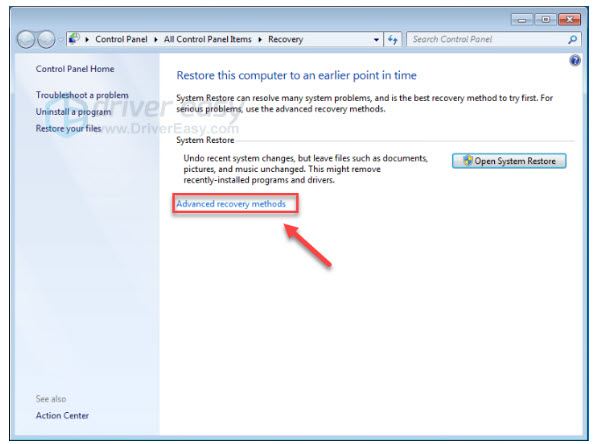
4) Click Advanced recovery methods.
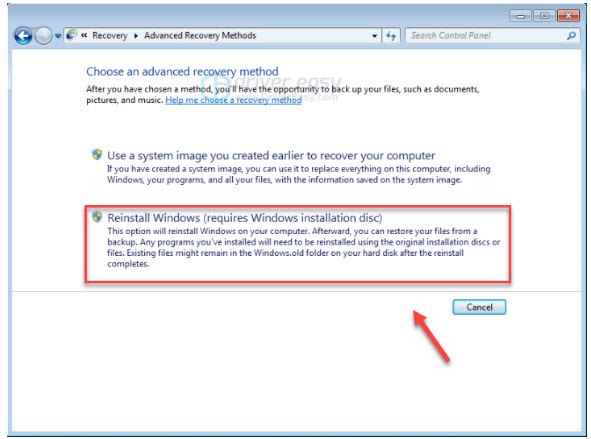
5) Select Reinstall Windows.
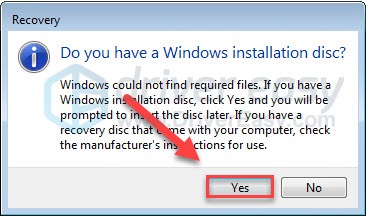
6) Click Yes.
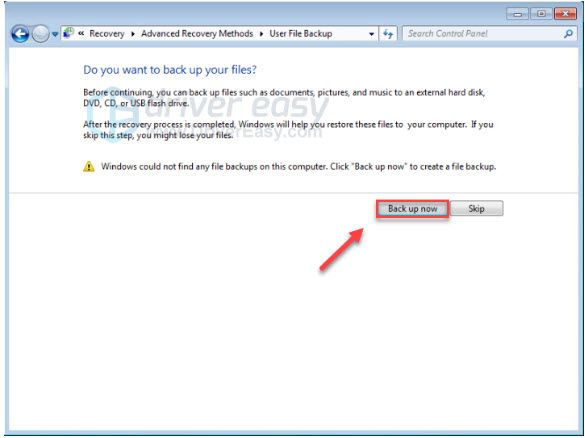
7) Click Back up now.
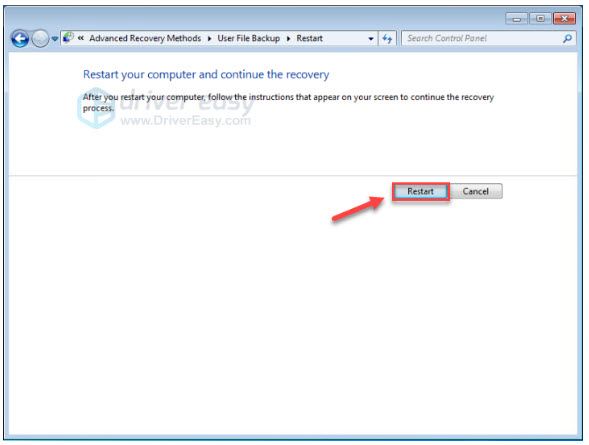
8) After you back up your files, click Restart and follow the on-screen instructions to reset your computer to the factory settings.
Option 2 – Reinstall Windows 7 with a USB/DVD recovery drive
If you don’t have an installation disc, you should create a USB/DVD recovery drive to reinstall your Windows. Follow the instructions below:
Step 1: Download the Windows 7 ISO files
1) Go to the Windows 7 Disc Image download page.
2) Enter your product key, then click Verify to download the Windows 7 ISO files.

Step 2: Create your installation USB Drive
1) Go to the Windows USB/DVD Download Tool download page, and click Download.

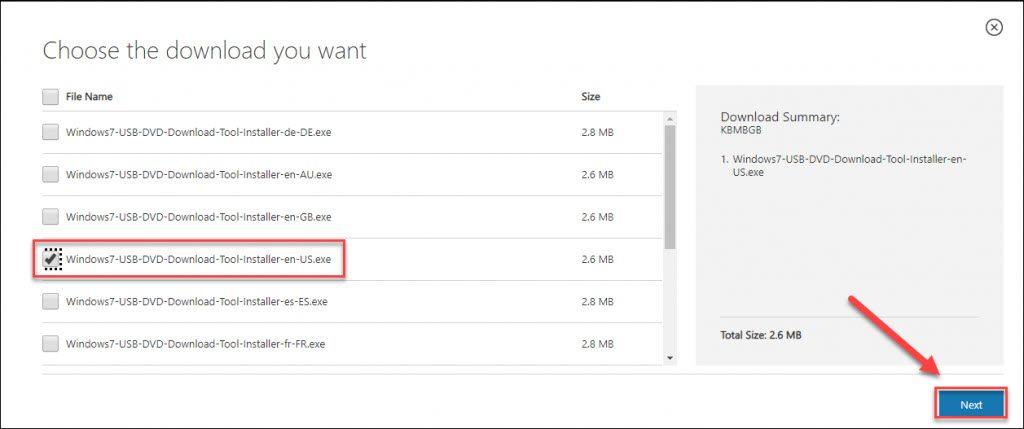
2) Select Windows7-USB-DVD-Download-Tool-Installer-en-US.exe, then click Next.
3) Open the downloaded file to install Windows7 USB/DVD Download Tool.
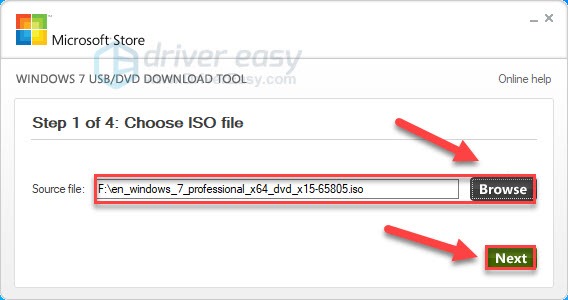
4) Run the Windows7 USB/DVD Download Tool. Then, click Browse to locate the Windows 7 ISO file that you have downloaded and click Next to continue.
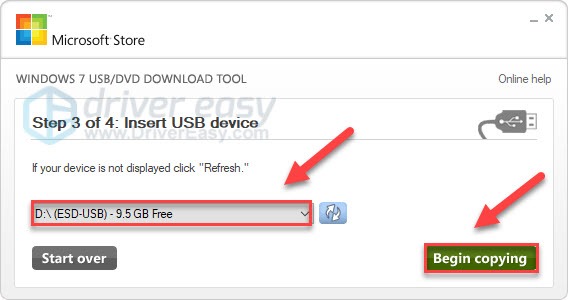
5) Click USB device if you’re using a USB drive.

6) Select the USB flash drive you want to use, then click Begin copying.
7) Exit the download tool when the process finishes.
Step 3: Install Windows 7 via USB/DVD
1) Turn off your computer and disconnect all peripherals (except for your monitor, keyboard, and mouse).
2) Plug your USB flash drive into a USB port on your computer. Or insert the CD into the drive.
3) Turn on your computer. Then, before the Windows logo appears, repeatedly press the function key on your keyboard to enter Boot Menu.
The function key to enter Boot Menu may vary depending on different computers. Here is how to access the Boot Menu for the most popular brands:
| Brand | Command |
| Acer | Esc or F9 or F12 |
| Asus | Esc or F8 |
| Dell | F12 |
| HP | Esc or F9 |
| Lenovo | F12 |
| Samsung | Esc |
| Sony Vaio | F11 |
| Toshiba | F12 |
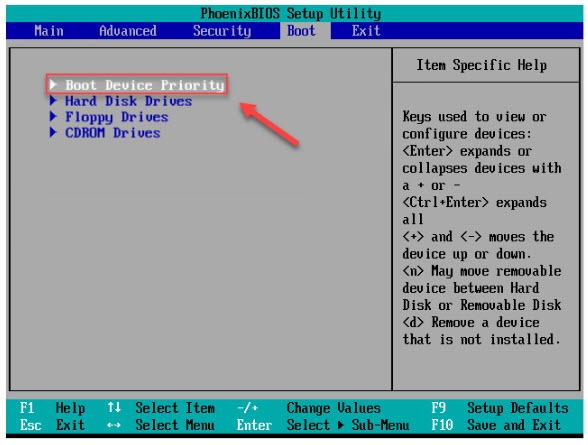
4) Select the Boot tab using the arrow keys on your keyboard, then select Boot Device Priority and press the Enter key.
5) Select the 1st Boot Device and set the Boot Device to your USB.
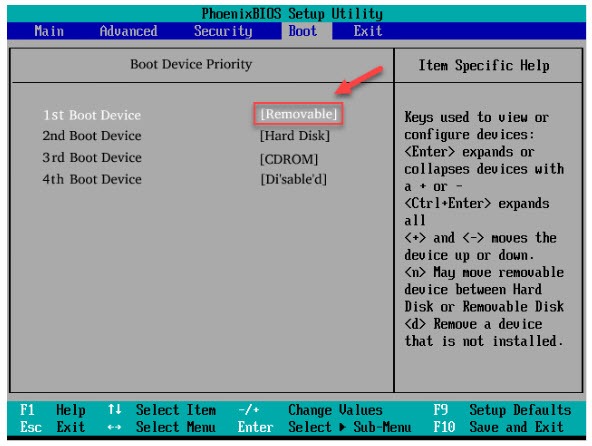
6) Press the F10 key on your keyboard and follow the on-screen instructions to reinstall your Windows 7 computer.
Hopefully, this article helped. Please feel free to leave a comment below if you have any suggestions and questions.