


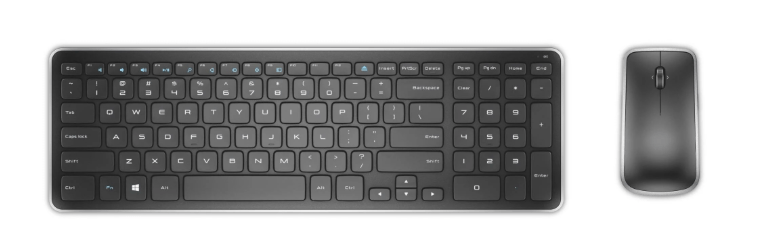
After several days of waiting, you finally got your Dell wireless keyboard delivered to home. With much excitement, you opened the package and connected the wireless keyboard to your computer. However, in an air of awkwardness, you found your keyboard not working at all, as if it’s making some sort of silent protest.
Rest assured that you’re not alone – many people have reported the same issue. Usually it’s not that difficult to solve. Just follow this tutorial and do the troubleshooting by yourself!
How to fix Dell wireless keyboard not working
The first thing you should do is to pinpoint the cause of your issue. Take the steps in the following order:
Step 1: Check the batteries
- First of all, look for any battery tabs that may prevent your batteries from offering power to the wireless keyboard. Then, make sure you remove the tabs.
- Replace the old batteries with a brand new pair. While replacing the batteries, make sure that you align the positive end of a battery with the positive side of the battery compartment and vice versa.
- See if your wireless keyboard gets back on track after you do the replacement; if so, then congrats – you’ve fixed the problem! Obviously the culprit for everything should be your worn-out batteries.
Step 2: Turn on the power
If there’s a power switch on your wireless keyboard, you should check whether you’ve turned it on. Usually you can find that switch at the bottom of your keyboard so make certain that the switch is set to ON.
Step 3: Plug the USB receiver into another port
Note that if you’re using an all-in-one PC, the USB receiver may be preinstalled in it. In this case, you should skip this step and head to the next one.
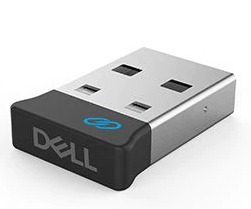
- Remove the USB receiver of your wireless keyboard from the port you’re using currently. Then wait for about 10 seconds.
- Plug the receiver into another USB port. Generally the port located at the back of your computer chassis is preferred because it has more electricity than the other ones. It might take you a minute or two to wait till your PC recognizes a new device plugged in.
- Check to see if your keyboard is working properly now. If not, go on to the next step.
Step 4: Remove any devices that may weaken the wireless signal
Chances are that some devices nearby have interrupted the wireless connection between your device and its USB receiver. In this sense, you should:
- Remove nearby objects such as TVs, cordless phones, and speakers far enough from your keyboard.
- Turn off all your wireless devices including Bluetooth.
- Make sure that your keyboard is close enough to its USB receiver, usually within 30 centimeters (1 foot).
Check to see if your wireless keyboard is working properly now. If not, please proceed to the next step.
Step 5: Connect your keyboard to another computer/laptop
This is a crucial step to determine whether it’s your keyboard or your PC that causes the problem. After connecting your wireless keyboard to another computer/laptop, test the device and see if it works well:
- If yes, then the culprit should be the previous computer you’re using.
- If not, the issue probably arises from an equipment malfunction in your wireless keyboard.
In the former scenario, you may go to Step 6 and take a closer look at your problem; in the latter however, you should visit Dell Support for technical support or warranty options.
Step 6: Reconnect your device
- If your USB receiver doesn’t have a Connect button on it, you should ignore this step and proceed to the next one. Or you may look for more specific instructions in your user manual on how to reconnect the wireless keyboard to its USB receiver.
- If your USB receiver has a Connect button, read on and follow the instructions below.
- Plug your USB receiver into a usable port. Then press and hold the Connect button on it until the LED light flashes.
- Press and hold the Connect button on your wireless keyboard until the light on its USB receiver stops flashing. Now your keyboard is in sync with the USB receiver.
- Test to see whether your keyboard is functioning well. If not, please move on to the next step.
Step 7: Update the device driver
If you haven’t installed the driver for your Dell wireless keyboard properly, that may also lead to the keyboard-not-working issue. To solve it, you should update the corresponding driver right away.
There’re 3 ways you can update your Dell wireless keyboard driver:
Option 1 – Automatically (Recommended) – This is the quickest and easiest option. It’s all done with just a couple of mouse clicks – easy even if you’re a computer newbie.
Option 2 – Manually via Device Manager – It’s a simple method but sometimes Windows may not detect or provide you with the latest drivers. What’s more, it might take you some effort to open Device Manager without a physical keyboard.
Option 3 – Manually via the official website – You’ll need some computer skills and patience to update your drivers this way, because you need to find exactly the right the driver online, download it and install it step by step.
Option 1 – Automatically update your driver (Recommended)
If you don’t have the time, patience or computer skills to update the Dell wireless keyboard driver manually, you can do it automatically with Driver Easy. More importantly, you don’t even need a physical keyboard to perform the update.
Driver Easy will automatically recognize your system and find the correct drivers for it. You don’t need to know exactly what system your computer is running, you don’t need to risk downloading and installing the wrong driver, and you don’t need to worry about making a mistake when installing. Driver Easy takes care of everything.
You can update your drivers automatically with either the FREE or the Pro version of Driver Easy. But with the Pro version it takes just 2 clicks:
- Download and install Driver Easy.
- Run Driver Easy and click the Scan Now button. Driver Easy will then scan your computer and detect any problem drivers.

- Click Update All to automatically download and install the correct version of all the drivers that are missing or out of date on your system (this requires the Pro version – you’ll be prompted to upgrade when you click Update All). Or if you just want to update the keyboard driver for now, simply click the Update button next to it.
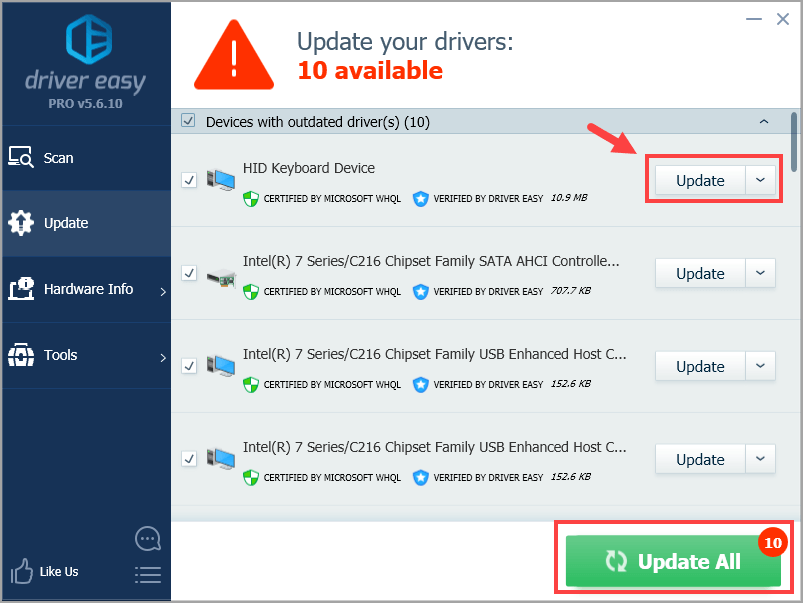
Note: you can do it for free if you like, but it’s partly manual.
Option 2 – Manually update your driver via Device Manager
You can also update your driver manually via Device Manager without the help of a keyboard. It might take you some effort, but it’s also the most commonly used method.
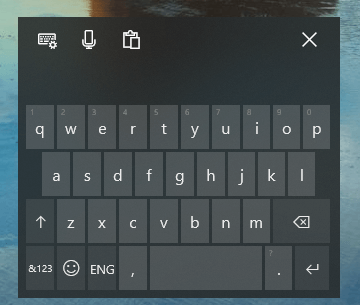
- Right-click any empty space of the taskbar that locates at the bottom of your computer screen to open its context menu. Then make sure you enable the Show touch keyboard button option.
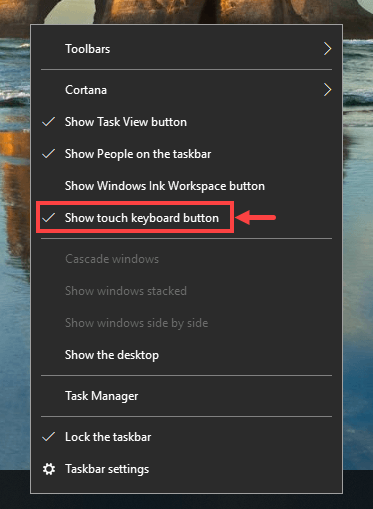
- There appears a keyboard icon in the notification area on your taskbar. Click the icon to invoke a virtual keyboard.

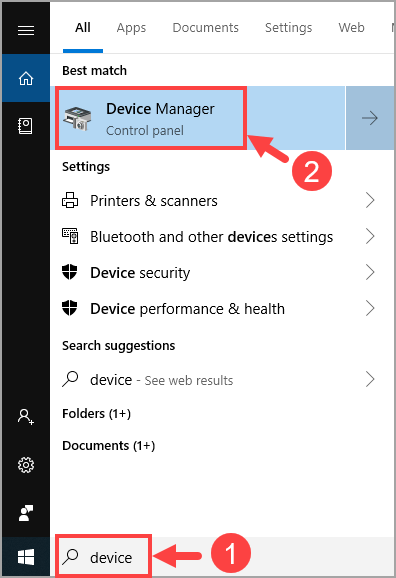
- Click the Windows logo icon at the left corner of your taskbar to open the Start menu. Then use the virtual keyboard to type device into the search box and select the Device Manager result.
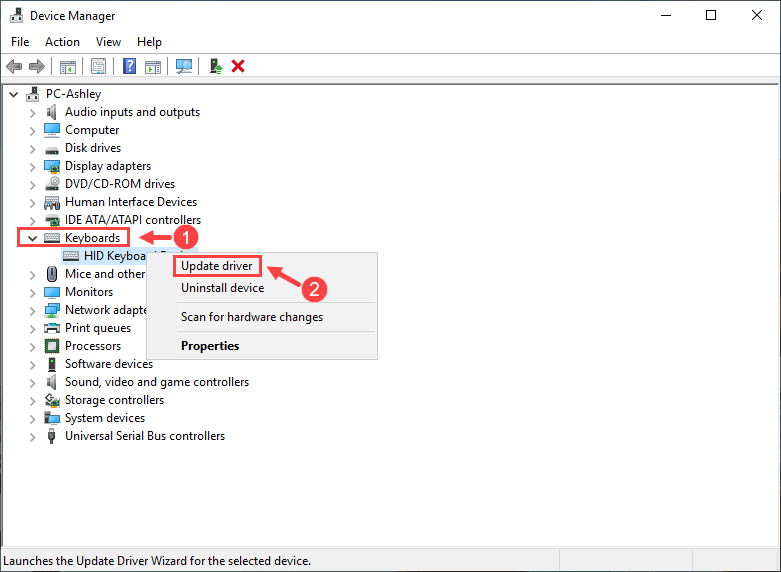
- Click the Keyboards category to open its drop-down list. Right-click on the keyboard model you’re using and select Update driver.
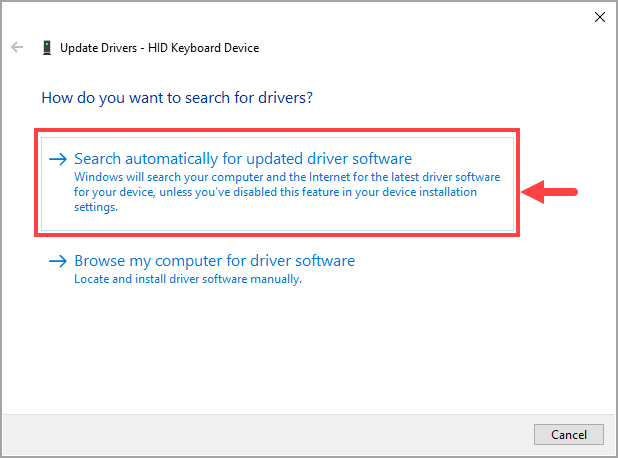
- Click Search automatically for updated driver software.
- Wait till the download and installation process finishes.
- Click Close when it’s all done.
- Now your driver has been updated by Windows successfully. Don’t forget to restart your computer for the changes to take effect even if you’re not asked to.
Option 3 – Manually update your driver via the official website
If you feel like updating your driver from the site of Dell, here’s how to do it:
- Find your way to the official website of Dell, or you may simply click:
https://www.dell.com/en-us - Move your mouse cursor to the Support option located in the upper part of the site. Then select Drivers & Downloads from its drop-down list.

- Type your keyboard model into the search box if you know it clearly; otherwise you could just type wireless keyboard. Usually, you’ll be presented with a list of search suggestions below, so go on to select one from the list according to your keyboard model. (If you don’t know how to invoke a virtual keyboard on your computer, you may refer to Option 2.)

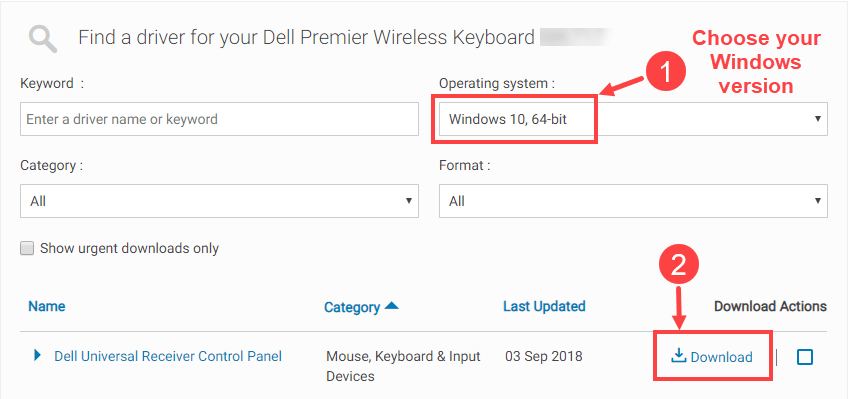
- In the next window, make sure you choose the correct edition of your Windows system. Then download all the drivers you need.
- Open the file where you’ve just downloaded the driver. In most situations, you’ll get a file with an EXE extension. Double-click on it and follow the onscreen instructions to install the driver.
- Don’t forget to restart your computer for the changes to take effect even if you’re not asked to.
So far, have you succeeded in getting your Dell wireless keyboard to work? If not, I’ll suggest you read the user manual once again and see if you’ve missed anything during the setup process. As a last resort, you should contact Dell Support for more in-depth instructions.
If you have any questions or ideas about this article, please feel free to leave a comment below. Thanks for reading!