


Imagine that one day when you’re playing League of Legends (LOL), your network gets so slow that your character has been thrown into danger many times. How infuriating! But don’t worry, you’re not alone – many players are complaining about their lag issues every day. Before calling your ISP or taking other unclear options, you should give the following 7 fixes a shot.
Here in this post, I’ll list solutions to both lagging and low FPS. You can decide whether to try all of them based on your situation.
8 fixes for League of Legends lag issue
Here are 8 fixes that have proved useful to many LOL players. You can try any of them selectively, or try them one by one; just work your way down the list until you find the one that works.
- Fix 1 – Modify your game settings
- Fix 2 – Change the DNS server
- Fix 3 – Update your device drivers
- Fix 4 – Stop unnecessary processes
- Fix 5 – Delete temporary/junk files
- Fix 6 – Adjust your Windows settings
- Fix 7 – Swap Wi-Fi to an Ethernet connection
- Fix 8: Make sure your computer is not overheating
Fix 1: Modify your game settings
When you think your LOL is “laggy,” meaning you cannot play it very fluidly, you should first try lowering or turning off certain settings of the game. If this fix did work out for you, then your lagging problem was probably caused by hardware failures.
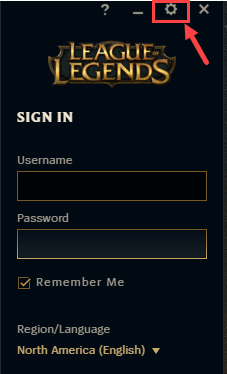
- Launch LOL and click the cog icon in the upper right corner.
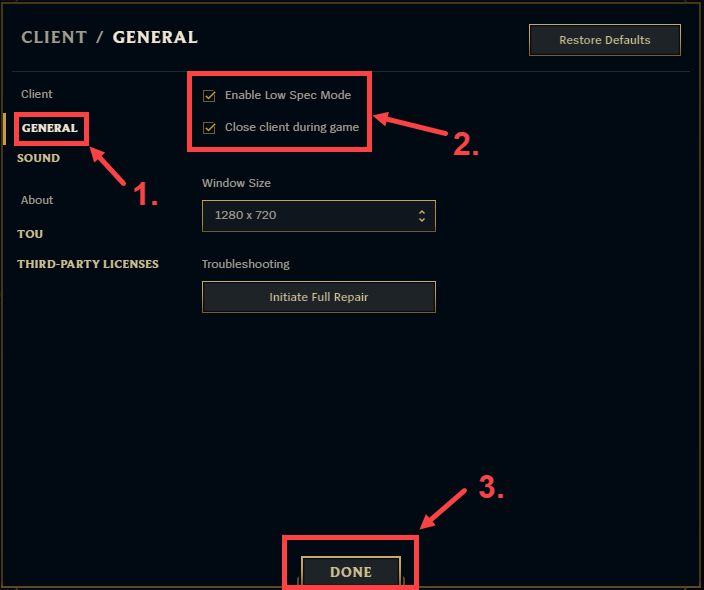
- In the CLIENT/GENERAL window, on the GENERAL tab, make sure you check the following two options: Enable Low Spec Mode and Close client during game. Click DONE to save the changes.
- Sign in to your account and start a new game.
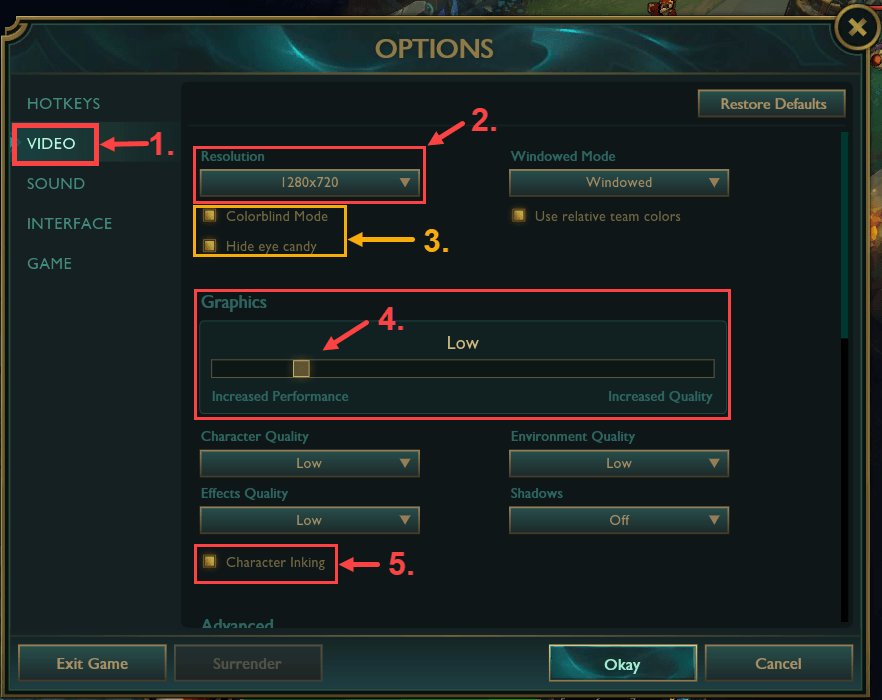
Press Esc on your keyboard to open the settings window during gameplay. Then make the following tweaks:
- On the VIDEO tab, in the details pane, expand Resolution and select 1280×720 (recommended) from the list.
- Check Colorblind Mode and Hide eye candy.
- Under Graphics, drag the slider to choose a quality level. You can set it to Low or Very Low if your PC is not powerful enough.
- Check Character linking.
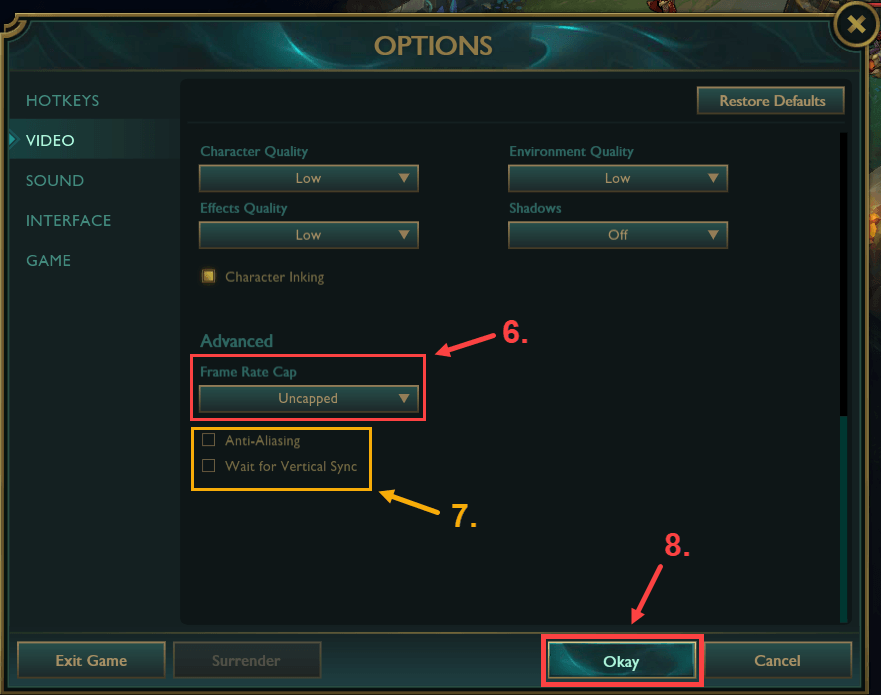
- Under Advanced, expand Frame Rate Cap and then select Uncapped.
- Deselect Anti-Aliasing and Wait for Vertical Sync.
On completion, click Okay to save the changes you’ve made.
Check to see if you continue to have the “lagging” problem. If you do, then please move on to the next fix, below.
Fix 2: Change DNS server
To improve your network condition, you should try to switch your ISP’s DNS server to the Google Public DNS address. This may improve the resolve time and provide you with more security online. Here are the steps:
- In the Windows search box, type cmd. Then click Run as administrator.
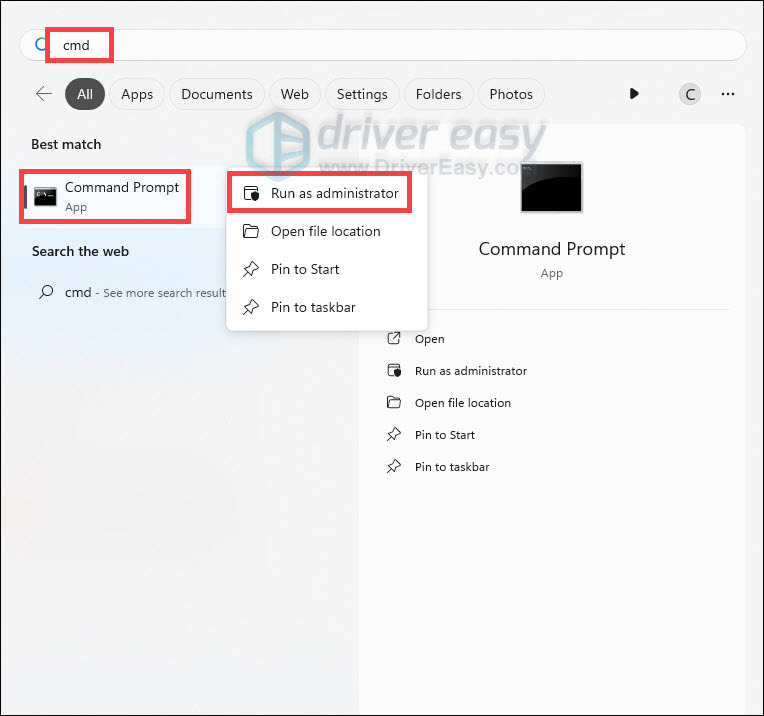
- Click Yes to continue.
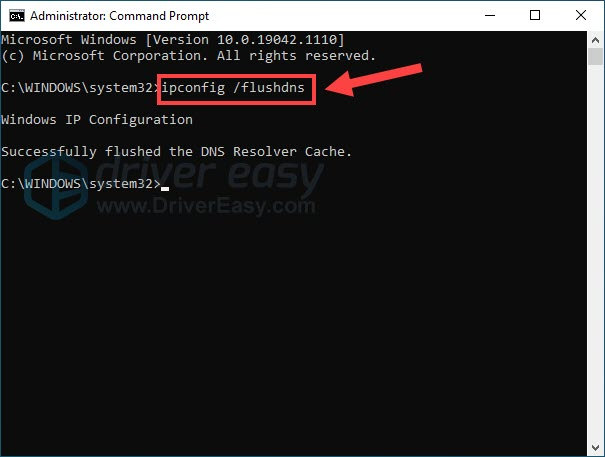
- In the command prompt window, type ipconfig /flushdns and press Enter.
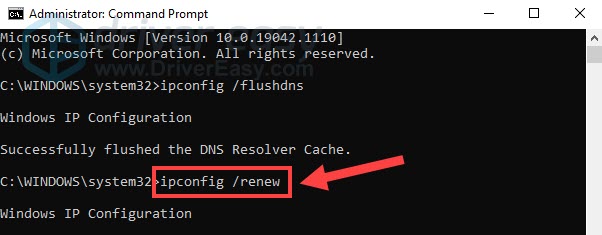
- Type ipconfig /renew and press Enter.
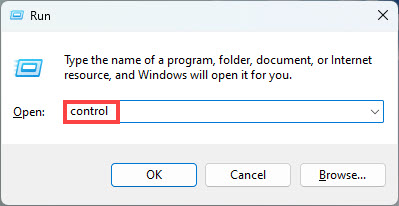
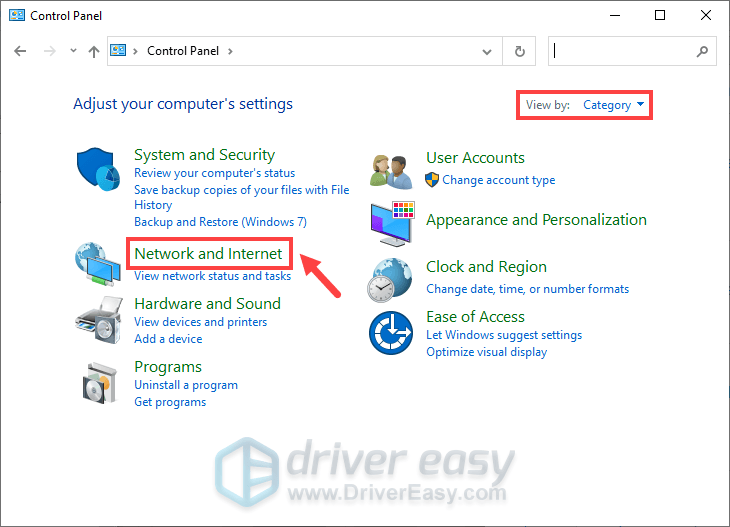
- On your keyboard, press the Windows key and R key at the same time. Type control and hit Enter.
- View by Category, and select Network and Internet.
 .
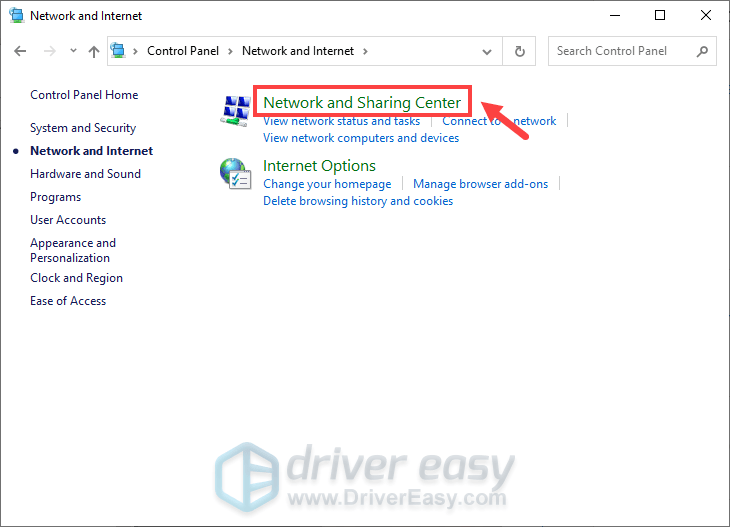
. - Select Network and Sharing Center.
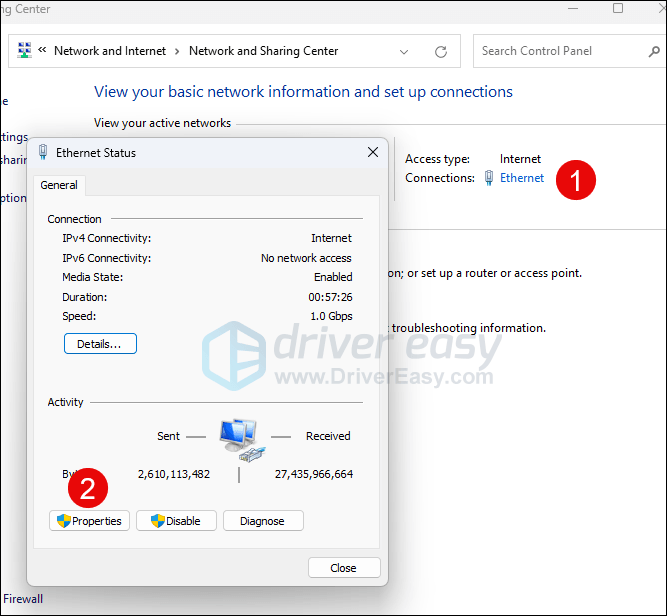
- Click the Internet connection you’re using, then select Properties.
- Click Internet Protocol Version 4 (TCP /IPv4) > Properties.
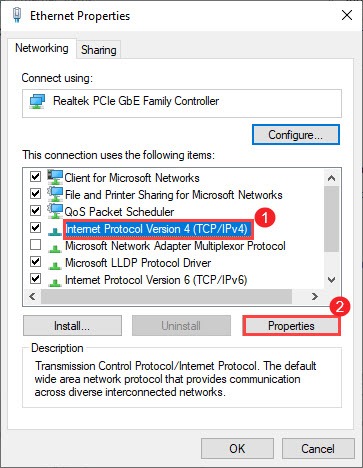
- Click Use the following DNS server addresses:
For Preferred DNS server, type 8.8.8.8
For Alternate DNS server, type 8.8.4.4
Check the box next to Validate settings upon exit and then click OK.
In case your lag issue with LOL still persists, you should try out Fix 3.
Fix 3: Update your device drivers
Your lag issue (whether it’s related to your hardware or network) with LOL can sometimes be caused by an outdated or corrupt device driver. If you’re not sure whether all your device drivers (especially video drivers and network adapter drivers) are up-to-date, you should check.
You can do this in Windows Device Manager, one device at a time. But this takes a lot of time and patience, and if any of your drivers do happen to be out of date, you’ll need to manually update them, which is difficult and risky. If you don’t have the time, patience, or computer skills to update the drivers manually, you can do it automatically with Driver Easy.
Driver Easy will automatically recognize your system and find the correct drivers for it. You don’t need to know exactly what system your computer is running, you don’t need to risk downloading and installing the wrong driver, and you don’t need to worry about making mistakes when installing.
You can update your drivers automatically with either the 7 days free trial or the Pro version of Driver Easy. It takes just 2 clicks, and you get full support and a 30-day money-back guarantee with the Pro version:
- Download and install Driver Easy.
- Run Driver Easy and click the Scan Now button. Driver Easy will then scan your computer and detect any problem drivers.

- Click the Activate & Update button next to the flagged device to automatically download and install the correct version of this driver.
Or click Update All to automatically download and install the correct version of all the drivers that are missing or out of date on your system (You’ll need the Pro version for this – when you select Update All, you’ll get a prompt to upgrade. If you’re not prepared to purchase the Pro version yet, Driver Easy provides a 7-day trial at no cost, granting access to all Pro features like fast downloads and easy installation. No charges will occur until after your 7-day trial period ends.)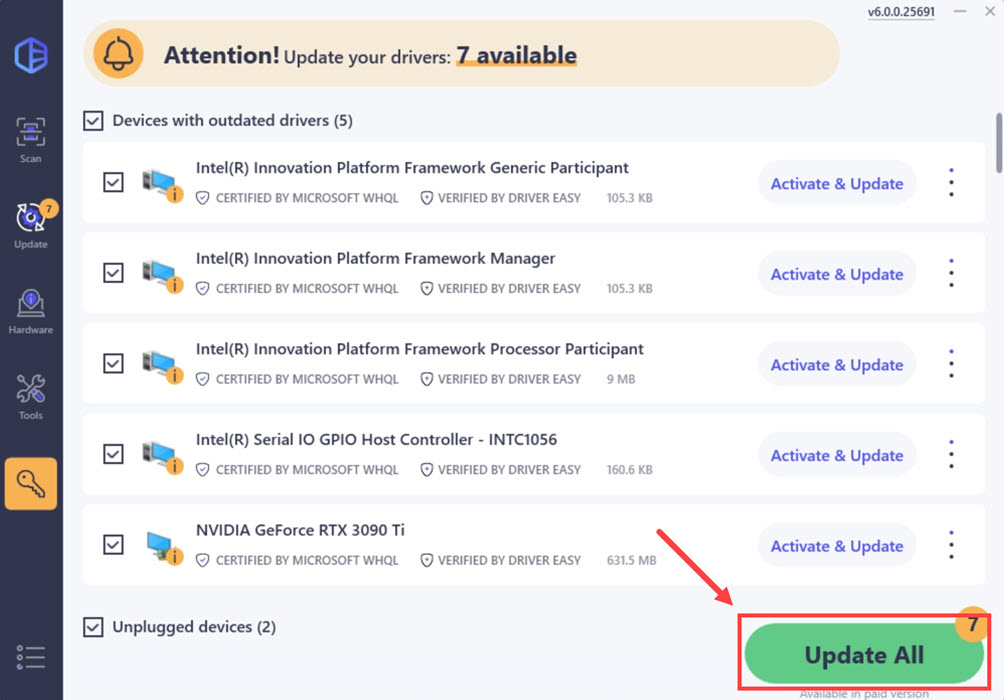
- After updating, restart your computer to take effect.
Fix 4: Stop unnecessary processes
Make sure you don’t run other resource-hogging programs simultaneously with LOL, because that would very likely cause the game to lag or stutter. To check how many processes are opened and what resources they’re consuming, you should take a closer look at the Windows Task Manager.
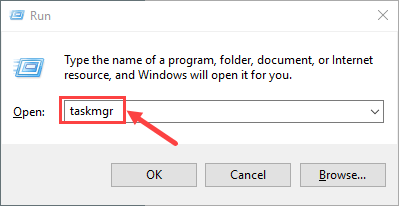
- On your keyboard, press the Windows logo key and R at the same time to invoke the Run dialog box. Type in taskmgr and hit Enter.
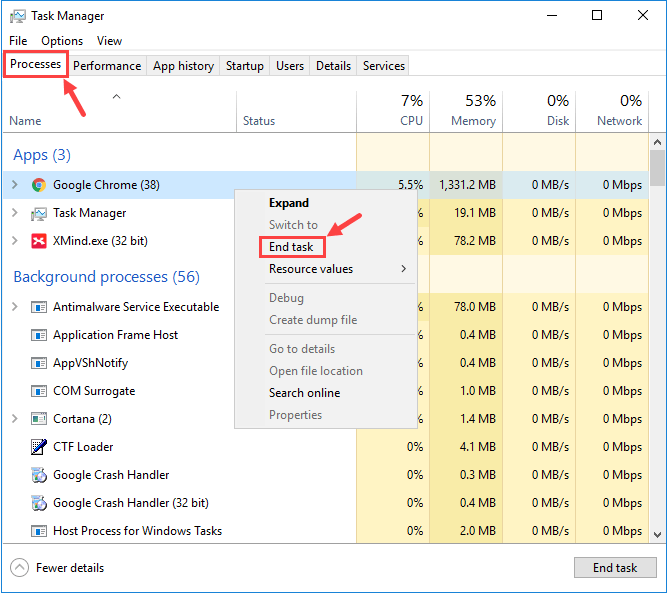
- On the Processes tab, right-click on the process you’re about to close and select End task.
- Disable your antivirus software temporarily. This is optional but you can give it a try and see if your lag problem is mitigated.
Note that Microsoft has its own default anti-malware, Windows Defender. It’s automatically enabled even if you also have other antivirus applications installed. Even if you disable your other antivirus programs, Windows Defender is always there for you during that certain time range. So, no need to worry too much about temporarily turning antivirus off.
That said, you should still be extra careful about what sites you visit, what emails you open and what files you download when your antivirus is disabled.
Fix 5: Delete temporary/junk files
Lots of people don’t have the habit of clearing temporary and junk files on a regular basis. However, these files can be the culprits that slow down your PC, even causing applications (including LOL) to lag. If you can’t remember when was the last time you removed them, then you should perform the following procedure to do a thorough clean.
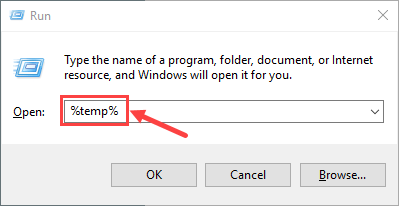
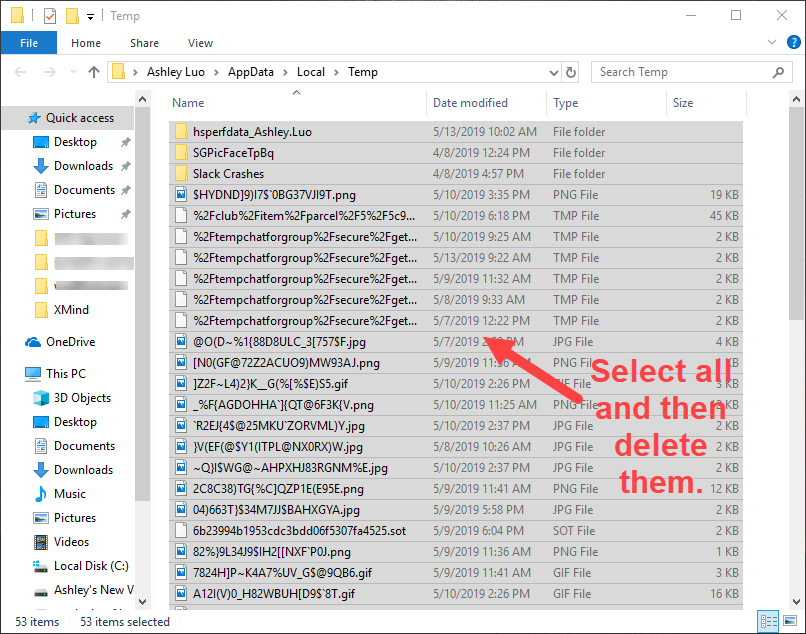
- On your keyboard, press the Windows logo key and R at the same time to invoke the Run dialog box. Type in %temp% and hit Enter.
- Press Ctrl + A to select all the files, then hit the Delete button on your keyboard to remove them. (This won’t affect your personal files.)
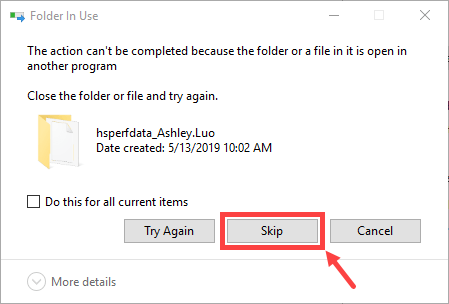
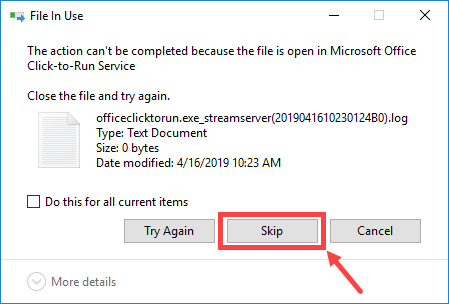
- Click Skip if you’re presented with a warning that says “the folder or a file in it is open in another program.”
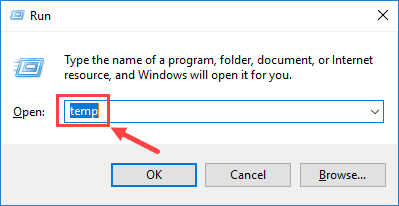
- On your keyboard, press the Windows logo key and R at the same time to open the Run dialog box again. Type in temp and hit Enter.
If prompted, click Continue to open the folder. - Select all the files and delete them. (This won’t affect your personal files.)
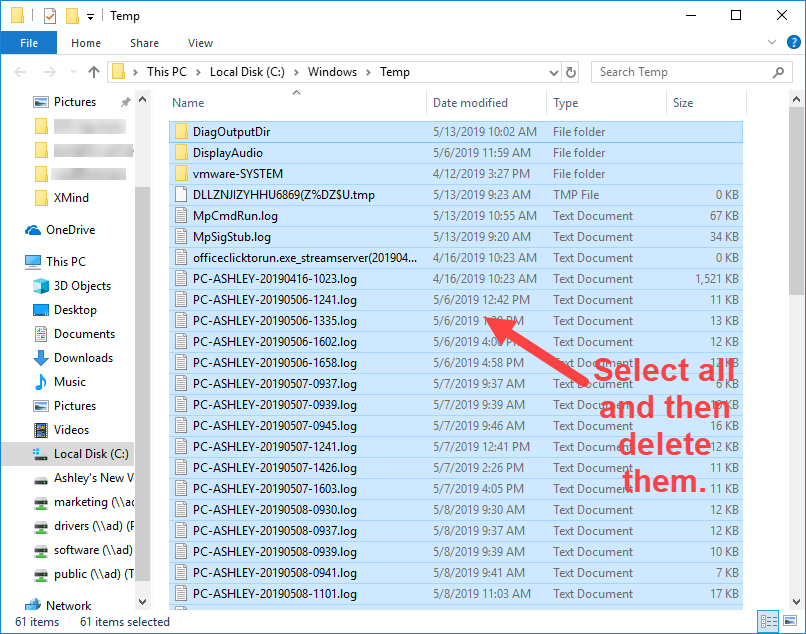
- Click Skip.
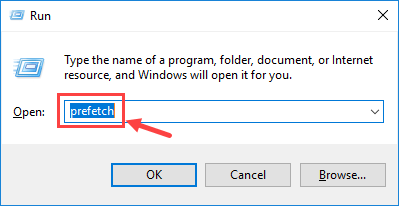
- On your keyboard, press the Windows logo key and R at the same time to invoke the Run dialog box again. Type in prefetch and hit Enter.
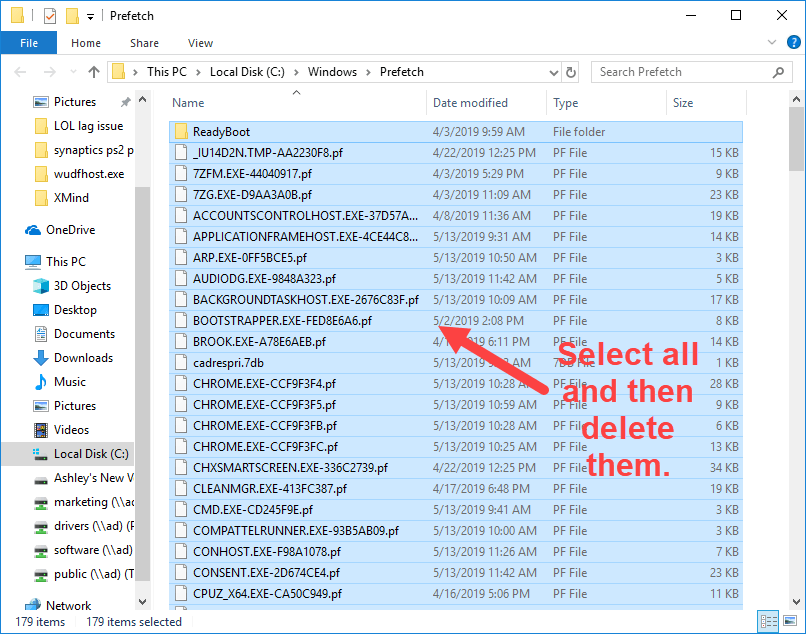
If prompted, click Continue to open the folder. - Select all the files and delete them. (This won’t affect your personal files.)
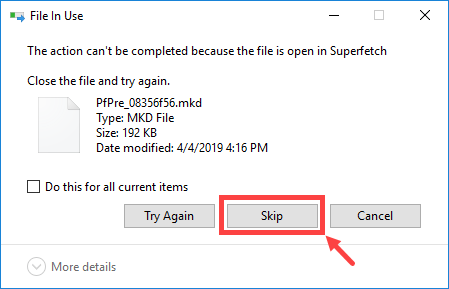
- Click Skip.
- Don’t forget to empty your Recycle Bin after finishing the steps above.
https://support.microsoft.com/en-us/help/4026616/windows-10-disk-cleanup
Fix 6: Adjust your Windows settings
If you’re using a laptop to play LOL, you should’ve known that when your PC is running out of battery, the game could be slowed down dramatically. Thus, don’t forget to keep your laptop on charge while playing video games. Besides, there’s one option you should configure to ensure LOL can run in tip-top condition – that’s the Performance Options (also available to desktop users).
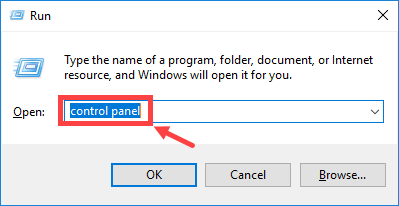
- On your keyboard, press the Windows logo key and R at the same time to open the Run dialog box. Type control panel and hit Enter.
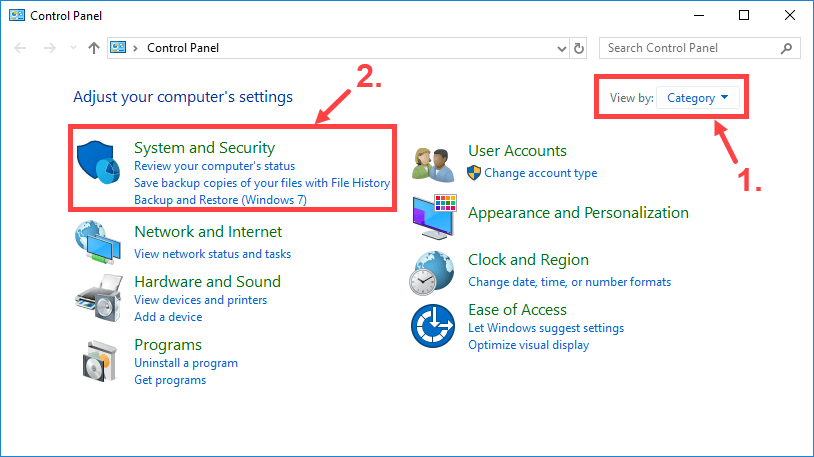
- Expand View by: and select Category. Then, click System and Security.
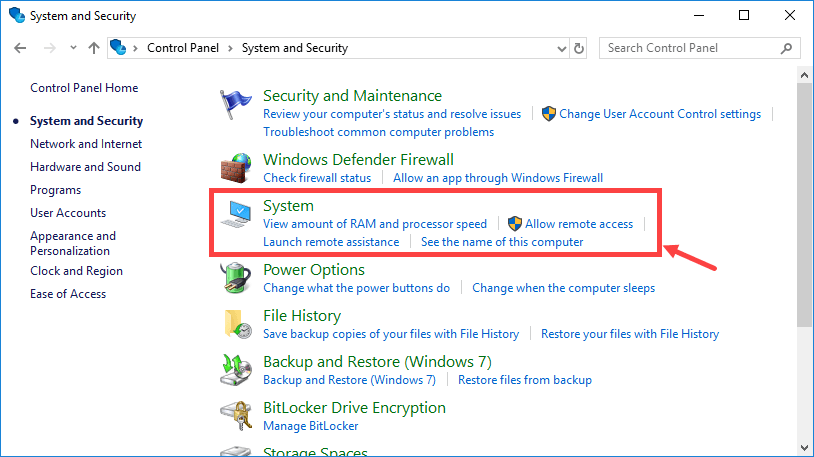
- Click System.
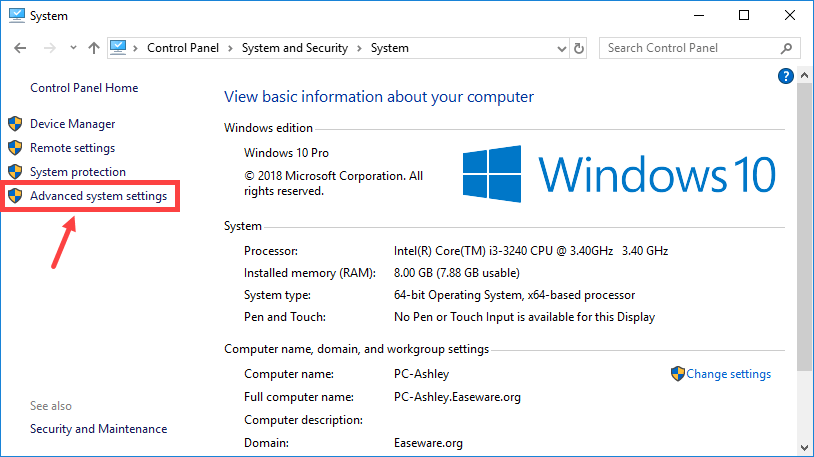
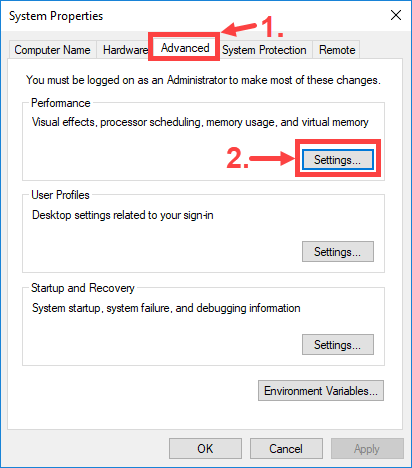
- In the left pane, click Advanced system settings.
- On the Advanced tab, click Settings… in the Performance section.
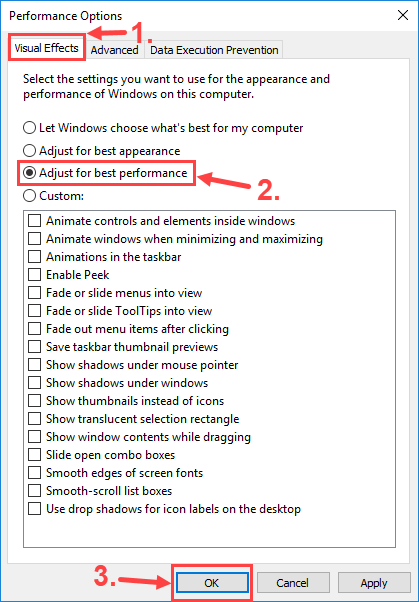
- On the Visual Effects tab, select Adjust for best performance. Then, click OK. (You can also click Custom and adjust the settings based on your own needs.)
Okay, time to test whether your LOL is still lagging. If it is, then you can take a stab at Fix 7.
Fix 7: Swap Wi-Fi to an Ethernet connection
Are you playing LOL with a wireless network? If yes, then this fix may be of some help. Admittedly, Wi-Fi is not as stable as a wired network so you’ll get more interruption when using Wi-Fi to play online games. For example, when you play LOL in a room far away from your router, the Wi-Fi signal you receive can be rather weak, causing major lag spikes in LOL.
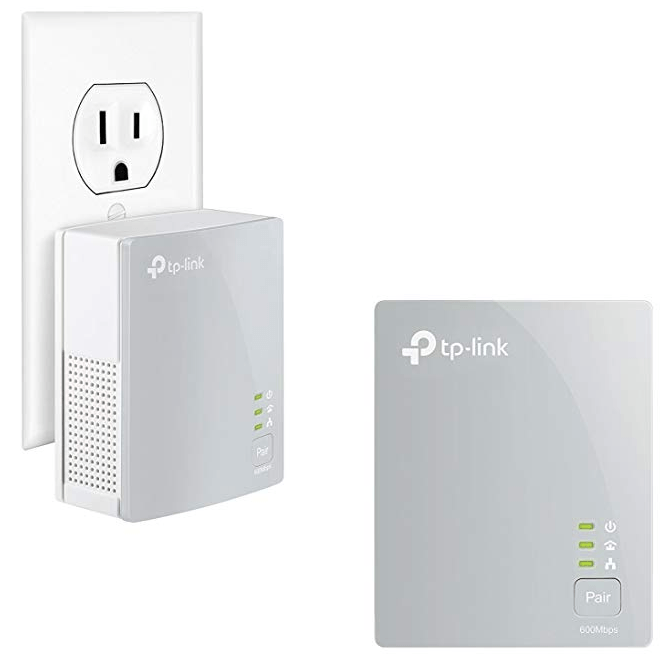
To solve this problem, you should swap Wi-Fi to an Ethernet connection, but this is not practical for everyone. As an alternative, you can buy a powerline Ethernet adapter which extends the reach of your home network to places with poor wireless coverage.
Also, you should avoid possible wireless interference that weakens your Wi-Fi signal such as cordless phones and microwave ovens. Place them far away from your router, or simply move your laptop to a new location covered with a stronger Wi-Fi signal.
Fix 8: Make sure your computer is not overheating
According to some users, the lagging issue in League of Legends happens when their CPU and GPU are running hot. So if the ventilation for your computer is rather poor, or not strong enough for all your hardware components, then there’ll be problems like sudden computer shut down, constant freezes, game lags and stutters, among many other PC and software program performance issues.
If you can feel the heat on your computer case or on your computer itself, or you can hear the fan(s) running very loud when you run resource-hungry software programs (like games), you need a cooler environment for your machine to make sure that the lagging in LOL stops.
Here is a detailed post for your reference if your computer is overheating: How to Know Your CPU Overheating and How to Fix It
Hopefully this post helped you resolve the lag issue with LOL. Please feel free to leave a comment below if you have further questions or other fixes to share. Thanks for reading!
