


Many iPhone users have experienced the iTunes not recognizing iPhone issue. But don’t worry if you happen to be one of them. According to user feedback, we’ve put together some fixes down below. Try them and get your iTunes working in a snap.
Basic troubleshooting steps
Before you continue to anything more advanced, make sure you’ve tried the following:
- Reboot your PC
- Change to an MFi certified cable
- Unlock your iPhone when connecting
If these basic steps didn’t give you luck, you can move on to the advanced fixes below.
Advanced fixes:
You might not need to try them all. Simply work down the list until you find the one that solves your problem.
- Unplug all USB accessories
- Disable Personal Hotspot on your iPhone
- Make sure your drivers are up to date
- Try other versions of iTunes
- Install all Windows updates
- Try your iPhone on another PC
Fix 1: Unplug all USB accessories
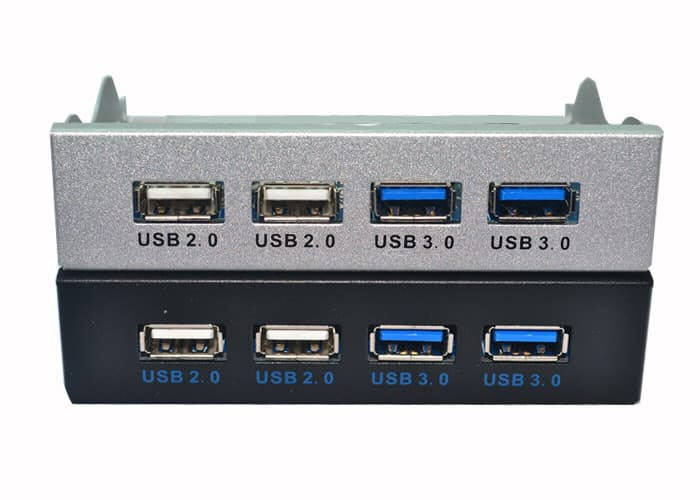
Sometimes iTunes won’t find your phone when there’re other conflicting accessories. In this case, you can try to remove all USB accessories except for your device.
Also, if you’re using a USB 3.0 port, try switching to a USB 2.0 port, and vice versa.
If this trick doesn’t help, simply move on to the next fix below.
Fix 2: Disable Personal Hotspot on your iPhone
Some users reported that the Personal Hotspot (tethering) function on your iPhone might be the root cause of this issue. When tethering is on, you might be sharing the mobile network on your PC through USB. So make sure you have disable tethering on your iPhone and try to connect again.
If you don’t know how, use these steps to check:
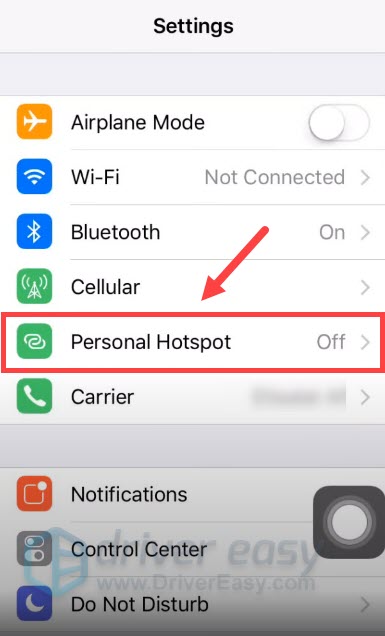
- Unlock your iPhone and open Settings. Tap Personal Hotspot.
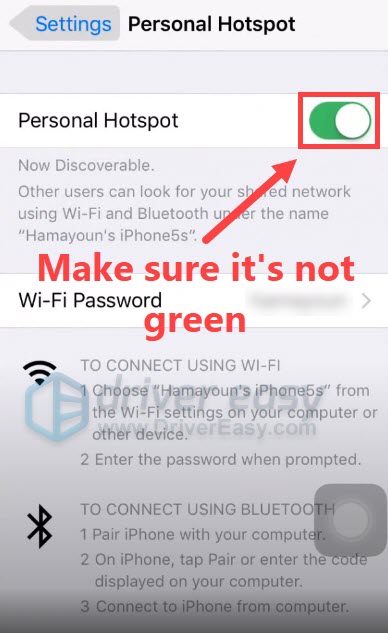
- Turn off the Personal Hotspot toggle switch.
- Now try to reconnect your iPhone.
If it’s not tethering in your case, simply check out the next fix.
Fix 3: Make sure your drivers are up to date
One of the most common causes of this issue is that you’re using broken or outdated computer drivers. A large number of users reported that iTunes works after a driver update. So before you attempt anything more complicated, definitely make sure you’re using the latest drivers.
There’re mainly 2 ways you can update your drivers: manually or automatically.
Option 1: Update your drivers manually
If you’re familiar with computer hardware, you can try to update your driver manually. To do so, visit your motherboard manufacturer’s website and search for your model. Then go to the download/support page and get the latest installers that’s compatible with your operating system.
Option 2: Update your drivers automatically (Recommended)
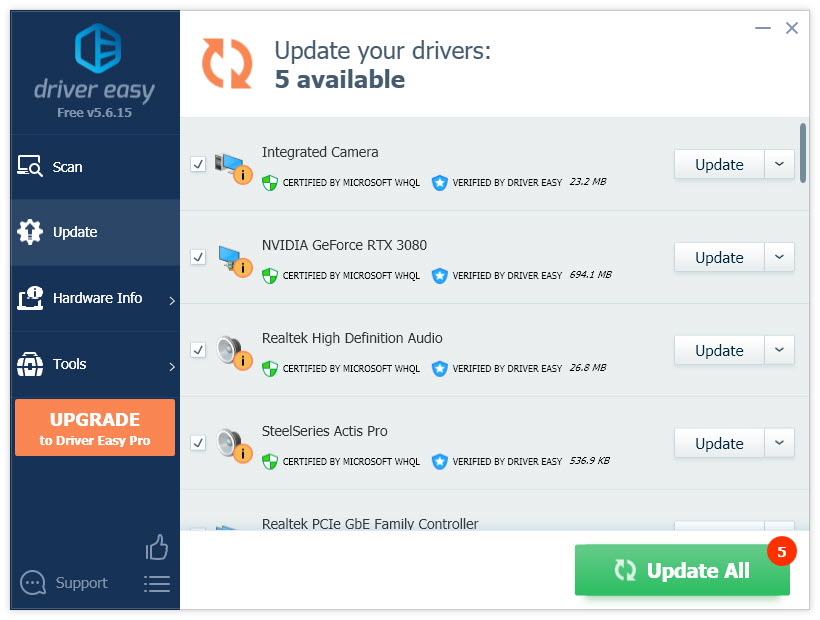
If you don’t have the time, patience or computer skills to update your drivers manually, you can do it automatically with Driver Easy.
Driver Easy will automatically recognize your system and find the correct drivers for it. You don’t need to know exactly what system your computer is running, you don’t need to risk downloading and installing the wrong driver, and you don’t need to worry about making a mistake when installing.
- Download and install Driver Easy.
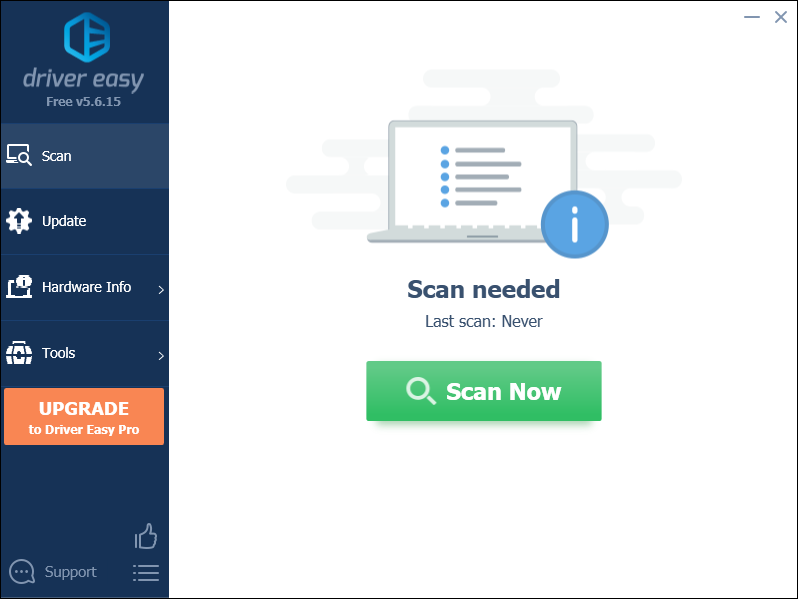
- Run Driver Easy and click Scan Now. Driver Easy will then scan your computer and detect any problem drivers.
- Click Update All to automatically download and install the correct version of all the drivers that are missing or out of date on your system.(This requires the Pro version – you’ll be prompted to upgrade when you click Update All. If you don’t want to pay for the Pro version, you can still download and install all the drivers you need with the free version; you just have to download them one at a time, and manually install them, the normal Windows way.)
Once you’ve updated all your drivers, restart your PC and check if iTunes is working now.
If the latest drivers don’t do the charm for you, take a look at the next fix below.
Fix 4: Try other versions of iTunes
iTunes has never worked perfectly on Windows, and sometimes the not recognizing iPhone problem is limited to a buggy version. You can try to uninstall iTunes completely and test other versions.
You can use the following steps to remove iTunes completely.
Uninstall iTunes completely
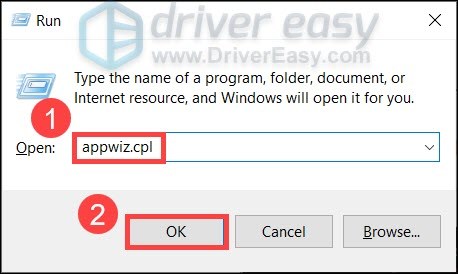
- On your keyboard, press Win+R (the Windows logo key and the R key) to open the Run box. Type or paste appwiz.cpl and click OK.
- Locate the following programs and double-click to uninstall. (Some might not exist on certain platforms.)
iTunes
Apple Software Update
Apple Mobile Device Support
Bonjour
Apple Application Support 32-bit
Apple Application Support 64-bit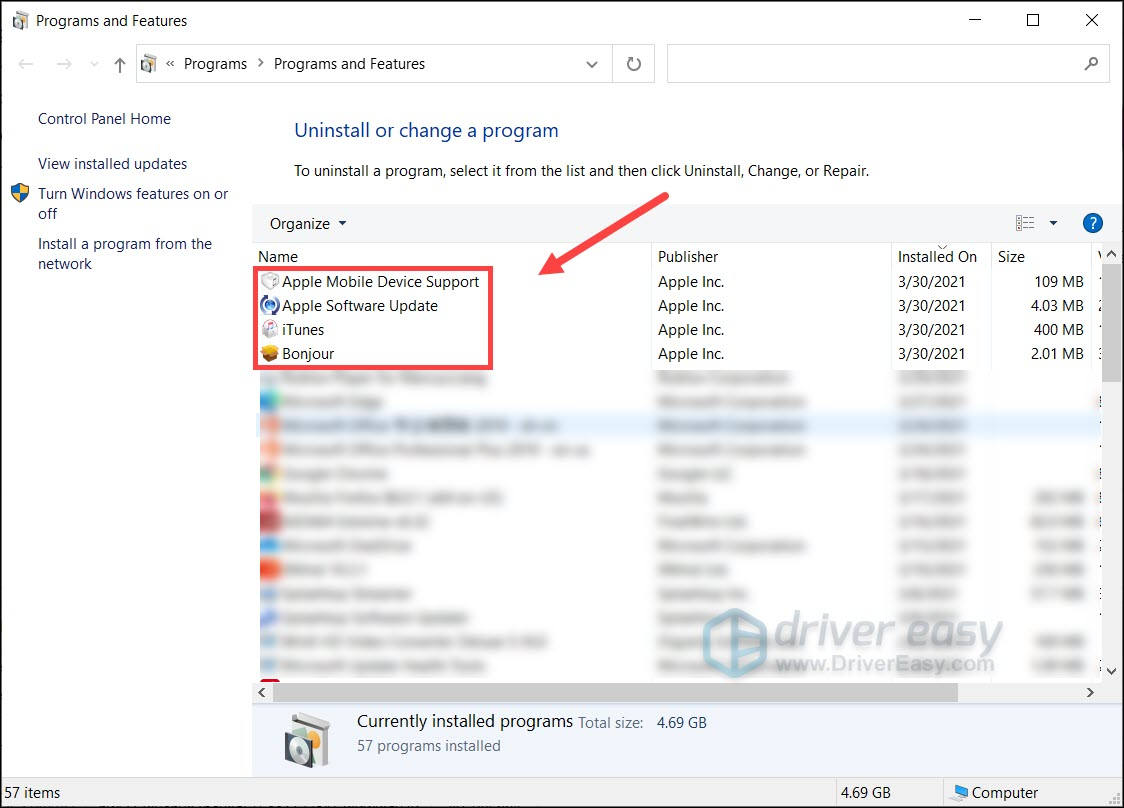
Then you need to remove the remaining files:
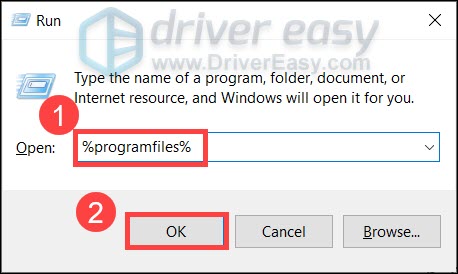
- On your keyboard, press Win+R (the Windows logo key and the R key) to invoke the Run dialog. Type or paste %programfiles% and click OK.
- Delete the following folders if exist:
iTunes
Bonjour
iPod - Open the Common Files folder, then the Apple folder.
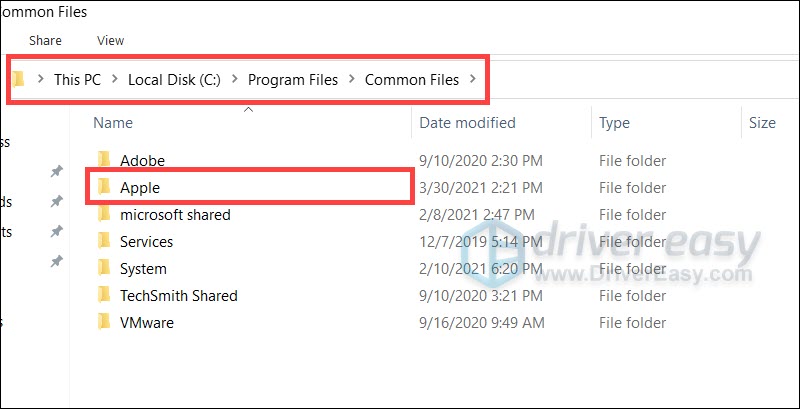
- Delete the following folders if exist:
Mobile Device Support
Apple Application Support
CoreFP
Then remove the following folders according to your operating system.
| Folders to remove | Operating system |
| C:Program Files (x86)iTunes C:Program Files (x86)Bonjour C:Program Files (x86)iPod C:Program Files (x86)Common FilesAppleMobile Device Support C:Program Files (x86)Common FilesAppleApple Application Support C:Program Files (x86)Common FilesAppleCoreFP | Windows 10 64-bit |
Now you need to download and install other versions of iTunes. Note that you shouldn’t choose ancient builds as they might not support new products.
For history iTunes versions, see this wiki. You can also check out the Microsoft Store version.
If reinstalling iTunes doesn’t give you luck, you can continue to the next fix.
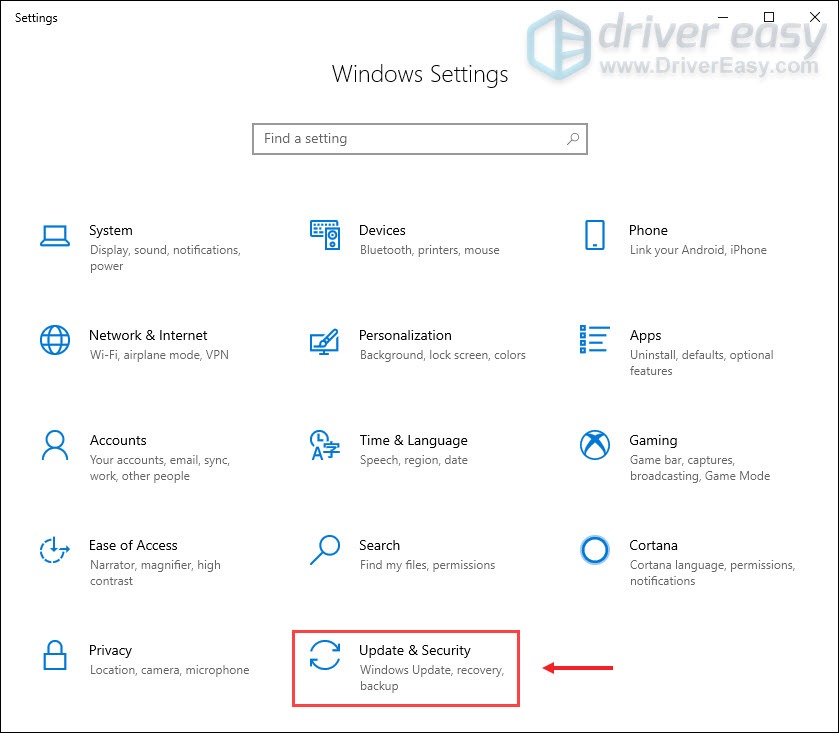
Fix 5: Install all Windows updates
Microsoft releases updates for Windows on a regular basis, mostly addressing compatibility issues. It might be a potential fix to your problem with iTunes:
- On your keyboard, press Win+I (the Windows logo key and the i key) to open the Windows Settings app. Click Update & Security.
- Click Check for updates. Windows will then download and install the available patches. It might take some time (up to 30 mins).
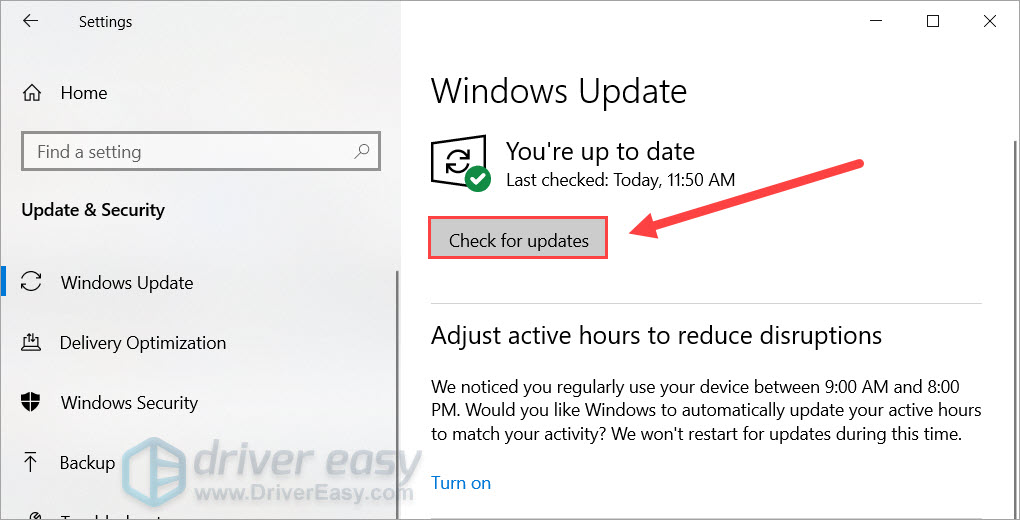
Once completed, restart your PC for the changes to take effect. Then test if iTunes detects your iPhone now.
If the issue lingers on, try the next solution below.
Fix 6: Try your iPhone on another PC
In some cases, it could be your phone that’s causing all the hassle. You can try connecting your iPhone to another computer to find out what went wrong exactly.
If the issue doesn’t appear on other PCs, it could mean that it’s a computer error. The most nuclear solution will be reinstalling your Windows system.
If the issue reappears, you might need to reset your iPhone or contact Apple Support for further assistance.
Hopefully, this tutorial helps you get your iTunes working with your iPhone properly. If you have any questions or ideas, feel free to leave a message and we’ll get back shortly.