


Keyboard backlight not working is a common problem which can happen on Windows or Mac. But if you meet this problem, you can take a look at this post. This post will give you a complete solution and explanation of the keyboard backlight not working problem on Windows and Mac.
For MAC
Method 1: Adjust the light sensor
Mac has a light sensor located on the top of your Macbook screen. In some situation, direct lighting, bright lights such as sunlight directly on the light sensor can cause the illumination indicator and controls become locked. This feature is aimed to disable the backlighting when it’s not needed.
The solution is simple: Adjust your Mac location so that the light can’t shine on the display and near the front-facing camera.
Check your keyboard again, if it doesn’t work, you can move to the next method.
Method 2: Adjust keyboard brightness
For Mac, you might have unintentionally set the light to 0. To solve it, you can adjust the keyboard brightness in the settings.
Here’s how:
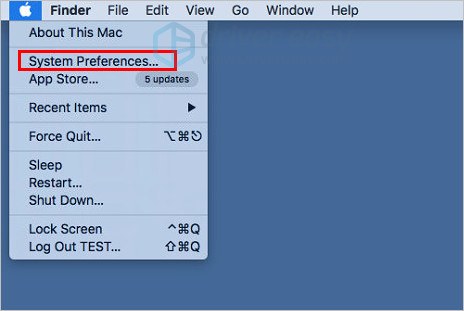
- Click the Apple icon in the top left corner.
- Click System Preferences.
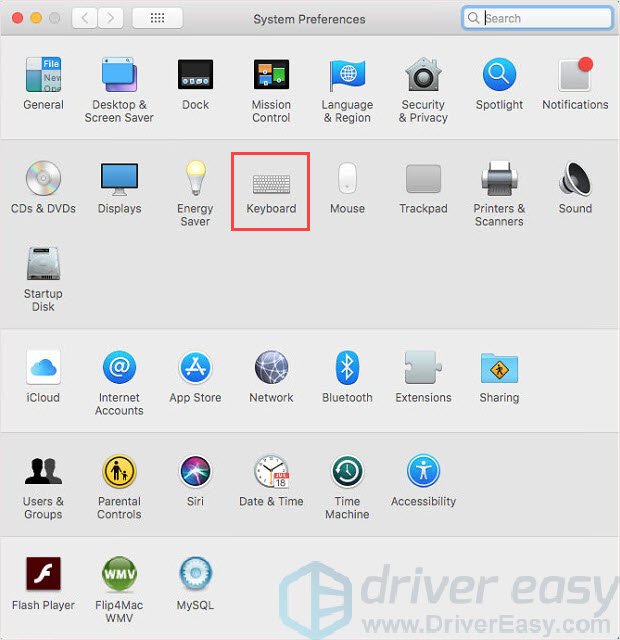
- Choose Keyboard.
- Uncheck Adjust keyboard brightness in low light.
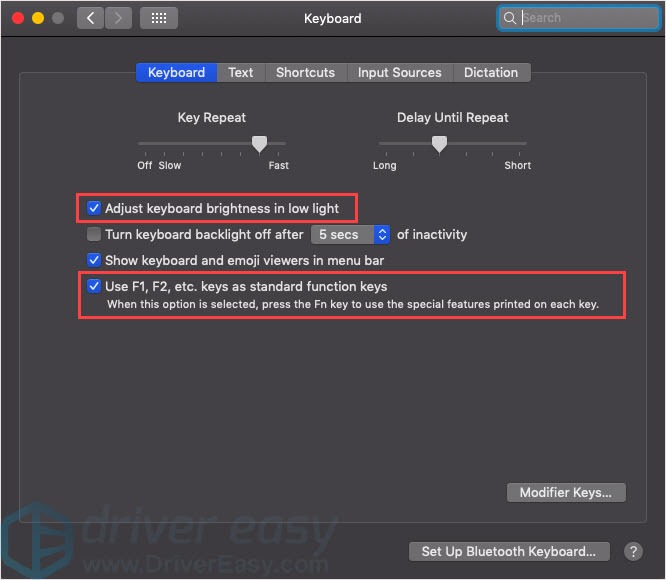
- Use the F1 and F2 keys to manually control the keyboard lighting level.
Method 3: Contact customer service
If the above methods can’t fix this issue, you’d better contact AppleCare for help. The problem may be caused by a hardware issue.
For Windows
There are different PC using the Windows system. The reason for the keyboard backlight not working may be various, but there are some common reason and common fixes you can try.
Common Method 1: Reboot your computer
Reboot your computer normally can solve many common errors. Shutdown your computer, take out the battery, wait for few seconds then put it back and reboot your PC.
After that, check the keyboard backlight again.
Common Method 2: Check your driver
It’s possible that the keyboard backlight not working issue is caused by certain driver issue.
Take the ASUS notebook as an example, the ATK driver directly influences the keyboard backlighting. But how do you know the problem is caused by the driver, not by others? Here’s how:
Step 1: Examine your computer
You need to examine the problem to know whether it’s a hardware issue or driver issue.
To do this, you need to enter it’s BIOS system.
Here’s how:
- Shut down your computer completely.
- Press the Power button to open it.
- When you see the loading screen, keep pressing F2 hotkey.
- In the BIOS system, press the key Fn + F3/F4 together to check your keyboard backlight can be turned on or not.
If the keyboard backlight doesn’t work or can’t be adjusted, the reason probably is the hardware issue. You can contact the manufacturer’s customer service or bring your computer to your local computer service center for help.
If it’s work in the BIOS system, you need to update the ATK driver package.
Step 2: Update the driver
ATK driver is the driver produced by ASUS in order to control the ASUS keyboard hotkeys. So if the ATK is outdated or missing, your keyboard backlight could have trouble and cause you problem.
There are 2 ways you can update the ASUS ATK drivers: manually and automatically.
Option 1 – Download and install the driver manually
ASUS keeps updating drivers. To get them, you need to go to the ASUS website, find the drivers corresponding with your specific flavor of Windows version (for example, Windows 32 bit) and download the driver manually.
Once you’ve downloaded the correct drivers for your system, double-click on the downloaded file and follow the on-screen instructions to install the driver.
- Go to ASUS official download page.
- Enter your model name and search or select the product in the drop-down menu.

- Click Driver & Utility.
- Select the operating system you’re using and then find the driver you need in the below menus.
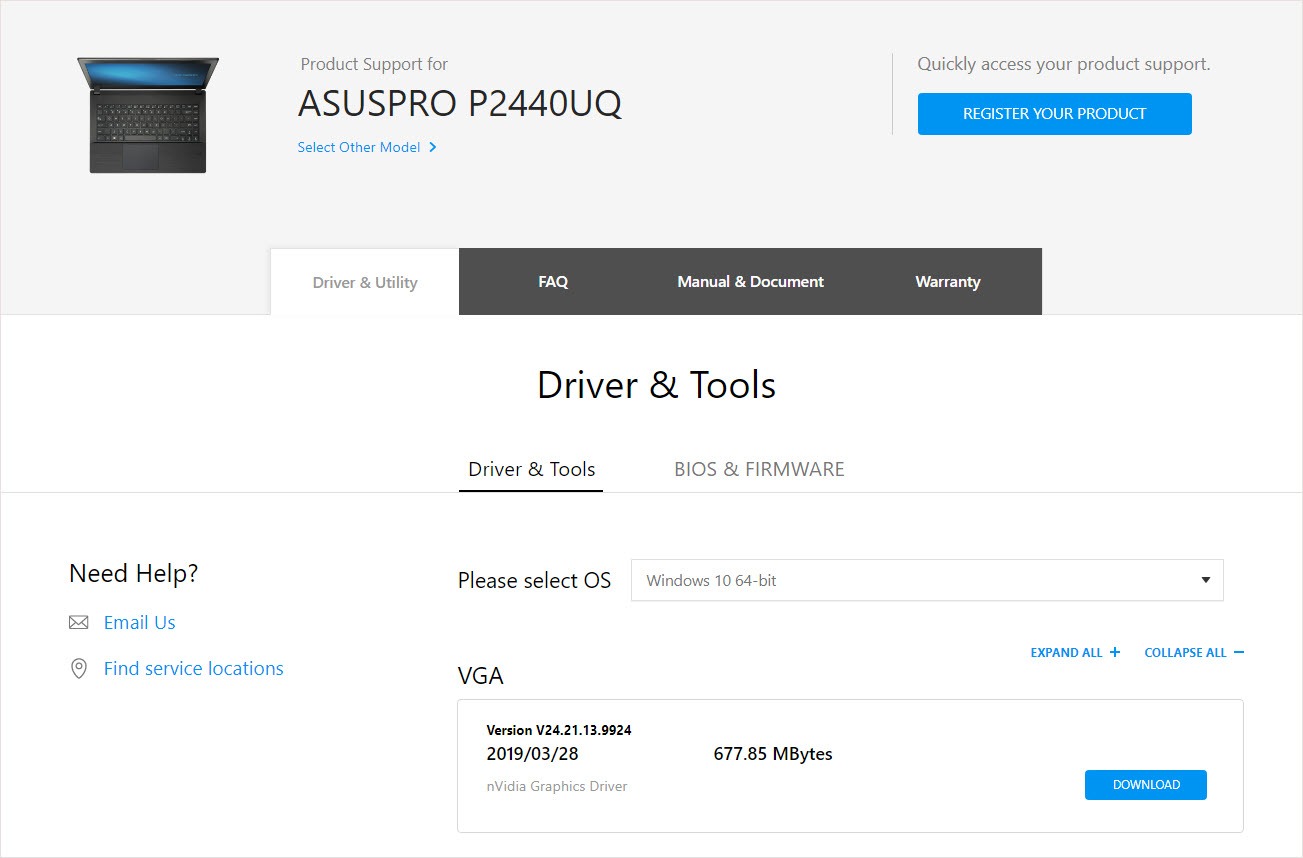
- Download and install the ATK driver manually.
Option 2 – Automatically update the ATK drivers
If you don’t have the time, patience or computer skills to update the driver manually, you can do it automatically with Driver Easy.
Driver Easy will automatically recognize your system and find the correct drivers for it. You don’t need to know exactly what system your computer is running, you don’t need to risk downloading and installing the wrong driver, and you don’t need to worry about making a mistake when installing.
You can update your drivers automatically with either the FREE or the Pro version of Driver Easy. But with the Pro version it takes just 2 clicks:
1) Download and install Driver Easy.
2) Run Driver Easy and click the Scan Now button. Driver Easy will then scan your computer and detect any problem drivers.

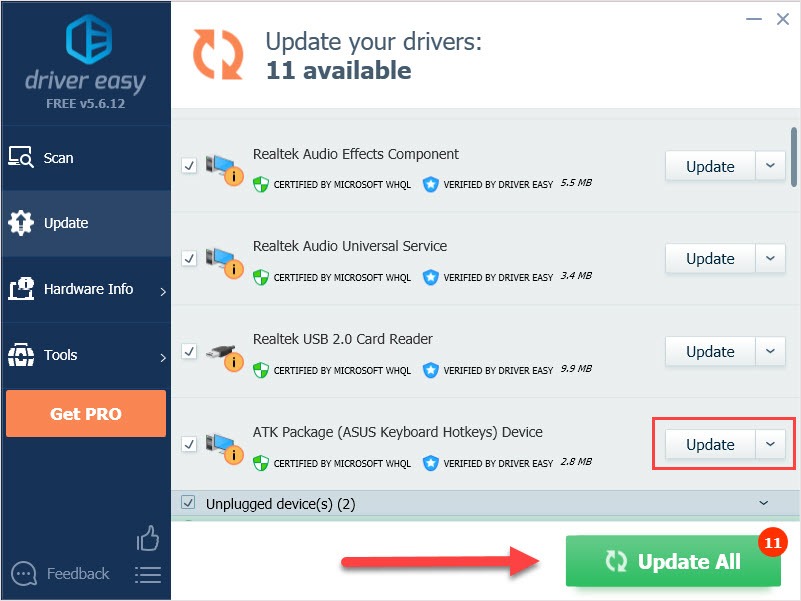
3) Click the Update button next to your ATK driver to automatically download and install the correct version of this driver (you can do this with the FREE version).
Or click Update All to automatically download and install the correct version of all the drivers that are missing or out of date on your system (this requires the Pro version – you’ll be prompted to upgrade when you click Update All).
Tips for keyboard maintenance
1. Try not to eat, smoke or drink on top of the keyboard to keep it clean.
2. Please do not keep hitting the keyboard vigorously. This will cause damage to the soft glue that supports the keyboard keys.
3. Clean the keyboard regularly. The dust in the button gap will accumulate and result in some malfunction of the keyboard if you didn’t clean the keyboard for a long time.
We hope the above information can help. if you have any questions or suggestions, please feel free to leave us a comment below. It would be very nice to know which method helps.