Wi-fi is no doubt an essential part of our modern daily life. How the life would be supposed there’s no Wi-Fi? We can’t imagine at all. It’s equal panic if your Wi-Fi stops working.
If you are struggling with Wi-Fi not working on Windows 10, don’t give up hope, read on to follow this guide. We will be showing you how to fix Wi-Fi connection issues in details.
- Make sure your Wi-Fi is turned on
- Reboot Windows 10 and your wireless router
- Reset your wireless adapter
- Reinstall Wi-Fi card driver
Method 1: Make sure your Wi-Fi is turned on
When you find your Wi-Fi is not working, the first thing to do is to check if Wi-Fi is turned on.
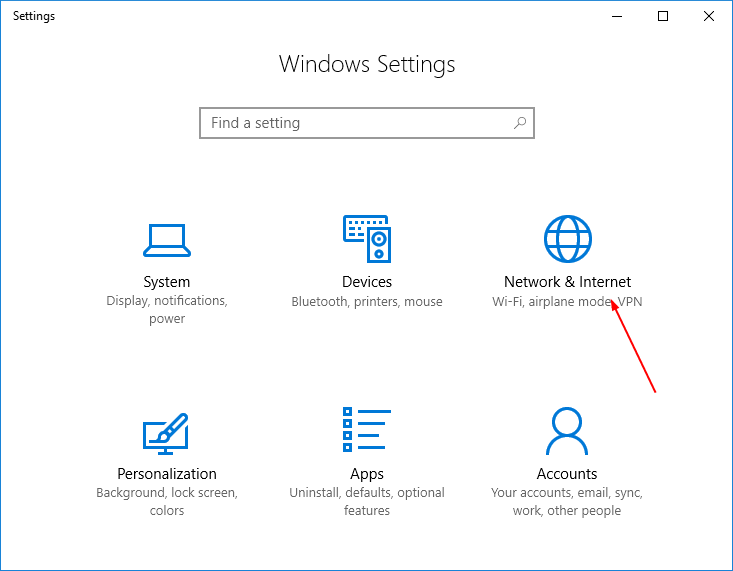
1) On your keyboard, press the Windows logo key ![]() + I key to open the Settings window. Then click Network & Internet on the open window.
+ I key to open the Settings window. Then click Network & Internet on the open window.
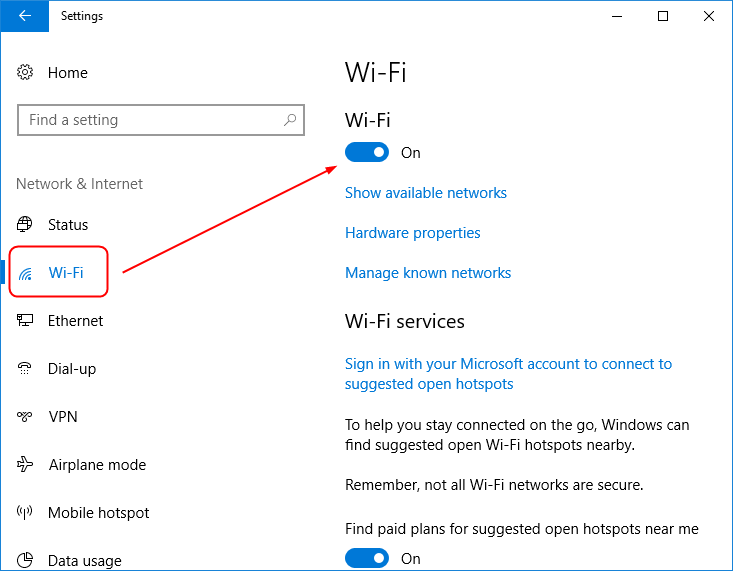
2) Click Wi-Fi on the left pane. Then see if it’s On on the right pane. a) If it’s Off, switch it to be On. Then see if your Wi-Fi could work. b) If it’s On already, go on to try next method.
Method 2: Reboot your Windows 10 computer and your wireless router
A simple reboot can always help users solve some computer woes. When your Wi-Fi stops working, try to reboot Windows 10.
If it still cannot work, unplug your wireless router and wait for a while. Then plug it back in. This is called “Power Cycle” your router. Wait for all the lights stop flashing, then check your if your Windows 10 can access the Wi-Fi connection.
Method 3: Reset your wireless adapter
Another tried-and-true fix for Wi-Fi issue is to Reset your wireless adapter.
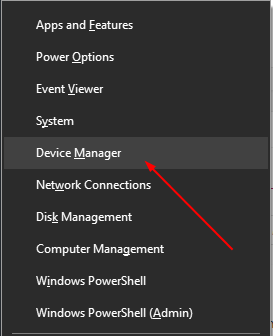
1) On your keyboard, press the Windows logo key ![]() + X key to open quick-access menu. Then click Device Manager.
+ X key to open quick-access menu. Then click Device Manager.
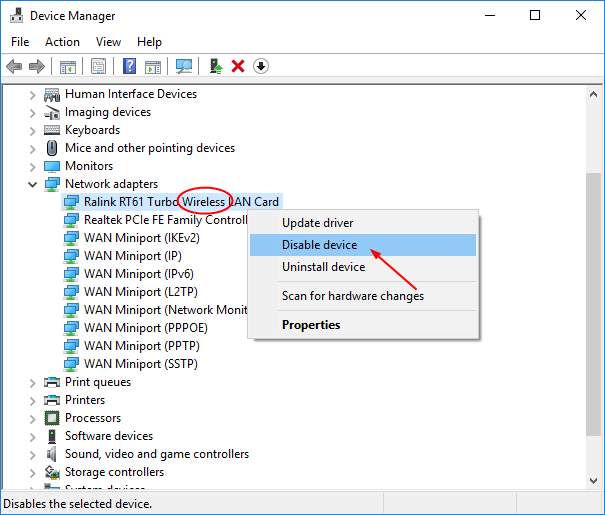
2) On the open window, find and expand Network adapters catalog. Then right-click on your Wi-Fi card driver (the name with wirless) to choose Disable device.
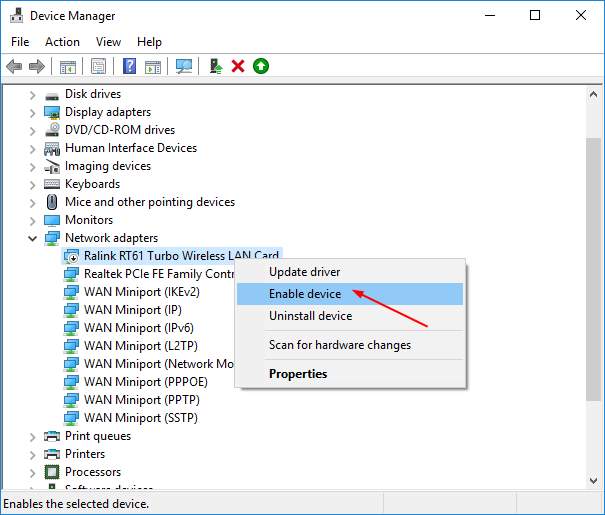
3) Wait a few seconds, then right-click on your Wi-Fi card driver again. And this time click Enable device.
Method 4: Reinstall your Wi-Fi card driver
Your Wi-Fi is not woring problem is probably being caused by driver issues. The steps above may resolve it, but if they don’t, Try to reinstall your Wi-Fi card driver.
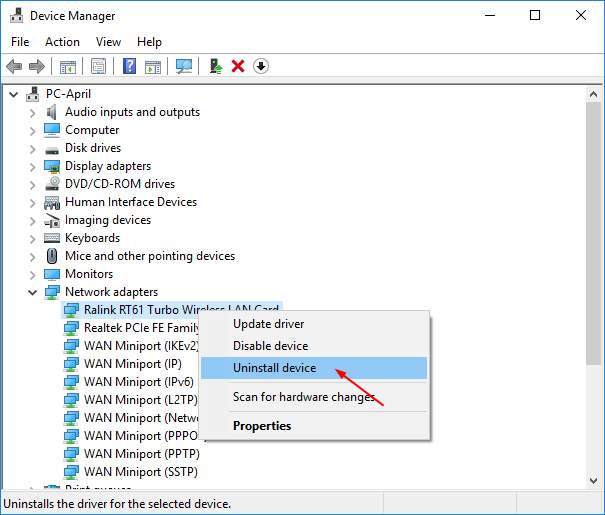
1) Follow the step 1-2 of Method 3 to locate your Wi-Fi card driver in Device Manager.
2) Right-click on Wi-Fi card driver to choose Uninstall device.
3) Head to your PC’s manufacturer’s website to download the latest driver for your Wi-Fi card. Then install it on your Windows 10.
If you’re not confident playing around with drivers manually, you can do it automatically with Driver Easy.
Driver Easy will automatically recognize your system and find the correct drivers for it. You don’t need to know exactly what system your computer is running, you don’t need to risk downloading and installing the wrong driver, and you don’t need to worry about making a mistake when installing.
Note: Driver Easy needs Internet connection for updating drivers. You can connect your Windows 10 to Ethernet network or use Offline Scan feature of Driver Easy .
1) Download and install Driver Easy.
2) Run Driver Easy and click Scan Now button. Driver Easy will then scan your computer and detect any problem drivers.

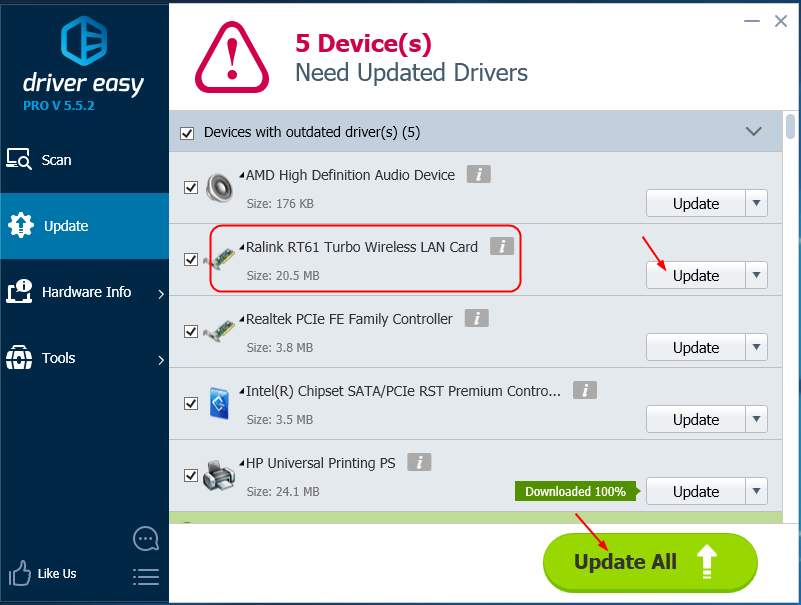
3) With the Free version of Driver Easy: Click the Update button next to a flagged Wi-Fi driver to automatically download and install the correct version of this driver.
With the Pro version of Driver Easy: Click Update All to automatically download and install the correct version of all the drivers that are missing or out of date on your system. (and you get full support and a 30-day money back guarantee)