


It’s frustrating when you connect Quest 2 to your PC but nothing happens – your computer just won’t recognize it. If this happens to you, don’t worry – you’re not alone! Many users have reported the same issue.
In this article, we’ll explore some of the most useful fixes. Let’s dive in and see how to get your Oculus functioning correctly.
Fixes for Oculus Quest 2 Not Connecting to PC problem
You may not have to try them all; just work your way down the list until you find the one that works for you.
1. Check Your PC Specifications
Before we dive into anything advanced, make sure that your PC can handle the demands of your Oculus Quest 2 headsets.
The minimum requirements to support the Oculus Quest 2:
| OS | Windows 10 |
| Port | USB 3.0 |
| CPU | Intel Core i5-4590 or an AMD Ryzen 5 1500X |
| Graphics | Nvidia GTX 970, 1060 3GB or better. That includes all GTX 16-series graphics cards besides the GTX 1650. Any from the AMD RX 500, 600, 5000, and Vega series. |
| Memory | 8GB |
Follow the steps below to see how to check your PC specs quickly:
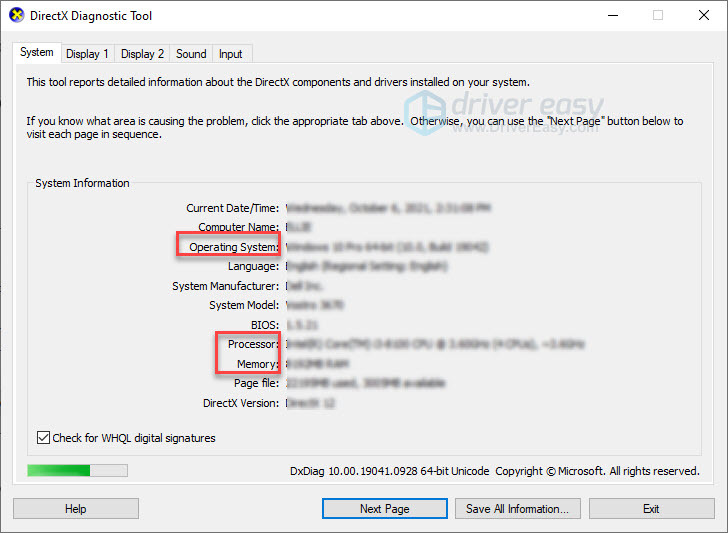
1) On your keyboard, press the Windows logo key and R at the same time to invoke the Run dialog.
2) Type dxdiag and click OK.

3) Check your Operating System, Processor, and Memory.
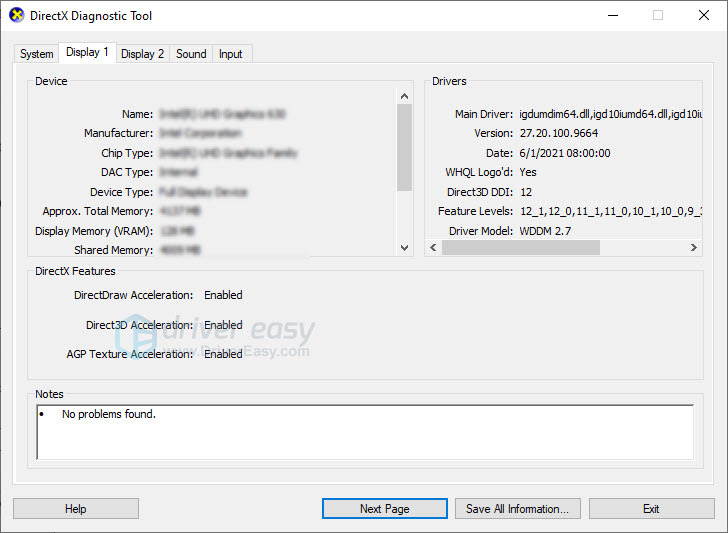
4) Click the Display tab, and then check your graphics card’s information.
If your PC meets the requirements, then move on to the next fix below.
2. Check Your USB Cable/Port
To connect your Quest to a PC, you will also need a high-quality USB cable that supports data and power simultaneously. You can buy it from Oculus at $79, or you can use a third-party cable, such as the Anker cable, which costs less. If you’re going to purchase a new cable, make sure that the USB cable is at least 3 meters so you can walk around and have a more comfortable experience.
You would also want to try connecting to another USB port on your PC to see if this issue is caused by the USB port.
Finally, re-seat the Link cable on both the headset side and the side that plugs into your PC just to make sure that all connections to the PC are secure.
3. Update OCULUS Software
To use Oculus Link on your PC, make sure you have installed the Oculus software and drivers and they are updated. Just go to the Oculus Support page and find the latest version of the app.
4. Log Out of Your Account and Log Back In
It may seem simple, but this works for many users. Sometimes, just logging out of the PC software and logging back in can fix temporary issues with your Quest.
5. Power Cycle Your Devices
If you haven’t tried this yet, give it a shot. A simple restart will reset your software and desktop environment and can often fix glitches like this.
Just turn off your computer and your Oculus Quest, then turn them back on to see if your PC can recognize Oculus Quest.
6. Update Your Device Drivers
This issue might occur when you’re using outdated or faulty drivers, especially your USB driver and Graphics driver. To keep your accessories working flawlessly with your operating systems and applications, make sure your device drivers are fully updated.
You can update your device drivers manually by going to the manufacturer’s website for each device, and searching for the driver for your exact module. Or you can update drivers automatically in just two clicks with Driver Easy.
Driver Easy will automatically recognize your system and find the correct drivers for it. You don’t need to know exactly what system your computer is running. You don’t need to risk downloading and installing the wrong driver, and you don’t need to worry about making a mistake when installing.
- Download and install Driver Easy.
- Run Driver Easy and click the Scan Now button. Driver Easy will then scan your computer and detect any problem drivers.

- Click Update All to automatically download and install the correct version of all the drivers that are missing or out of date on your system.
(This requires the Pro version which comes with full support and a 30-day money-back guarantee. You’ll be prompted to upgrade when you click Update All. If you’re not ready to buy the Pro version, Driver Easy offers a 7-day free trial which includes access to all the Pro features such as high-speed download and one-click install. You won’t be charged anything until your 7-day trial has ended.)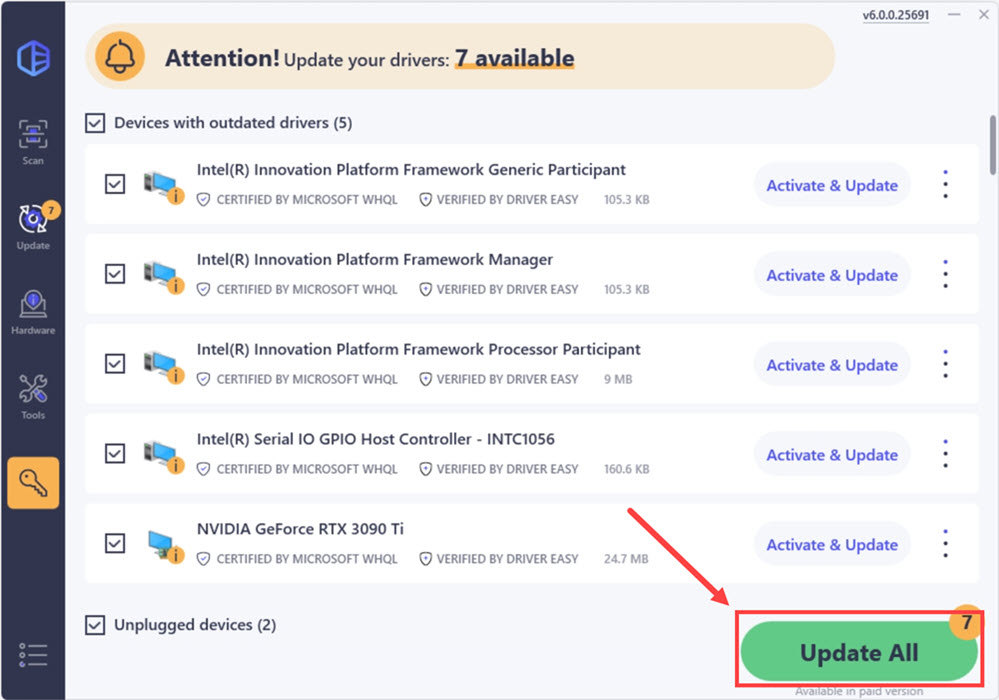
- Restart your computer for the changes to take effect.
If your issue persists, then move on to the next fix below.
7. Turn off Air Link
If you’re switching to the regular wired Oculus Link connection from wireless Oculus Air Link, you might run into issues like this.
To fix it, just open your Quest 2 Settings and go to Experimental. You can turn off Air Link from there.
8. Disable USB Power Settings
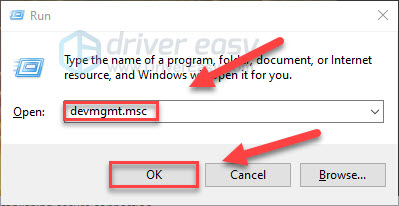
1) On your keyboard, press the Windows logo key and R at the same time.
2) Type devmgmt.msc then click OK to open Device Manager.
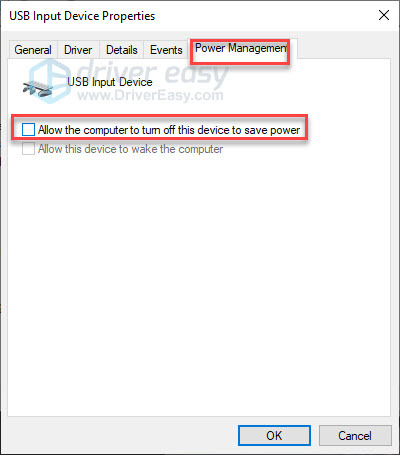
3) Double click Human Interface Device, then right-click USB Input Device and select Properties.

4) Under the Power Management, ensure that the options to save power are deselected.
9. Factory Reset Your Quest
This can fix several problems with the Quest. But before you proceed, note that this will delete your game data. You’ll need to download all of your games after this.
To factory reset your Quest 2, follow the instructions below:
1) Press and hold the power and volume buttons until it turns on.
2) Highlight Factory reset, then press the power button to select it.
3) Select Yes, erase and factory reset, then press the power button to initiate the reset.
Hopefully, this post helped. Feel free to leave a comment below if you have any questions or suggestions.