


The pagefile.sys file is large in your computer and you worry that it will slow down your PC performance, right? In this article, we are going to explain what this file is about and how you should deal with the large size.
What pagefile.sys actually does?
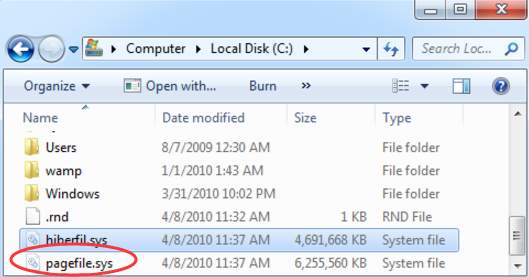
“pagefile.sys” is a virtual memory file which located in C: drive by default. You won’t see this file until you set the system to show hidden files. When your system runs low on RAM (Random Access Memory), it will move some memory to pagefile.sys to run smoothly. Let’s learn more details below.
RAM is used to store all kinds of data that you are using, like running files and programs. Our computer stores this data in RAM because it is much faster to read from RAM than to read from the hard drive. The volume of RAM is limited. When RAM is running up, the System will identify the data that you don’t use anymore or use not too much, then move these data to pagefile. sys. For instance, if you are using Chrome and some web pages are minimized, they are doing nothing but still taking much memory. To free up more RAM for the applications that you are using, Windows will move these least-used pages of memory out to pagefile.sys. That’s what pagefile. sys used for
When the file becomes large, should you disable it?
Though your pagefile.sys is large, it won’t slow down the PC performance at all, so it is not recommended to disable or delete it.
Disabling the file may even cause serious system problems. Without having pagefile.sys, if RAM becomes full and there is no place to store the memory temporarily, some programs may crash or refuse to run. This is slowing down PC performance.
What you can do:
Change the size of file for better PC performance
It is not recommended to delete the file, but you can change the size for better PC performance. Follow these steps:
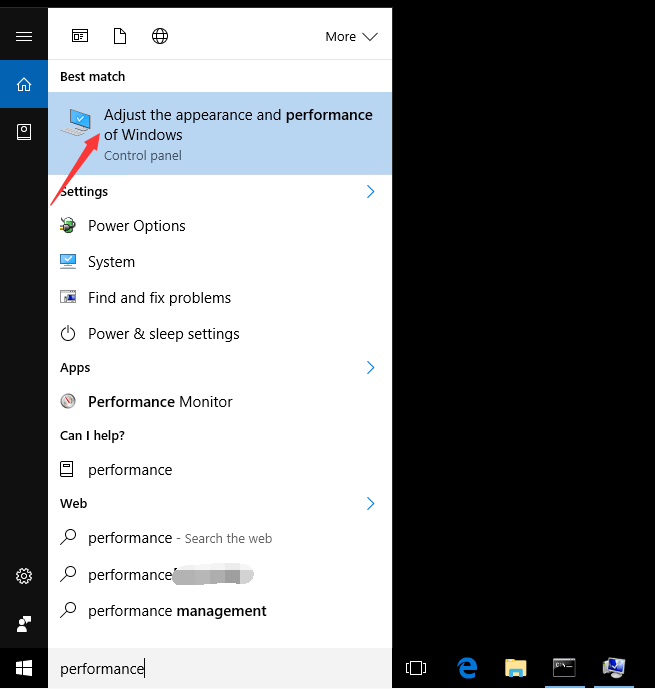
1) Type “performance” in the search box and click on Adjust the appearance and performance of Windows in the pop-up menu.
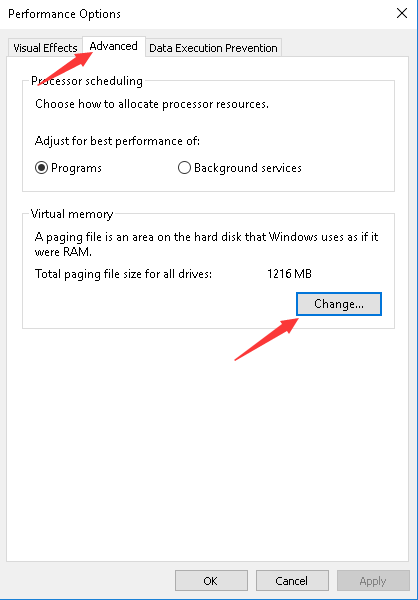
2) Go Advanced tab and click on the Change… button.
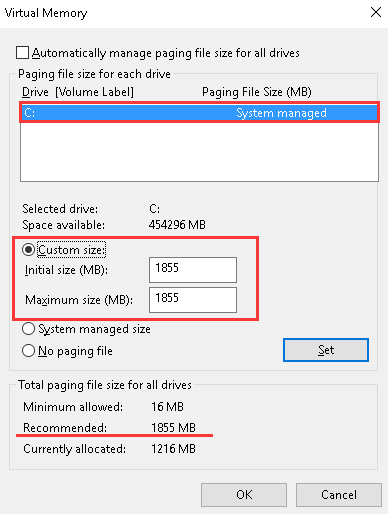
3) Uncheck the box next to Automatically manage paging file size for all drives. Highlight the Drive that your Windows 10 is installed on. Select Custom size then change the Initial size and Maximum size to the Recommended size (In my case, the Recommended size is 1855 MB. Yours might be different.). After that, click the Set button.
4) Click the OK button.
5) Restart your PC for the changes to take effect.
If your PC runs slowly, you can also speed it up by using the below methods.
Method 1. Free up memory by getting rid of useless programs running in the background
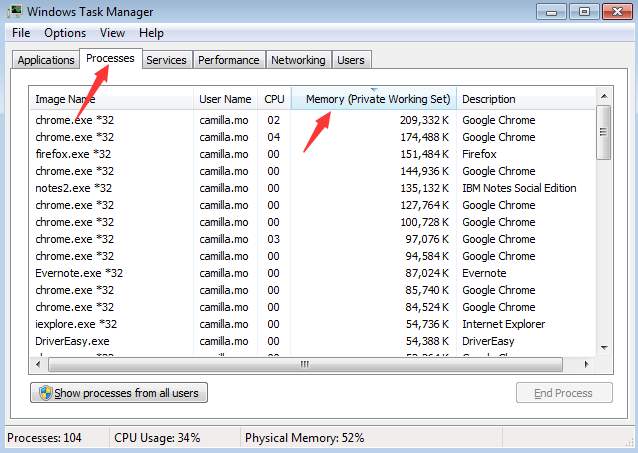
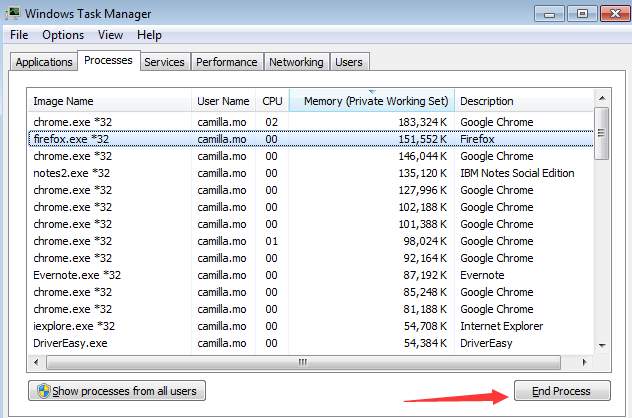
You can close the useless programs through Task Manager.
1). Press Ctrl+Shift+Esc keys together to open Task Manager.
2). Go to Processes tab. In this tab, you can see how much memory that running applications is taking up.
3). Choose a program that you don’t use but stays on and click End process.
Method 2. Upgrade your RAM
If you need to open a large amount of applications at the same time, maybe it is time to upgrade your RAM. After that, your computer would most probably run faster.
Method 3. Remove the crapware
Crapware could be the cause of slow PC performance. Uninstall them and see if your PC runs faster or not.
Method 4. Update Graphics Drivers
Faulty Graphics drivers can cause a PC to run slowly. Updated Graphics drivers can boost the PC performance a lot. So if your PC runs slowly, try updating Graphics drivers.
If you don’t have the time, patience, or computer skills to update the drivers manually, you can do it automatically with Driver Easy.
Driver Easy will automatically recognize your system and find the correct drivers for it. You don’t need to know exactly what system your computer is running, you don’t need to risk downloading and installing the wrong driver, and you don’t need to worry about making a mistake when installing.
You can update your drivers automatically with either the FREE or the Pro version of Driver Easy. But with the Pro version, it takes just 2 clicks (and you get full support and a 30-day money-back guarantee):
1) Download and install Driver Easy.
2) Run Driver Easy and click the Scan Now button. Driver Easy will then scan your computer and detect any problem drivers.

3) Click the Update button next to a flagged graphics driver to automatically download the correct version of this driver, and then you can manually install it (you can do this with the FREE version).
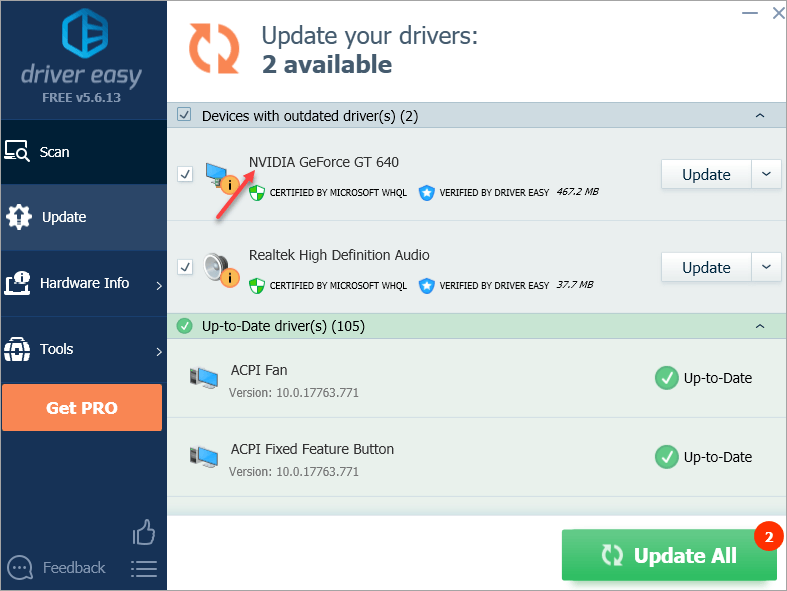
Or click Update All to automatically download and install the correct version of all the drivers that are missing or out of date on your system (this requires the Pro version – you’ll be prompted to upgrade when you click Update All).
Here take NVIDIA GeForce GT 640 for example. Driver Easy will detect the graphics card you’ve installed.
Hopefully, you find this article helpful. If you have any questions, ideas, or suggestions, feel free to leave a comment below.