


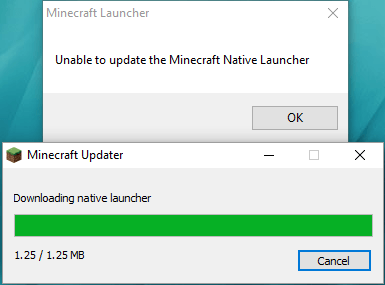
Your Minecraft Native Launcher starts to update but it never finishes and only gives you an error message: Unable to update the Minecraft Native Launcher.
Before you start, first, check whether Minecraft is compatible with Windows 10. Then, update the latest drivers for your PC. Finally, install the updates for Minecraft Native Launcher again after updating the Windows system. If it doesn’t work, move to the below fixes.
Don’t forget to check your internet connection. If your network is not working properly, the Minecraft Native Launcher couldn’t update.
Try these fixes:
You don’t have to try them all; just work your way down the list until you find the one that works for you.
- Run Program Compatibility Troubleshooter
- Download the updates from Website
- Check your antivirus software
- Reinstall the Minecraft
Fix 1: Run Program Compatibility Troubleshooter
Windows has many built-in troubleshooters. The Program Compatibility Troubleshooter can help games that are not downloaded from the Windows 10 Store.
Here’s how:
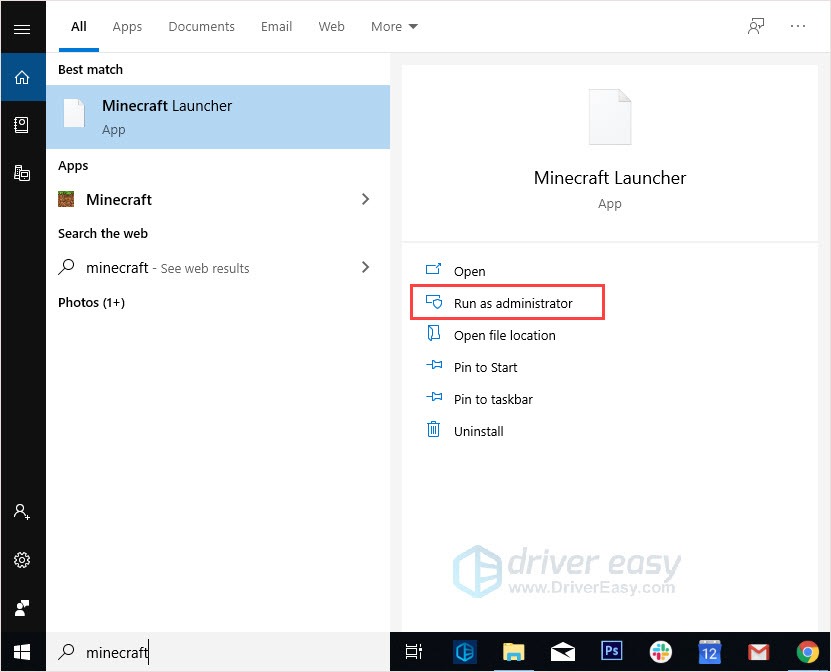
- Press the Windows logo key.
- In the Search bar, type Minecraft and click Open file location.
- Right-click on the Minecraft Launcher and click Troubleshoot compatibility.
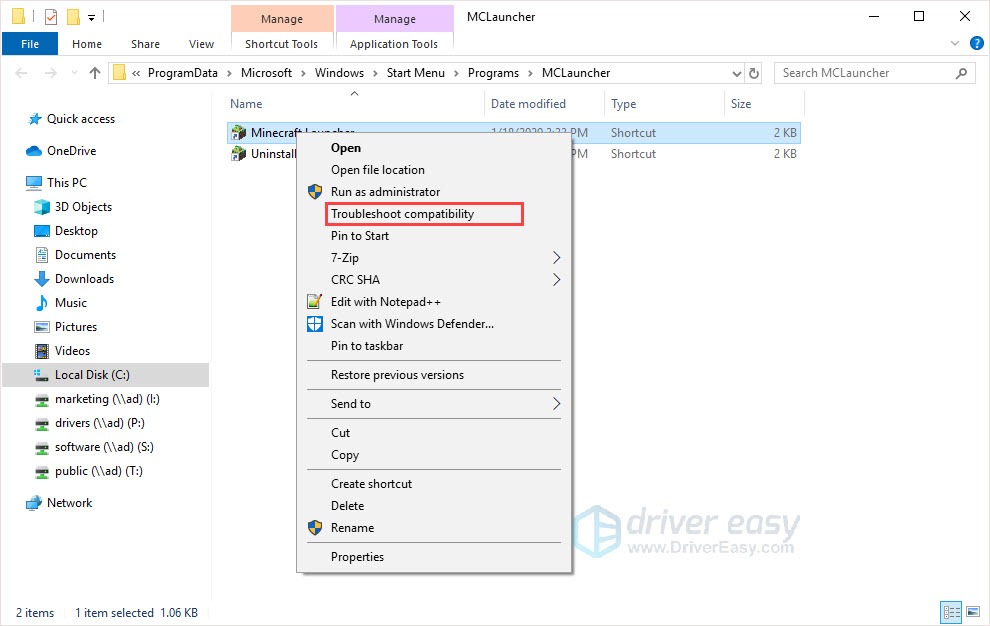
- Follow the on-screen instructions to finish the process.
Fix 2: Download the updates from Website
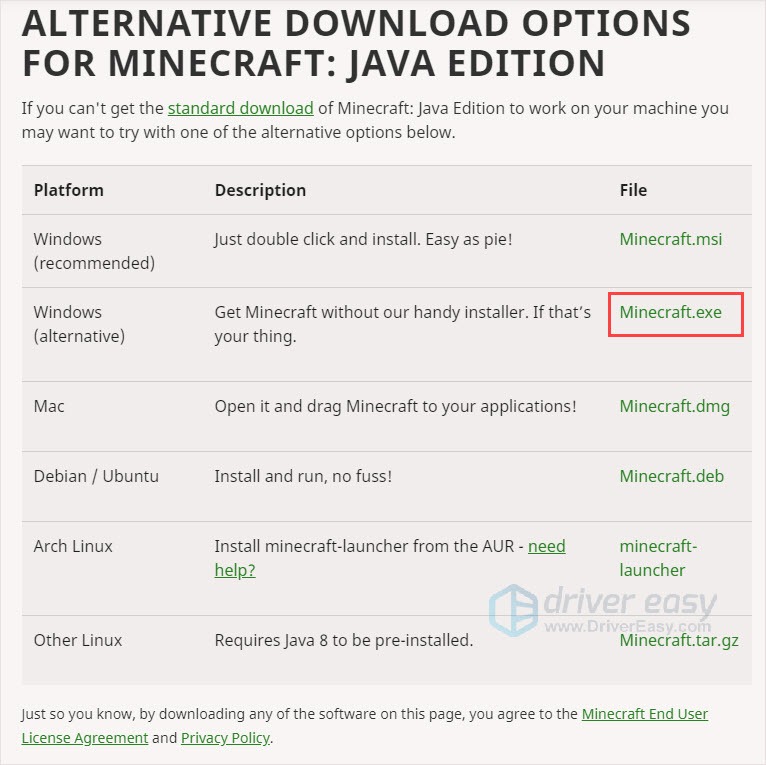
Instead of downloading the updates from the Minecraft Native Launcher, you can also go to Minecraft webpage to download the update files manually.
- Go to the Minecraft download page.
- Click Try an alternative download below the big green Download button.
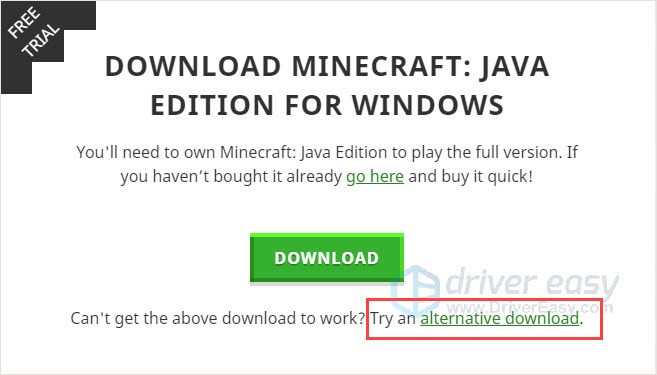
- Then download the Minecraft.exe and install it.
Fix 3: Check your antivirus software
One common cause for the crashing issue is your antivirus software blocking some features of the game and causing problems. So go to your antivirus software and unblock the game program to fix it.
Or there’s another situation. The antivirus software takes Minecraft as a potential virus so the updates were blocked. In this case, you need to temporarily disable antivirus software and check whether it could solve the unable to update the Minecraft Native Launcher issue.
Fix 4: Reinstall the Minecraft
If no fix works, reinstalling Minecraft is a good option to try. The main purpose is that by downloading a fresh copy of the game from the official website and clean the old one completely.
- Press the Windows logo key + R.
- Type appwiz.cpl and press Enter.
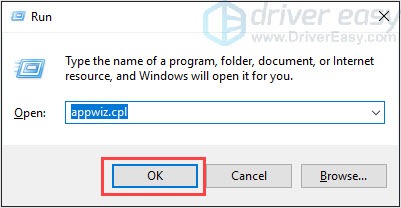
- Right-click on Minecraft and click Uninstall.
- Press the Windows logo key + E to open File Explorer.
- Type %Appdata% in the address bar and press Enter.
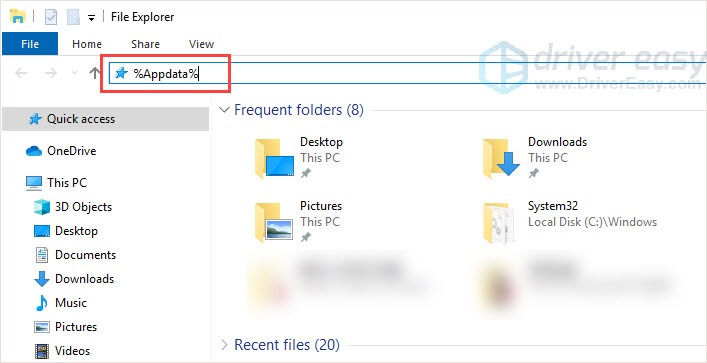
- Find the Minecraft folder and delete it.
- Go to Minecraft official website to download the latest version.
- Install and run the program to check.
Update Windows drivers
It is very important to update your device drivers. Windows 10 doesn’t always give you the latest version. But with outdated or wrong drivers, you may encounter various issues. So it’s really important to keep your drivers updated to improve your gaming experience.
There are two ways you can update your driver: manually and automatically.
Option 1 – Manually– You’ll need some computer skills and patience to update your drivers this way because you need to find exactly the right driver online, download it and install it step by step.
OR
Option 2 – Automatically (Recommended)– This is the quickest and easiest option. It’s all done with just a couple of mouse clicks – easy even if you’re a computer newbie.
Option 1 – Download and install the driver manually
You can download graphics drivers from the manufacturer official website. Search for the model you have and find the correct driver that suits your specific operating system. Then download the driver manually.
Option 2 – Automatically update drivers
If you don’t have time or patience to manually update your graphics drivers, you can do it automatically with Driver Easy.
Driver Easy will automatically recognize your system and find the correct drivers for it. You don’t need to know exactly what system your computer is running, you don’t need to risk downloading and installing the wrong driver, and you don’t need to worry about making a mistake when installing.
You can update your drivers automatically with either the FREE or the Pro version of Driver Easy. But with the Pro version, it takes just 2 clicks (and you get full support and a 30-day money back guarantee):
- Download and install Driver Easy.
- Run Driver Easy and click the Scan Now button. Driver Easy will then scan your computer and detect any problem drivers.
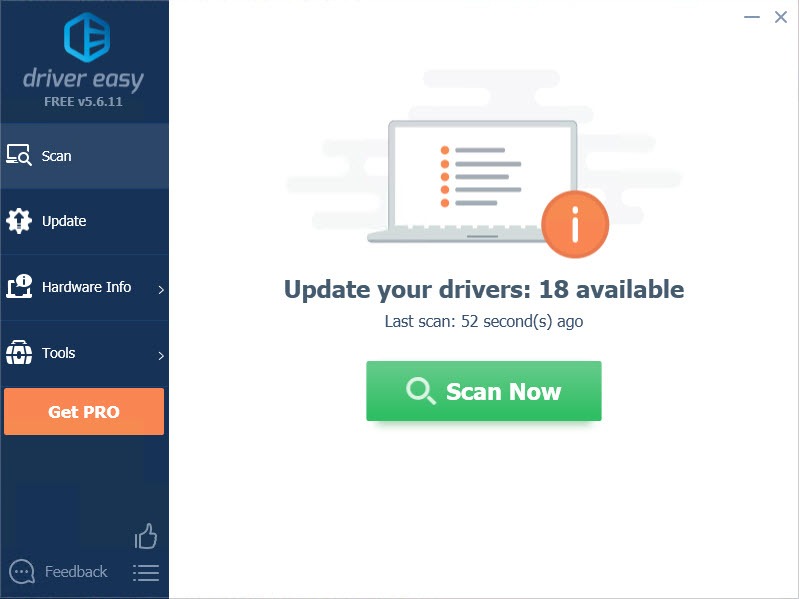
- Click the Update button next to the flagged driver to automatically download the correct version of that driver, then you can manually install it (you can do this with the FREE version).
Or click Update All to automatically download and install the correct version of all the drivers that are missing or out of date on your system. (This requires the Pro version which comes with full support and a 30-day money back guarantee. You’ll be prompted to upgrade when you click Update All.)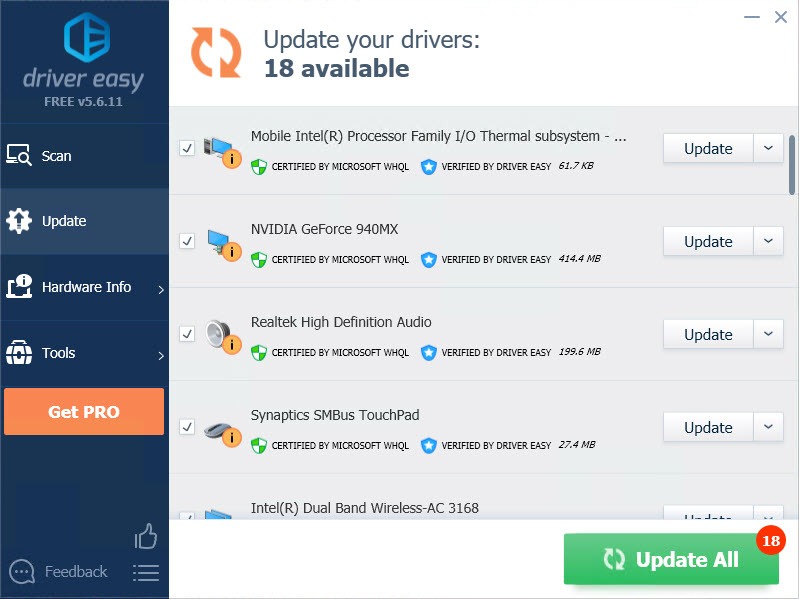
Be sure to attach the URL of this article if needed for more expedient and efficient guidance.
Hope this post could help. If you have any questions, please leave comments below, we’ll try our best to help.