


After a day’s work, you click Shut down and pack your stuff for leaving. But when you glance at your computer screen, it’s still on the loading screen. You stand and watch it impatiently. Usually, the shutdown process should be taken no more than a few seconds. But when it takes you a lot of time while shutting down, your computer has Windows 11, 10 slow shutdown issue.
Don’t worry, you’re not alone. And this issue should be easy to fix.
Try these fixes
- Disconnect your USB-C device before shut down
- Run Power Troubleshooter
- Disable Fast Startup feature
- Repair system files
- Registry fix
Fix 1: Disconnect your USB-C device before shut down

Photo from Amazon
Microsoft has confirmed that there’s a new bug which will affect your computer shut down process slowly. The bug in the USB Type-C Connector System Software Interface (UCSI) software may cause a 1 minute delay for Windows 10 to shut down.
Note: This bug only affects with Windows shut down, won’t influence normal functionality on your computer. And it will work normally after restarting the system.
The solution for this bug is very simple.
Disconnect your USB Type-C devices before you shut down your computer. So this bug won’t affect your shutdown process.
Fix 2: Run Power Troubleshooter
Windows has built-in troubleshooter to fix some common errors. You can try Power Troubleshooter to fix the slow shut down issue.
Windows 10
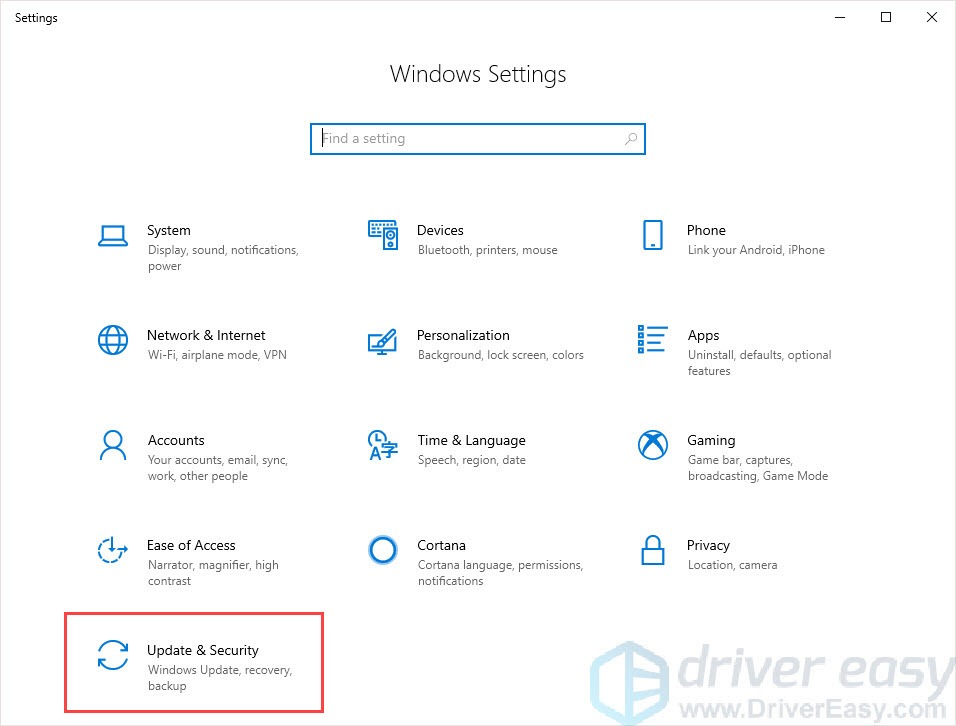
- Press the Windows logo key + I to open Settings.
- Click Update & Security.
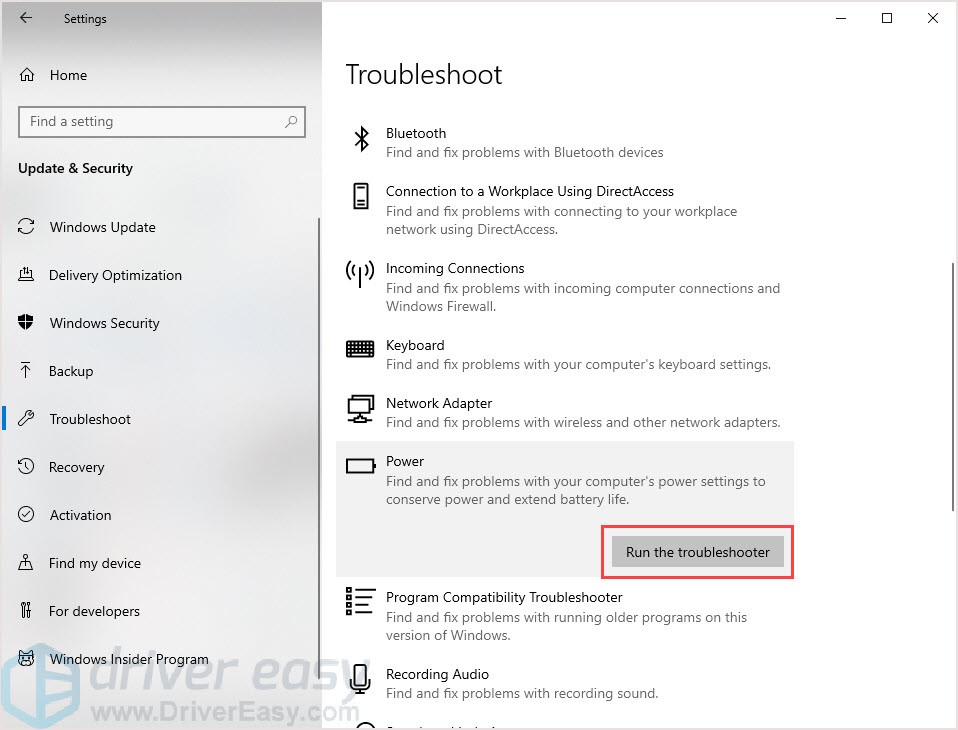
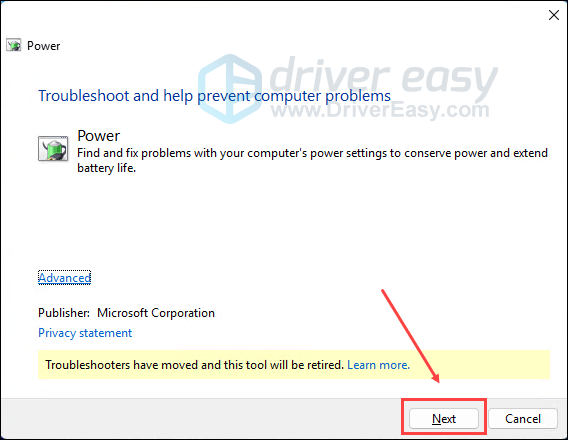
- Choose Troubleshoot in the left pane. Then click Power and click Run the troubleshooter.
- Follow the on-screen instructions to finish the process.
- Reboot your computer to apply the changes.
Windows 11
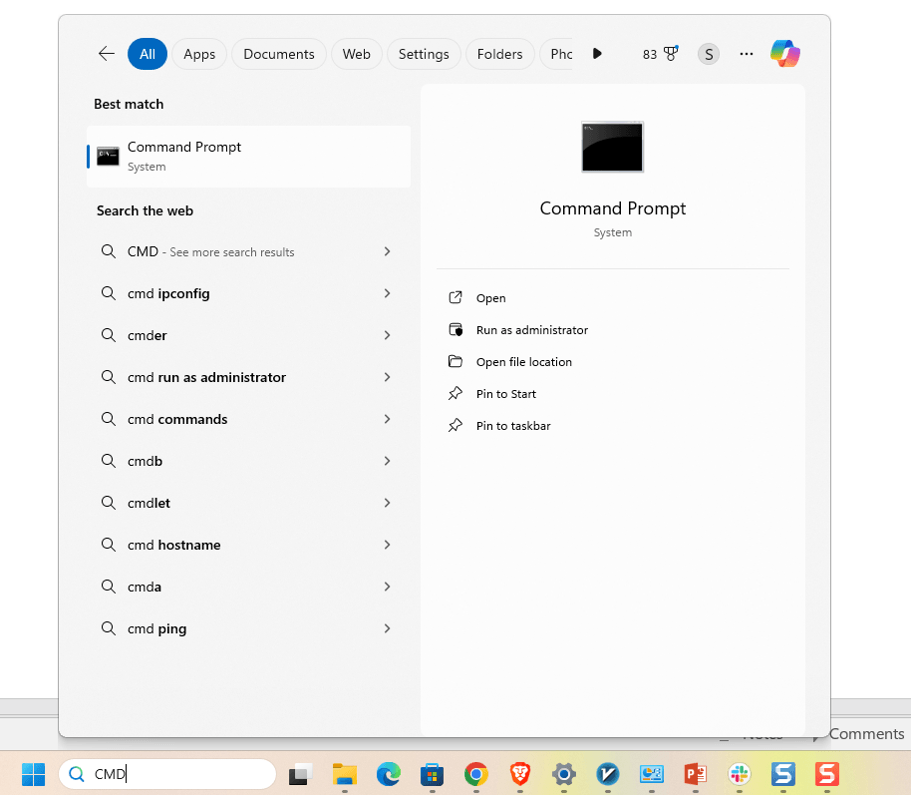
- Type cmd in the Windows search bar and open Command Prompt.
- Copy and paste the following command, and hit Enter.
msdt.exe /id PowerDiagnostic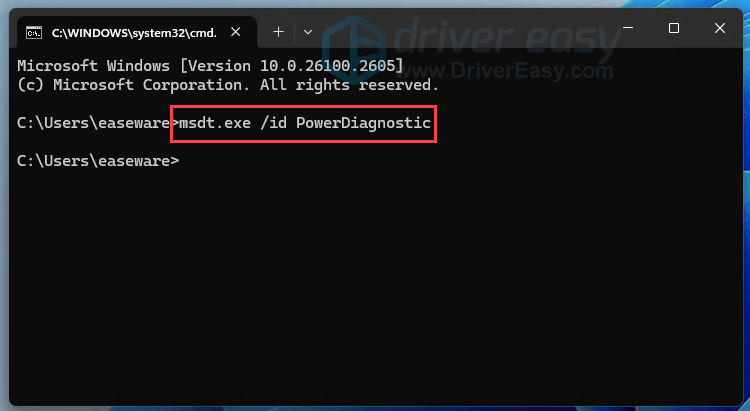
- You’ll see a new Windows popping up. Click Next to start the troubleshooting.
Fix 3: Disable Fast Startup feature
If your Fast Startup is enabled, when you shut down the computer, you may encounter slow shutdown or back to the Windows Lock Screen.
Fast Startup is supposed to reduce startup time by pre-loading some boot information before your PC shuts off. But when it’s enabled and you shut down the computer, all sessions logged off and the computer enters hibernation. This feature may slow down shutdown speed for your computer.
To solve it, you can simply disable the Fast Startup.
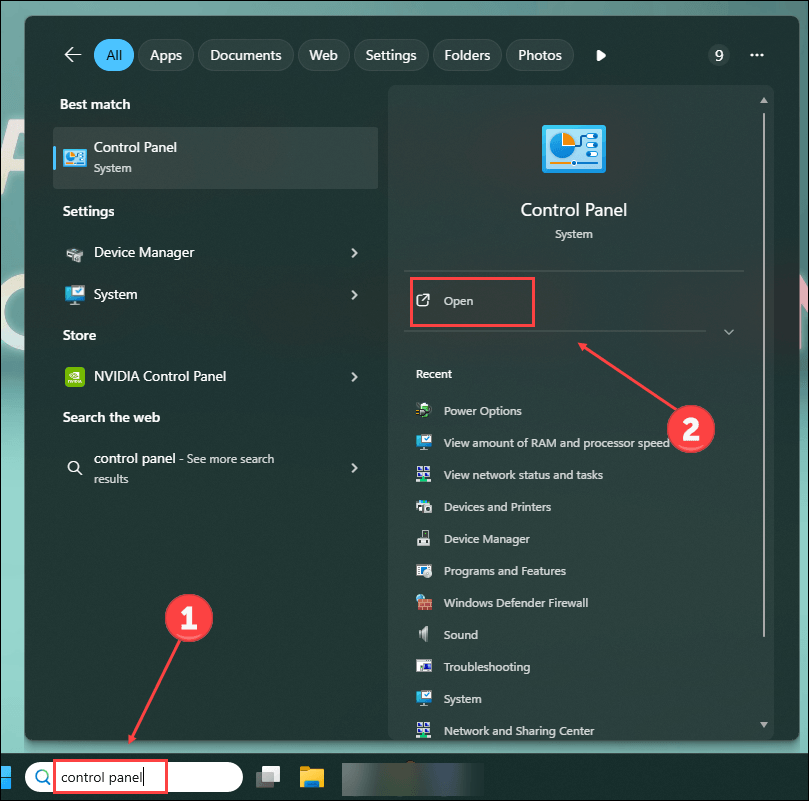
- Type Control Panel in the Windows search bar and click Open.
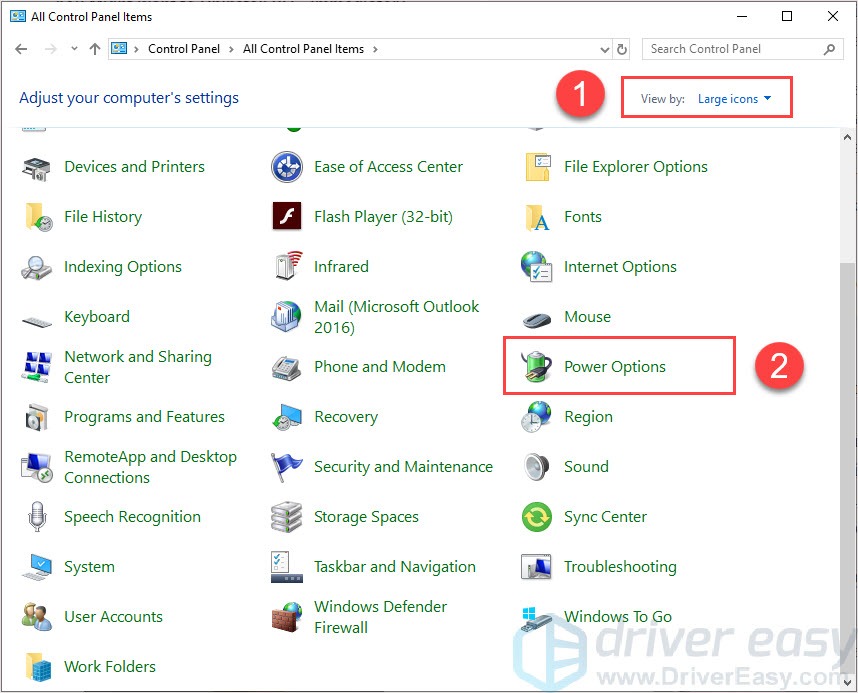
- Change View by Large icons and click Power Options.
- Click Choose what the power button do.

- Click Change settings that are currently unavailable.
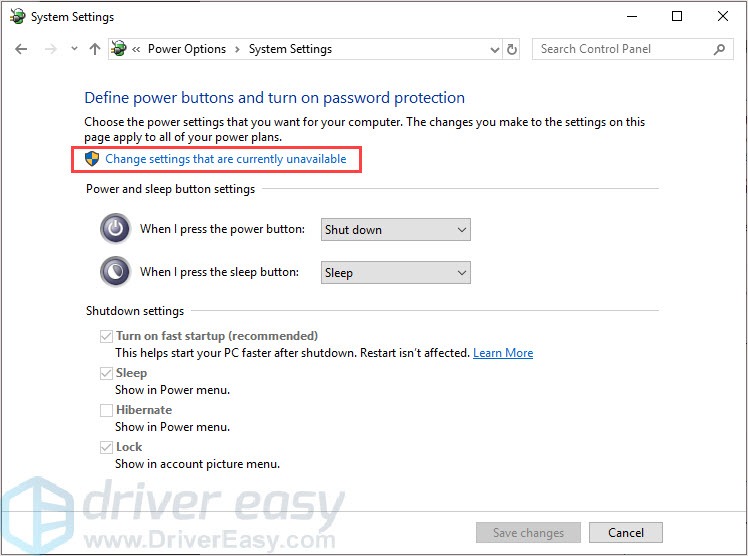
- Make sure you uncheck Turn on fast startup (recommended). Then click Save Changes.
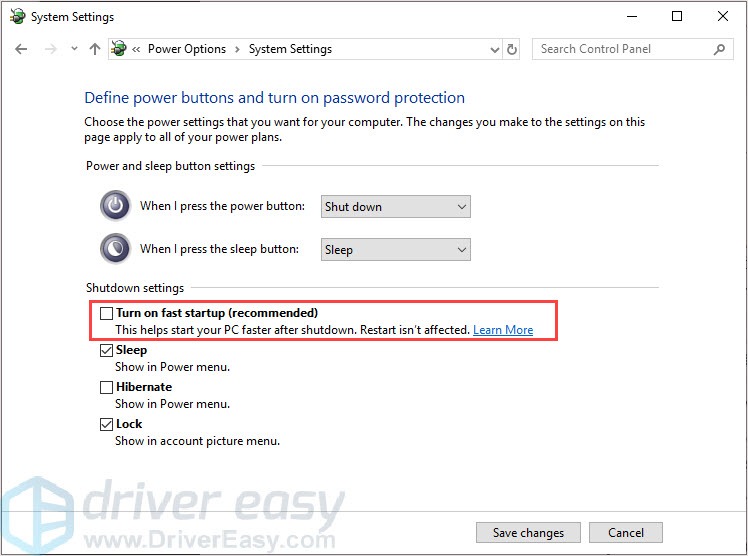
- Reboot your computer to apply the changes.
Fix 4: Repair system files
The corrupted system file will let the system take more time to shut down your computer. To solve it, you can use System File Checker (SFC) to repair the broken system files.
- On your keyboard, press the Windows logo key and R key at the same time to invoke the Run box.
- Type “cmd” and press Shift+Ctrl+Enter together to open Command Prompt in the administrator mode.

Note: Do NOT click OK or just press the Enter key as that won’t allow you to open Command Prompt in the administrator mode. - Type “sfc /scannow” in the window and press Enter. Then wait for the verification is 100% complete.
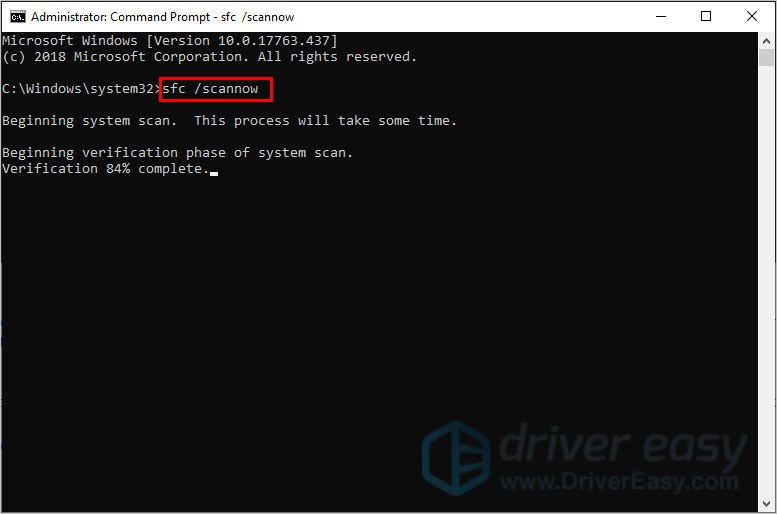
- Reboot your computer to check the changes.
If the result indicates that there are broken files exists but SFC can’t fix it, you can turn to Deployment Image Servicing and Management (DISM) Tool for deeper examine and repair.
Click here for a tutorial on how to use the DISM Tool.
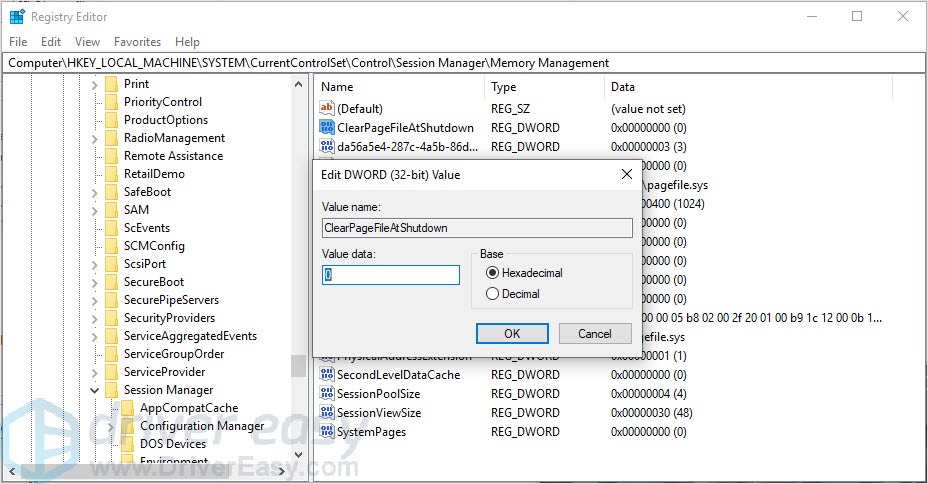
Fix 5: Registry fix
If the above fixes can’t help, you can try this one. The corruption of registry files may the reason for the slow shut down issue. You can solve the issue by following the below steps:
- Press the Windows logo key + R to open the Run box.
- Type “regedit” and press Enter to open Registry Edition.

- Copy and paste the text into the address bar and press Enter.
“Computer\HKEY_LOCAL_MACHINE\SYSTEM\CurrentControlSet\Control\Session Manager\Memory Management“. - Double-click ClearPageFileAtShutdown, change the value to 0.
- Copy and paste the text into the address bar and press Enter.
“Computer\HKEY_LOCAL_MACHINE\SYSTEM\CurrentControlSet\Control“. - Find WaitToKillServiceTimeout file in the right pane. Double click it and set the value between 1000 to 20000.
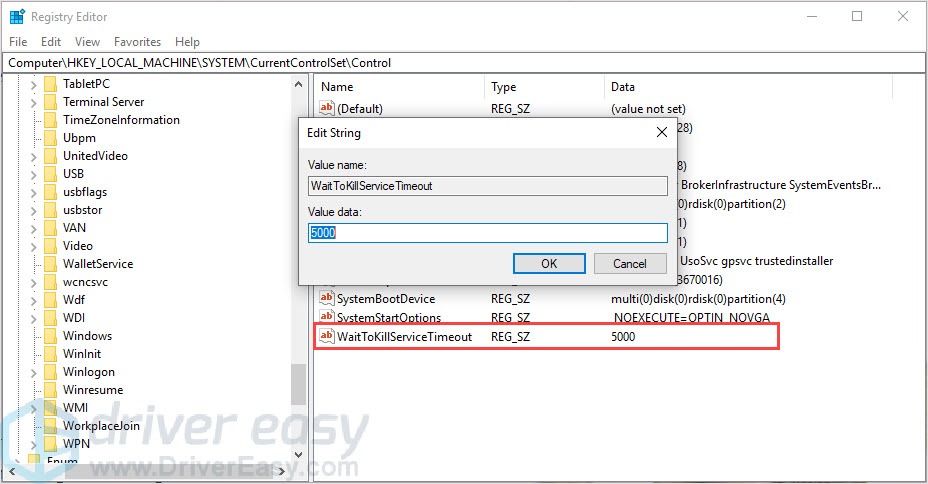
- Click OK.
- Reboot your computer to apply the changes.
Bonus: Update your driver
If there’re any old or corrupted drivers on your Windows 10 PC, this will cause trouble to your computer. To get a better-using experience and prevent your computer from trouble, it’s important to keep your device drivers up-to-date.
You can do this manually by downloading the latest drivers from the devices’ manufacturer official website. This will take time and need a litter computer knowledge. If you want to save some time or not confident with drivers, you can use Driver Easy to do it automatically.
- Download and install Driver Easy.
- Run Driver Easy and click Scan Now button. Driver Easy will then scan your computer and detect any problem drivers.

- Click Update All to automatically download and install the correct version of all the drivers that are missing or out of date on your system (this requires the Pro version – you’ll be prompted to upgrade when you click Update All).

- Reboot your Windows 11 computer and check the issue.
Hopefully, the above methods can help you to fix your problem. If you have any suggestions or questions, feel free to leave your comments below.