


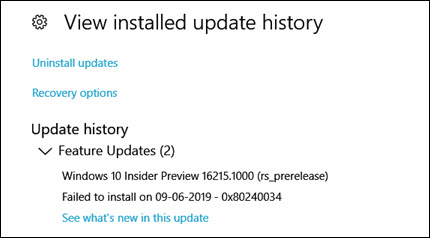
If you’re looking for a solution to fix the Windows Update 0x80240034 error, you’ve come to the right place. Here are 4 solutions to try.
Fixes to try:
You may not have to try them all. Just work your way down the list until you find the one that works for you.
- Disable your antivirus temporarily
- Run the Windows Update troubleshooter
- Clear the Windows Update cache
- Repair corrupted system files using Command Prompt
Fix 1: Disable your antivirus temporarily
Your problem is sometimes caused by interference from antivirus software. To see if that’s the problem for you, temporarily disable your antivirus program and check if the problem persists. (Consult your antivirus documentation for instructions on disabling it.)
Try Windows Updates to see if this helped. If it runs correctly after you disable the antivirus software, contact the vendor of your antivirus software and ask them for advice, or install a different antivirus solution.
If this didn’t work for you, read on and check the fix below.
Fix 2: Run the Windows Update troubleshooter
When update errors occur, another quick fix you can choose is running the Windows Update troubleshooter.
The Windows Update troubleshooter is a Windows built-in utility that can detect and fix common update problems automatically.
Here is how to do it:
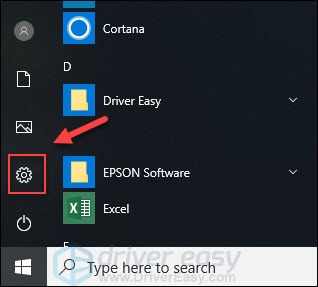
1) On your keyboard, press the Windows logo key, and then click the Settings button.
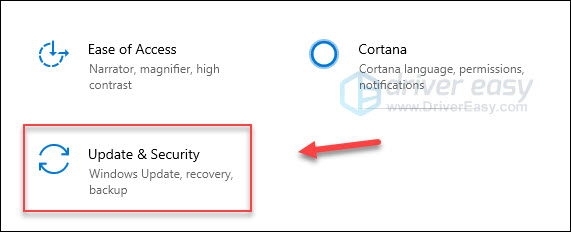
2) Select Update & Security.
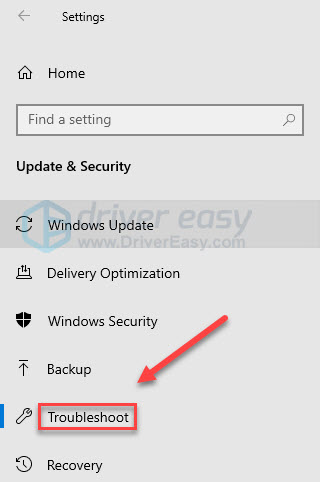
3) Select Troubleshoot.
4) Select Windows Update, and then click Run the troubleshooter.
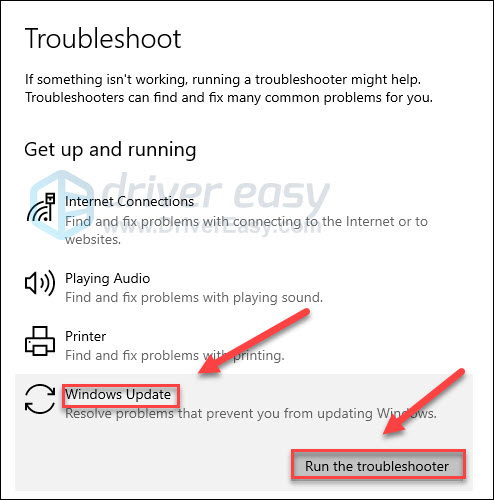
5) Wait for the troubleshooter to detect your problem, and then follow the on-screen instructions to fix it automatically.
If your computer fails to detect the problem, don’t worry! There are still 2 more fixes to try.
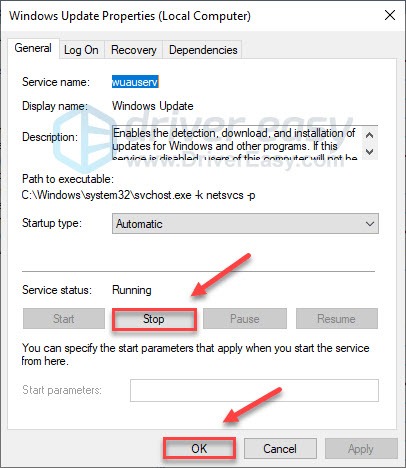
Fix 3: Clear the Windows Update cache
In many cases, the Windows Update cache could be the cause of your problem. In this case, clearing the cache can help. Follow the instructions below:
1) On your keyboard, press the Windows logo key and R.

2) Type services, then press the Enter key.
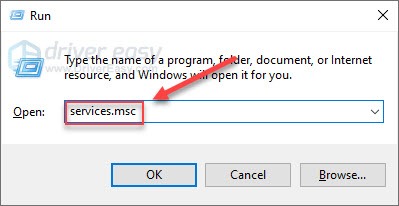
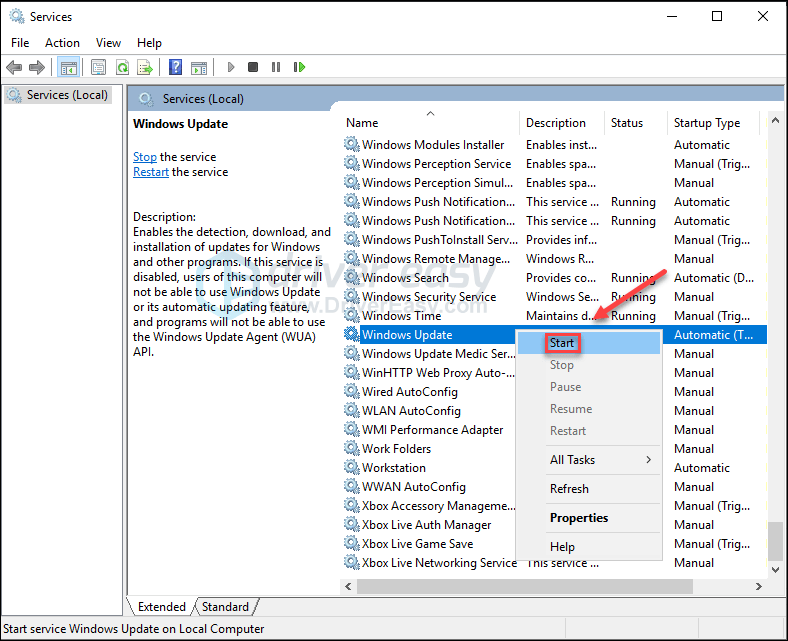
3) Double-click Windows Update.
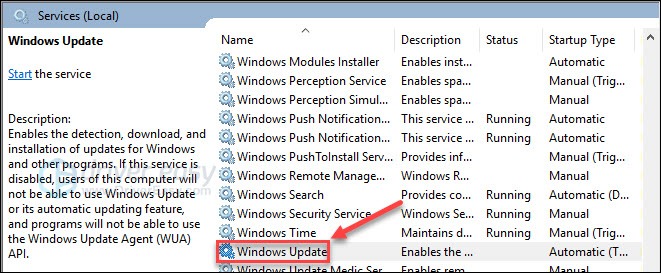
4) Click Stop, and then click OK.
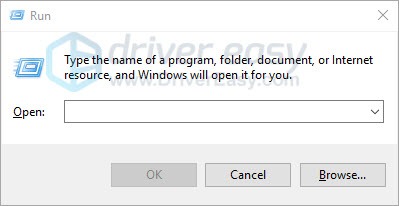
5) On your keyboard, press the Windows logo key and R at the same time to open the Run dialog.
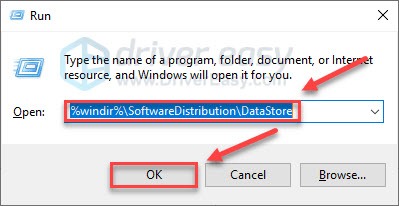
6) Type %windir%\SoftwareDistribution and click OK.
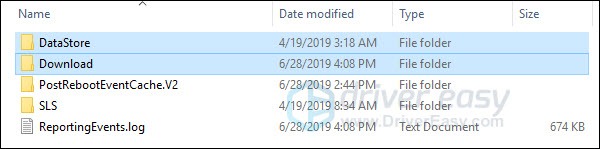
7) Press and hold the Shift key on your keyboard, then click DataStore and Download to highlight these two folders.
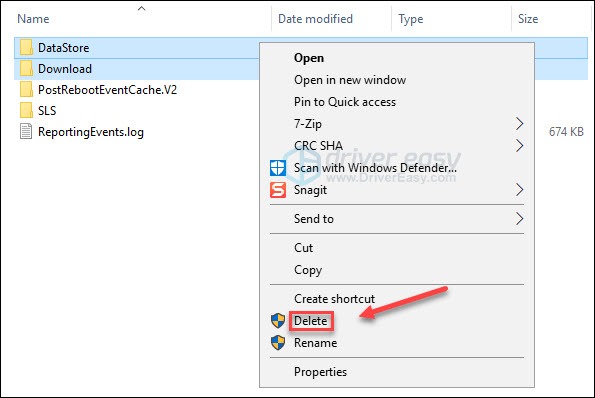
8) Right-click the highlighted folders, and then click Delete.
9) On your keyboard, press the Windows logo key and R.
10) Type services, then press the Enter key.
11) Right-click Windows Update and select Start.
12) Restart your computer and perform a system update to see if your problem has been resolved.
If not, check the fix below.
Fix 4: Repair corrupted system files using Command Prompt
Corrupted or damaged system files on your computer may also be the reason why the update fails. If that’s the problem for you, running Command Prompt can help. Follow the instructions below:
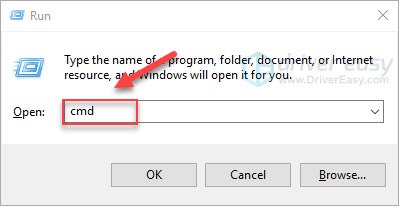
1) On your keyboard, press the Windows logo key and R at the same time.
2) Type cmd, then press the Ctrl, Shift and Enter keys at the same time to run Command Prompt as administrator.
3) Type sfc.exe /scannow, then press the Enter key on your keyboard.

4) Type dism.exe /online /cleanup-image /startcomponentcleanup, then press the Enter key on your keyboard.
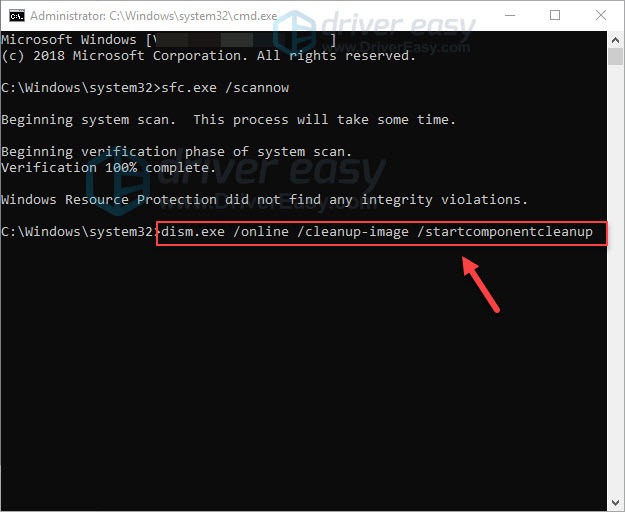
5) Type dism.exe /online /cleanup-image /restorehealth, then press the Enter key on your keyboard.
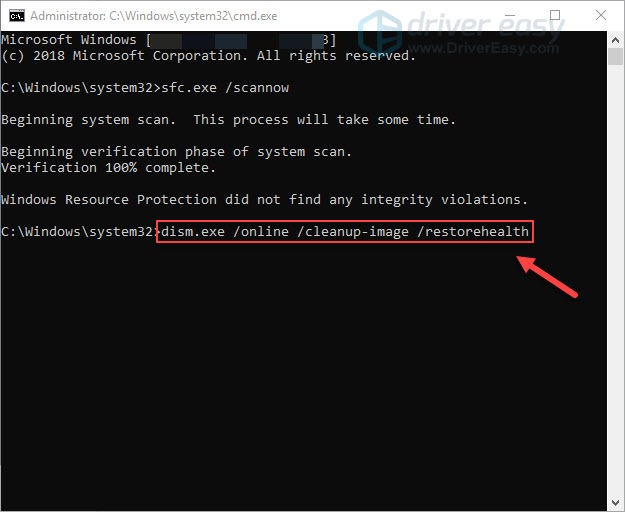
6) Wait for the process to be complete. Then, try updating your system again to see if this method worked.
Hopefully, this article helped in resolving your problem. Please leave a comment below if you have any suggestions and questions.