


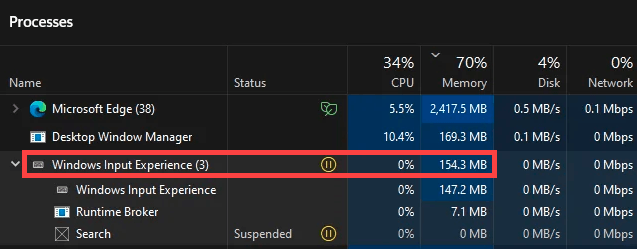
Have you ever opened Task Manager and noticed Windows Input Experience hogging hundreds of megabytes or even gigabytes of memory, while your PC starts slowing to a crawl? You’re not alone. Many users are confused about what it is, why it is chewing up RAM, and whether they can safely disable it. This post should cover all you want to know.
Table of contents
What is Windows Input Experience and Why Can It Spike Memory
Windows Input Experience is a legitimate system component designed to manage input from hardware like keyboards, touchescreens, mice, and virtual tools like the on-screen keyboard. It typically runs quietly with minimal resource usage. However, on rare occasions, it can eat up memory due to several reasons:
- Unused Language Packs or Input Methods: Even if you don’t actively use them, having many language packs or extra input methods installed can quietly consume memory in the background.
- Outdated Windows Version or Drivers: If your Windows system or input‑device drivers (like keyboard, touchscreen, pen, or touchpad) are outdated or incompatible, the Input Experience service may suffer from known bugs or memory leaks that have since been resolved in newer updates.
- Corrupted System Files: The essential Windows system files that “Windows Input Experience” relies on can sometimes become damaged. This corruption can lead to erratic behavior and increased resource usage.
- And much more.
How to Fix Windows Input Experience High Memory Usage
Now that we’ve unmasked Windows Input Experience and explored the reasons behind its excessive memory consumption, it’s time to dive into the practical steps to solve this issue.
1. Restart Your Computer & Input Experience Service
Sometimes, the simplest solutions are the most effective. A simple restart can work wonders. It can resolve a number of software glitches and memory overloads.
After the restart, go to the Services tab of the Task Manager, locate TabletInputService, right-click it and select Restart.
If restarting these services doesn’t work for you, try the other fixes below.
2. Remove Unused Language Packs
If you have multiple language packs or input methods enabled, especially those you don’t frequently use, they can contribute to higher memory usage. Removing them can help free up memory:
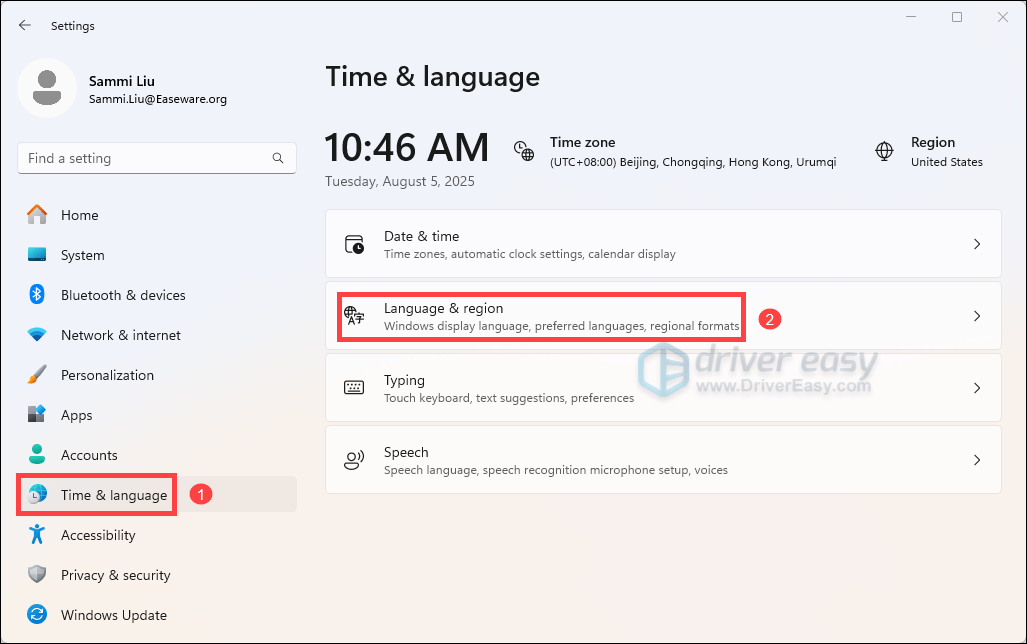
- Press Win + I to open Settings.
- Go to Time & language > Language & region.
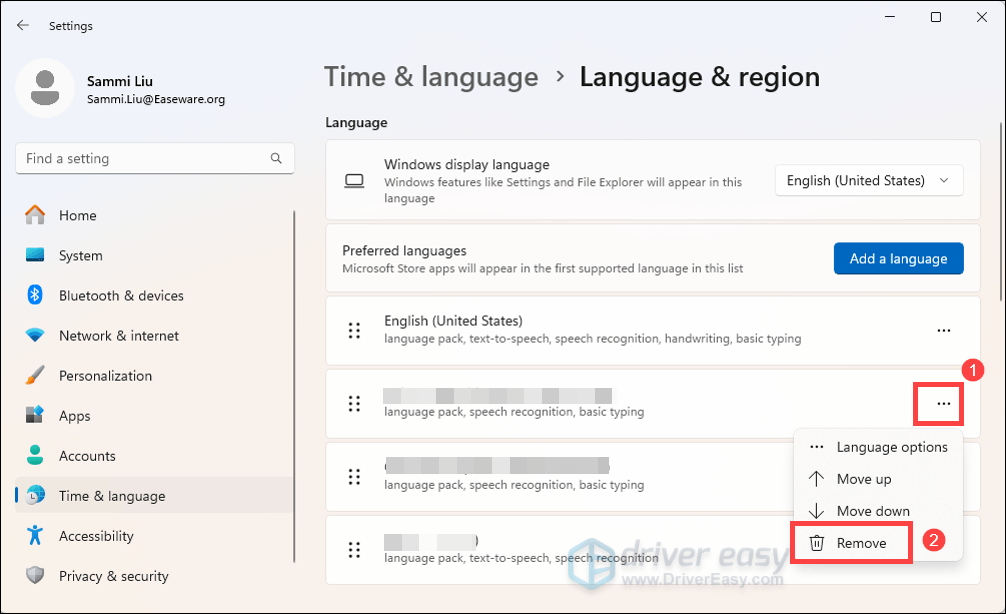
- Review installed language packs, select the ones you don’t need, click on the three dots next to them and click Remove.
- Restart your PC and open the Task Manager to see how much memory Windows Input Experience is in use. If it’s still using high memory, proceed to the next fix below.
3. Disable Narrator and On-Screen Keyboard
Features like on-screen keyboard and Narrator launch components that rely on Input Experience. If you do not necessarily use them, disabling them can lighten the load. Below are the steps you can take:
on Windows 11
- Press Win + I to open Settings.
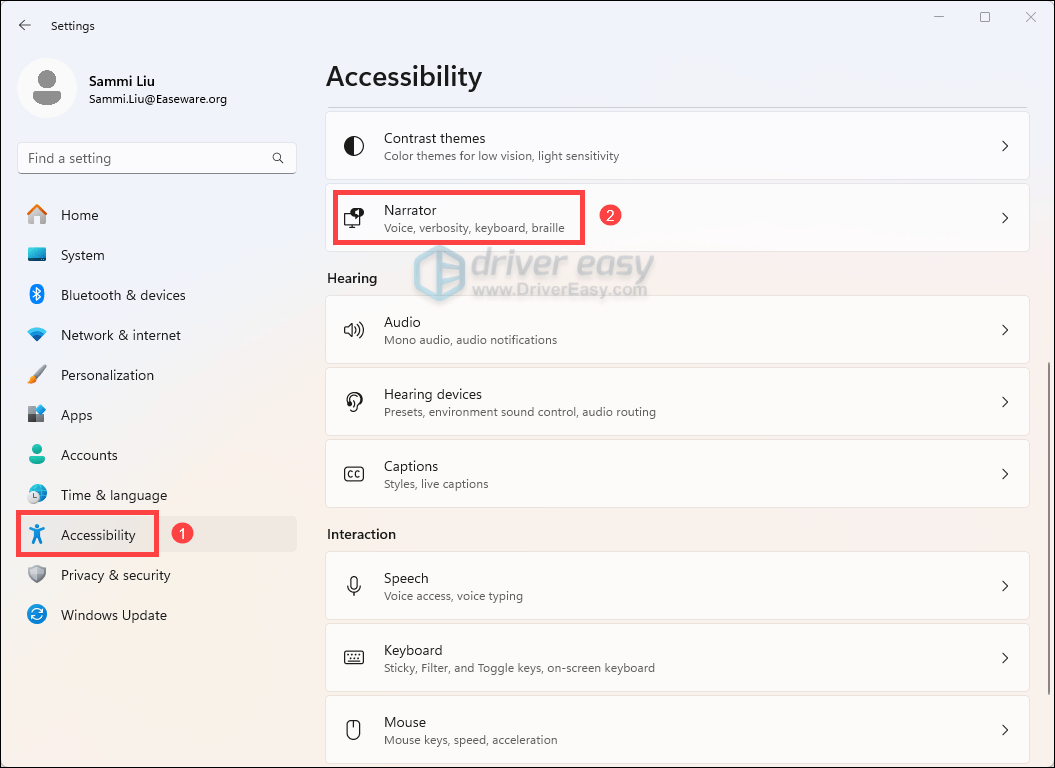
- Go to Accessibility > Narrator.
- Toggle off Narrator.

- Back to Accessibility. Scroll down to the Interaction section, then click Keyboard.
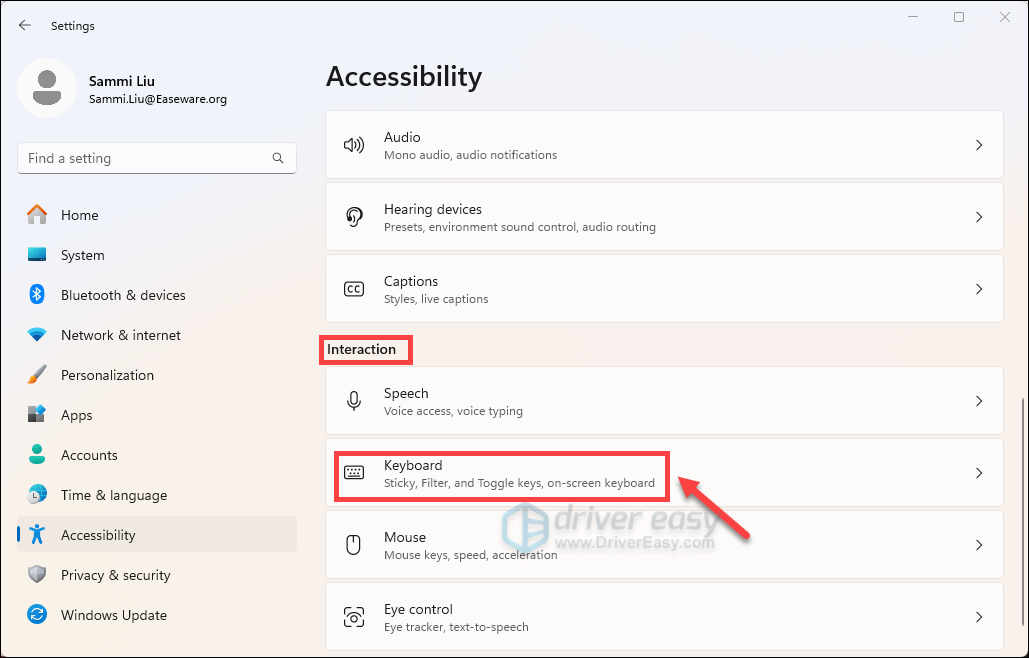
- Toggle off On-screen keyboard.

- After making these changes, restart your PC and see if your problem has been solved. If your issue persists, move on to the next fix.
on Windows 10
- Press Win + I to open Settings.
- Click Ease of Access.

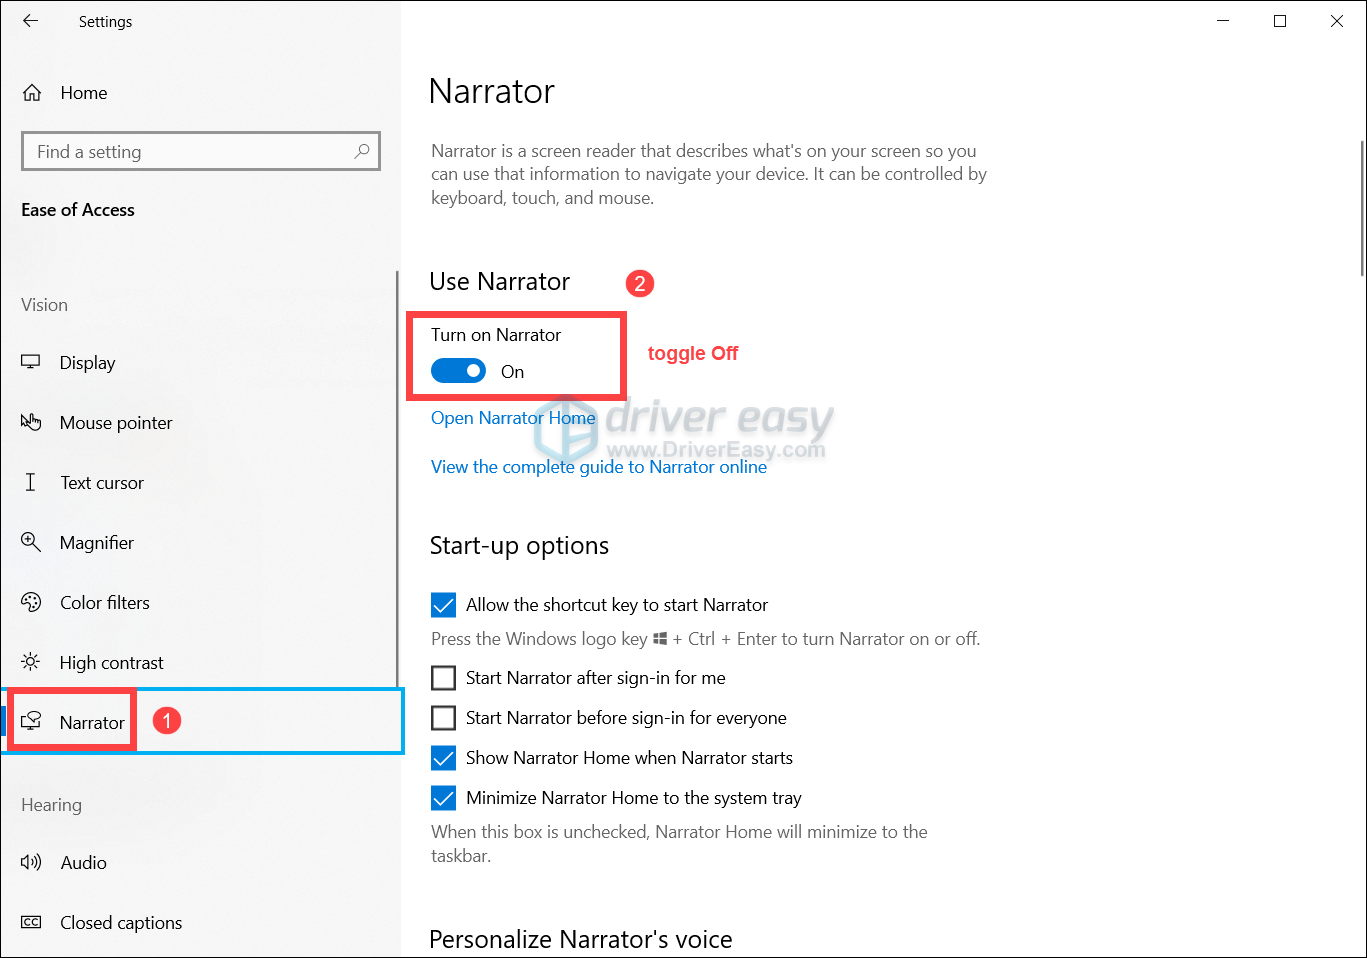
- From the sidebar on the left, select Narrator. Under the Use Narrator header, turn off the Turn on Narrator option.
When prompted, click Turn off Narrator.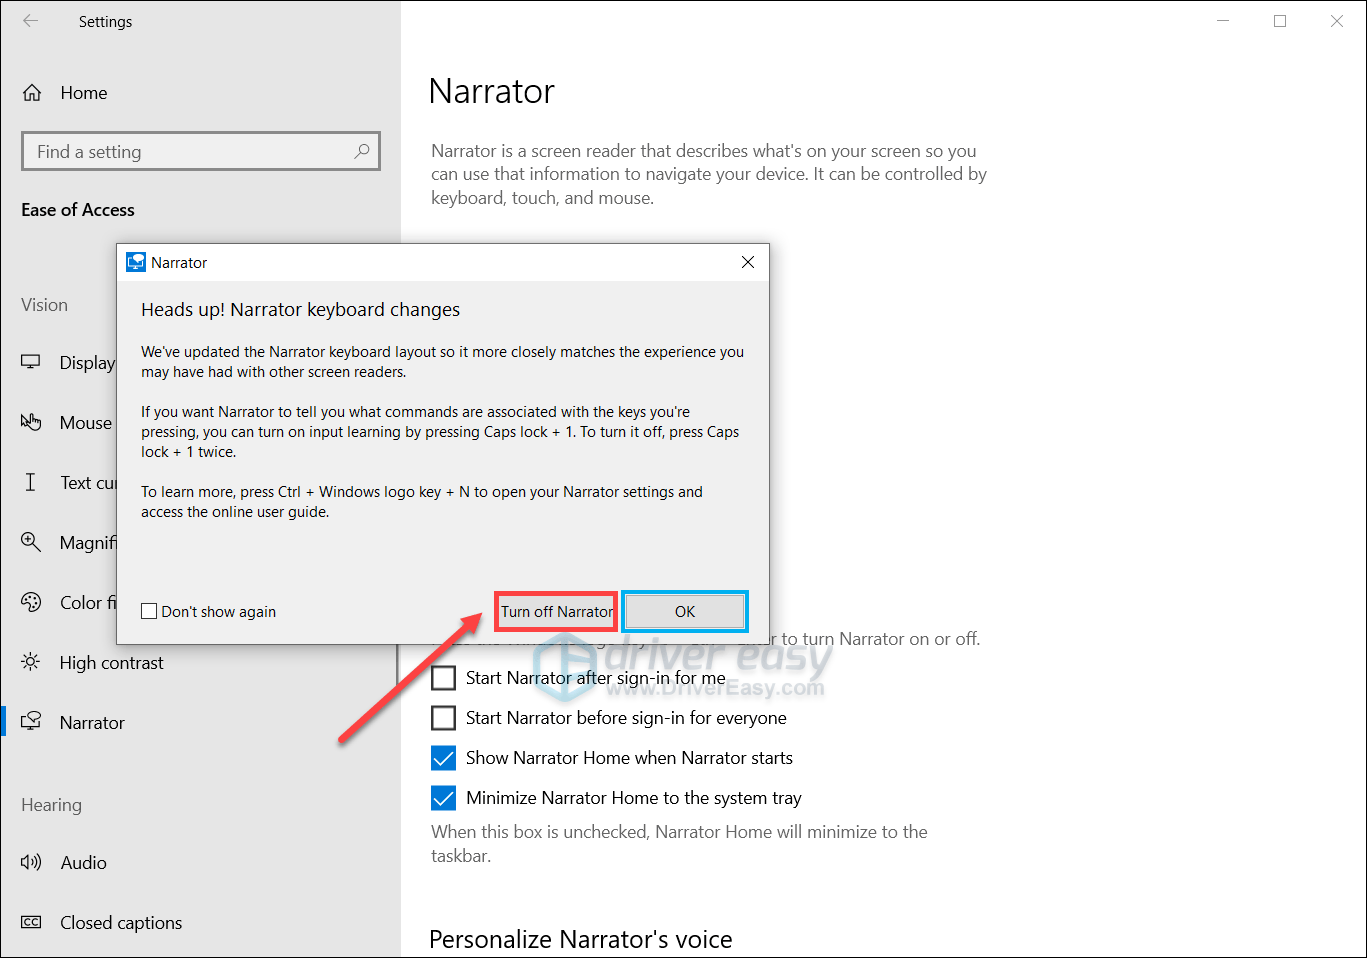
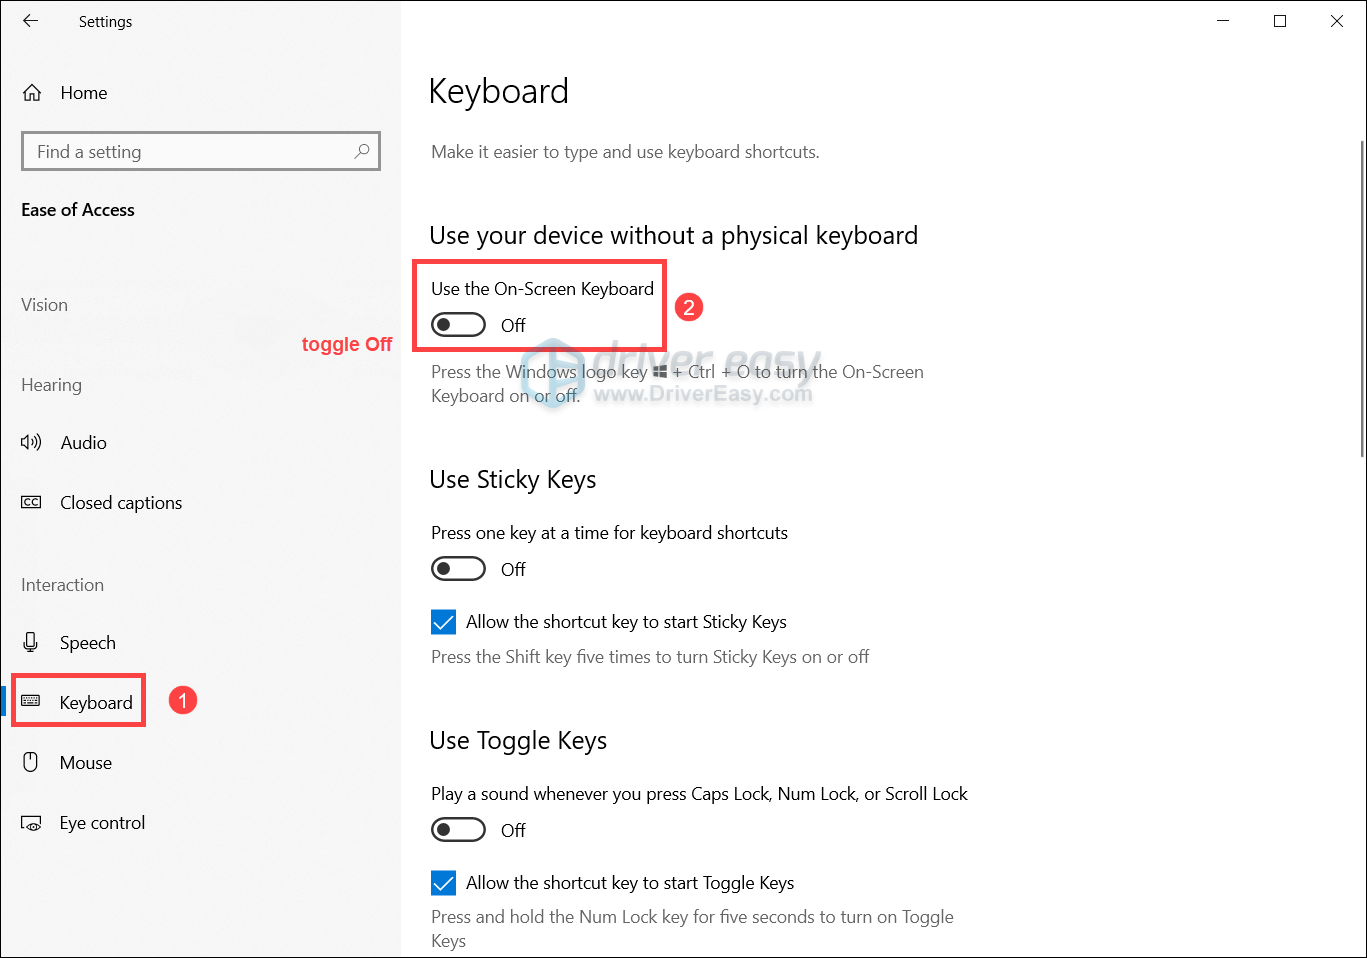
- Back to the Ease of Access settings, click Keyboard from the sidebar on the left, then toggle off On-Screen Keyboard.
- After making these changes, restart your PC and see if your problem has been solved. If your issue persists, move on to the next fix.
4. Update Your Drivers
When your keyboard, touchpad, touchscreen, or handwriting input is driven by outdated or mismatched drivers, the Windows Input Experience can start behaving inefficiently. To resolve your issue, you should update your drivers.
You can do this manually from the Device Manager, or visit your device manufacturer’s site for input-related drivers and manually download the latest compatible drivers. This can be time-consuming and may require some computer knowledge.
If you’d rather avoid the hassle of manual searching — and the risks that come with it — you can update automatically with Driver Easy. Driver Easy is a trusted driver updater that makes the process effortless. It automatically detects the exact drivers your system needs and installs them correctly, without the risk of picking the wrong version.
All it takes is just a few clicks:
- Download and install Driver Easy.
- Run Driver Easy and click the Scan Now button. Driver Easy will then scan your computer and detect any problem drivers.
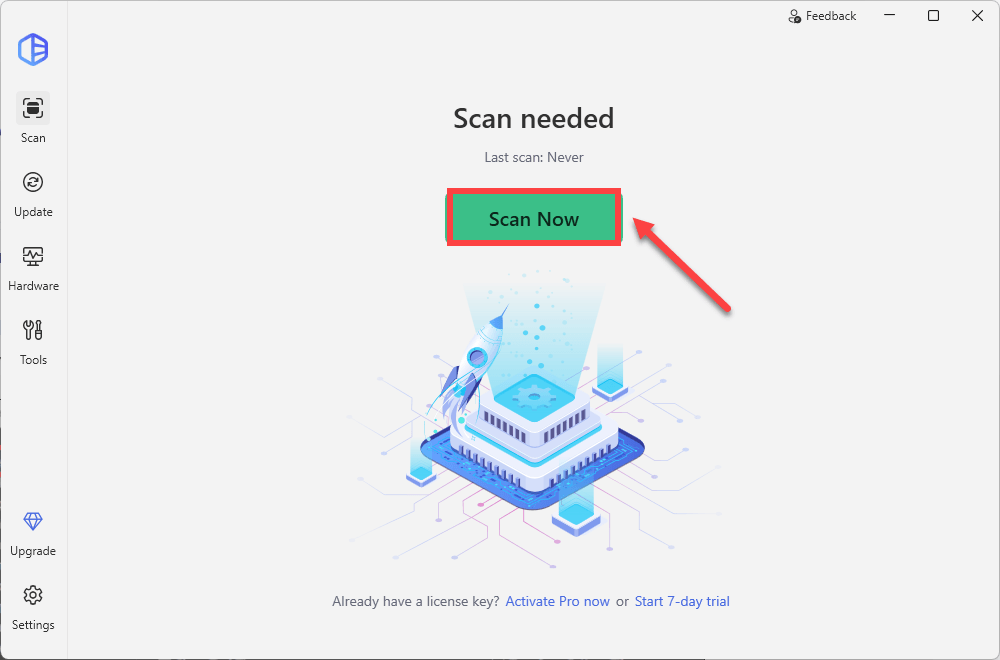
- Click the Activate & Update button next to the drivers flagged in the scan results to start a 7-day free trial or upgrade to Driver Easy Pro. Either option will automatically download and install the latest drivers for you.

- Restart your computer for the changes to take effect. Then check the memory usage on Task Manager. If Windows Input Experience still runs high on memory usage, proceed to the next fix.
5. Download & Install All Windows Updates
When Windows Input Experience starts hogging memory, one of the simplest and most effective troubleshooting steps is to install all pending Windows updates. Occasionally, Microsoft releases patches that fix memory leaks or performance glitches affecting input-related services. Follow the steps below to install all available Windows updates:
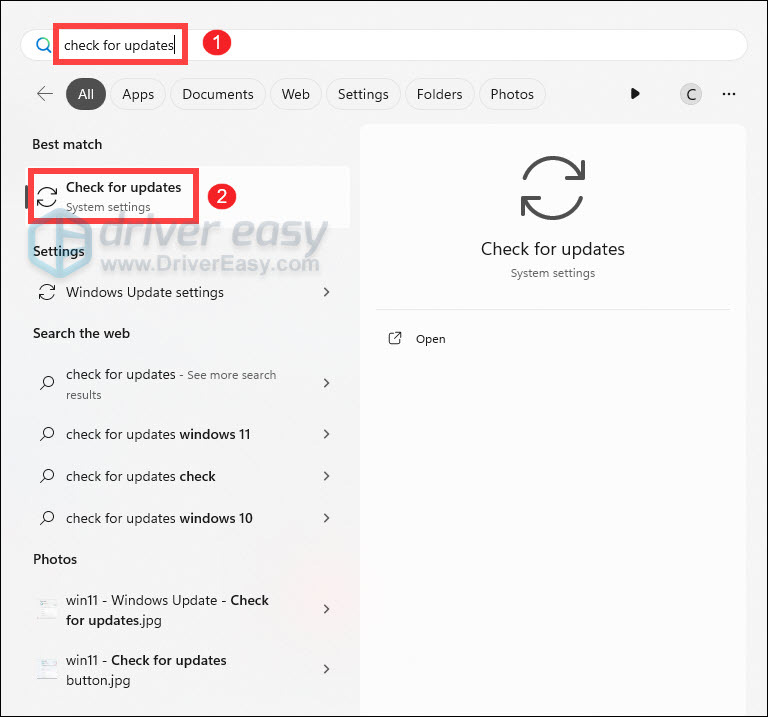
- Press the Windows logo key to invoke Search. Then type check for updates, and select it from the list of results.
- If you’re told that “Updates available to install”, simply click on the Install all button.

Or you can click on the button Check for updates to see if there are updates available.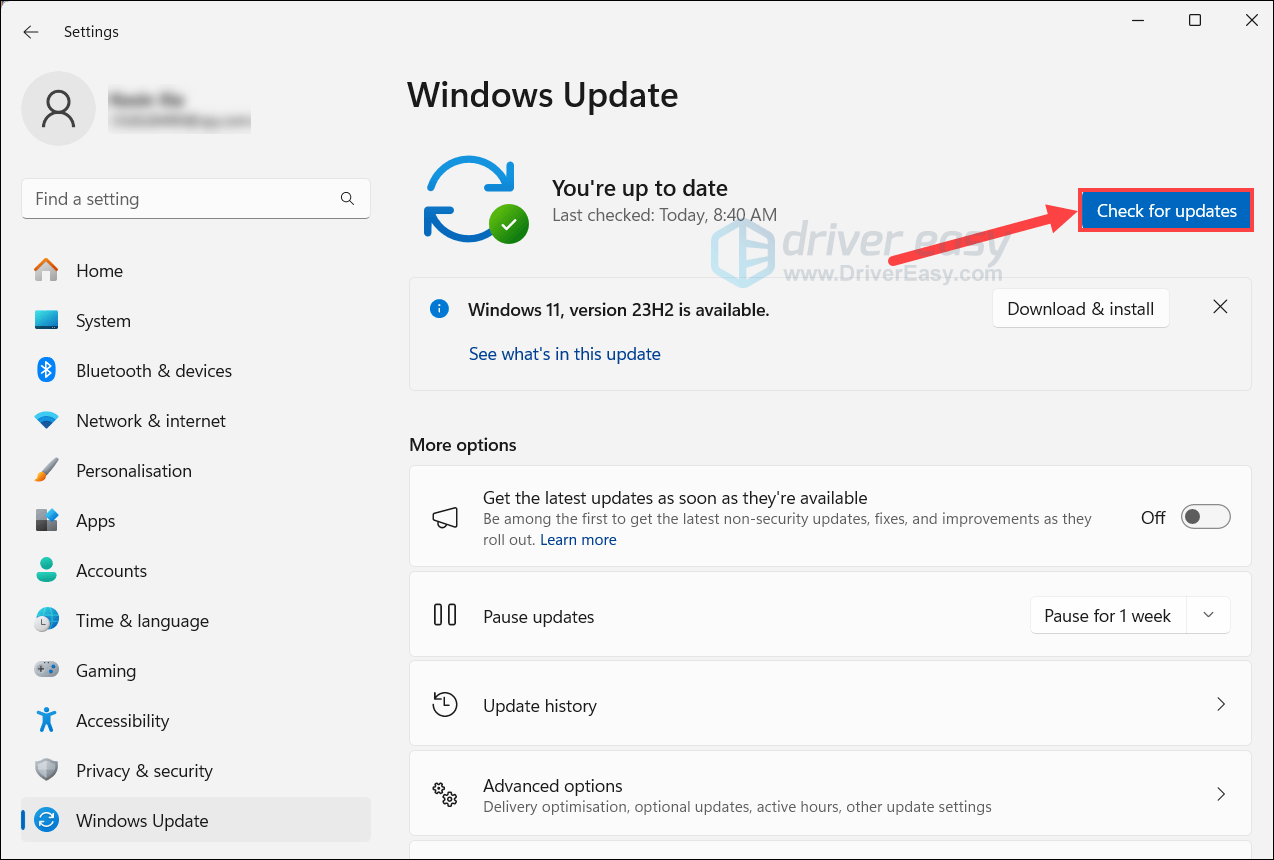
- Then follow the on-screen instructions to download and install the latest Windows updates. You should be prompted to restart your device upon completion. If your issue persists, try the next fix below.
6. Repair Corrupted System Files
Sometimes, the very files Windows relies on to run its background services, like Windows Input Experience, can become damaged. When these core system files get corrupted, the Input Experience process may struggle to function properly. It may use too much memory, freeze, or leak resources. Running the System File Checker tool (SFC) can restore system integrity and resolve those hidden glitches, often bringing memory usage back to normal.
- press the Windows logo key to invoke Search. Type cmd, right-click Command Prompt from the list of results, and select Run as administrator.
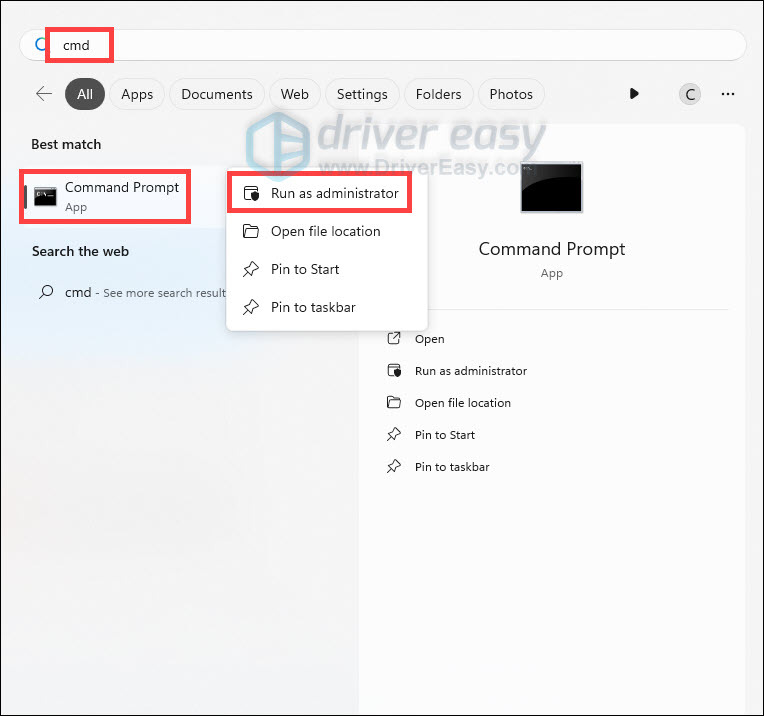
- In the Command Prompt window, type sfc /scannow and hit Enter.
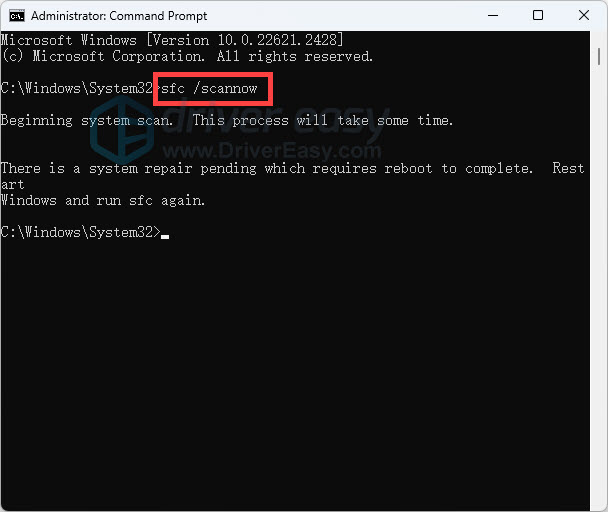
The sfc /scannow command will scan all protected system files and replace corrupted files with a cached copy. Note that you should not close this Command Prompt window until the verification is 100% complete.
| sfc /scannow result | What it means |
| Windows Resource Protection did not find any integrity violations. | The SFC tool did not detect any corrupted, missing, or damaged system files on your computer. This is a good sign! It indicates that your system files are intact and functioning as they should. |
| Windows Resource Protection could not perform the requested operation. | The SFC tool encountered an issue preventing it from completing the scan. Try rebooting into safe mode, running the DISM command, and running the sfc /scannow again. *To run the DISM command, you just need to execute the following commands sequentially: DISM /Online /Cleanup-Image /CheckHealth |
| Windows Resource Protection found corrupt files and successfully repaired them. | The operation was successful. |
| Windows Resource Protection found corrupt files but was unable to fix some of them. | It has detected corrupted system files but couldn’t repair them. To address this issue, view details of the System File Checker process to find the corrupted file, and then manually replace the corrupted file with a known good copy of the file. |