


To make it easier to understand the difference between HTTPS and HTTPS, we can put it this way: HTTPS is the secure version of the standard HTTP, with the extra S standing for Secure.
Websites with HTTPS, which is also know as SSL (secure socket layers) enabled, definitely provide more security than those without.
For website owners, HTTPS, or SSL, automatically encrypts any information going to and from your servers, which prevents hackers from getting sensitive information of your visitors as it transmits through the Internet.
In this post, we will introduce the very easy way for you to install SSL certificate on Nginx from the very beginning, that is, from the stage where your Nginx has yet to be installed. Basically, what you need to so is:
1. Install and Activate Nginx
2. Get a Certificate and Activate it
3. Install SSL on Nginx
Before we dive in, we need to get the following things ready:
1) Host with a dedicated IP address. SSl requires that your website has itw own dedicated IP address, so as to provide the best security. We will be using www.howtofixes.com as an example in this post.
2) An SSL certificate. In this post, we will be using a certificate from a free SSL issuing authority, Certbot.
Now, let’s move on and get your SSL certificate installed on Nginx.
If you have already installed Nginx, please go straight to 2. Get a Certificate and activate it.
NOTE: Please remember to hit Enter after each of the command. The hot key combination for paste in Xshell 5 is Shift + Insert.
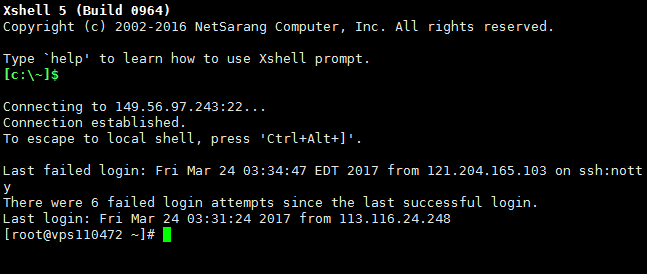
1) Open Xshell 5 and log into the server that you want to install SSL on.
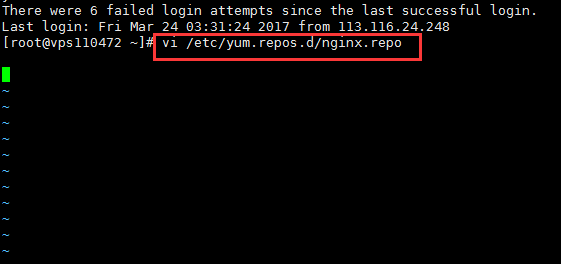
2) Copy and paste the following command in to add the official yum source.
vi /etc/yum.repos.d/nginx.repo
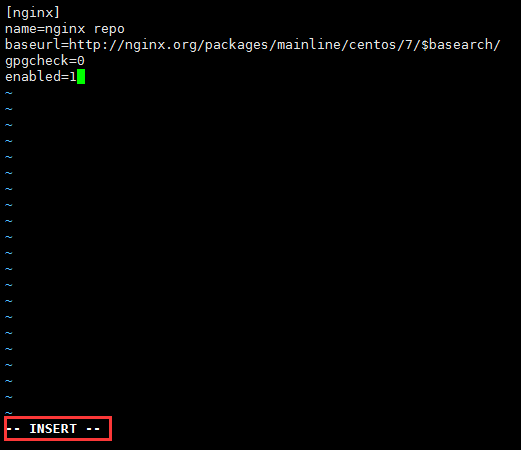
3) Now let’s hit the I (insert) key. You should be able to see the wording INSERT in the bottom left corner. Then copy and paste the following command in.
[nginx]
name=nginx repo
baseurl=http://nginx.org/packages/mainline/centos/7/$basearch/
gpgcheck=0
enabled=1
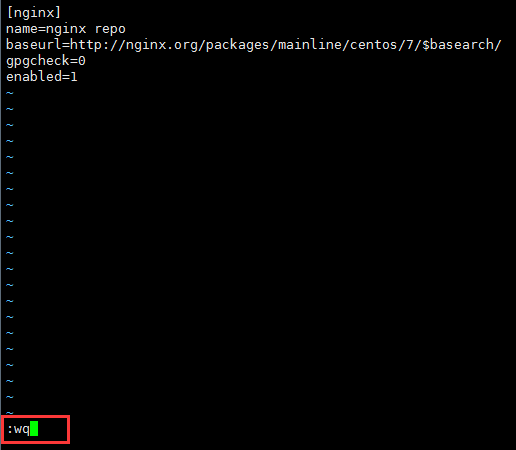
3) Now, press the Esc button and then type in command :wq then hit Enter to save the change and go back to our server.
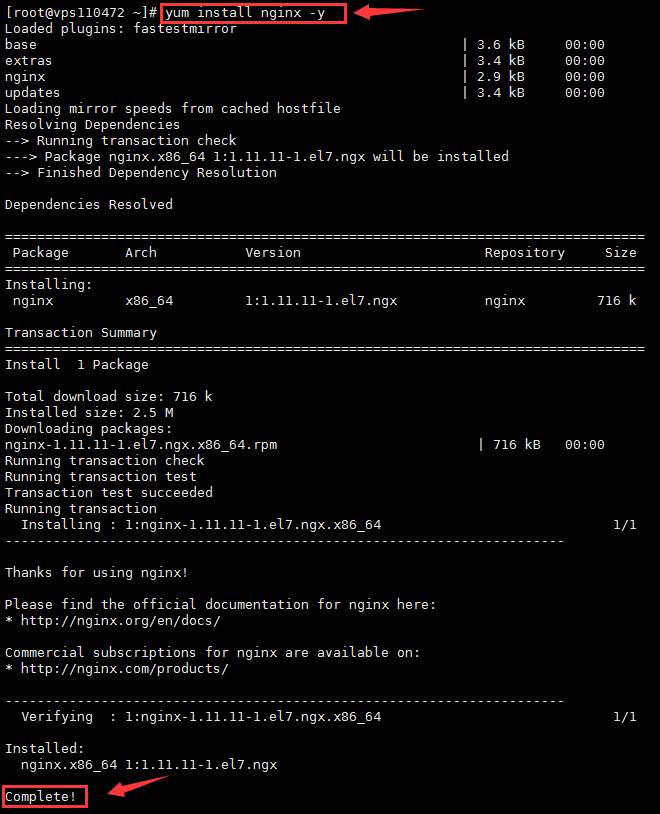
4) Copy and paste the following command to install Nginx server automatically. You should be able to see Complete if the installation succeeds.
yum install nginx -y
5) Copy and paste the following command in to get the Nginx server started.
systemctl start nginx

To make sure that Nginx starts correctly, copy and paste in the following command:
netstat -tulnp | grep 80

If you don’t see any instructions telling you how to restart your Nginx server and that your are in port 80, then you are good to go.
6) Now let’s enable Nginx to start as the system starts by copying and pasting the following command.
systemctl enable nginx

2. Get a Certificate and activate it
We are to get the certificate from Certbot and then activate it.
NOTE: Please hit Enter after each of the command. The hot key combination for paste is Shift + Insert.
1) We need to download Certbot first. Still, copy and paste the following command in.
yum install epel-release -y
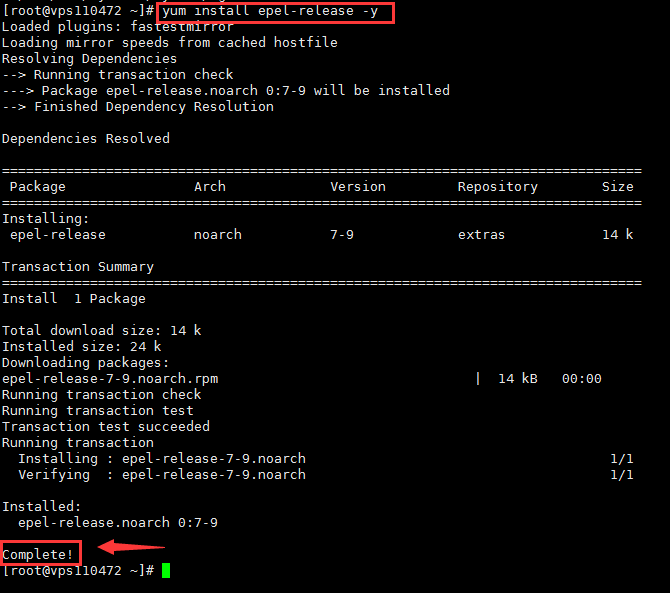
You should be able to see Complete! when the download finishes.
2) Now let’s install Certbot. Copy and paste the following command in.
yum install certbot -y

You will also see Complete! when the installation finishes.
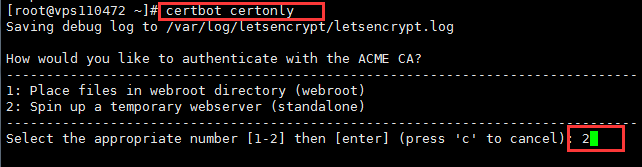
3) Now we are to obtain the certificate. Copy and paste in the following command:
certbot certonly
You will be prompted to choose the way to authenticate the certificate. We type 2 to choose the second option.
4) Then we need to enter our email address that we used for the certificate. Type it in and hit Enter.

Hit A to agree to move on.

Then hit Y to move on.

5) Then you need to type in the domain name of your website. In the screenshot, we use www.howtofixes.com as our exemplar domain name. You will see Congratulations! when the process finishes.

6) Now let’s check the detailed certificate and private key location. Copy and paste the following command in and you should be able to see.
ls /etc/letsencrypt/live/www.howtofixes.com

/etc/letsencrypt/live/www.howtofixes.com/fullchain.pem is the certificate address.
/etc/letsencrypt/live/www.howtofixes.com/privkey.pem is the address of the private key of the certificate.
Mark down the information, you will need it later.
1) Now we are to install SSL on Nginx. First, copy and paste the following command in.
vi /etc/nginx/conf.d/default.conf
You will see the default configuration pop out. Press d (lower case) and then G (upper case) to delete the default configuration.

2) Copy and paste the following configuration but DO NOT hit Enter button just yet, we need to make some changes to the configuration as per your situation.
Use the up and down arrow keys as the on-screen indicator instead of your mouse.
- The server_name under 80 port should be changed to the domain name of your website plus the IP address of the server.
- The ssl_certificate under 443 ssl port should be changed to the location of your certificate, which has been marked down in 2.6. The ssl_certificate_key under the same port should be changed as per the location of the private key, which is also marked down in 2.6.
server {
listen       80;
server_name  www.howtofixes.com howtofixes.com 149.56.97.243 ;
return 301 https://$server_name$request_uri;
#charset koi8-r;

#access_log  logs/host.access.log  main;

location / {
        root   /usr/share/nginx/html;
        index  index.html index.htm;
}
#error_page  404              /404.html;

    # redirect server error pages to the static page /50x.html
    #
    error_page   500 502 503 504  /50x.html;
    location = /50x.html {
        root   /usr/share/nginx/html;
    }
}
server {
    listen       443 ssl;
    server_name  localhost;
    ssl_certificate      /etc/letsencrypt/live/www.howtofixes.com/fullchain.pem;
    ssl_certificate_key /etc/letsencrypt/live/www.howtofixes.com/privkey.pem;

    ssl_session_cache    shared:SSL:1m;
    ssl_session_timeout  5m;

    ssl_ciphers  HIGH:!aNULL:!MD5;
    ssl_prefer_server_ciphers  on;

    location / {
        root   /usr/share/nginx/html;
        index  index.html index.htm;
    }
}
So when you done modifying the code and paste it in, the window should look like this:
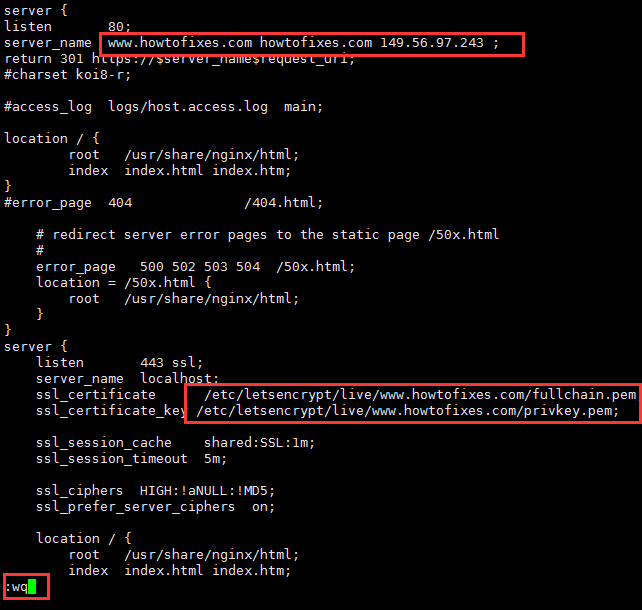
Make sure that you have done no mistake in typing your server and certificate information. Then hit Esc key and then type in :wq to save the change and move on.
3) We need to test whether the configuration works. Copy and paste the following command.
nginx -t

If the configurations are problem free, you should be able to see successful at the end.
4) Copy and paste the following command in to restart Nginx for the changes to take effect.
systemctl restart nginx

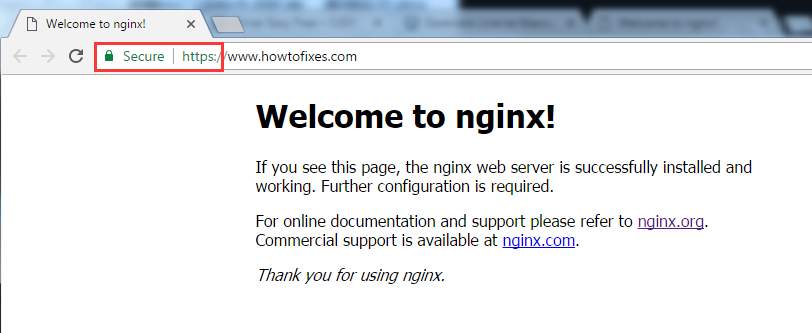
5) Now, visit www.howtofixes.com. The domain name starting with https and the Secure in front indicate that your SSL installation is successful.
6) To make sure that the SSL is indeed working, type the domain name www.howtofixes.com in the search box on QUALYS’ SSL LABS.
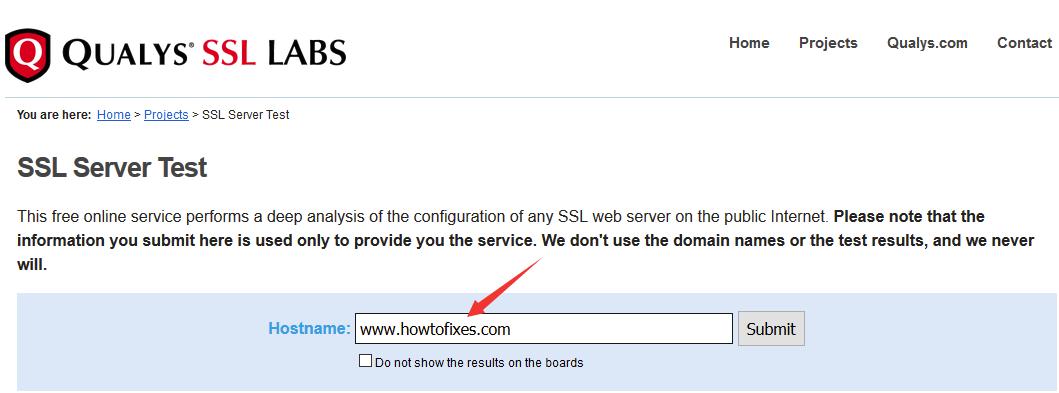
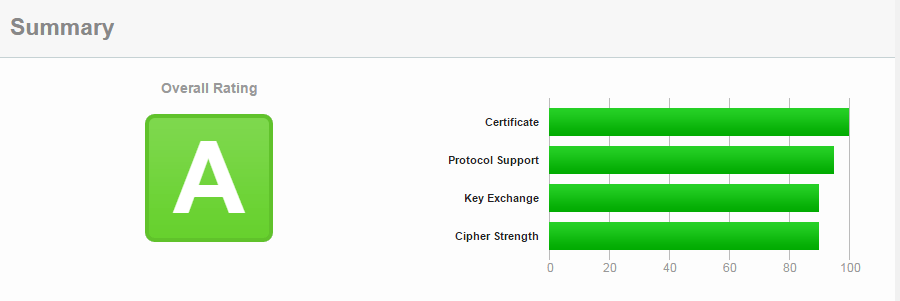
The result should come out in just a few minutes.
There you go. That’s all you need to do to install SSL certificate on Nginx for your websites!