


You might wanna make a screenshot for different occasions, whether to capture a great moment of a show or an important page of information.
There are multiple ways to take a screenshot in Windows 10. Some of them are convenient, while others are not. Want to know which way serves better for you? Let’s find out.
1. Using Keyboard Shortcut
A. Quick Screenshot To Your Clipboard
Press PrtScn to quickly capture your display and copied to your clipboard. You can paste into image editor or other programs you want to use.

B. Quick Saved Screenshot
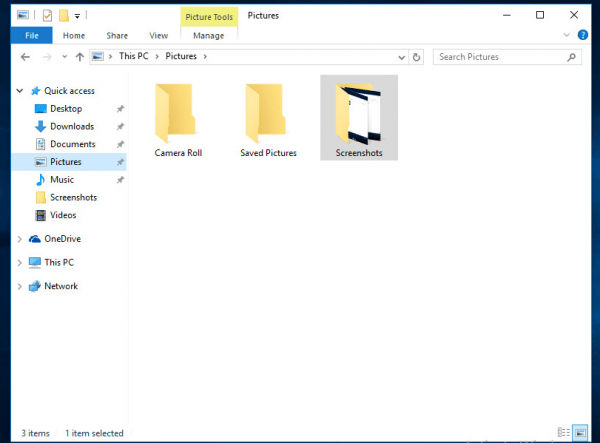
Press Windows Key + PrtScn to quickly capture your display and saved to the Screenshot Folder. (default location as below)
C. Screenshot of the Current Active Window without Saving
Click on the tile bar of a window you wish to capture, anywhere in the area,
There are multiple ways to take a screenshot in Windows 10. Some of them are convenient, while others are not. Want to know which way serves better for you? Let’s find out.
1. Using Keyboard Shortcut
A. Quick Screenshot To Your Clipboard
Press PrtScn to quickly capture your display and copied to your clipboard. You can paste into image editor or other programs you want to use.
B. Quick Saved Screenshot
Press Windows Key + PrtScn to quickly capture your display and saved to the Screenshot Folder. (default location as below)
C. Screenshot of the Current Active Window without Saving
Click on the tile bar of a window you wish to capture, anywhere in the area,

Press ALT + PrtScn, it will be copied to your clipboard. Paste into image editor or other programs you want to use.
2. Using built in Snipping Tool
Finding the snipping tool has never been more tricky, it’s well hidden so you need to specifically ask for it.
Enter Snipping Tool in the search box, ![]()
Now, choose from types of snip you want by clicking the arrow next to New.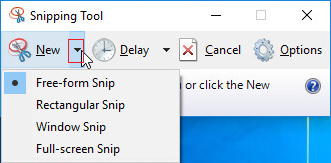
After you’re done snipping, a window for the image you just capture will pop and then you can save it or start a new one.
Or, You could start a timer-like snip as for the Delay button, choose from 0-5 second delay before the snip so that you can make a pose set up things you want. 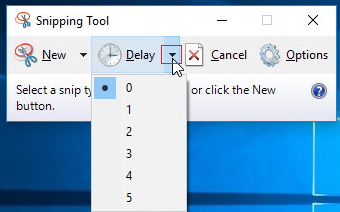
Click New after that to start.
1
1 people found this helpful
0 Comments
Most Voted