


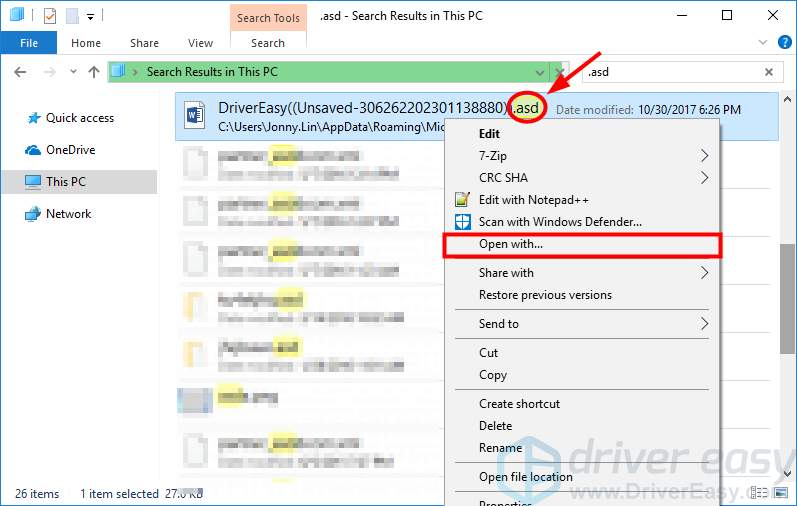
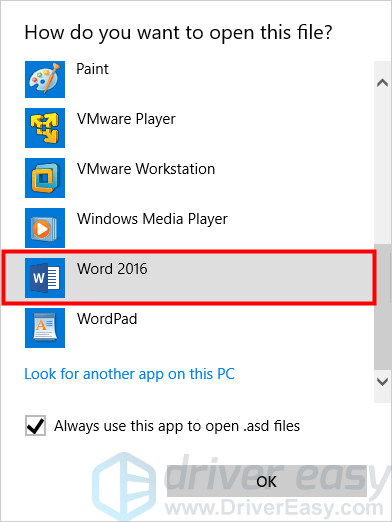
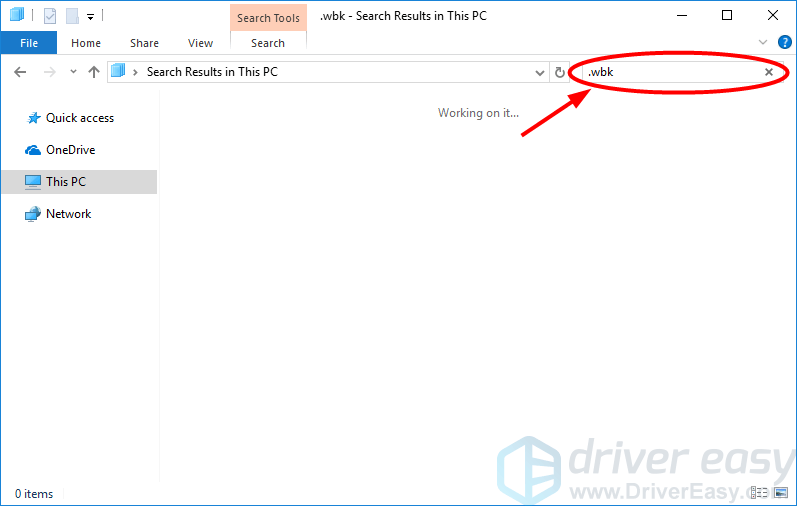
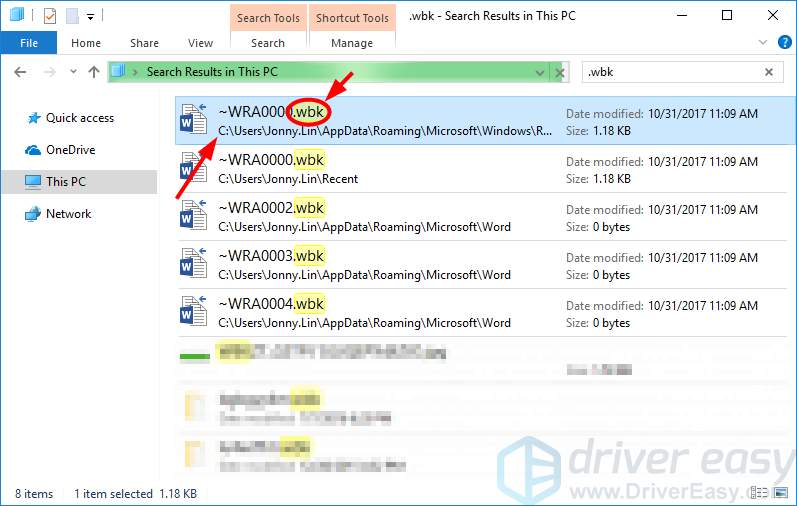
Method 1: Recover from recent changes
When you are editing a Word document, the Word application will create backup copies or auto-save files for you at regular intervals. So you can use these files to recover your Word document when it is missing or corrupted. If the application or your computer stopped working when you were editing your file, you can try opening the document again. Word will show you the Document Recovery pane and a list of available files it saved for you. Choose the latest available file to recover your document from it.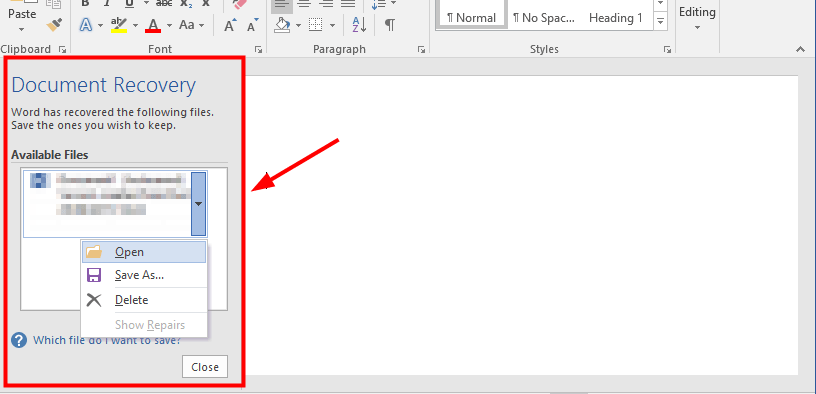
Method 2: Recover from previous versions
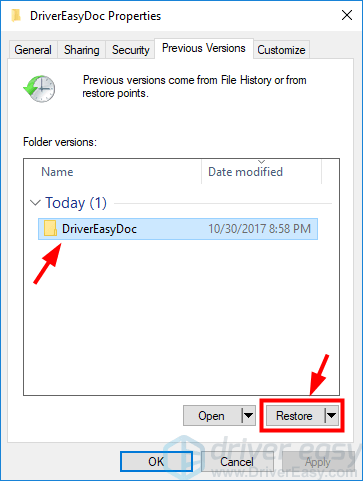
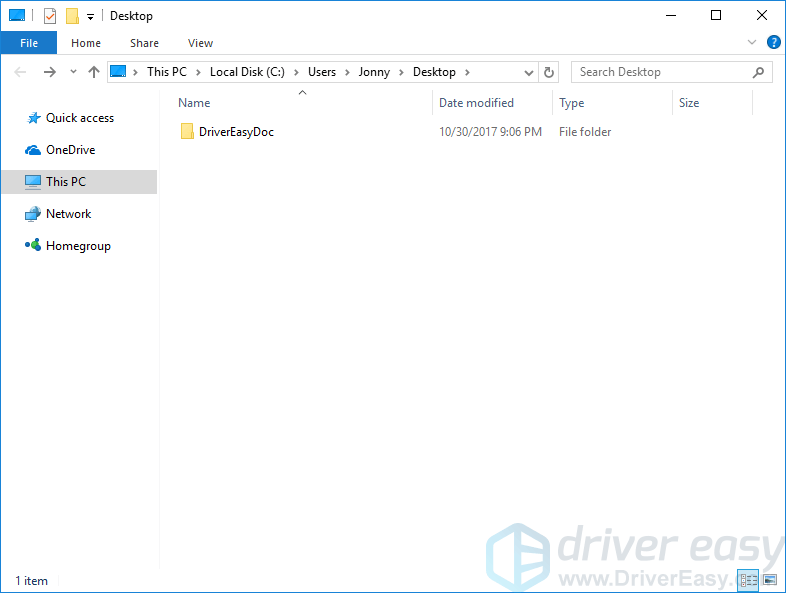
(This method will only work if your computer have backed up your Word document or the folder that contains them or if you have created a system restore point. Otherwise you should skip this method and try the tips below. The tip at the bottom will show how to automatically back up your documents in order to enable the previous versions feature.) Windows can save the previous versions of your files or folders. These previous versions come from the backups or the system restore points you have created. You can recover your files in a folder by restoring the folder to a previous version before your document corrupted or disappeared. To use previous versions to recover your documents: 1) Right click the folder you want to recover and select Restore previous versions.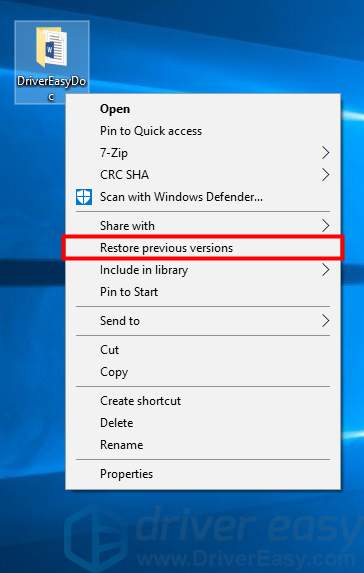
Method 3: Perform data recovery
If you don’t have any backup copy of your Word document, the most effective way to recover your document is to perform data recovery. You need to do this with the help of third-party software or an expert. There are a lot of data recovery software on the Internet, paid or free. You can do some research and test with several programs to find out the one that really works for you. But please note that you should be able to run the tool directly without installation (this helps you protect your deleted documents from being overwritten). Or you can find a data recovery specialist to recover your Word documents. Search on the Internet for the data recovery service providers near you. Be extra careful about the reputation and reliability of service provider. The data recovery service better at these is more likely to save your documents.Final tip: Back up your files regularly
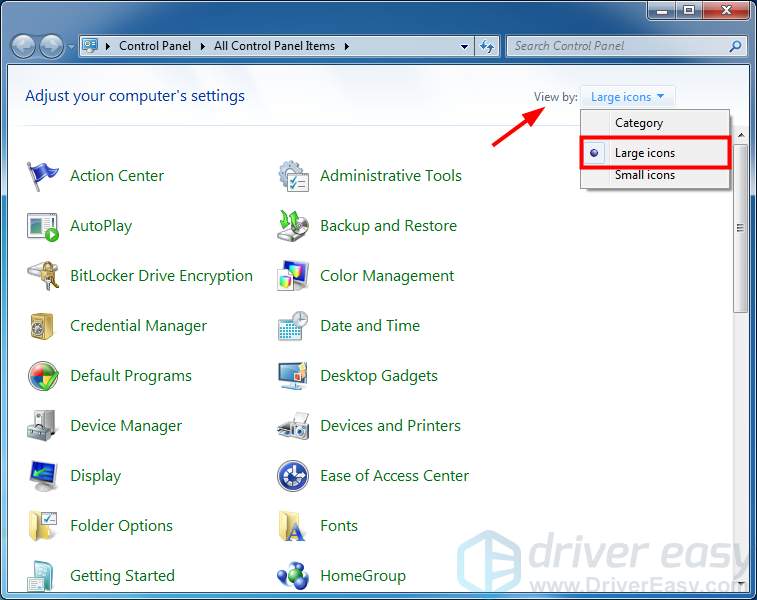
It is still possible that your Word documents are missing or corrupt some day. You should back up your Word documents in advance to prevent yourself from getting into big trouble like this. To back up your files, you can routinely copy and paste them to your USB flash drive or external hard drive. But, instead of doing this manually, you can ask your Windows system can back up your files automatically. There are some differences between backing up your files on Windows 10 and on Windows 7. The following steps will show you the different processes on these systems. If you are using Windows 7: 1) Click the Start button at the lower left corner of your screen. Then click Control Panel.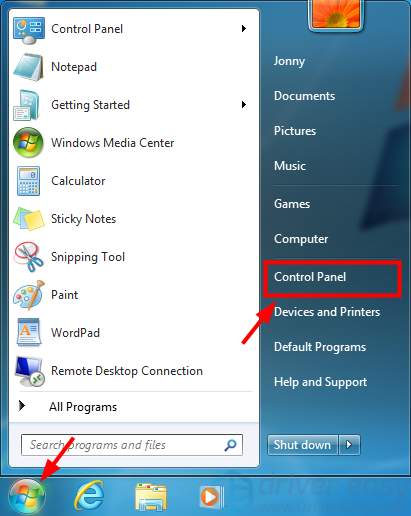 2) Under View by, click Large icons.
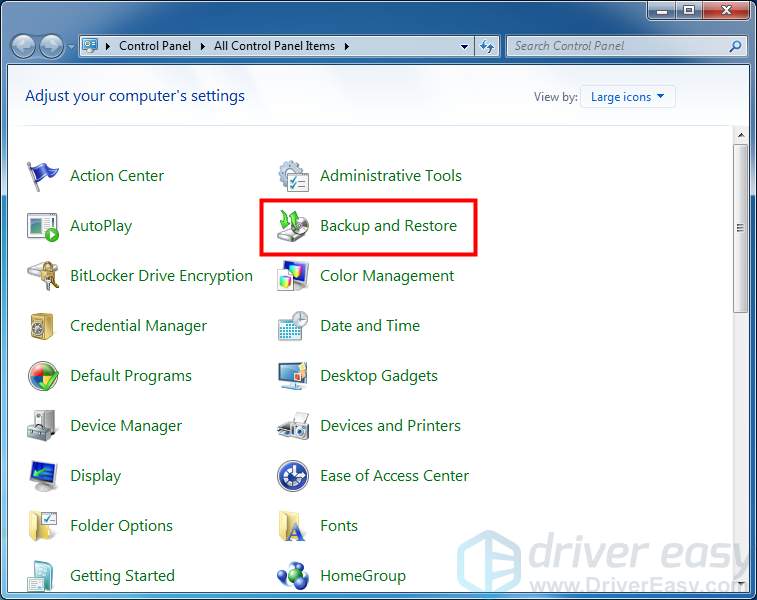
 3) Click Backup and Restore.
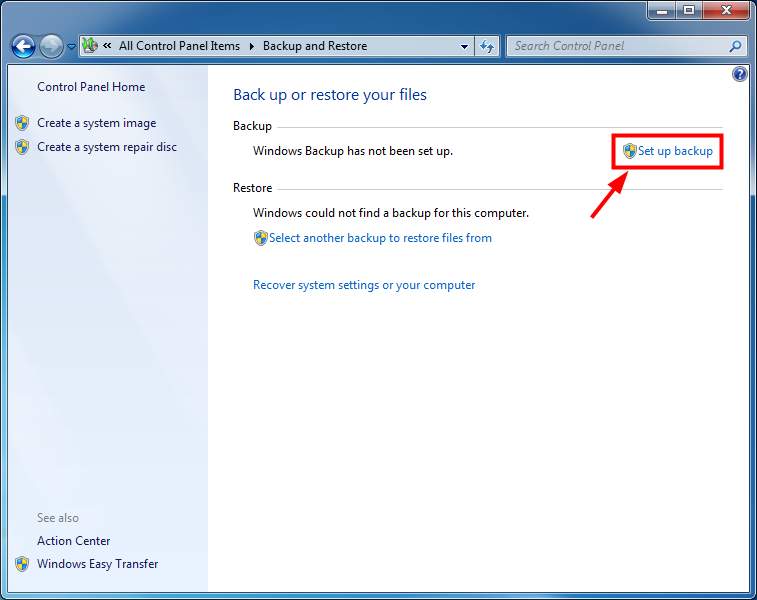
 4) Click Set up backup.
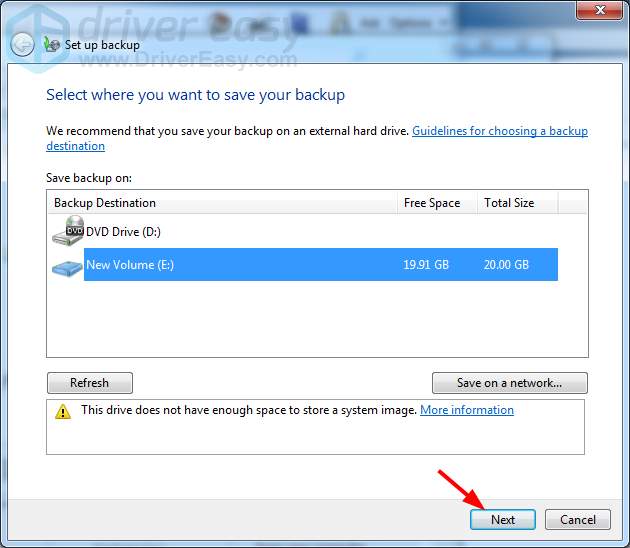
 5) Select a backup destination. (You can save it on a partition of your hard drive or on your USB flash drive or external hard drive. You can also save it to another computer on the same network by clicking the Save on a network button. It’s better for you to choose a destination other than your hard drive in case it fails.) After that, click Next.
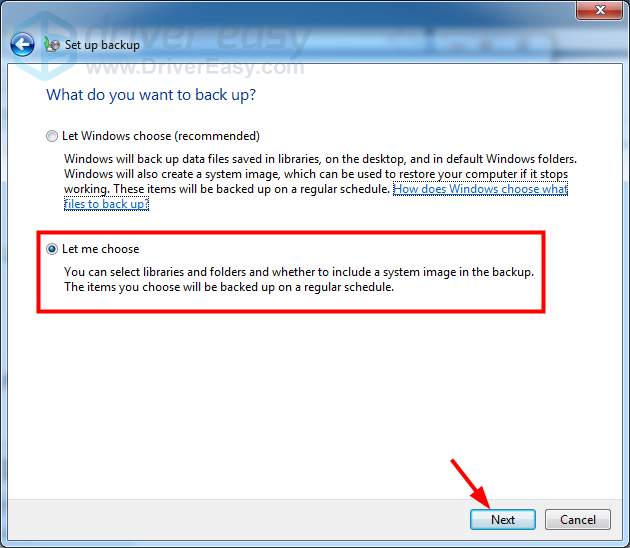
 6) Click the option button of Let me choose (this allows you to choose what to back up manually). Then click Next.
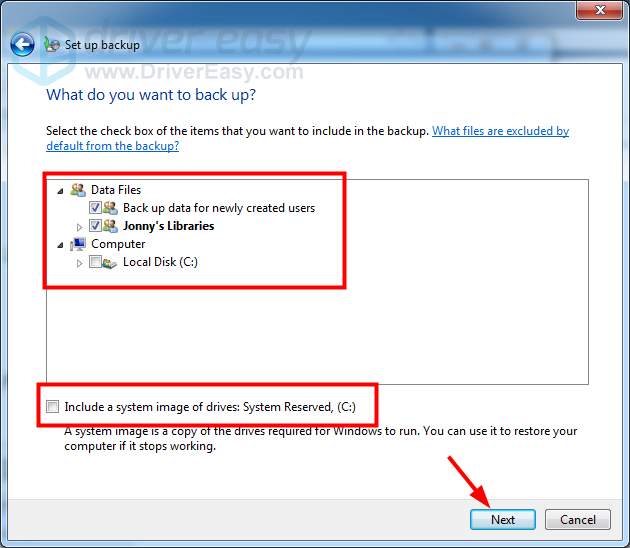
 7) Choose what you want to back up and whether you want to include a system image (this requires larger storage space). Then click Next.
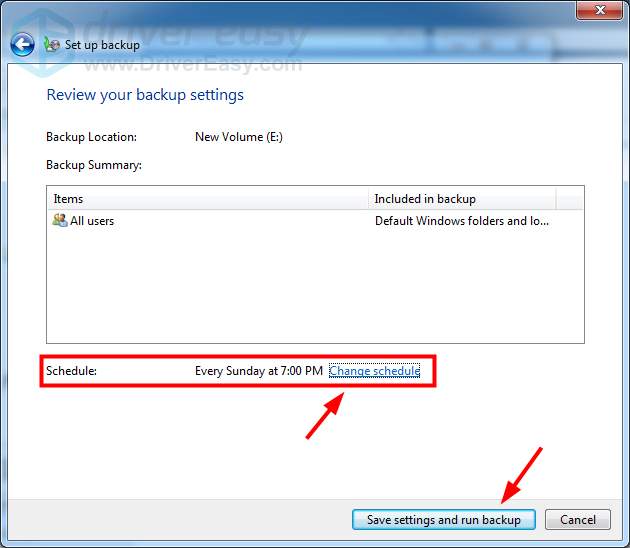
 8) Click Change schedule to change the back up schedule if you are not satisfied with it. Then click Save settings and run backup.
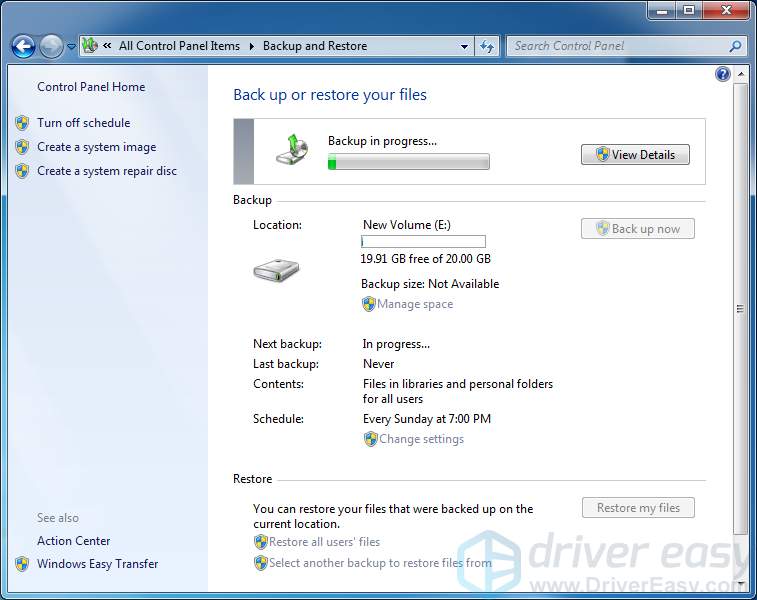
 9) Your system will automatically run the backup for you.
 To back up your files on Windows 10, you should turn on a feature called File History. To do so:
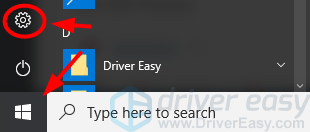
1) Select the Start button at the lower left corner of your screen. Then click the Settings icon.
To back up your files on Windows 10, you should turn on a feature called File History. To do so:
1) Select the Start button at the lower left corner of your screen. Then click the Settings icon.
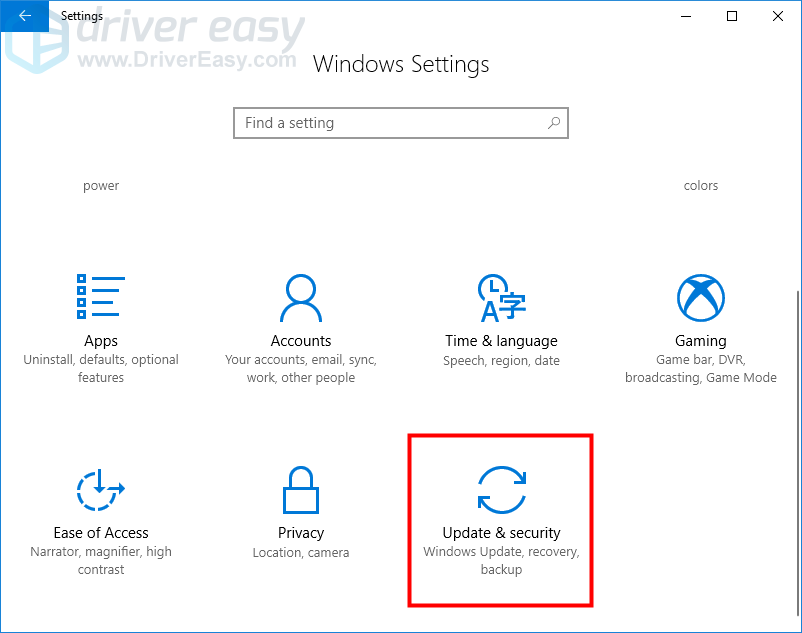
 2) Select Update & Security.
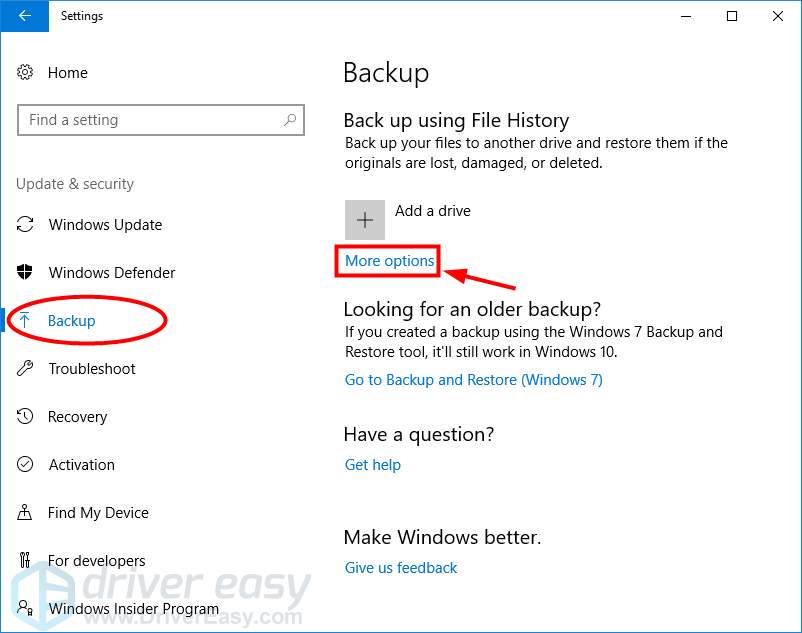
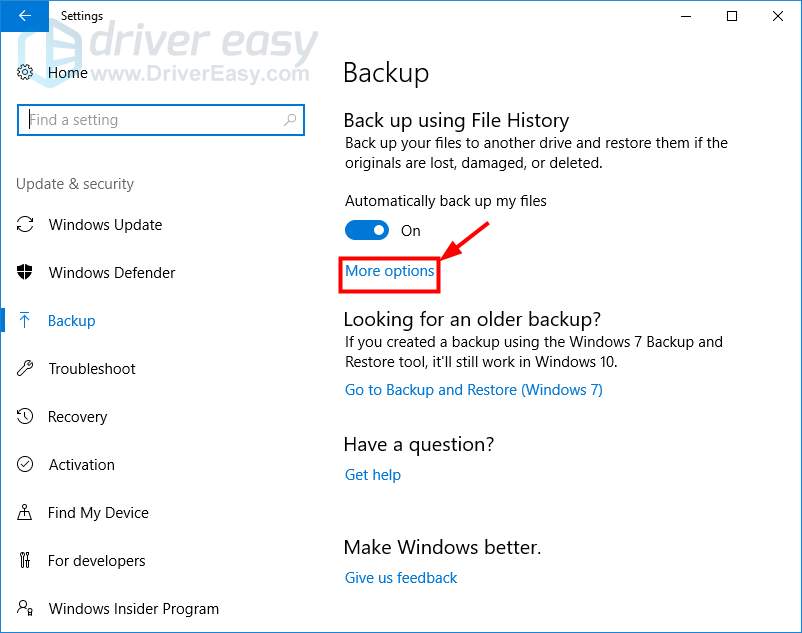
 3) Select Backup. Then click More options.
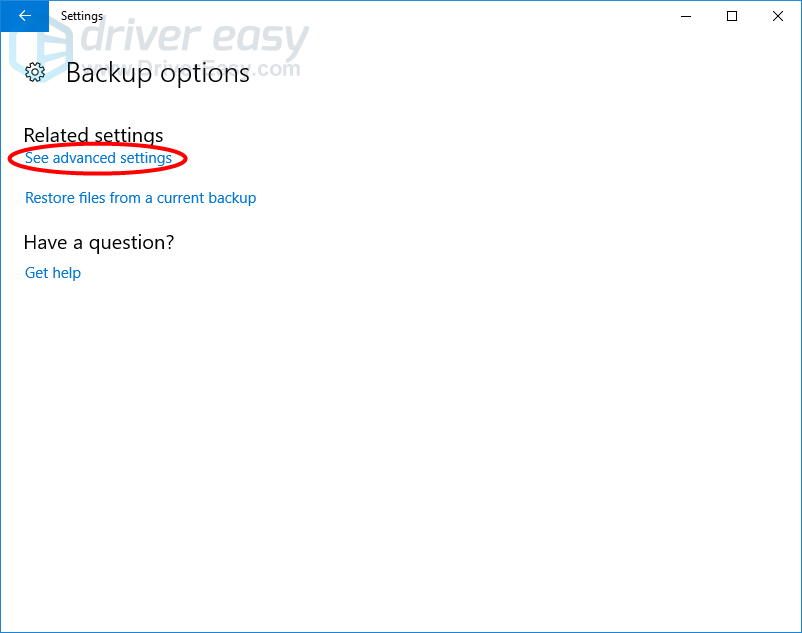
 4) Click See advanced settings.
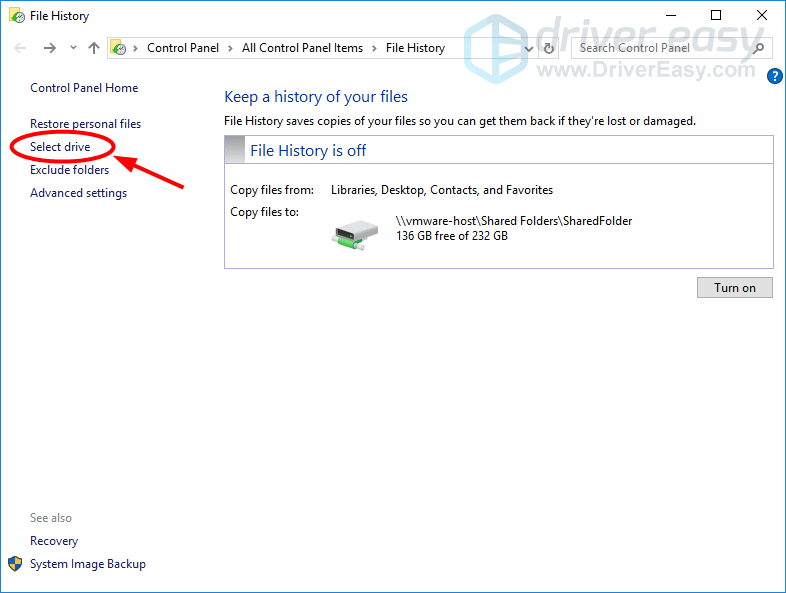
 5) Click Select drive in the left pane to select where you want to save your backup.
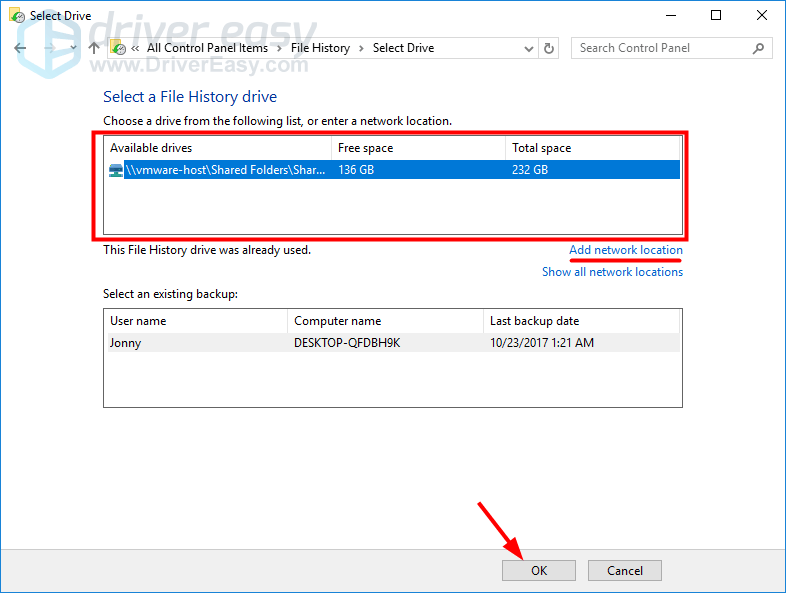
 6) Select a drive from the list to store your backup. (Your system disallows you to save your backup on the hard drive where the system is installed. It is recommended that you choose to save on your USB flash drive or external hard drive. If you want back up a file on a another computer on the same network, click Add network location.) After that, click OK.
 File History is now turned on. It will automatically save copies of your files to the designated location.
 If you want to change the settings of backup, go back to the backup settings window and click More options.
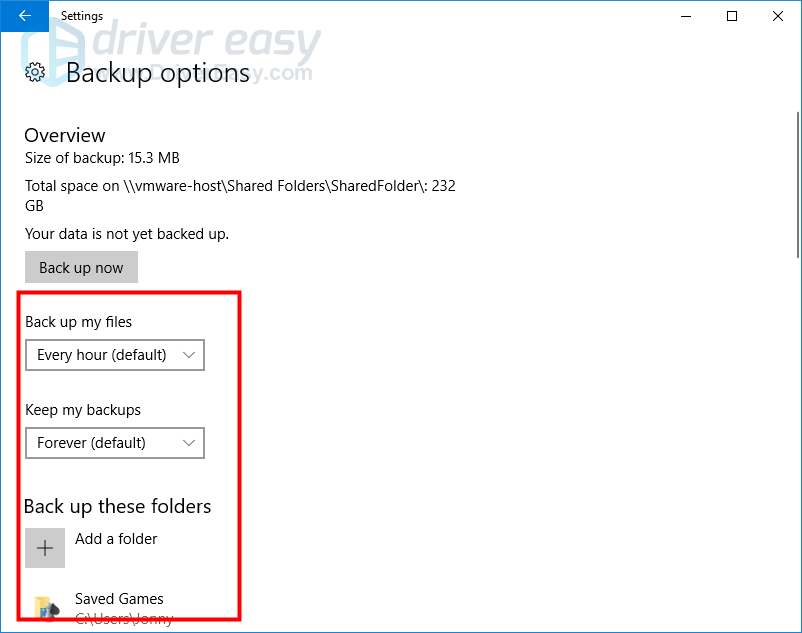
 You can configure the Backup options, such as when and what you want to back up.
 When you turn on the back up features, your computer will routinely back up your files for you. These backup copies can one day save your life when you lose your Word documents or other important files.
2
2 people found this helpful
0 Comments
Most Voted