


A graphics (aka. video card, GPU, display) driver is a tiny program in your computer that enables the graphics card to communicate with the operating system. This way, the graphics card can better do its job in controlling how graphics (images, videos, apps, animation, 3D) are displayed on the computer and improving them.
Your screen won’t lose display after you uninstall the driver since Windows has its own basic built-in driver that takes the graphics rendering job from there. But the problem with the Windows basic driver is that you’re not getting the best out of your graphics card and you may also face poor screen resolution, blurry screen issues and crashes etc.
Content
Part 1: Uninstall your graphics driver
Part 2: Install the latest graphics driver
Part 1: Uninstall your graphics driver
Uninstalling your graphics driver from Device Manager can be just as easy as doing that with a driver uninstaller. Here’s how:
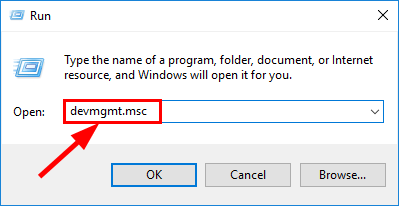
- On your keyboard, press the Windows logo key and R at the same time, then type devmgmt.msc into the box and press Enter.
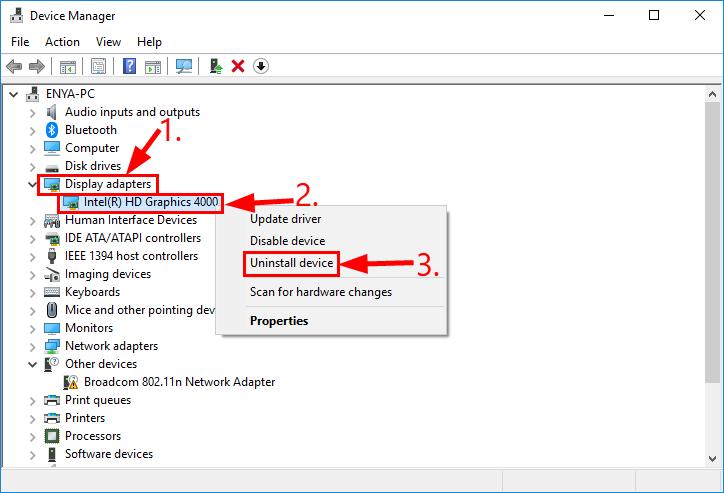
- Locate and double-click on Display adapters (aka. Graphics card, Video card). Then right-click on the item right below and click Uninstall device.
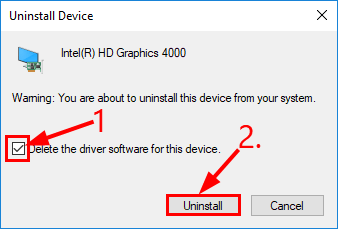
- Click Uninstall in the pop-up window.
- Restart your computer for the changes to take effect.
Part 2: Install the latest graphics driver
As mentioned above, it’s ALWAYS recommended to have the latest display driver installed for improved computer performance(better visual effects to say the very least, especially for gamers).
There’re two ways you can update your device drivers —
Update your drivers manually – You can update your device drivers manually by going to your GPU card’s manufacturer’s website, and searching for the most recent correct driver for the exact device. Be sure to choose ONLY drivers that are compatible with your variant of Windows system versions.
OR
Update your drivers automatically – If you don’t have the time, patience or computer skills to update your drivers manually, you can, instead, do it automatically with Driver Easy. You don’t need to know exactly what system your computer is running, you don’t need to risk downloading and installing the wrong driver, and you don’t need to worry about making a mistake when installing. Driver Easy handles it all.
You can update your drivers automatically with either Free or the Pro version of Driver Easy. But with the Pro version it takes just 2 clicks (and you get full support and a 30-day money back guarantee):
- Download and install Driver Easy.
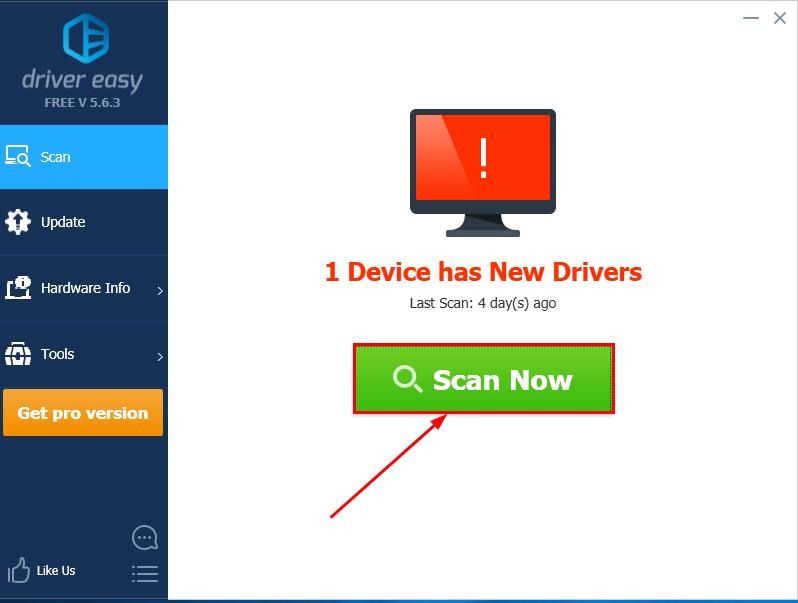
- Run Driver Easy and click the Scan Now button. Driver Easy will then scan your computer and detect any problem drivers.
- Click Update All to automatically download and install the correct version of ALL the drivers that are missing or out of date on your system (this requires the Pro version – you’ll be prompted to upgrade when you click Update All).

You can also click Update to do it for free if you like, but it’s partly manual. - Restart your computer and enjoy!
Hopefully this post has guided you in the right direction in uninstalling your graphics driver. If you have any questions, ideas or suggestions, please let me know in the comments. Thanks for reading!
Featured image by Christian Wiediger on Unsplash