


If you want to record audio on Windows 10, there’s a handy tool — Voice Recorder. It’s a pre-installed app. Read on, and this article tells you whatever you want to know about Voice Recorder.
You’ll learn
- How to set up a microphone for Voice Recorder on Windows 10?
- How to use Voice Recorder on Windows 10?
- How to fix issues with Voice Recorder on Windows 10?
How to set up a microphone for Voice Recorder on Windows 10?
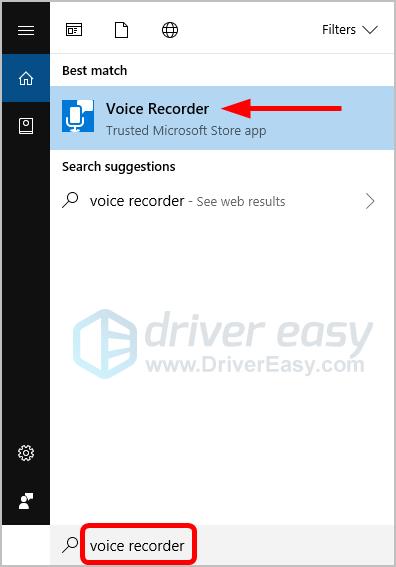
- Type voice recorder in the Windows search box, and select Voice Recorder.
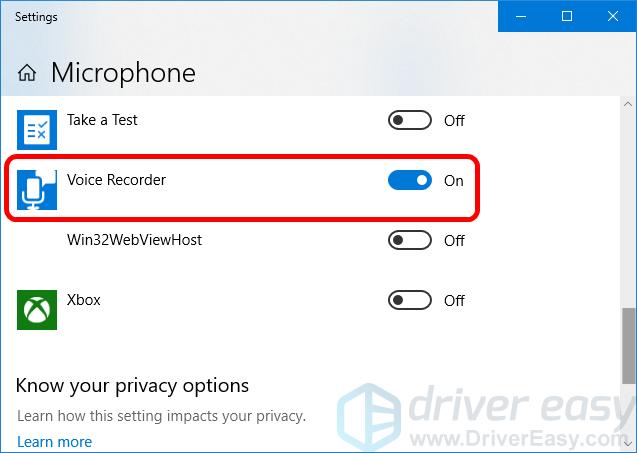
- A window will pop up and may display an error message: You need to set up a microphone in Settings — Just click the three dots in the lower left corner, and choose Microphone settings.

- In the Settings window, verify Allow apps to access your microphone is turned on.

- In the Choose which apps can access your microphone section, make sure Voice Recorder is enabled.
- Close the Settings window and the Voice Recorder window.
- Relaunch Voice Recorder through the search box, and you should be able to record smoothly.
How to use Voice Recorder for Windows 10?
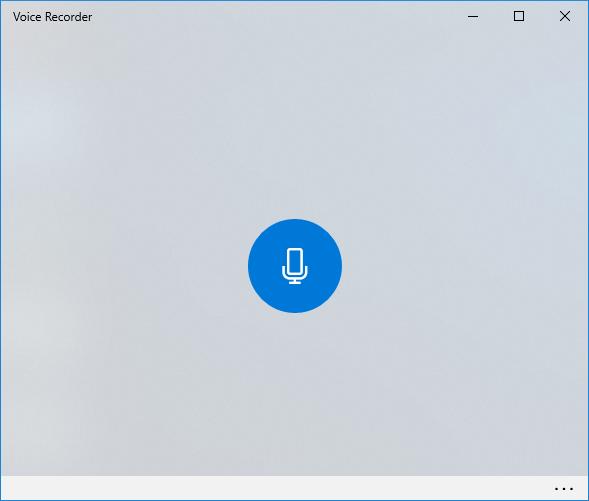
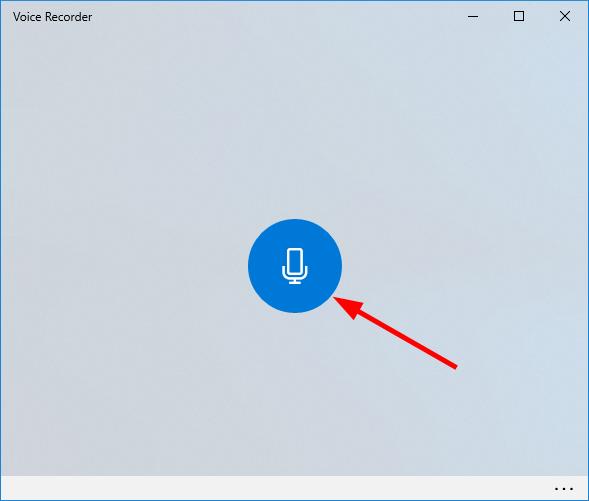
- Launch Voice Recorder through the Windows search box.

- Click the microphone icon to begin recording.
- You can pause the recording at any time — click the pause icon in the lower left.
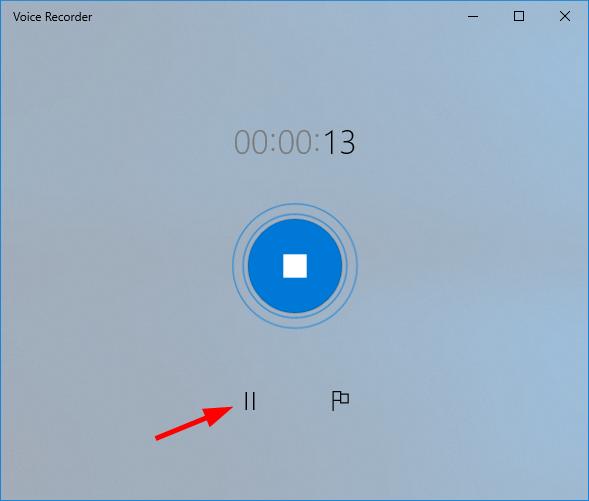
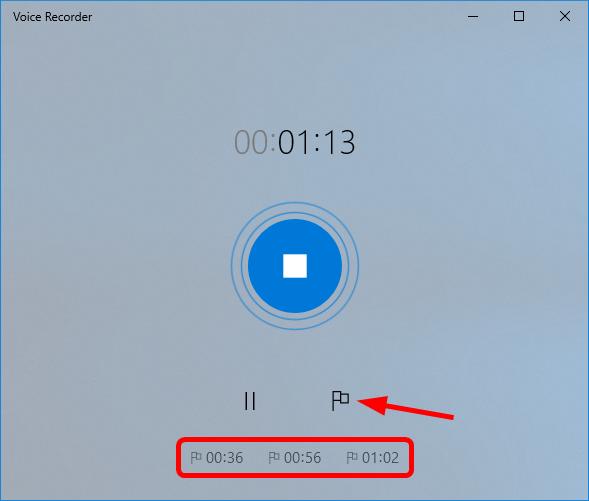
Another thing you can do is mark certain parts of your recording — click the flag icon in the lower right to add a marker in the recording. You can add as many markers as you want.
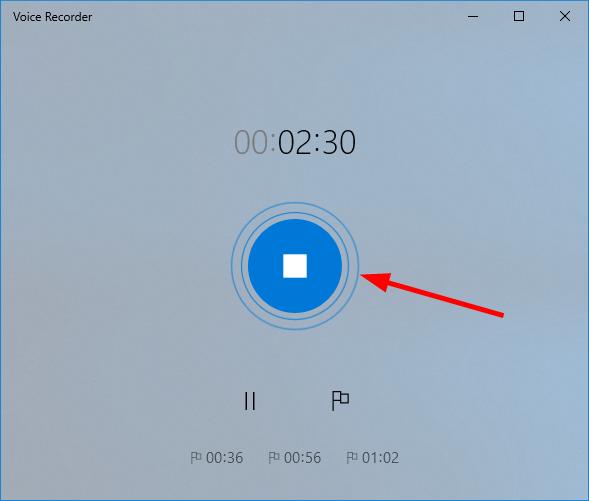
When you’re done recording, click the stop button in the middle to stop recording.
You can then click the recording to play it.
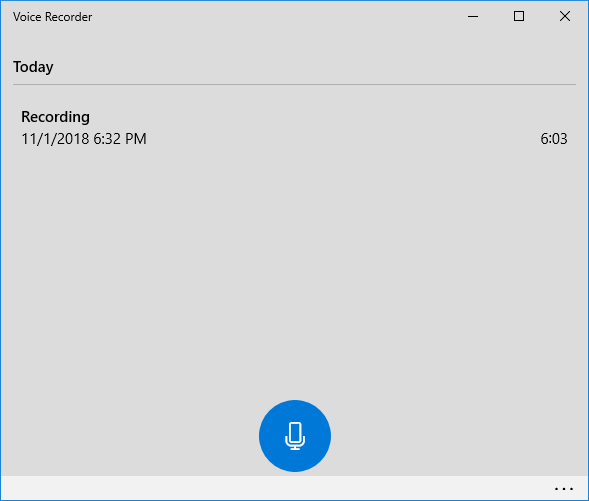
There’re a few actions you can perform on your recording: share, trim, delete and rename your recording.

Note: All the markers you added also appear on the play bar.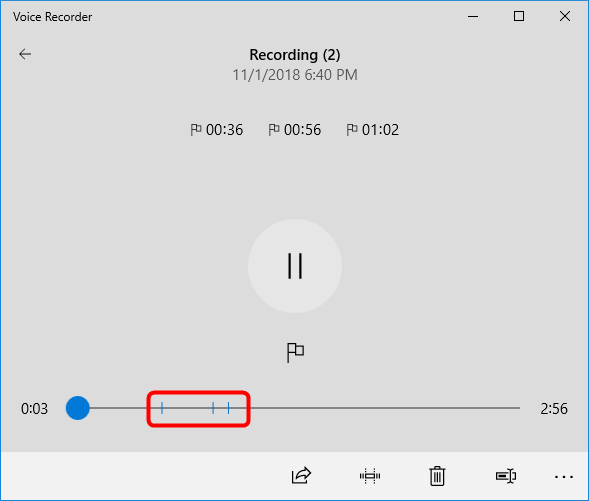
If you want to open the file location of the recording, just click the three dots in the lower-right corner, and select Open file location.
If you can’t record because your mic isn’t working, you may need to update your audio driver.
How to fix issues with Voice Recorder for Windows 10?
A missing or outdated audio driver may stop you from recording on Windows 10. You can try fixing the issue by updating your audio driver.
There are two ways to update your audio driver: manually and automatically.
Manual driver update — You can update your audio driver manually by going to the manufacturer’s website and searching for the most recent correct driver. Be sure to choose the driver that’s compatible with your exact audio device model and your version of Windows.
Automatic driver update — If you don’t have the time, patience or computer skills to update your audio driver manually, you can, instead, do it automatically with Driver Easy.
Driver Easy will automatically recognize your system and find the correct drivers for it. You don’t need to know exactly what system your computer is running, you don’t need to be troubled by the wrong driver you would be downloading, and you don’t need to worry about making a mistake when installing. Driver Easy handles it all.
- Download and install Driver Easy.
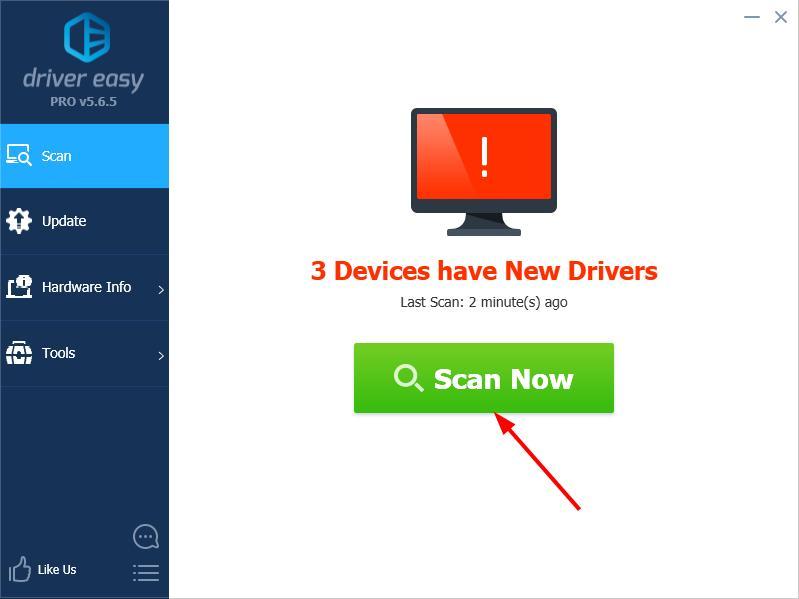
- Run Driver Easy and click Scan Now. Driver Easy will then scan your computer and detect any problem drivers.
- Click the Update button next to your audio device to automatically download the correct version of its driver, then you can manually install it (you can do this with the FREE version).
Or click Update All to automatically download and install the correct version of all the drivers that are missing or out of date on your system. (This requires the Pro version which comes with full support and a 30-day money back guarantee. You’ll be prompted to upgrade when you click Update All.)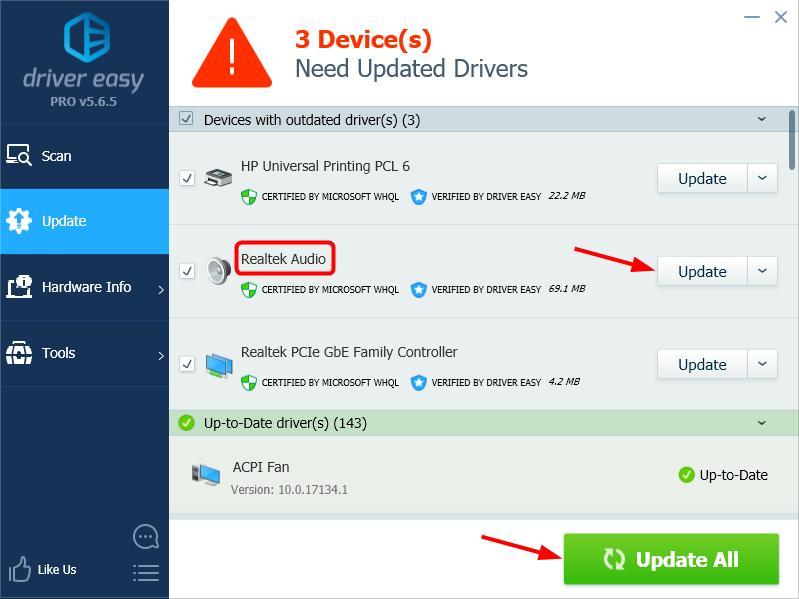 Note: If you need assistance, please contact Driver Easy’s support team at support@drivereasy.com.