


Don’t know how to set up a VPN connection on your Mac? Don’t worry! It’s pretty easy! After reading this article, you should be able to use VPN on your macOS devices on your own quickly and easily!
What is VPN?
VPN (Virtual Personal Network) is a type of connection you can use to secure your identity and protect your personal information when surfing the Internet.
VPN creates a secure “tube” to connect your Mac to the Internet. Once you connected to a VPN server, all the activities on your Mac will be encrypted. So hackers cannot steal your personal information, and your privacy won’t be revealed to your government and your ISP (Internet Service Provider).
To configure a VPN connection on your Mac:
The easiest and most convenient option for setting up a VPN connection is to use a VPN service. With a VPN service, you can set up a VPN connection on your Mac easily and quickly.
To use a VPN service, you just need to download a VPN application.
Here we recommend you NordVPN as your best pick for its military-grade encryption. If you decide to choose NordVPN, Here’s a NordVPN coupon code for you!
NordVPN helps you set up a fast, stable and secure Internet connection to anywhere. And all you need to do is several clicks! What’s more, with one NordVPN account, you can set up a VPN connection on all devices. NordVPN allows you to connect up to 6 devices at the same time! Here is how to do it:
- Click here to visit the official website of NordVPN. Then follow the steps on its web page to select your plan and create your NordVPN account.
- On your macOS device, visit the NordVPN download page to download and install it.
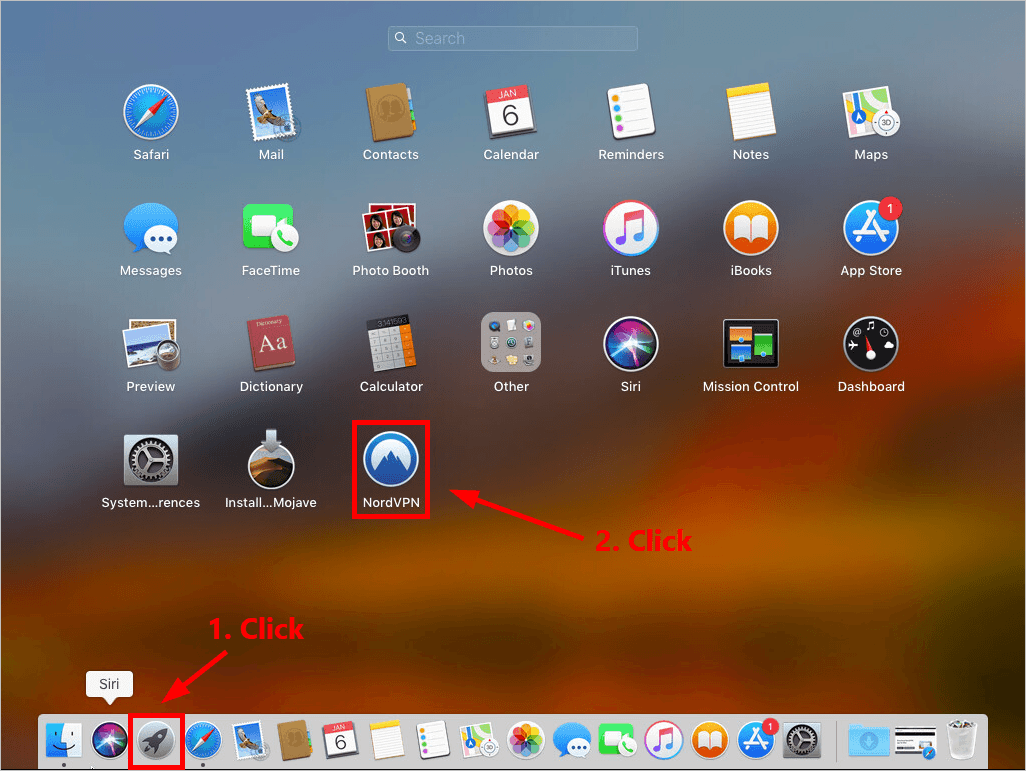
- Find NordVPN in Launchpad and click on it to launch the application.
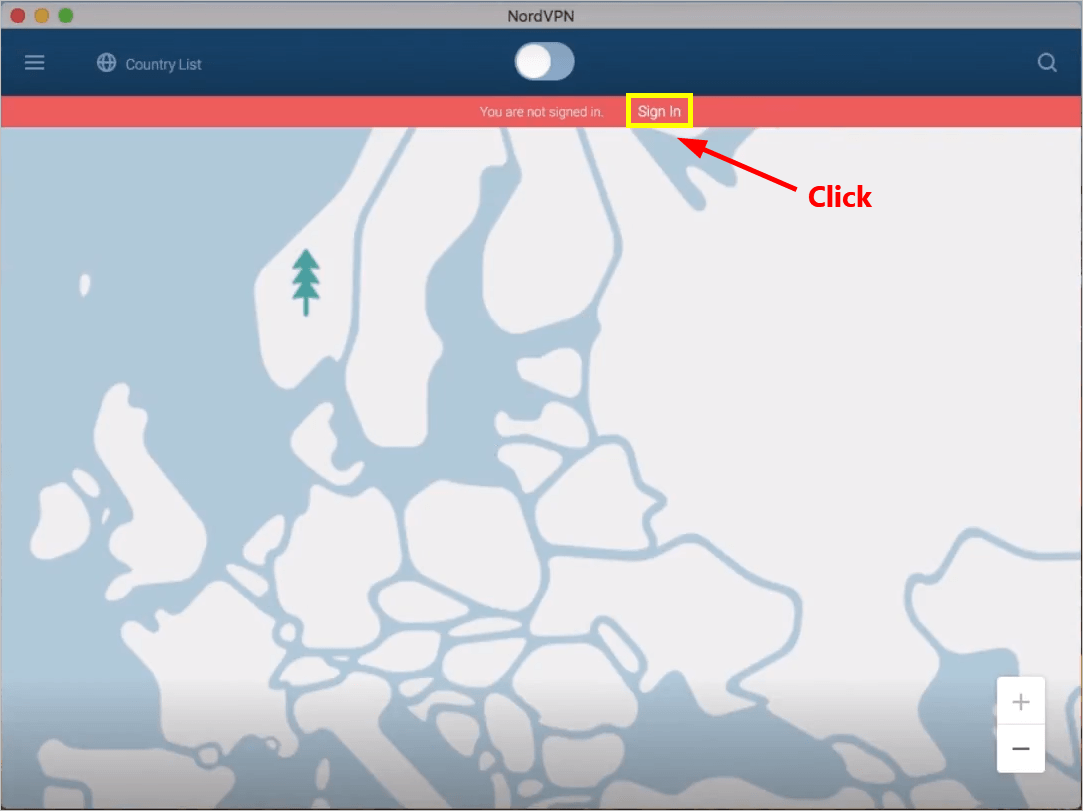
- Click Sign In.
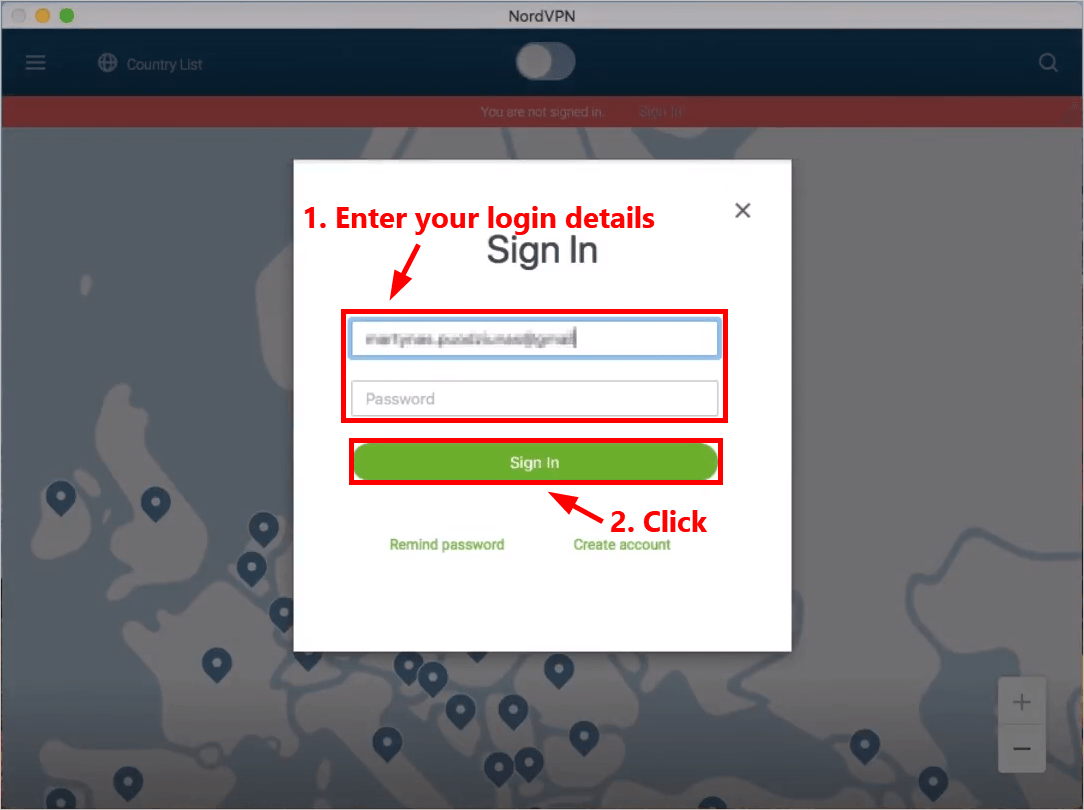
- Enter your NordVPN account and password, then click Sign In.
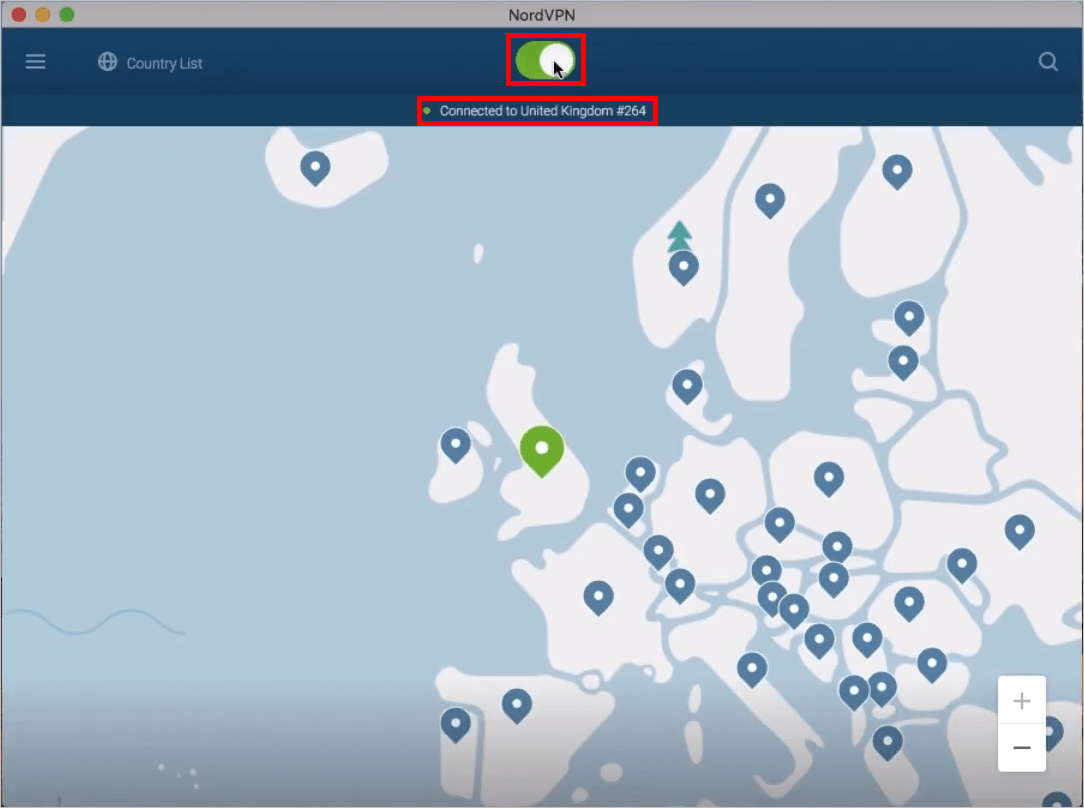
- Follow the on-screen instructions to continue. Turn on the Quick connect toggle.
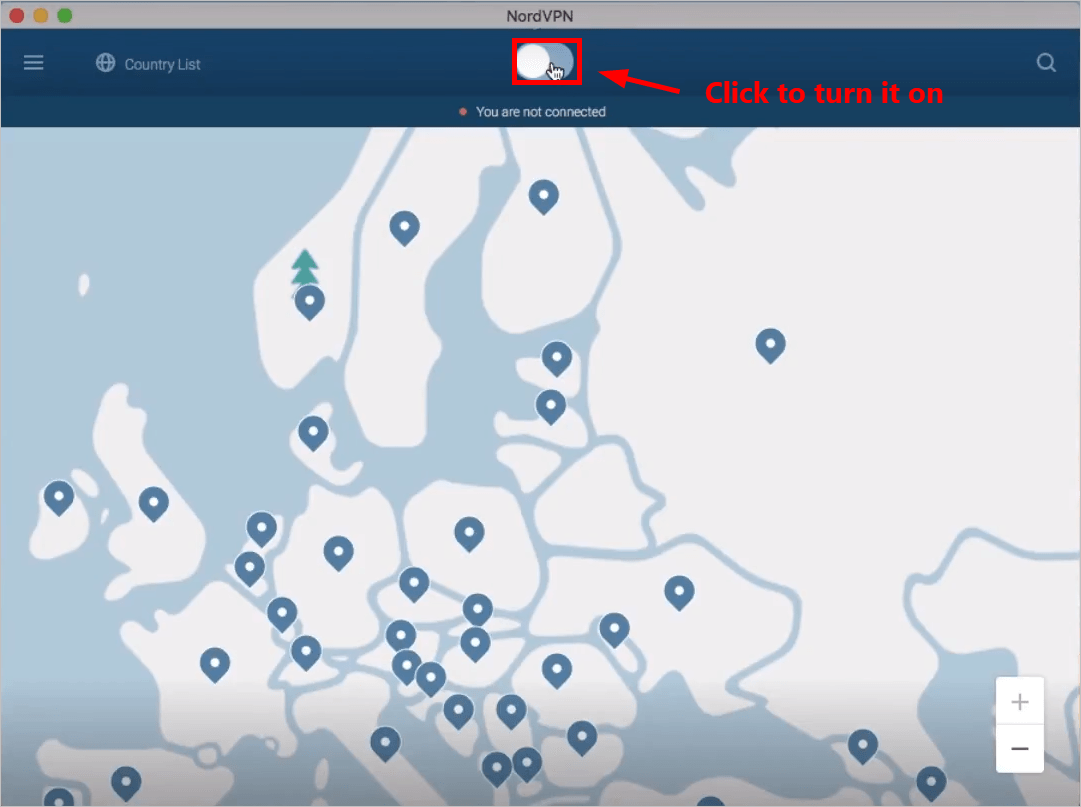
- You should be able to connect to the best NordVPN server recommended for you quickly and easily. Once connected, the quick connect button will turn green.
That’s it! Now you’ve set up a VPN connection on your Mac. It’s pretty easy, isn’t it?
Hopefully after reading this article, you gain a better understanding of how to use a VPN on your Mac. If you have any questions or suggestions, you’re more than welcome to leave us a comment below.