


Your Windows 10 PC suddenly shows your entire display in black & white? Don’t worry! You’re not the only one to experience this issue. Recently, many Windows 10 users have reported the very same issue. More importantly, you should be able to fix it pretty easily…
Fixes to try
You don’t have to try them all. Just work your way through the list until you find the one that does the trick for you.
Fix 1: Turn off color filters in Windows Settings
If your screen suddenly turns black and white when you’re using your Windows 10 PC, especially when you’re copying files using the shortcut key Ctrl + C, you may accidentally trigger the color filters feature by pressing its shortcut key (The Windows logo key + Ctrl + C). Follow the instructions below to turn off color filters:
- On your keyboard, press the Windows logo key and type color filter.
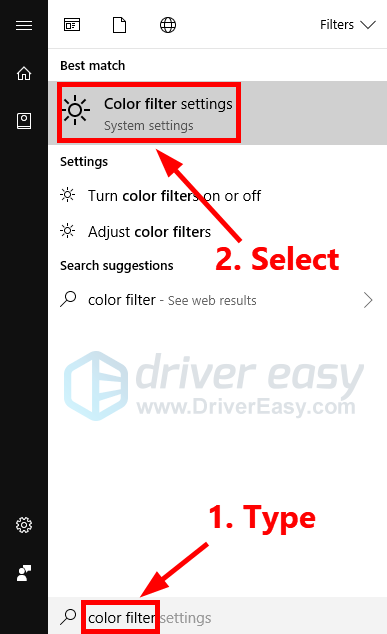
- In the pop-up window, turn off the toggle under Use color filters. Then uncheck the box next to Allow the shortcut key to toggle filter on or off.
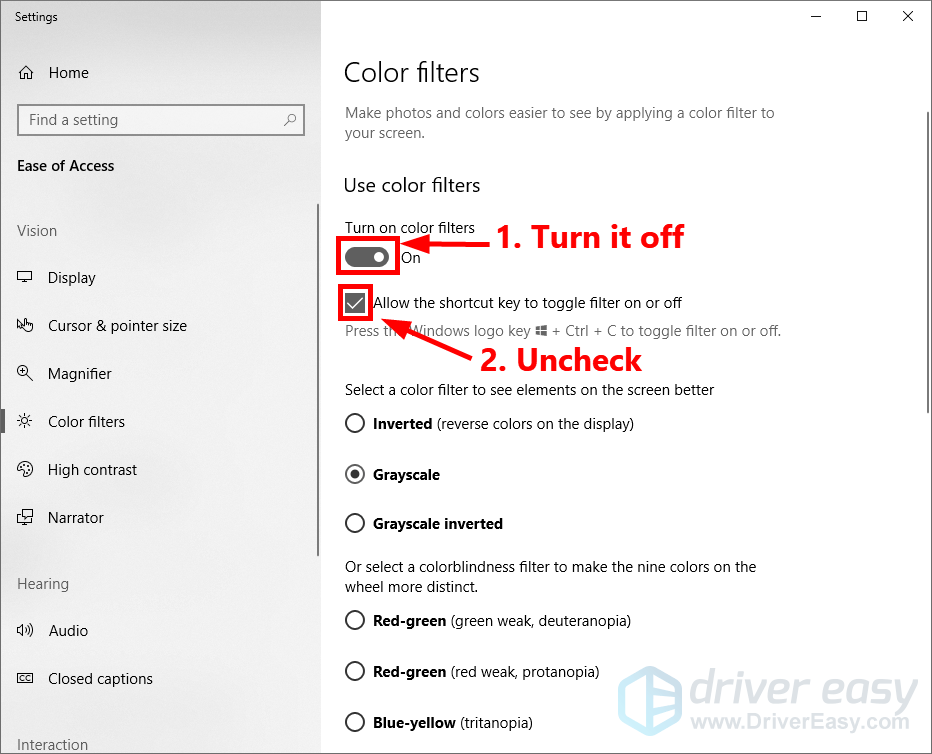
Your display on your Windows 10 PC should be back to normal after you turn off the color filters feature.
Bonus tip: Update your graphics driver
If turning off color filters doesn’t resolve this issue. Don’t worry! You may also run into this issue if there is something wrong with your graphics driver. Try updating your graphics driver to see if you can resolve this issue. By updating your graphics driver, you can also avoid many unexpected display issues and boost your game performance!
There are two ways to update your graphics driver: manually and automatically.
Update your graphics driver manually – You can update your graphics driver manually by going to the manufacturer’s website, and searching for the latest driver for your graphics card. Be sure to choose the driver that’s compatible with your exact graphics card model and your version of Windows.
or
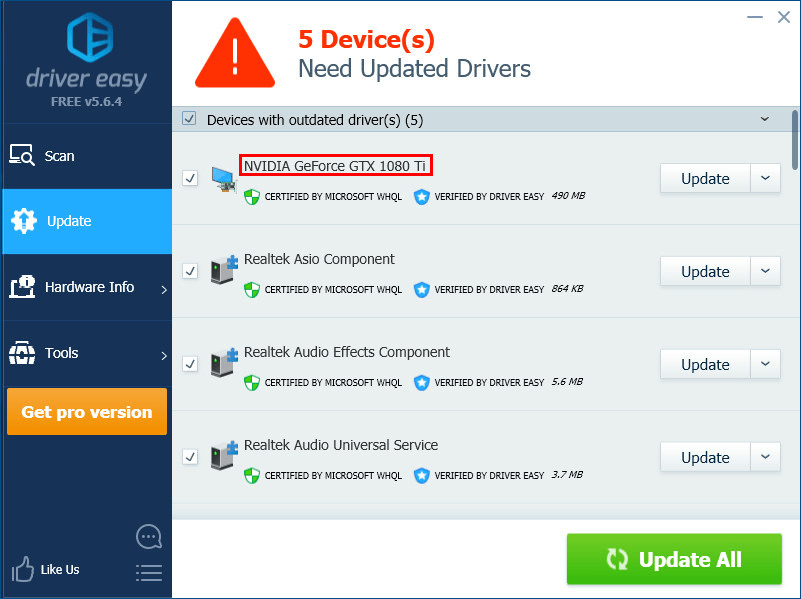
Update your drivers automatically – If you don’t have the time, patience or computer skills to update your graphics driver manually, you can, instead, do it automatically with Driver Easy. You don’t need to know exactly what system your computer is running, you don’t need to risk downloading and installing the wrong driver, and you don’t need to worry about making a mistake when installing. Driver Easy handles it all.
- Download and install Driver Easy.
- Run Driver Easy and click Scan Now. Driver Easy will then scan your computer and detect any problem drivers.

- Click Update next to your graphics card to automatically download the correct version of its driver, then you can install it manually. Or click Update All to automatically download and install the correct version of all the drivers that are missing or out of date on your system (This requires the Pro version – you’ll be prompted to upgrade when you click Update All. You get full support and a 30-day money back guarantee).
If you have any questions or suggestions, please leave your comment below.