Re-register the taskbar using Windows Powershell
This method has worked for many Windows 10 users. It may work like a charm for you.
Follow these steps:
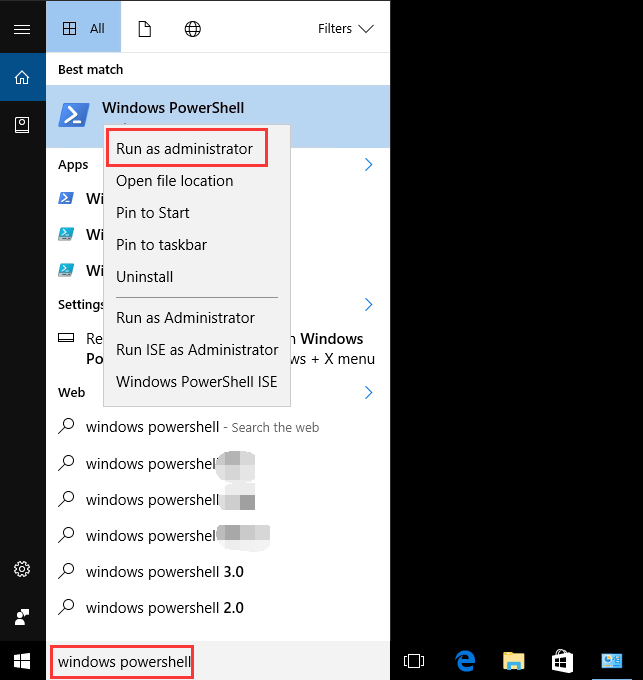
1. Type Windows Powershell in the search box. Once the result menu pop-up, right-click on Windows PowerShell and select Run as administrator.
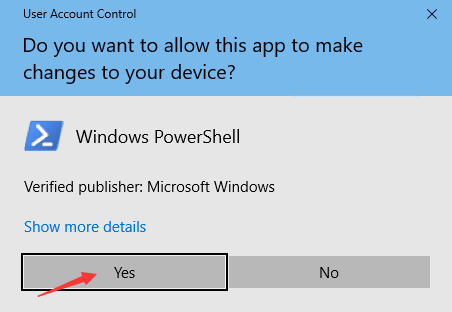
2. Select Yes in the pop-up UAC (User Account Control) window.
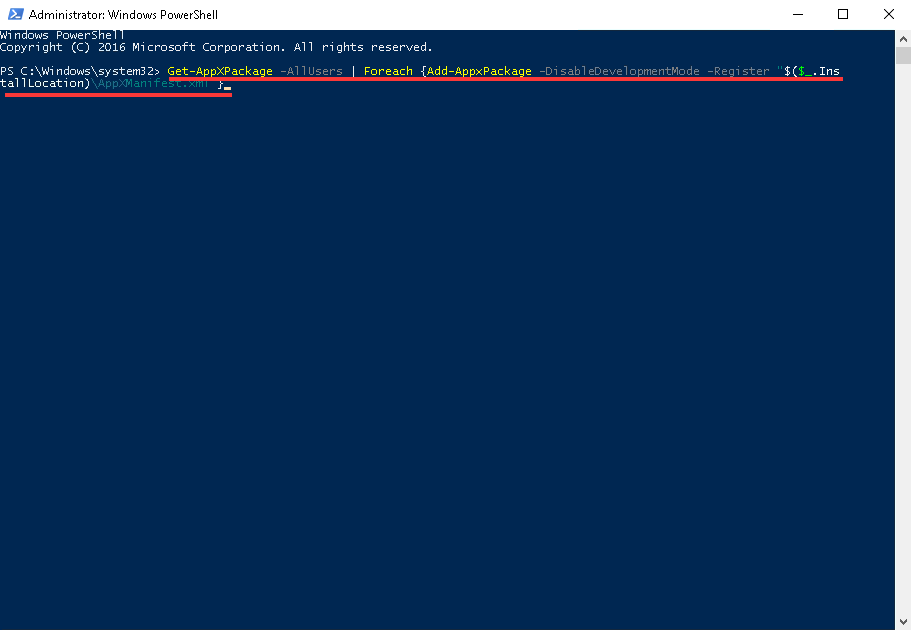
3. Copy and paste below command in PowerShell window and press Enter key. (After copying, to paste, right-click on your mouse then the paste will be done automatically. Alternatively, press Ctrl+V.)
Get-AppXPackage -AllUsers | Foreach {Add-AppxPackage -DisableDevelopmentMode -Register “$($_.InstallLocation)\AppXManifest.xml”}
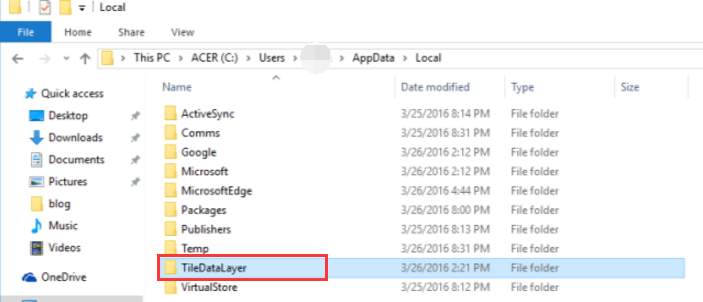
4. Navigate to: C:/Users/name/AppData/Local/ (The name is your Account Username)and delete the TileDataLayer folder.
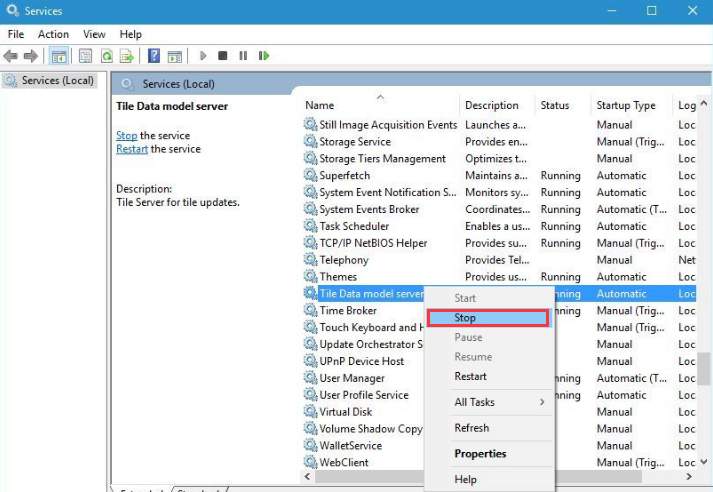
If you are unable to delete the folder, follow below steps to stop “Tile Data model server” service, then delete it again.
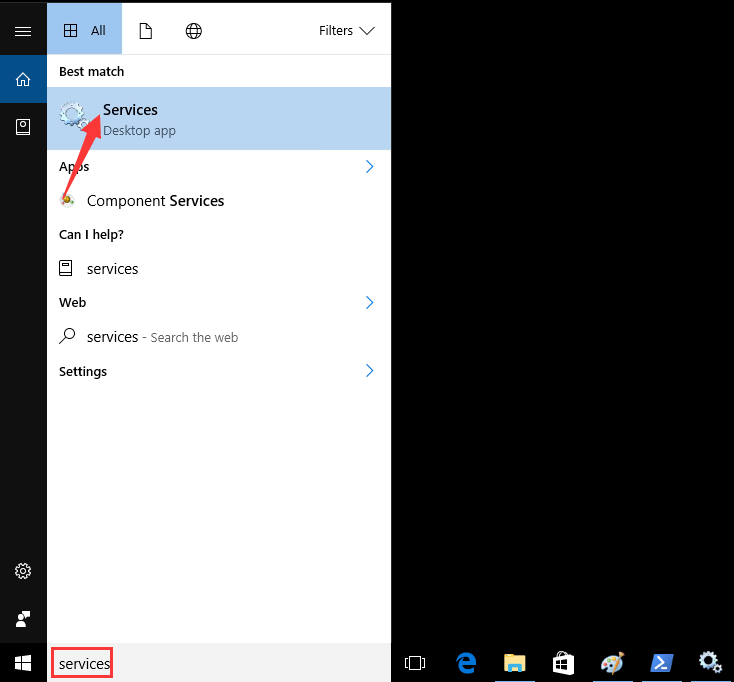
1. Type services in the search box and select Services. This is to open Services dialog box.
2. In Services dialog box, locate the tiledatamodelsvc (Tile Data model server) service, right click on it and select Stop on the context menu.
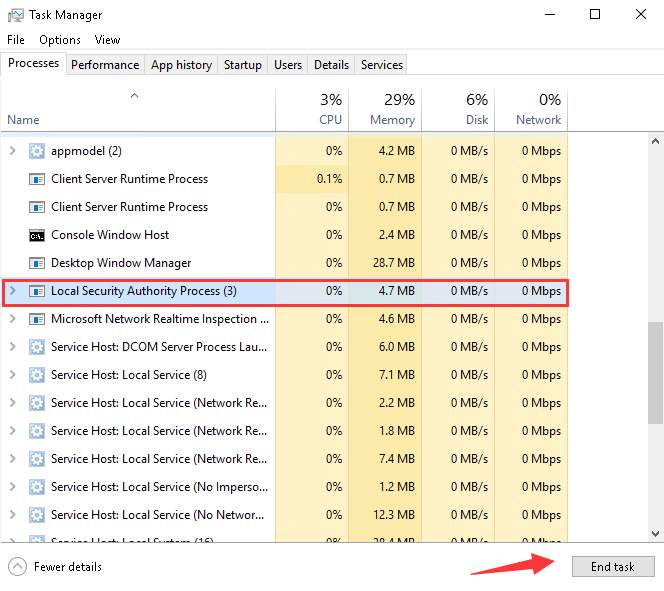
Shut down Local Security Authority Process
If above method doesn’t work for you, try ending Local Security Authority Process.
Follow these steps:
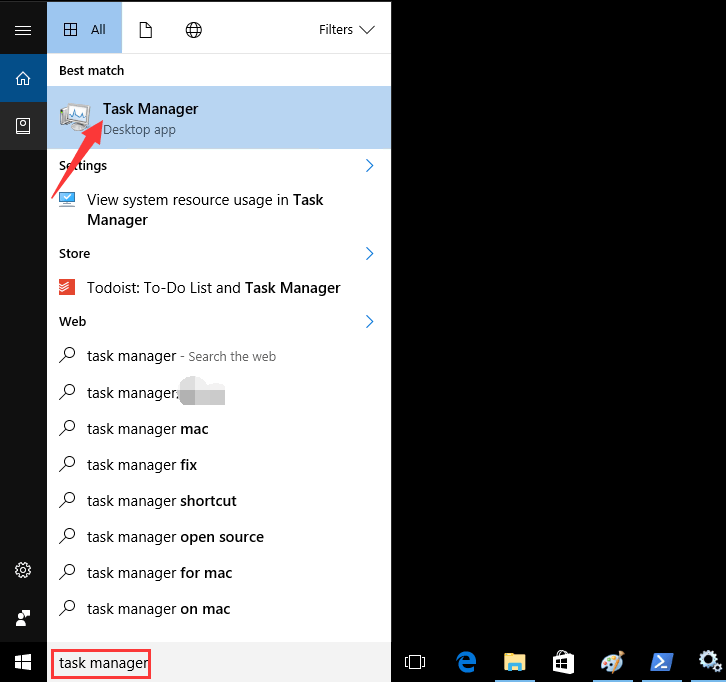
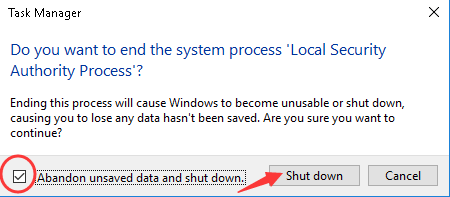
2. Locate Local Security Authority Process and click on End task button.
3. Check the box next to “Abandon unsaved data and shut down” and click on Shut down button.