


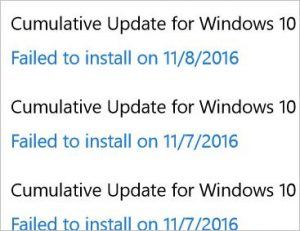
Many Windows 10 users have recently reporting an issue with Windows Update. What happens is that they are constantly getting an error on Windows Update that their updates failed to install.
If you’re also experiencing this issue, you’re no doubt very frustrated. But don’t worry. We’ve put together some solutions to help you fix this annoying issue.
Try these fixes
You may not have to try them all; just work your way down the list until you find the one that works for you.
- Run Windows Update Troubleshooter
- Download and install the update manually
- Reset the Windows Update related components
- Set your Windows Update services to start automatically
Method 1: Run Windows Update Troubleshooter
Windows 10 has a built-in troubleshooter that can detect and fix issues with Windows Update. You should try running the troubleshooter to see if this fixes your install failure issues.
- Press the Windows key on your keyboard, then type “troubleshoot” and click Troubleshoot in the list of results.
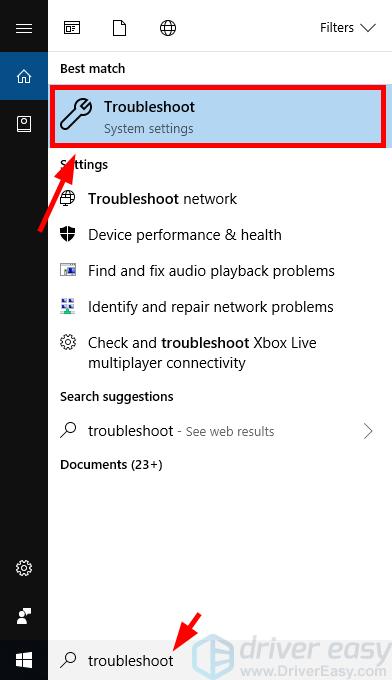
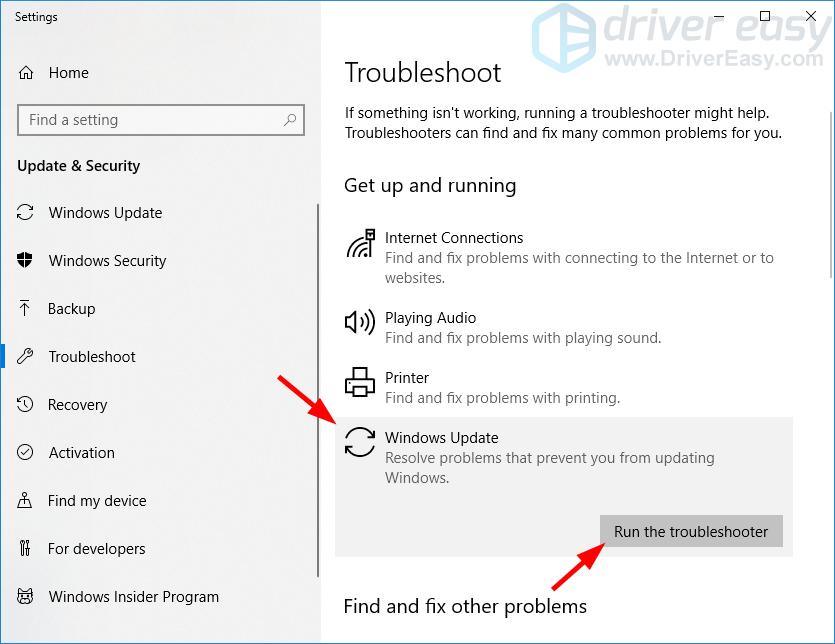
- Click Windows Update and then click Run the troubleshooter.
- Follow the on-screen instructions of the troubleshooter to check and fix your Windows Update issues.
Hopefully this fixes your issues. But if not, there are still other fixes you can try…
Method 2: Download and install the update manually
If Windows Update fails to install the update for you, you can download and install it manually. Here’s how you can do it:
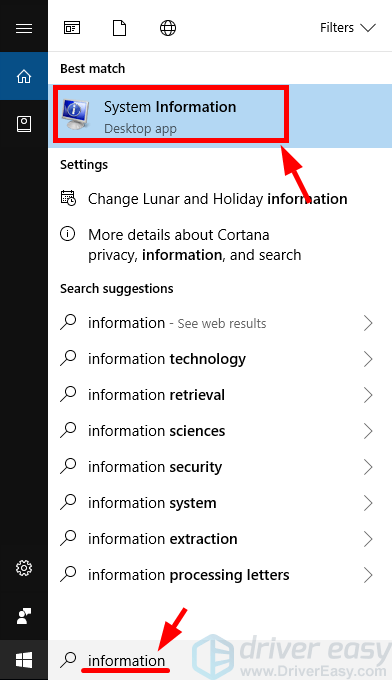
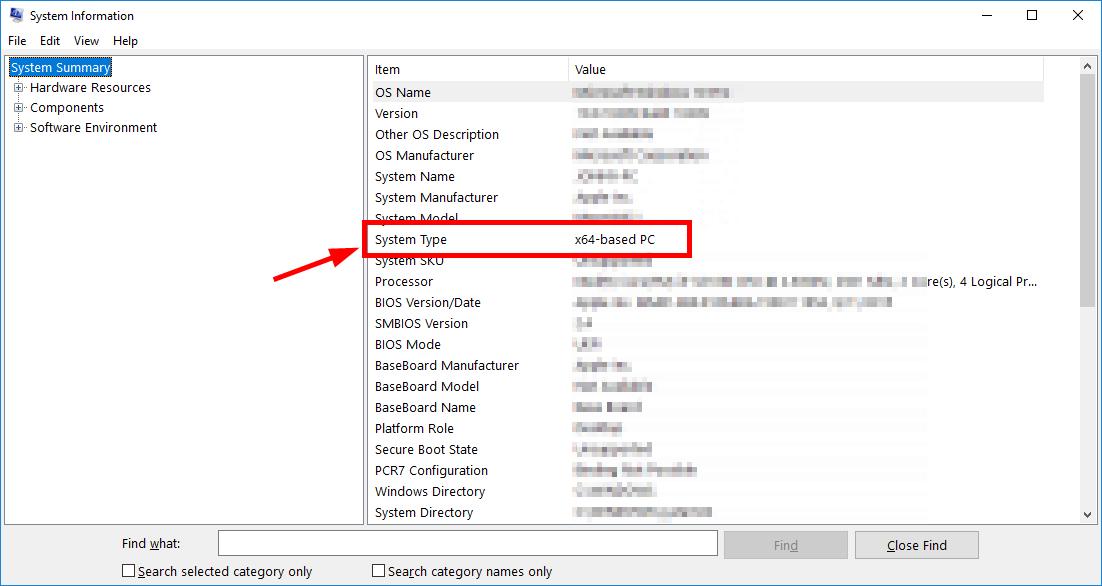
- Press the Windows logo key on your keyboard and type “information“. In the list of results, click System Information.
- View your System Type In the System Information window. Its value is usually x64-based or x86-based (or sometimes ARM64-based).This is an important piece of information and you should note it down. It will be useful when you are looking for the right updates for your Windows 10 system.
- On Windows Update, click View update history, then note down the system updates that failed to install. (You may need to get the information from the update history.)
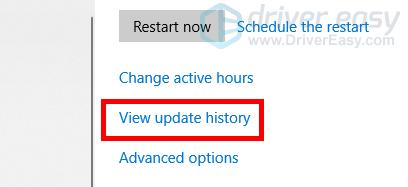 Note down the update code that starts with “KB“.
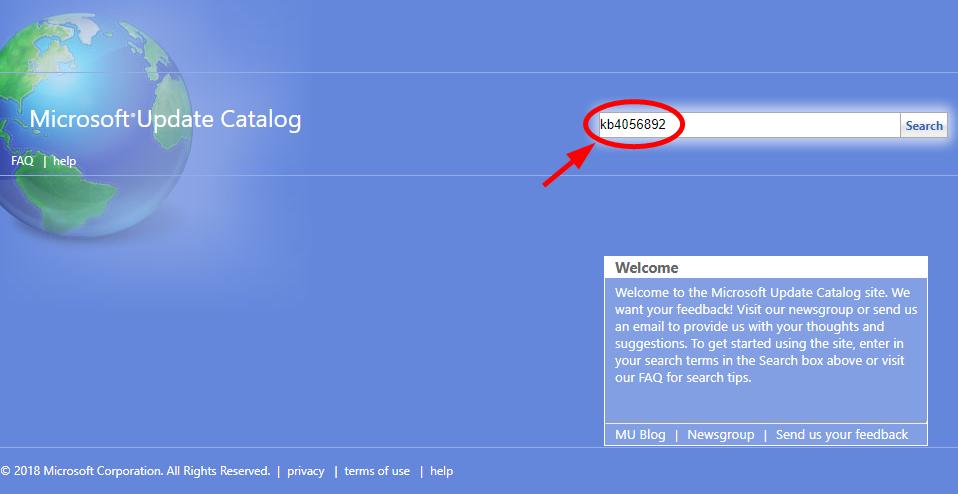
- Go to Microsoft Update Catalog. Then search for the update you’ve failed to install.
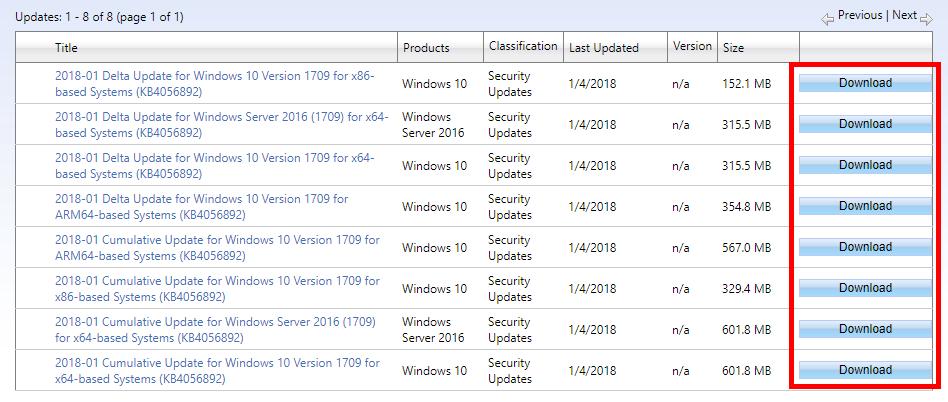
- In the search results, find the update that matches your operating system and system type (x86-, x64- or ARM64-based). Then click Download next to the update.
- Click the link on the new window to download the update.
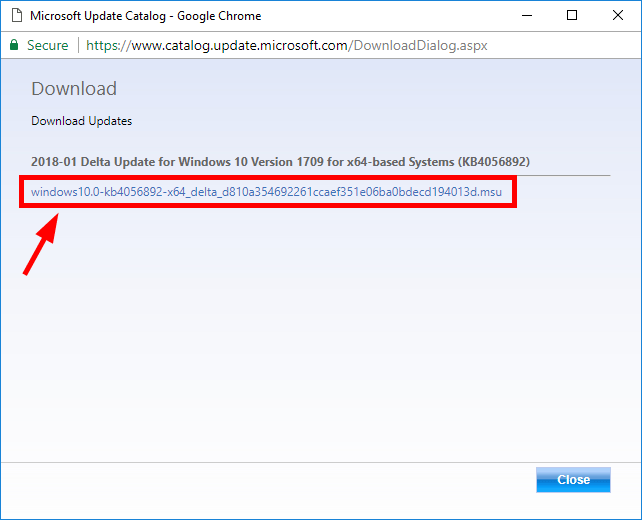
- Open the file you’ve just downloaded and follow the on-screen instructions to install the update.
If you’re able to install the update, great! But if not, there are still two fixes for you to try…
Method 3: Reset the Windows Update related components
Your Windows Update may fail to install the updates because its components are corrupted. These components include the services and temporary files and folders associated with Windows Update. You can try resetting these components and see if this fixes your problem.
To reset these components:
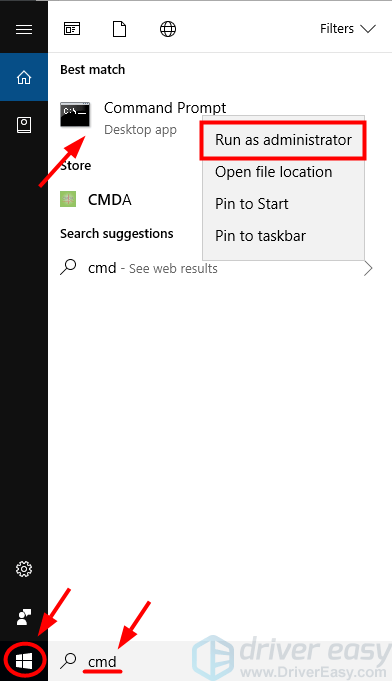
- Click the Start button in the lower left corner of your screen, then type “cmd“. In the list of results, right-click Command Prompt and select Run as administrator.
- In Command Prompt, type the following lines of command and press Enter on your keyboard after typing each:
net stop bits
net stop wuauserv
net stop appidsvc
net stop cryptsvc
These commands will stop the services that Windows Update requires to download and install updates.
- Type these lines of command and press Enter after typing each in Command Prompt:
ren %systemroot%\softwaredistribution softwaredistribution.old
ren %systemroot%\system32\catroot2 catroot2.old
This will rename the SoftwareDistribution and catroot2 folder, which are used by Windows Update to store data and temporary files. Your system will detect that these folders are missing, and then it’ll create new ones. The purpose of this is to force the system to use the new SoftwareDistribution and catroot2 folders so that Windows Update can avoid issues with the old ones.
- In Command Prompt, type these commands and press Enter after each to restart the services you closed just now:
net start bits
net start wuauserv
net start appidsvc
net start cryptsvc
- Check your Windows Update to see if it’s able to install your update.
If it is, then you’ve solved your problem. But if not, you may need to…
Method 4: Set your Windows Update services to start automatically
You may have this issue with Windows Update because its services are not configured to start automatically on startup. In this case, you should set it to start automatically. To do so:
- Click the Start button in the lower left corner of your screen, then type “cmd“. In the list of results, right-click Command Prompt and select Run as administrator.
- In Command Prompt, type the following lines of command and press Enter on your keyboard after typing each line:
SC config bits start= auto
SC config cryptsvc start= auto
SC config trustedinstaller start= auto
SC config wuauserv start= auto
- Close the Command Prompt window and restart your computer
Now your Windows Update should be able to install updates for you.
If you have any questions, feel free to leave us a comment below!