


Microsoft has officially rolled out Windows 11 for eligible users. However, the new operating system is not exempted from encountering many issues. Some users have reported that they are experiencing a flickering screen in Windows 11. If you happen to be one of them, don’t worry. In this tutorial, we’ll show you how to fix the problem easily and quickly.
Try these fixes
Here are 8 fixes that have helped other users resolve the screen flickering issue. You don’t have to try them all, just work your way down the list until you find the one that works for you.
- Check your cables
- Update your display driver
- Change the refresh rate
- Update or uninstall incompatible apps
- Change Accent color and Background
- Disable animation effects
- Disable hardware acceleration
- Repair your system files
Fix 1: Check your cables
A loose or damaged monitor cable can cause your screen to flicker. Before you begin to troubleshoot the screen flickering issues, you should first check if your monitor cables are plugged in securely.
- Completely turn off your computer and monitor. Then unplug your monitor cable and plug it back in properly.
- If your monitor cable is damaged, replace it with a new one.
- If your computer has multiple graphics cards (like an integrated GPU plus a dedicated GPU), you can check if it’s a graphics card issue by switching the display ports on your PC.
Once you’ve confirmed that your cables are not the problem, move on to troubleshoot the driver issues.
Fix 2: Update your display driver
One common cause of screen flickering is a corrupted or outdated display driver. To see if that’s the case, you should update your display driver to the latest version.
There are mainly two ways to update your display driver:
Manual driver update – You can update your display drivers manually by going to the manufacturer’s website (NVIDIA, AMD or Intel) for your display adapters, and searching for the most recent correct driver. Be sure to choose only drivers that are compatible with Windows 11.
Automatic driver update – If you don’t have the time, patience or computer skills to update your display drivers manually, you can, instead, do it automatically with Driver Easy. Driver Easy will automatically recognize your system and find the correct drivers for your exact display adapter, and your Windows version, and it will download and install them correctly:
- Download and install Driver Easy.
- Run Driver Easy and click the Scan Now button. Driver Easy will then scan your computer and detect any problem drivers.
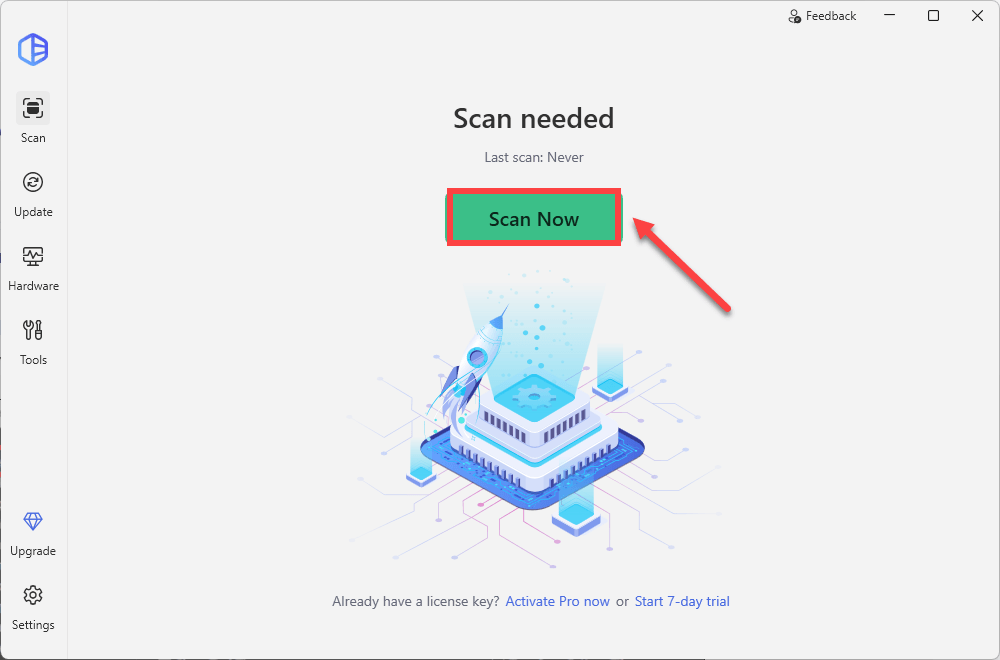
- Click Update All to automatically download and install the correct version of all the drivers that are missing or out of date on your system. (You’ll need the Pro version for this – when you select Update All, you’ll get a prompt to upgrade. If you’re not prepared to purchase the Pro version yet, Driver Easy provides a 7-day trial at no cost, granting access to all Pro features like fast downloads and easy installation. No charges will occur until after your 7-day trial period ends.)

After updating your display driver, restart your device and check if the screen flickering issue is resolved or not.
If the issue remains, check out the next fix.
Fix 3: Change the refresh rate
The refresh rate of a display is the number of times per second that your monitor draws a new image. If your display refresh rate is not set properly, you may encounter screen flickering issues in Windows 11. To fix it, you can change the refresh rate. Here’s how:
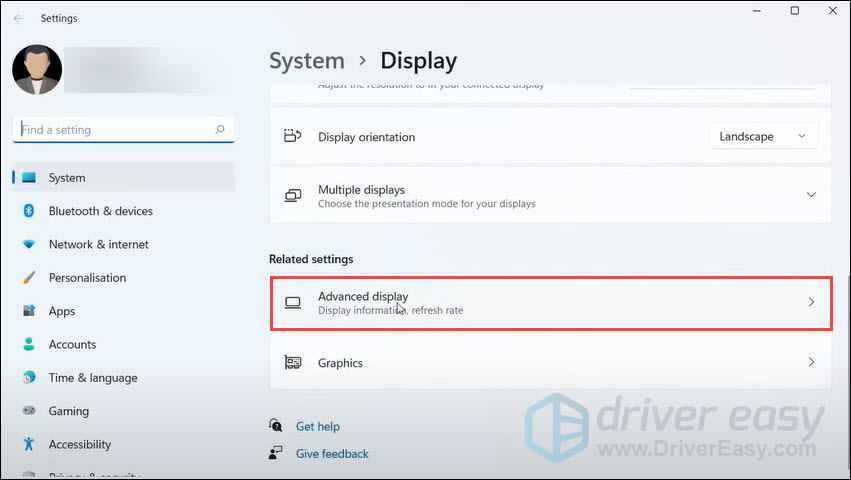
- On your desktop, right-click an empty space and select Display settings.

- In the pop-up window, scroll down the page and select Advanced display.
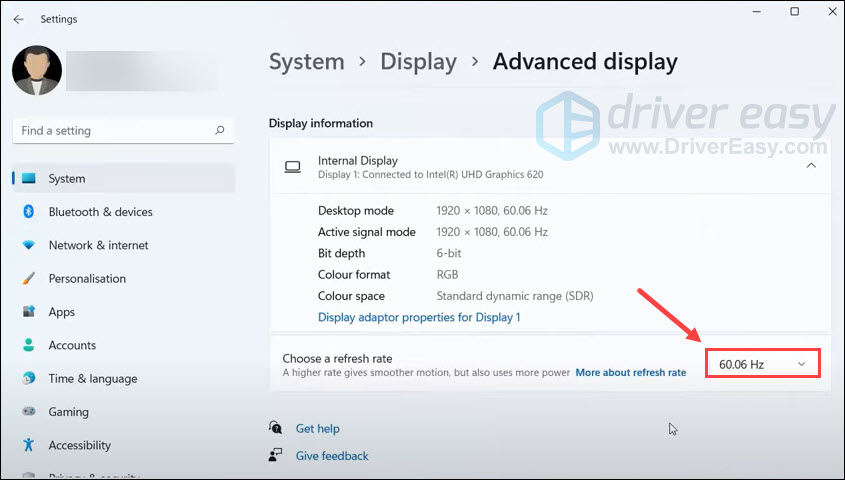
- For Choose a refresh rate, select a different refresh rate.
If changing the refresh rate doesn’t solve your problem, you may consider updating or uninstalling incompatible apps.
Fix 4: Update or uninstall incompatible apps
The app developers often release updates to tackle compatibility issues with the new operating system. If your apps are still running in an old version, you may encounter a flickering screen on your Windows 11 PC. To fix the potential problem, you need to update all your apps to the latest version.
If updating apps doesn’t solve your flickering issues, consider uninstalling the recently installed apps, as they may not be compatible with Windows 11 and can cause a flickering screen. To uninstall an app:
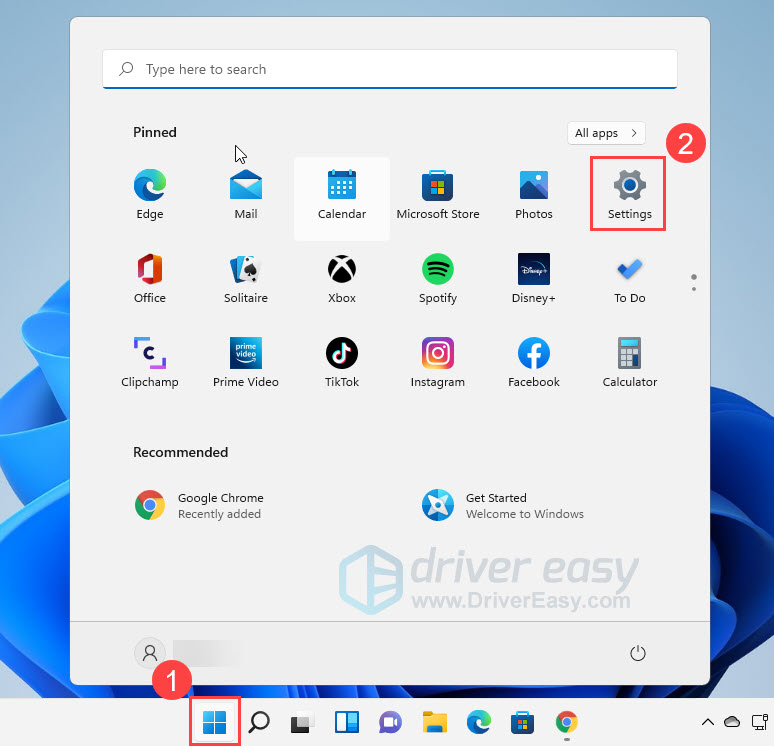
- Click Start and select Settings.
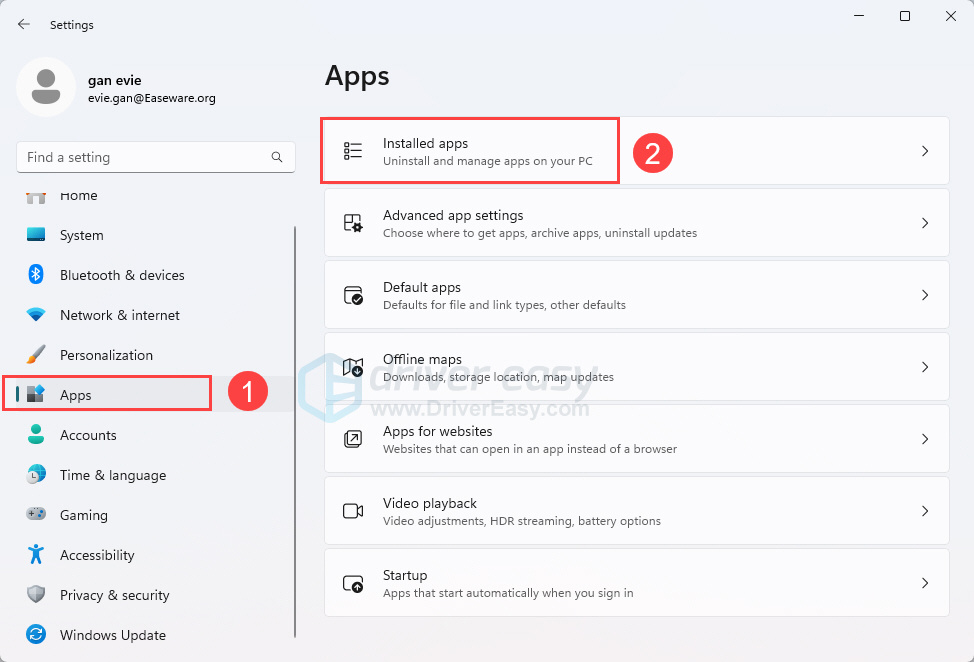
- In the left panel, select Apps, then click Installed apps.
- Scroll down the list and find the app you want to uninstall. Then click the three dots icon and select Uninstall.
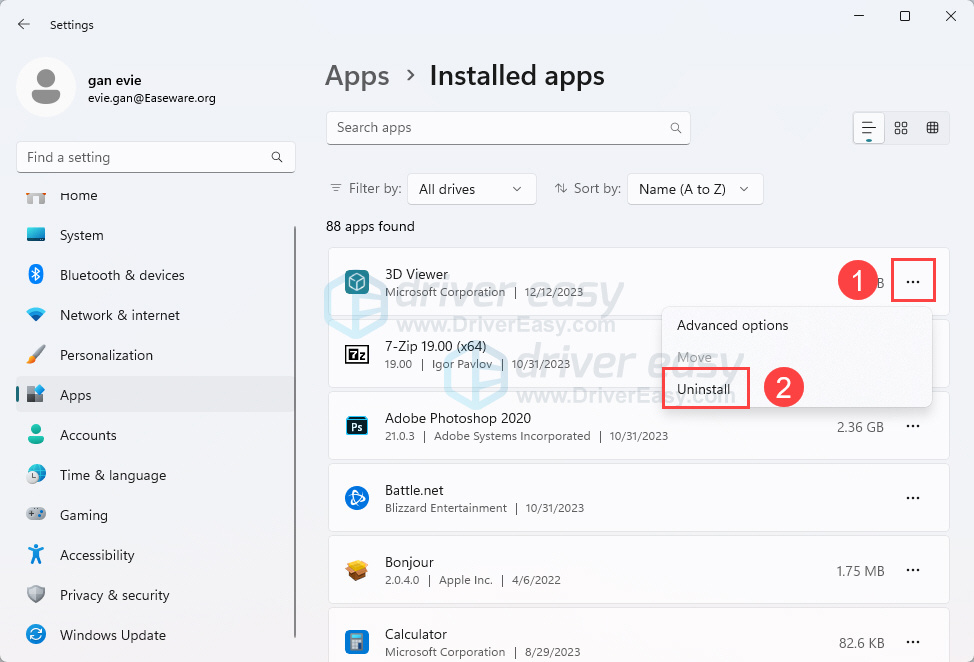
- Click Uninstall again to confirm your choice.
You can also perform a clean boot to check if the flickering is software-related. This will start Windows with only the essential services and programs so as to minimize the interference:
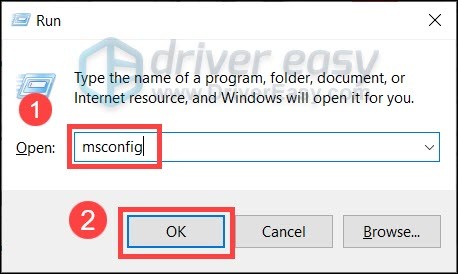
- On your keyboard, press Win+R (the Windows logo key and the r key) at the same time to invoke the Run box. Type or paste msconfig and click OK.
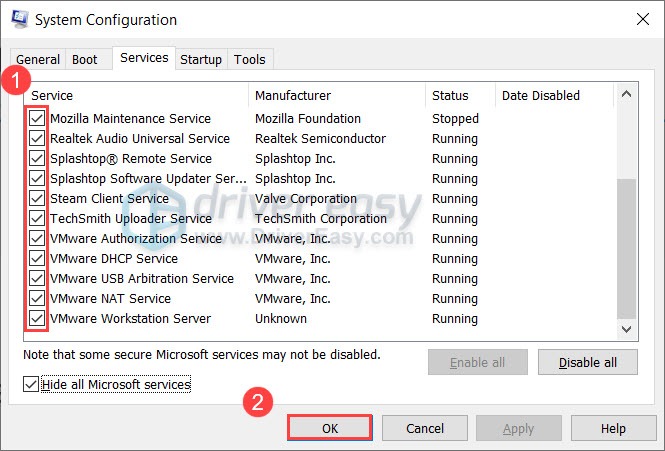
- In the pop-up window, navigate to the Services tab and check the box next to Hide all Microsoft services.
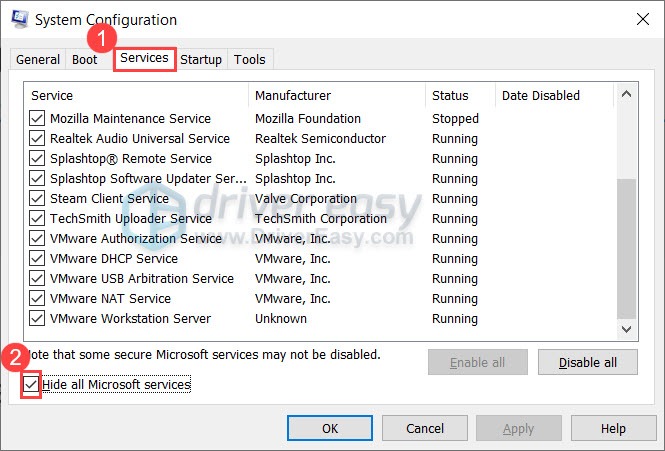
- Uncheck all the services EXCEPT those belong to your hardware manufacturers, such as Realtek, AMD, NVIDIA, Logitech and Intel. Then click OK to apply the changes.
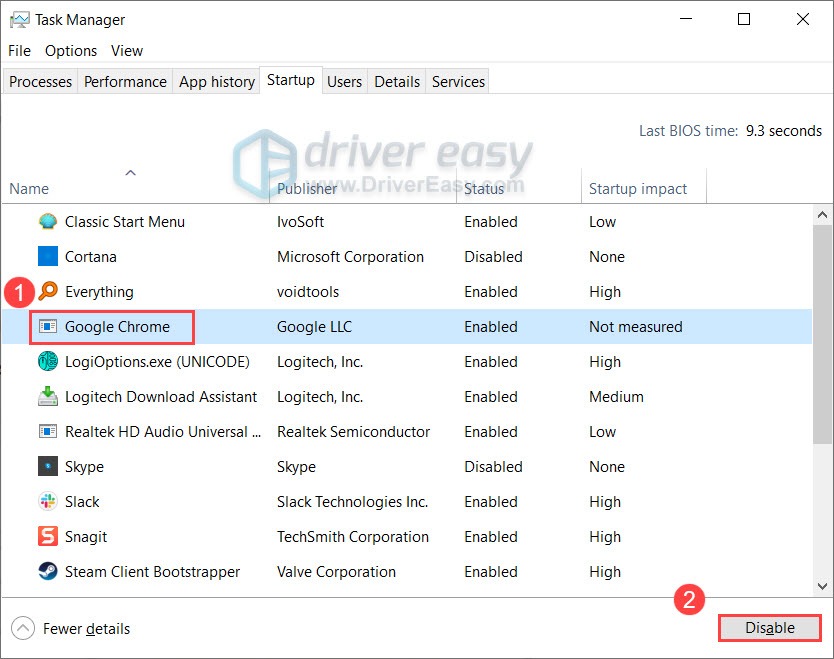
- On your keyboard, press Ctrl, Shift and Esc at the same time to open Task Manager, then navigate to the Startup tab.
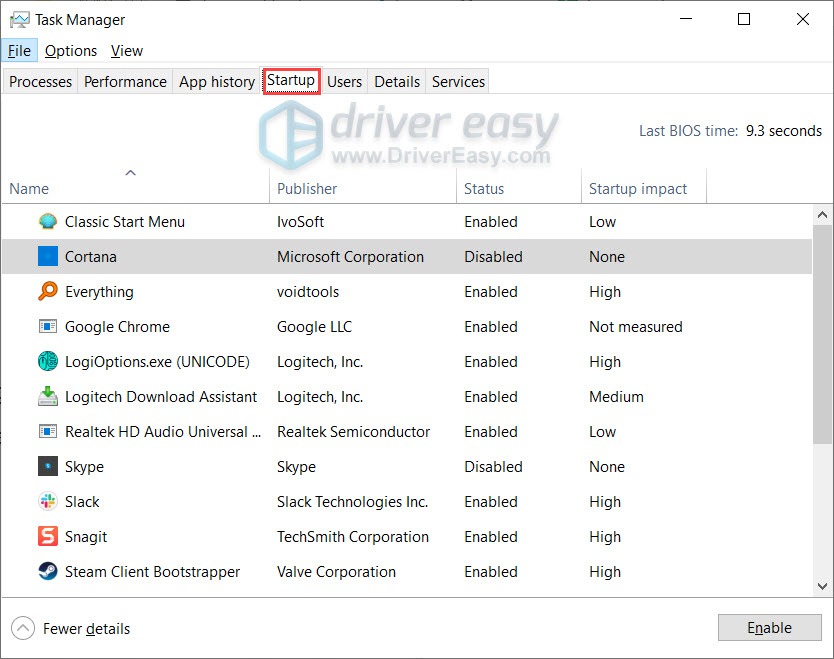
- One at a time, select any programs you suspect might be interfering, and click Disable.
- Restart your PC.
If the flickering stops after a clean boot, use the computer as you normally would but pay attention to the programs launched if the issue reappears.
Fix 5: Change Accent color and Background
Just like Windows 10, there is an option in Windows 11 that allows your system to automatically select an accent color from your background. However, there are many reports that this option turns out to be a culprit of screen flickering. So you can follow these steps to disable it:
- On your keyboard, press the Windows logo key and I at the same time to open Windows Settings.
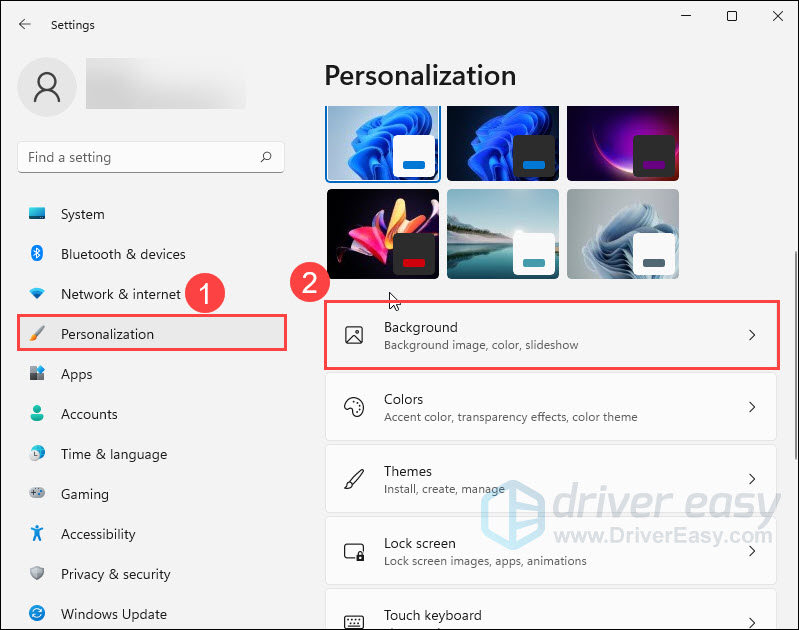
- In the left panel, select Personalization, then click Background.
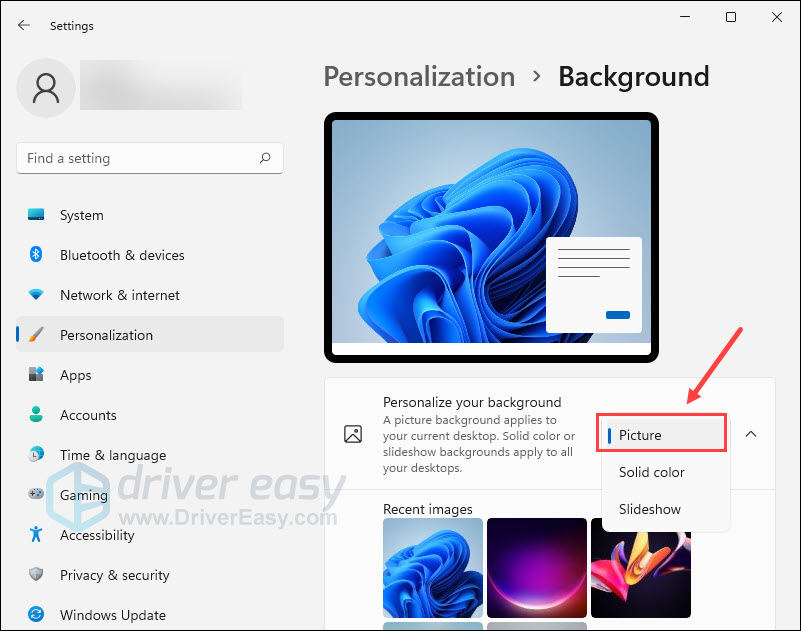
- To personalize your background, select Picture or Solid color. (You should avoid using the Slideshow option, which might cause your screen to flicker.)
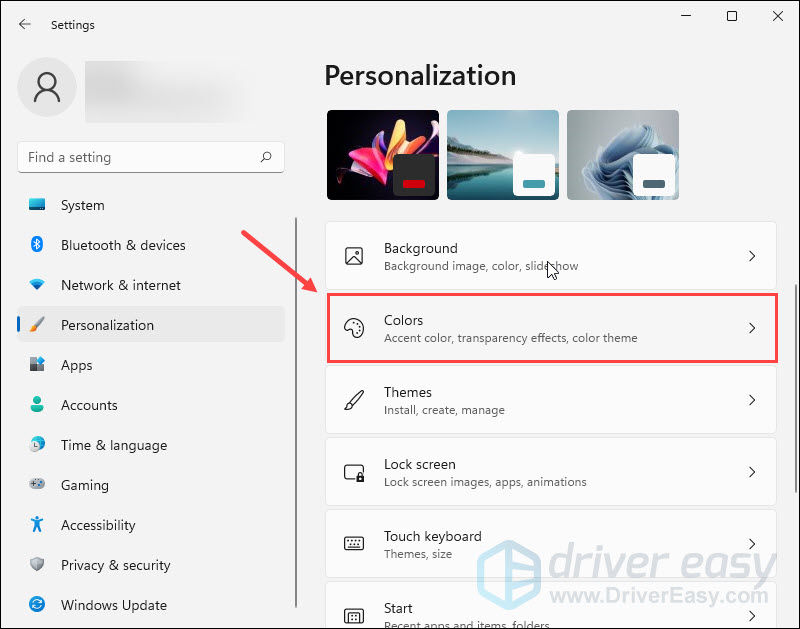
- Go back to Personalization window and select Colors.
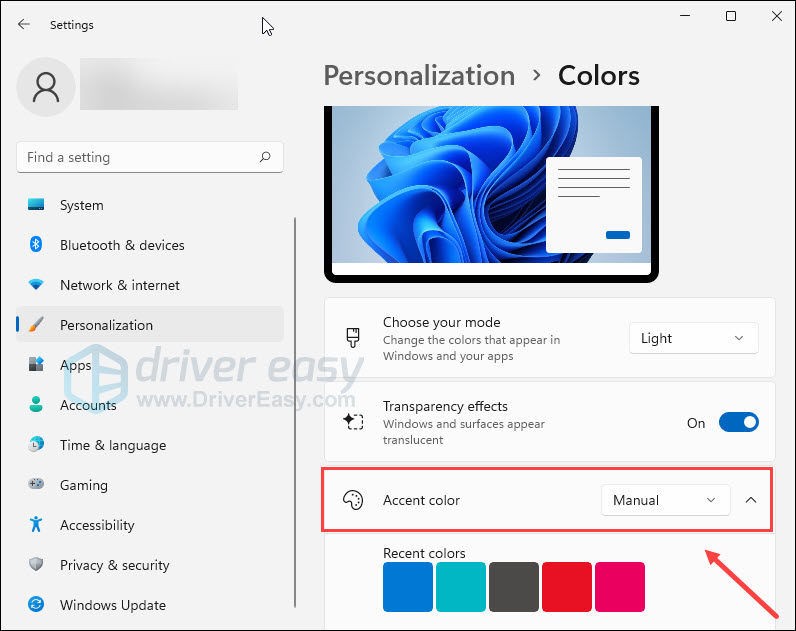
- For Accent color, select Manual.
Once done, check if the screen flickering issue is resolved or not. If not, try the next fix below.
Fix 6: Disable animation effects
Some users reported that they fixed the screen flickering issue in Windows 11 by disabling animation effects. You can give this a try. Here’s how:
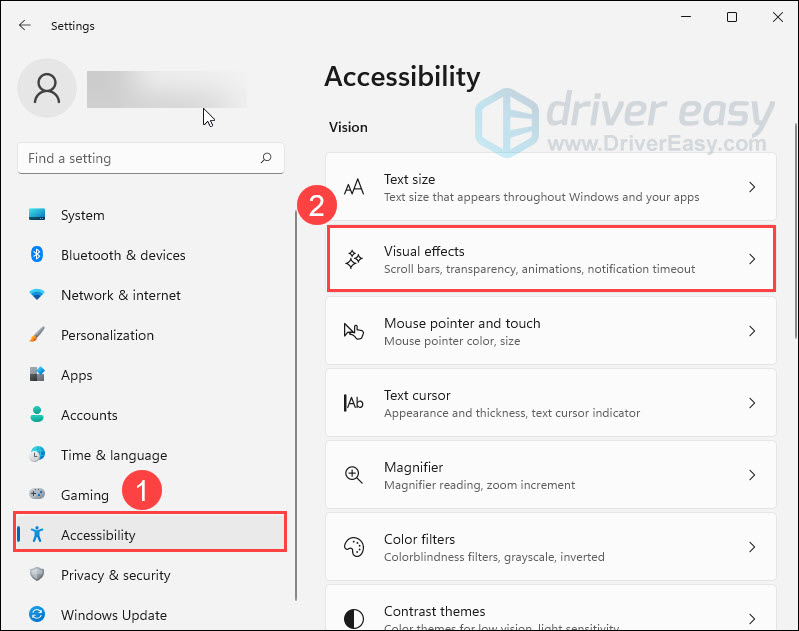
- On your keyboard, press the Windows logo key and I at the same time to open Windows Settings.
- In the left panel, select Accessibility, then click Visual effects.
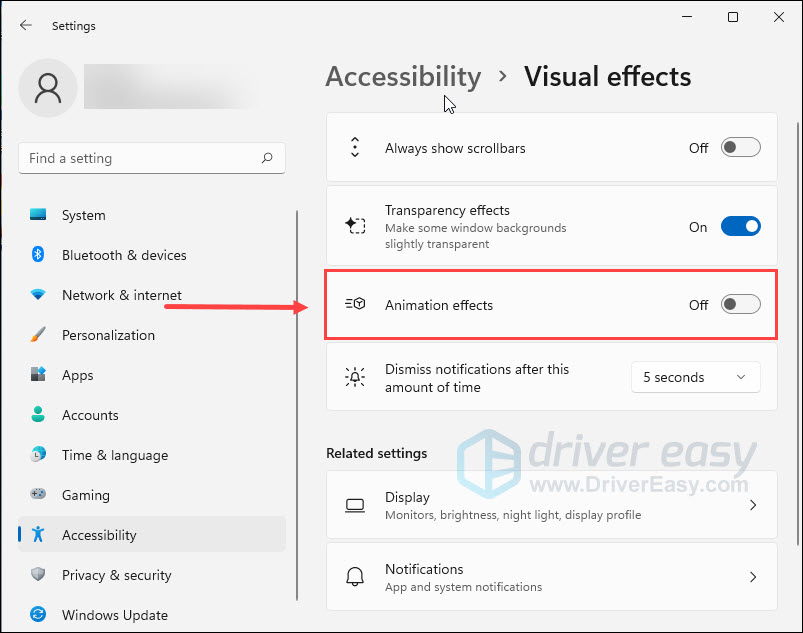
- Turn off Animation effects.
Check if you’re still facing a flickering screen.
If this fix doesn’t do the trick, try the next one below.
Fix 7: Disable hardware acceleration
The hardware acceleration feature is widely used to improve overall performance. But in some cases, it may also cause your screen to flicker. To fix the issue, you’ll need to disable hardware acceleration on your PC. Here’s how:
To disable hardware acceleration in Windows 11:
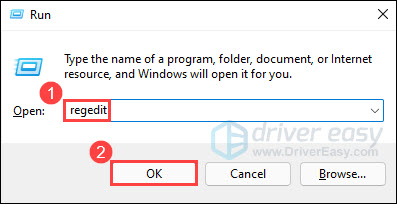
- On your keyboard, press the Windows logo key and R at the same time to invoke the Run dialog box. Then type regedit and click OK.
- In Registry Editor, navigate to HKEY_CURRENT_USER\SOFTWARE\Microsoft\Avalon.Graphics.
- Under Avalon.Graphics, on the right pane, check to see if there is a key named DisableHWAcceleration.
If there is, double-click on it and change the Value Data from 0 to 1. Click OK to save changes.
If there isn’t, right-click on empty space and select New > DWORD (32-bit) value.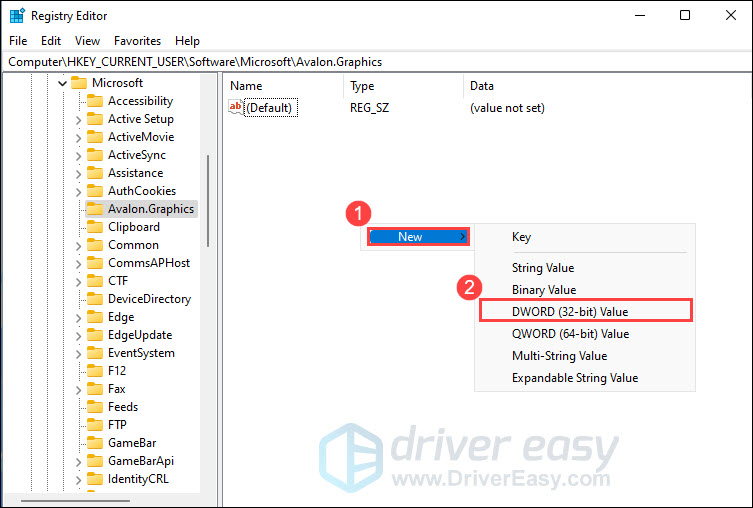
Then rename the file as DisableHWAcceleration. Double-click on the file and change the Value Data from 0 to 1. Click OK to save changes.
- Close Registry Editor and restart your computer.
If the flickering issue occurs while using your browser, you’ll need to disable hardware acceleration in your browser as well. Here we’ll take Google Chrome for example.
To disable hardware acceleration in Google Chrome:
- On your computer, open Google Chrome.
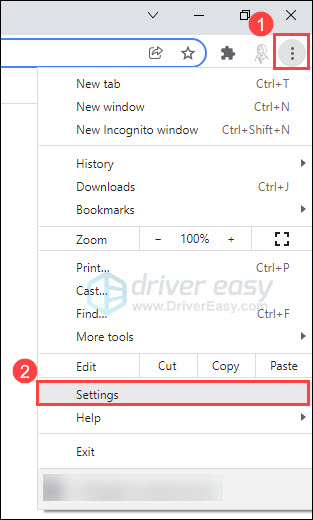
- At the top right, click the vertical three dots icon and select Settings.
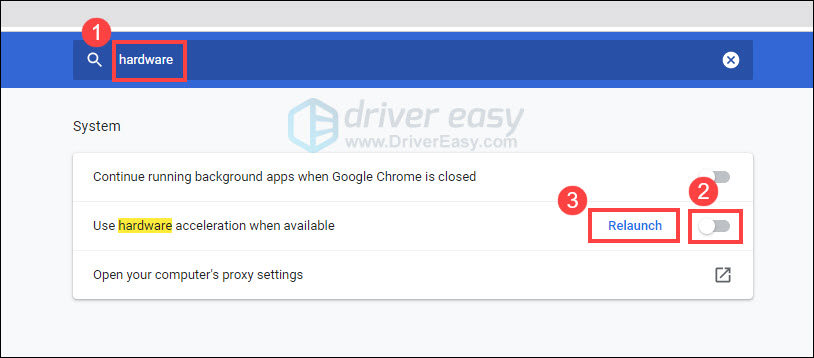
- In the search bar, type hardware. Find the Use hardware acceleration when available setting, toggle the switch to OFF(grey switch). Then click Relaunch.
Now check if the screen flickers again. If the issue persists, check out the last fix below.
Fix 8: Repair your system files
If there are any missing or corrupted system files, you may see a flickering or flashing screen on your Windows 11 PC. To fix it, you can use System File Checker to scan and restore system files.
System File Checker is a built-in tool that allows users to scan for and restore corrupted Windows system files. To perform SFC scan and repair Windows image:
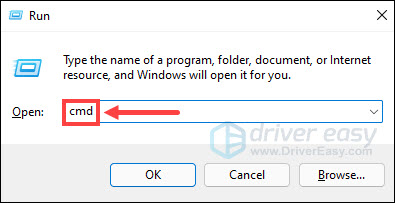
- On your keyboard, press the Windows logo key and R at the same time to open the Run dialog box. Type cmd and press Ctrl + Shift + Enter to run Command Prompt as administrator.
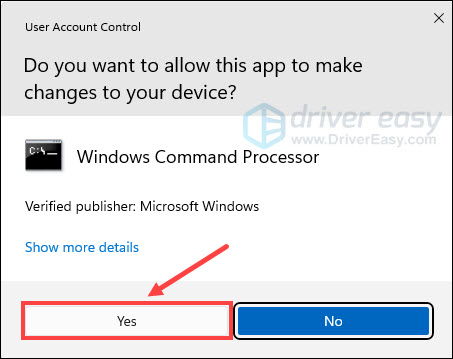
- If you are prompted for permission by User Account Control, click Yes to continue.
- At the command prompt, type the following command, and then press Enter. It may take several minutes for the Deployment Image Servicing and Management (DISM) tool to scan and restore corrupted system images.
DISM.exe /Online /Cleanup-image /Restorehealth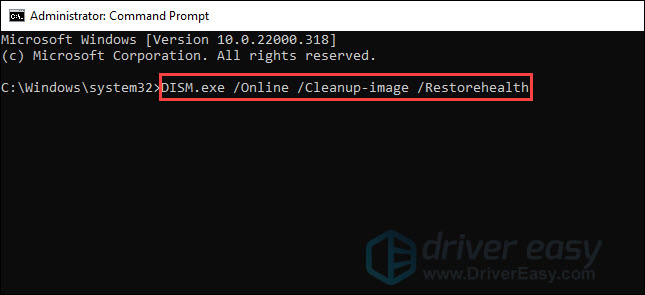
- After the process is complete, type the following command, and then press Enter.
sfc /scannow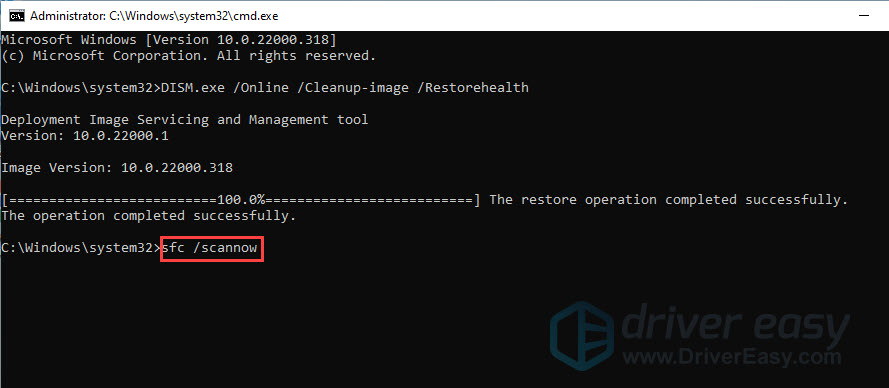
- Wait a few minutes for the System File Checker tool to scan and repair damaged system files.
Once done, check if your problem has been resolved.
That’s it. Hopefully, this post helped you fix Windows 11 screen flickering issues. If you have any questions or suggestions, feel free to leave us a comment below.