


It could be annoying when you click the Start button or hit the Windows key but nothing happens. Maybe even worse, you can’t find the Start button on your desktop after upgrading to Windows 11. You’re not the only one facing the Windows 11 Start menu not working issue.
Rebooting your PC is always the first thing to try, if it doesn’t help, you can try our fixes, one of them may help you fix the issue.
- If you can’t find the Windows Start button, move to fix 3.
Try these fixes:
There are too many fixes and methods on the internet that leads to information and choice overload. We filtered the information and found the proven fixes.
You don’t have to try them all; just work your way down the list until you find the one that works for you.
- Restart the Windows Explorer
- Update your driver
- Bring back your Start button
- Check for Windows Update
- Repair system files
Fix 1: Restart the Windows Explorer
Restarting Windows Explorer is a temporary fix for you to start with. Windows Explorer also called File Explorer, it’s the file management application in Windows, but it also controls things like the Start Menu, the taskbar, and others. So restarting Windows Explorer would refresh the Start menu and may bring back the Start menu.
- Press the CTRL + Shift + Escape key together to open the Task Manager.
- Scroll down to find Windows Explorer. Right-click on it and select Restart.
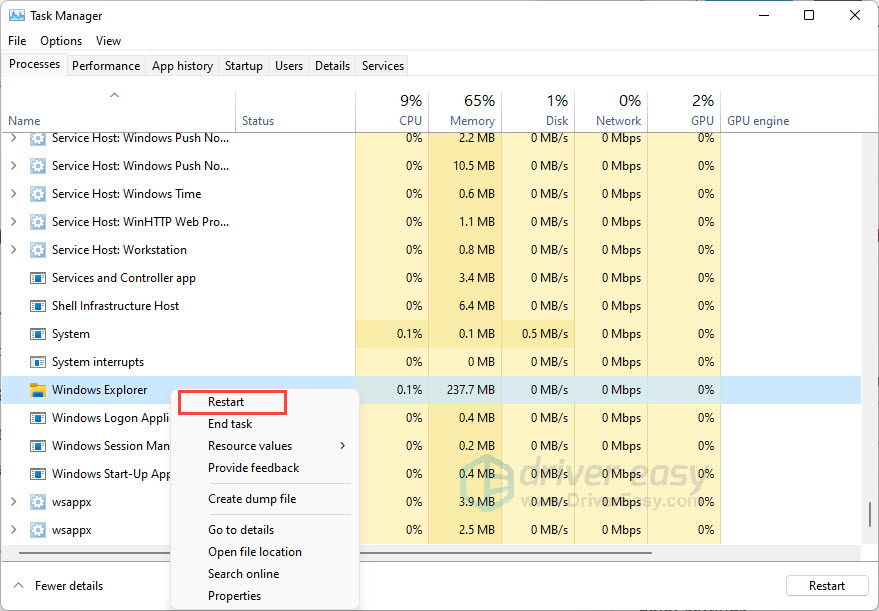
- Check if your Start menu is working or not.
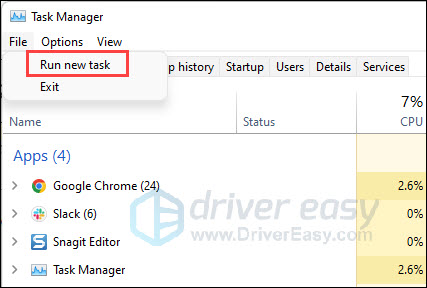
If you can’t find Windows Explorer in the Process tab, click the File button and select Run new task. Enter Explorer and restart it.
Then, check whether the Start menu is working or not after restarting Windows Explorer.
If this temporary fix doesn’t help, you can move to the next fix.
Fix 2: Update your driver
Updating your drivers would fix the start menu not working in Windows 11 for you. Many Windows 11 users have tried this and are sure about it. The driver works as a bridge between the system and devices. Therefore, outdated drivers are like shaky bridges that may cause potential problems.
There are two ways you can update your driver: manually and automatically.
Option 1 – Manually – Windows Update doesn’t always provide the latest working driver. Therefore, you’ll need some computer skills and patience to update your drivers yourself. Because you need to find exactly the right driver online, download it and install it step by step.
Option 2 – Automatically (Recommended) – Let Driver Easy do the job. This is the quickest and easiest option. It’s all done with just a couple of mouse clicks – easy even if you’re a computer newbie.
Driver Easy will automatically recognize your system and find the correct drivers for it. You don’t need to know exactly what system your computer is running, you don’t need to risk downloading and installing the wrong driver, and you don’t need to worry about making a mistake when installing.
You can update your drivers automatically with either the FREE or the Pro version of Driver Easy. But with the Pro version, it takes just 2 clicks (and you get full support and a 30-day money back guarantee):
- Download and install Driver Easy.
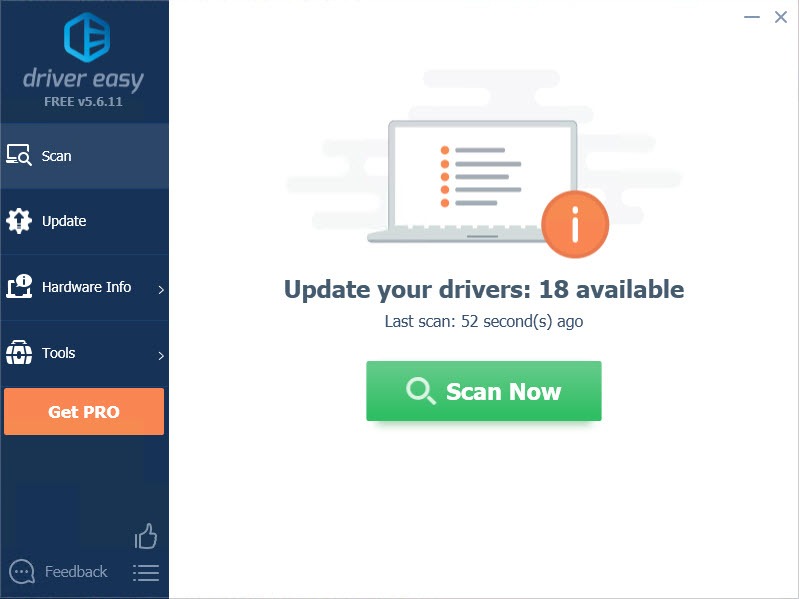
- Run Driver Easy and click the Scan Now button. Driver Easy will then scan your computer and detect any problem drivers.
- Click the Update button next to the flagged driver to automatically download the correct version of that driver, then you can manually install it (you can do this with the FREE version).
Or click Update All to automatically download and install the correct version of all the drivers that are missing or out of date on your system. (This requires the Pro version which comes with full support and a 30-day money back guarantee. You’ll be prompted to upgrade when you click Update All.)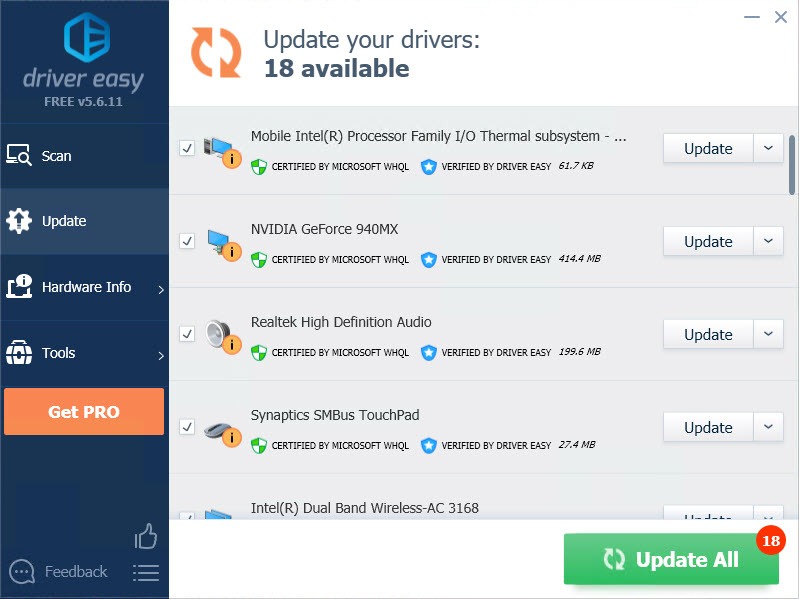
Fix 3: Bring back your Start button
It is clear that the Windows optional update KB5010414 causes the disappearance of the Start button. Users complain about their Start button disappears as soon as they hover over it. This is caused by a conflict with widgets that are trying to appear at the same time.
Therefore, you can disable widget to fix the issue, or roll back to an earlier build.
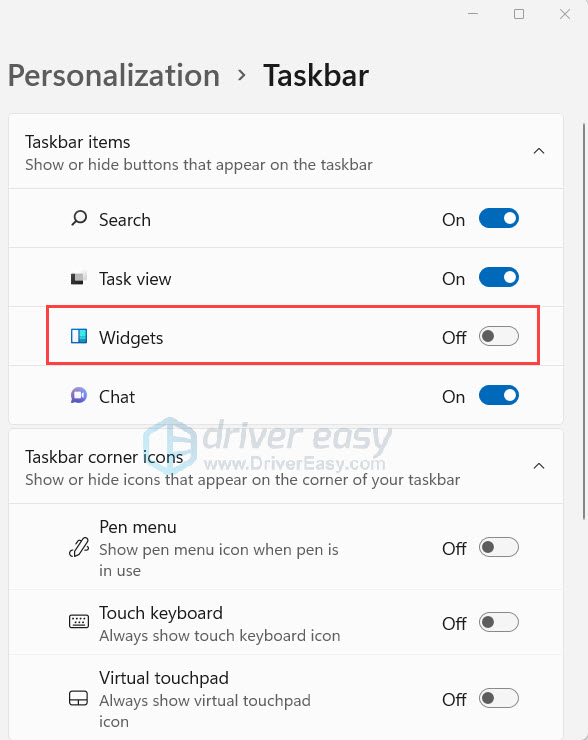
Disable widget
- Right-click on the Taskbar and click the Taskbar settings.

- Turn off Widgets on the right panel to disable them.
Roll back to an earlier build
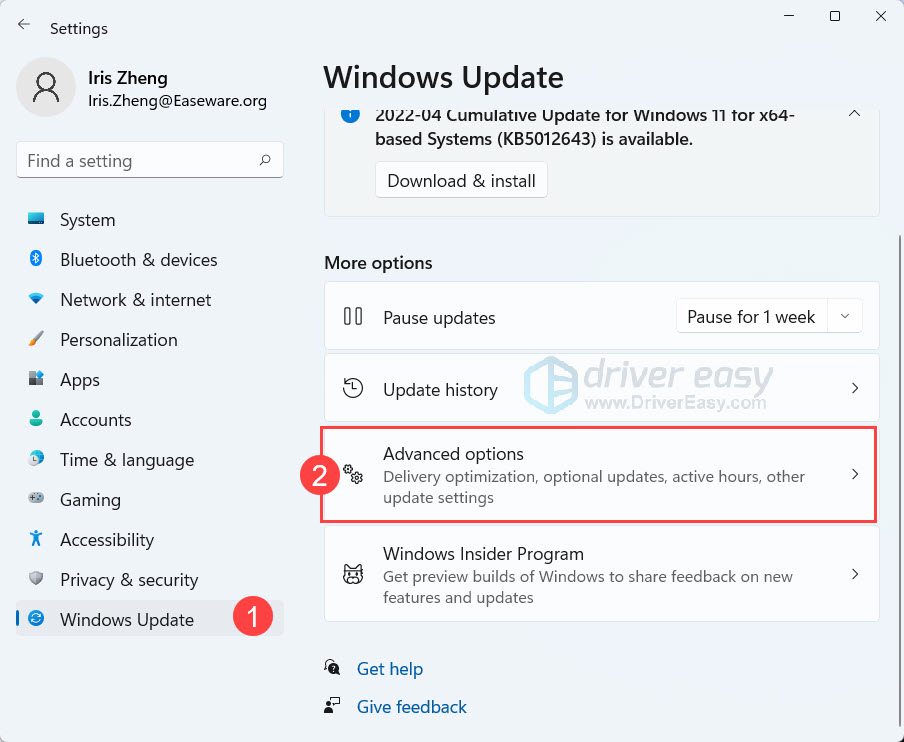
- Press the Windows logo key + I key together to open the Settings.
- Click Windows Update on the left panel.
- Select the Advanced options on the right panel.
- Scroll down to find Recovery.
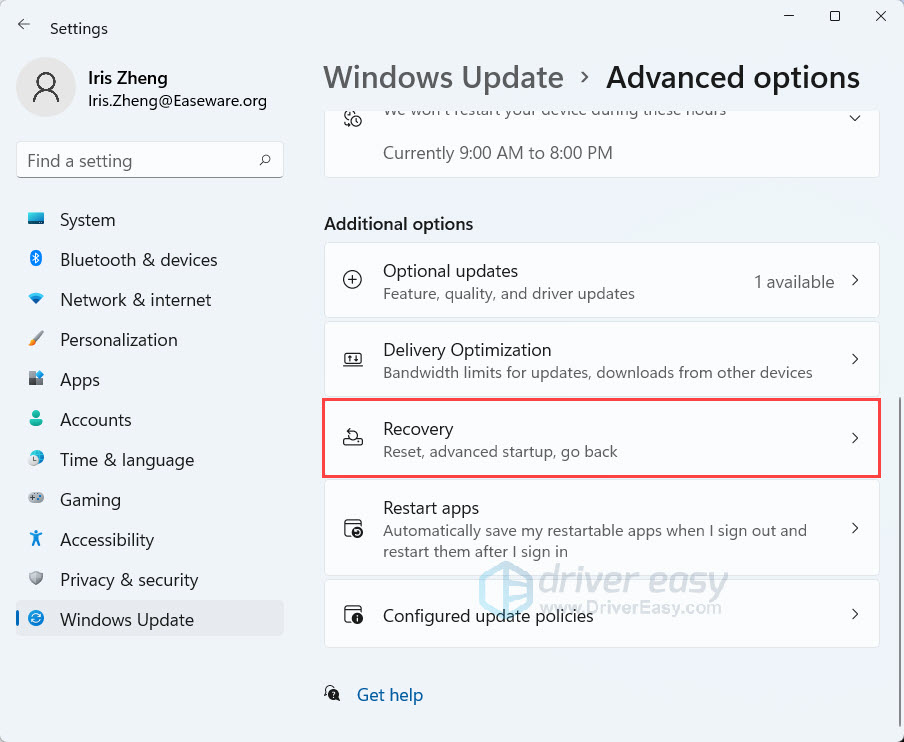
- Hit Go back.
- Follow the on-screen instructions till you see the Go back to earlier build button. Click it.
- Wait for your PC to do the work. When the process is finished, reboot your PC and see if it fixes your issue.
If this fix doesn’t meet your need, you can move to the next fix.
Fix 4: Check for Windows Update
If you can’t open the Start menu by clicking or pressing the Windows logo key, you can give Windows Update a try. You won’t be the only one who is troubled by the problem. Microsoft may release an optional patch to fix this issue.
- Press the Windows logo key + I key together to open Settings.
- Click Windows Update on the left panel.
- Select the Check for updates button to start checking.
- If there are available updates for your PC, click Download & install to install the updates.

- When the process is finished, restart your PC and see if the problem persists.
If you don’t have available updates or nothing happened after the update, you can move to the next fix.
Fix 5: Repair system files
Corrupted and missing system files and corrupted Windows installations could be the culprit of the Windows 11 Start menu not working issue. You need to scan your whole system to identify and repair the corruption. You can do it manually.
System File Checker is a built-in tool to check for corrupt, damaged system files and manage to restore them if there’re any. However, this tool can only diagnose major system files, and won’t deal with damaged DLL, Windows Registry keys, etc.
To check and restore your system file might take time and computer skills. You will need to run numerous commands, wait for the process to complete, or risk your personal data.
Step 1. Scan corrupt files with System File Checker
System File Checker (SFC) is a Windows built-in tool to identify and repair corrupted system files.
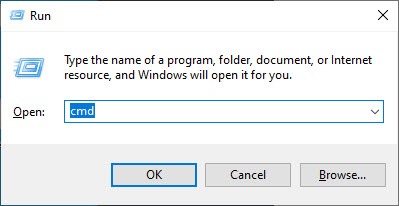
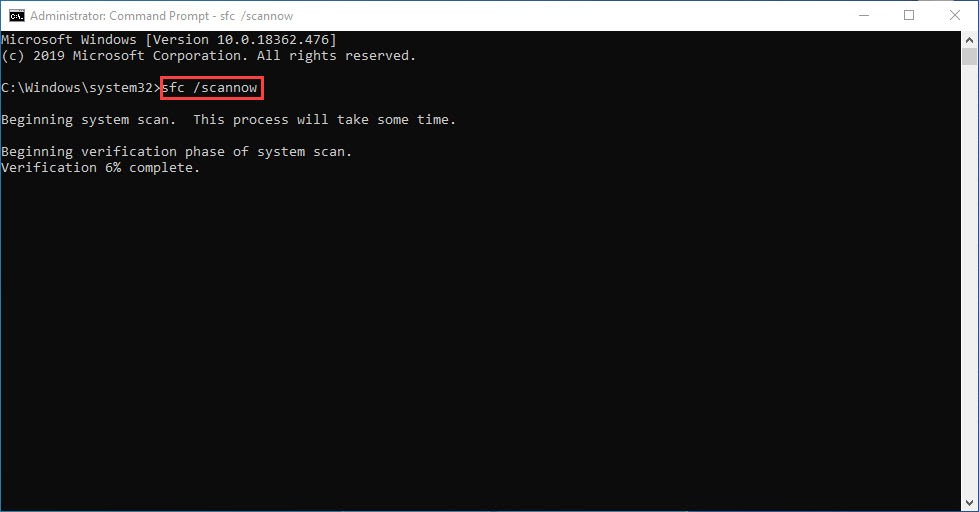
1) On your keyboard, press the Windows logo key and R at the same time to open the Run box. Type cmd and press Ctrl+Shift+Enter to run Command Prompt as administrator.
Click Yes when prompted for permission to make changes to your device.
2) In the Command Prompt, type the following command and hit Enter.
sfc /scannow
3) System File Check will begin to scan all system files and repair any corrupted or missing ones it detected. This may take 3-5 minutes.
4) You may receive some messages after the verification.
No matter what message you receive, you can try running dism.exe (Deployment Image Servicing and Management) to check the device performance and health of your PC.
Step 2. Run dism.exe
1) Run Command Prompt as admin and enter the following commands.
- This command line will scan the health of your PC:
dism.exe /online /cleanup-image /scanhealth
- This command line will restore the health of your PC:
dism.exe /online /cleanup-image /restorehealth
2) After the restore health process finishes, you may get some error messages.
- If restore heath gave you errors, you can always try this command line. This will take up to 2 hours.
dism /online /cleanup-image /startcomponentcleanup
- If you get Error: 0x800F081F with the restore health scan, reboot your PC and run this command line.
Dism.exe /Online /Cleanup-Image /AnalyzeComponentStore
If the System File Check finds any files corrupted, follow the on-screen instructions to repair them, and then restart your computer for the changes to take full effect.
That’s all about the Windows 11 Start menu not working issue. Hope one of the fixes is working for you. If you have any questions or suggestions, you’re welcome to leave a comment below.
