


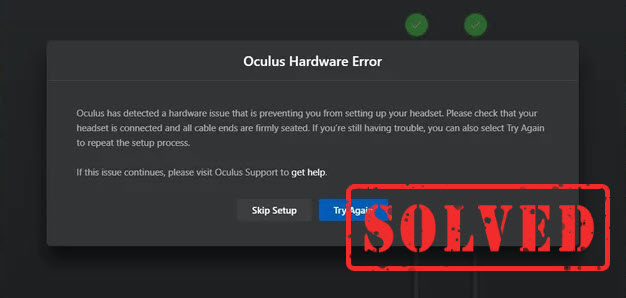
If you’re receiving an Oculus hardware error that prevents you entering VR or setting up your Rift or Quest 2, you’re not alone. Many users encountered the same problem while playing VR games. This may be related to the connection, drivers, computer settings or system files, but fortunately it’s not hard to fix. Read on to find out…
Try these fixes:
Here are 4 proven fixes for the Oculus hardware error. You may not try them all. Simply work your way down the list until you find the one that does the trick.
- Check for connection
- Disable USB power saving
- Update your device drivers
- Factory reset your Oculus Quest or Quest 2
Fix 1 – Check for connection
The Oculus hardware error may indicate the failure to detect your VR headset or sensor. So the very first thing you should do is to check the connection. And here are a few basic steps to troubleshoot:
- If you’re connecting wirelessly, don’t forget to enable Air Link on both the Oculus desktop settings and headset settings. But if you’re using the Link cable, make sure to toggle off the Air Link option.
- Power off your headset, turn it on, and then replug it back in. Sometimes a simple restart will just solve the temporary glitches.
- Try connecting the headset to another USB port on your computer. You may switch between USB 2.0 and 3.0 ports to see which works.
- Disconnect other unnecessary peripherals such as digital camera, printer or external hard drive from the computer to avoid interference.
If the headset is still not recognized, check out the next solution.
Fix 2 – Disable USB power saving
Windows may enable the power-saving feature for your USB ports by default. That said, an individual USB port may shut down when it’s used intermittently and cause the headset not connecting. To prevent your devices from disconnecting randomly or not being recognized, you could adjust related settings as follows:
Change the power management settings
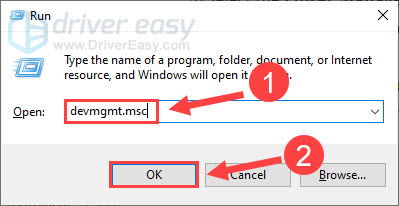
- On your keyboard, press the Windows logo key and R at the same time to invoke the Run command.
- Type devmgmt.msc and click OK.
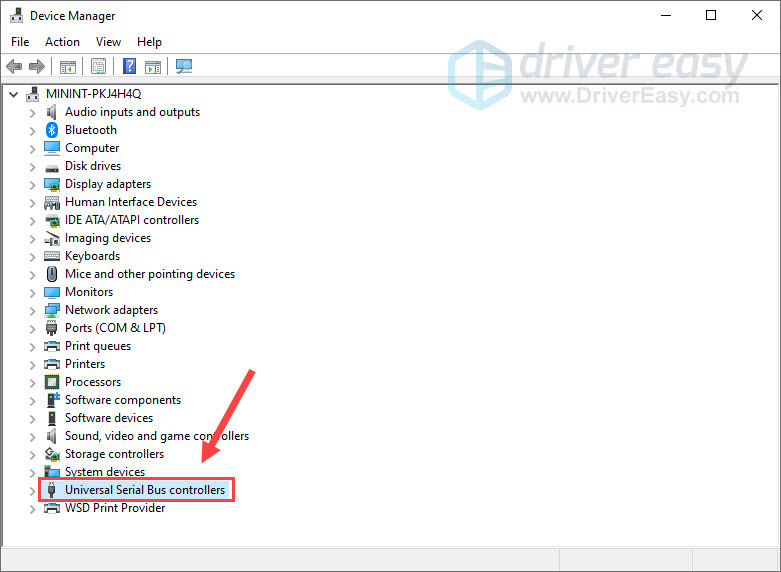
- Double-click Universal Serial Bus controllers to expand the category.
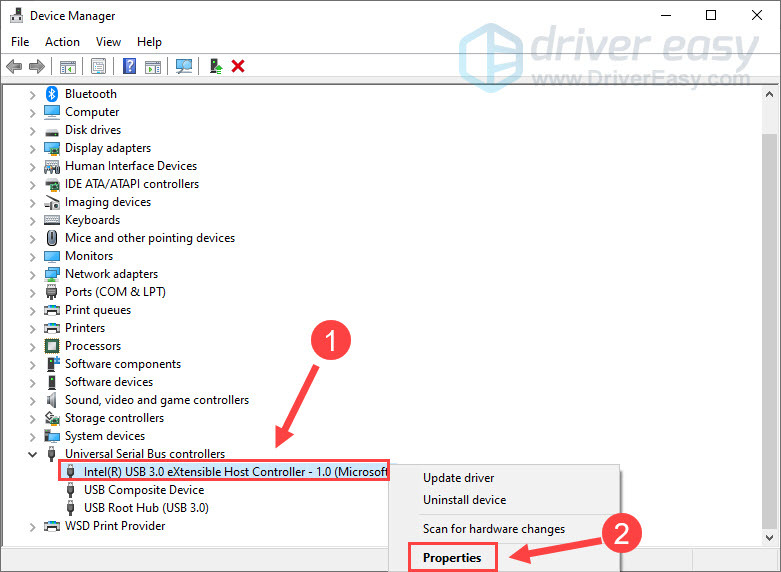
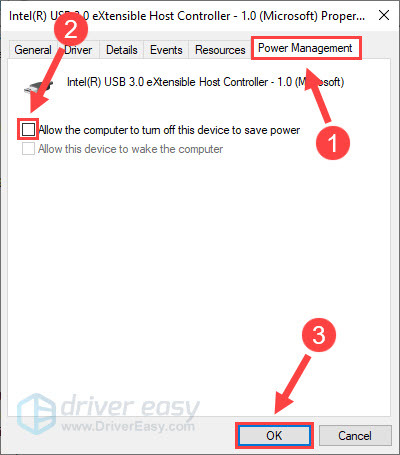
- Right-click the USB device and select Properties.
- Select the Power Management tab. Untick Allow the computer to turn off this device to save power and click OK to save the changes.
Repeat the steps to disable power management for each USB port and then test the issue. If the problem persists, check out below to turn off USB selective suspend as well.
Turn off USB selective suspend
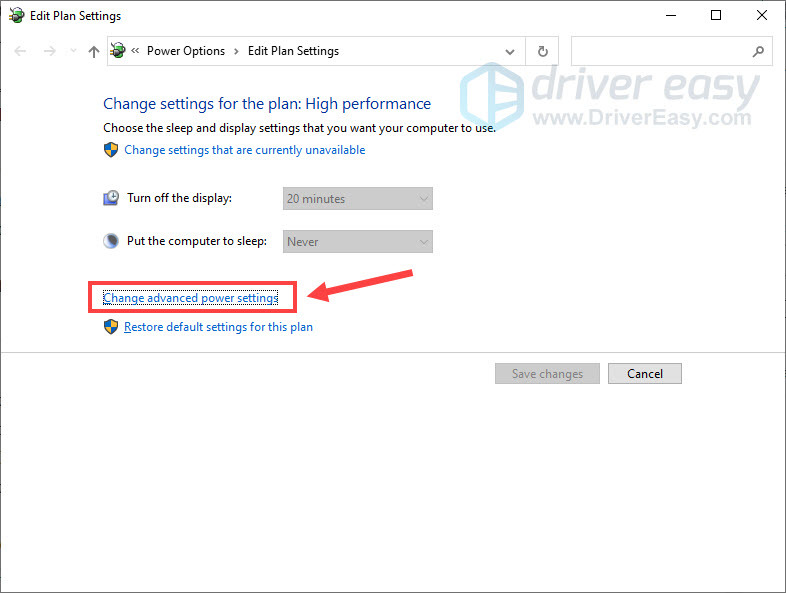
- On your desktop, type power plan in the Windows search box and click Edit power plan.
- Click Change advanced power settings.
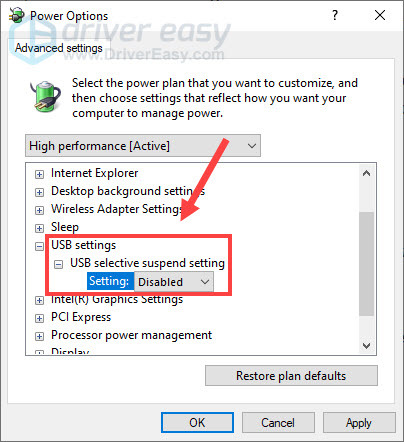
- Double-click USB settings > USB selective suspend setting. Then select Disabled from the drop-down menu.
- Click OK.
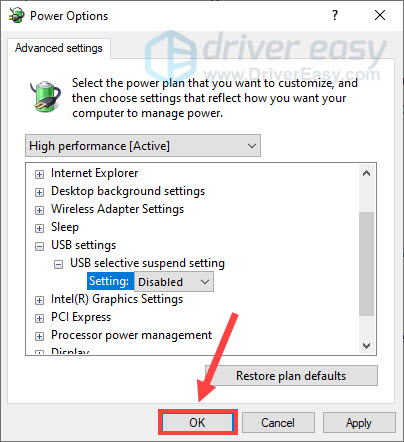
Now see if your Oculus Rift or Quest launches as normal. If not, continue to the next method.
Fix 3 – Update your device drivers
Device drivers allow your hardware to communicate with the computer. If they’re faulty or outdated, your Oculus performance will be greatly impacted. So staying up-to-date with the latest drivers, your graphics driver and USB driver in particular, is essential for a smooth experience with the Oculus devices.
You could get the most recent drivers directly from the manufacturer’s website, download and install them manually. But if you’re not familiar with device drivers or don’t have the time and patience to update them manually, use Driver Easy to do it automatically and easily.
Driver Easy will automatically recognize your system and find the correct drivers for your exact devices and your Windows version. And it takes only 3 steps to get them working correctly:
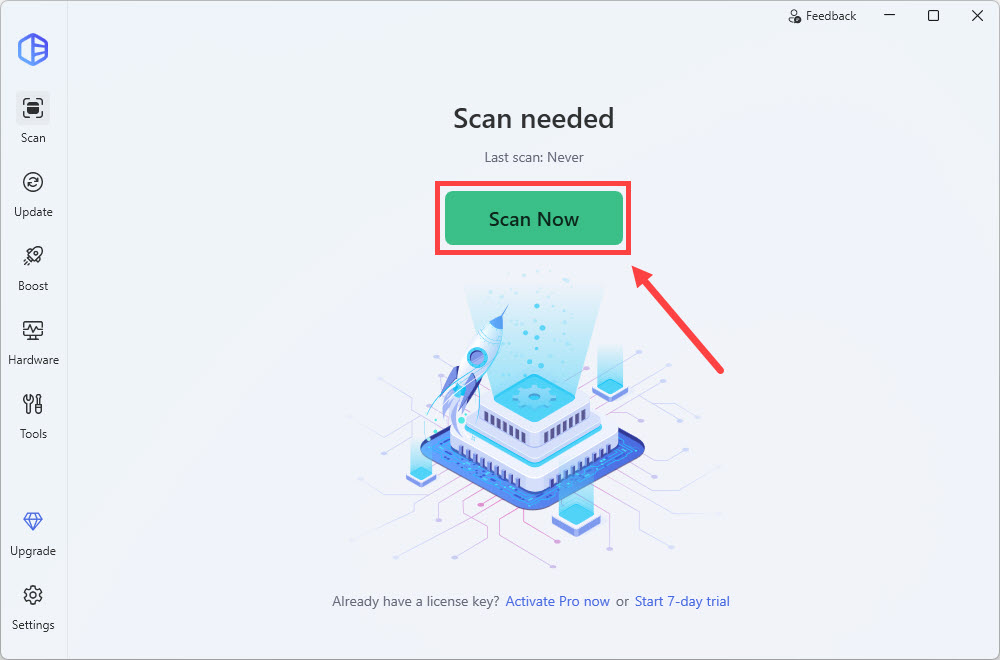
- Download and install Driver Easy.
- Run Driver Easy and click the Scan Now button. Driver Easy will then scan your computer and detect any problem drivers.
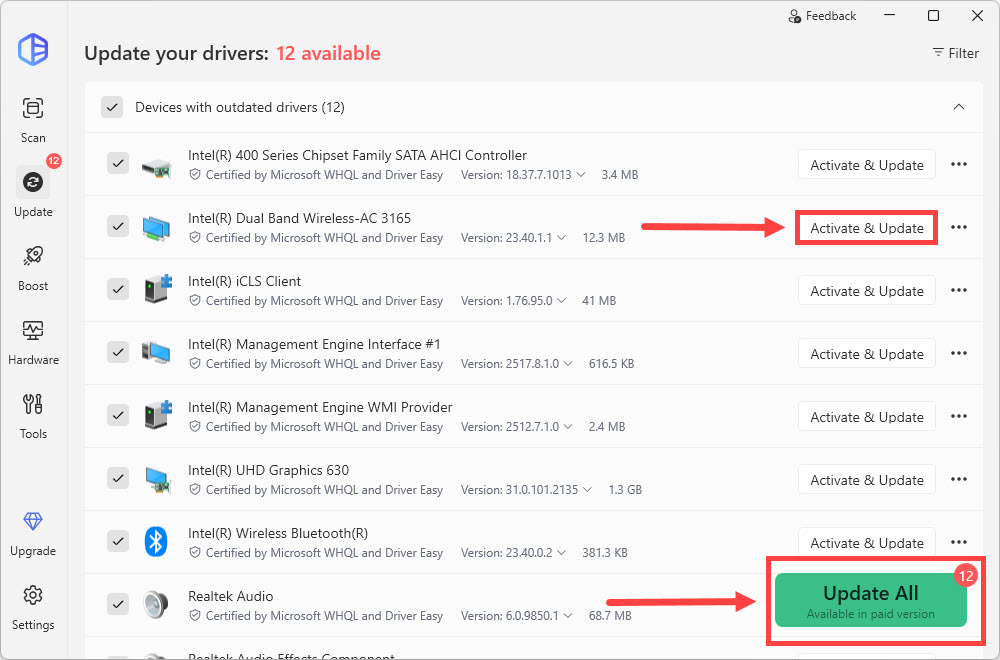
- Click the Activate & Update button next to any flagged driver to automatically update the correct version of that driver. Or click Update All to automatically download and install the correct version of all the drivers that are missing or out of date on your system.
🔔This requires the Pro version which is packed with a variety of advanced features. If you’re not prepared to purchase the Pro version yet, Driver Easy provides a 7-day trial at no cost, granting access to all Pro features like fast downloads and easy installation. No charges will occur until after your 7-day trial period ends.
Wait for the process to complete and reboot your computer. Then connect your rig and test. If the Oculus hardware error still pops up, try the next fix.
Fix 4 – Factory reset your Oculus Quest or Quest 2
You may consider factory resetting your Oculus Quest or Quest 2 as a last resort. It will wipe the headset clean and solve some obstinate technical issues effectively. But be warned: a factory reset is irreversible and will remove all account information, downloaded games, and content from the headset.
- Turn off your headset.
- Press the power and volume (-) button at the same time until the boot screen appears.
- Select Factory Reset and click Yes to confirm.
You’ll need to connect the Oculus Quest or Quest 2 again before using it. If you don’t know, follow our guide to set up your Oculus Quest correctly. Once done, check if the error is resolved.
Hopefully you’re able to fix the Oculus hardware error with one of the methods above. Please feel free to leave a comment below if you have any questions or suggestions.